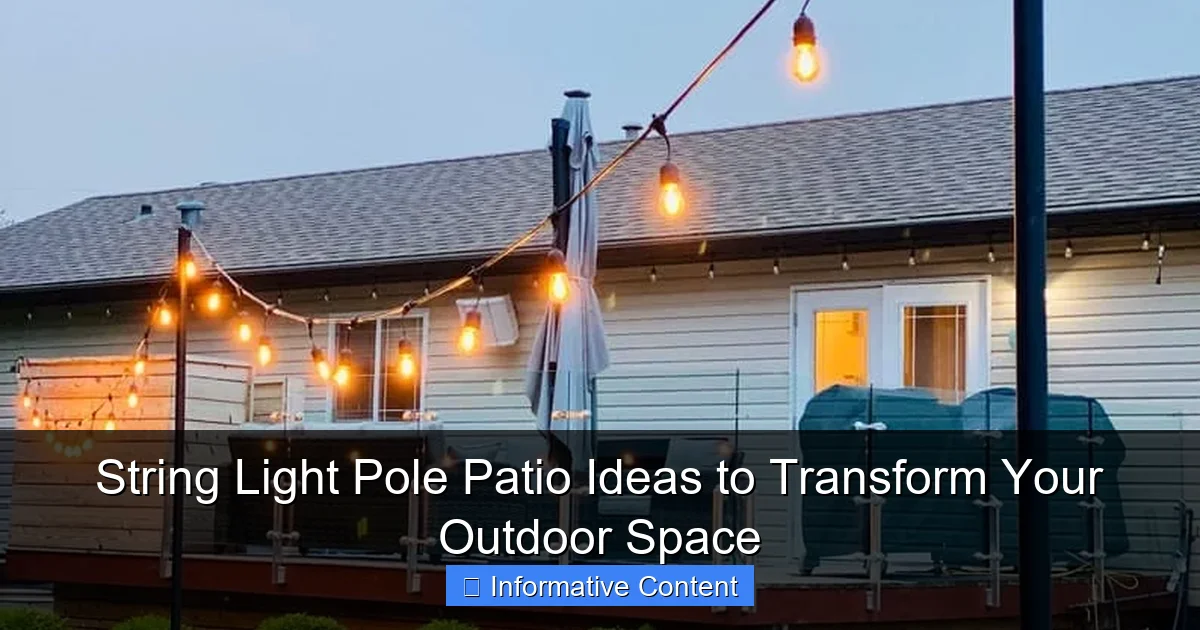
Featured image for string light pole patio
Image source: images.farmfoodfamily.com
String light pole patios instantly elevate your outdoor ambiance with warm, inviting illumination and effortless style. By strategically placing poles around seating areas, pools, or dining spaces, you create cozy zones perfect for entertaining or relaxing after sunset—all while adding architectural interest and functionality to your backyard design.
Key Takeaways
- Plan your layout first: Measure space and mark pole positions for balanced lighting.
- Choose weather-resistant poles: Opt for durable materials like steel or aluminum for longevity.
- Mix heights for depth: Vary pole heights to create visual interest and dimension.
- Use dimmers or smart bulbs: Adjust brightness to set the perfect mood effortlessly.
- Add decorative elements: Hang plants or lanterns between poles for added charm.
- Anchor poles securely: Ensure stability with concrete footings or weighted bases for safety.
📑 Table of Contents
- Why String Light Pole Patios Are a Game-Changer for Outdoor Living
- Choosing the Right String Light Pole System for Your Patio
- Designing Your String Light Pole Layout: Creative Ideas That Work
- Installation Tips: From Planning to Power
- Top String Light Pole Kits and Accessories (2024)
- Real-Life Inspiration: String Light Pole Patio Transformations
- Final Thoughts: Light Up Your Life—Literally
Why String Light Pole Patios Are a Game-Changer for Outdoor Living
Imagine stepping into your backyard after sunset. Instead of darkness, you’re greeted by the soft, warm glow of string lights strung between elegant poles—casting just enough light to highlight your favorite outdoor furniture, plants, and pathways. It’s not just lighting; it’s ambiance. It’s comfort. It’s a transformation.
String light pole patios have become one of the most beloved ways to elevate outdoor spaces. Whether you’re hosting a dinner party, enjoying a quiet evening with a book, or stargazing with your family, the right lighting can turn an ordinary yard into a magical retreat. I remember the first time I added string lights to my own patio. I was skeptical—would they look tacky? Too dim? Too much work? But within minutes of flicking the switch, I was hooked. The mood shifted instantly. The space felt cozier, more intentional, and honestly, a little bit enchanted.
Choosing the Right String Light Pole System for Your Patio
Before you start hammering poles into your lawn or drilling into your deck, take a moment to think about what you’re really trying to achieve. Are you going for a boho-chic vibe, a modern minimalist look, or something rustic and farmhouse-inspired? Your design goals will shape your choice of poles, lights, and installation method.
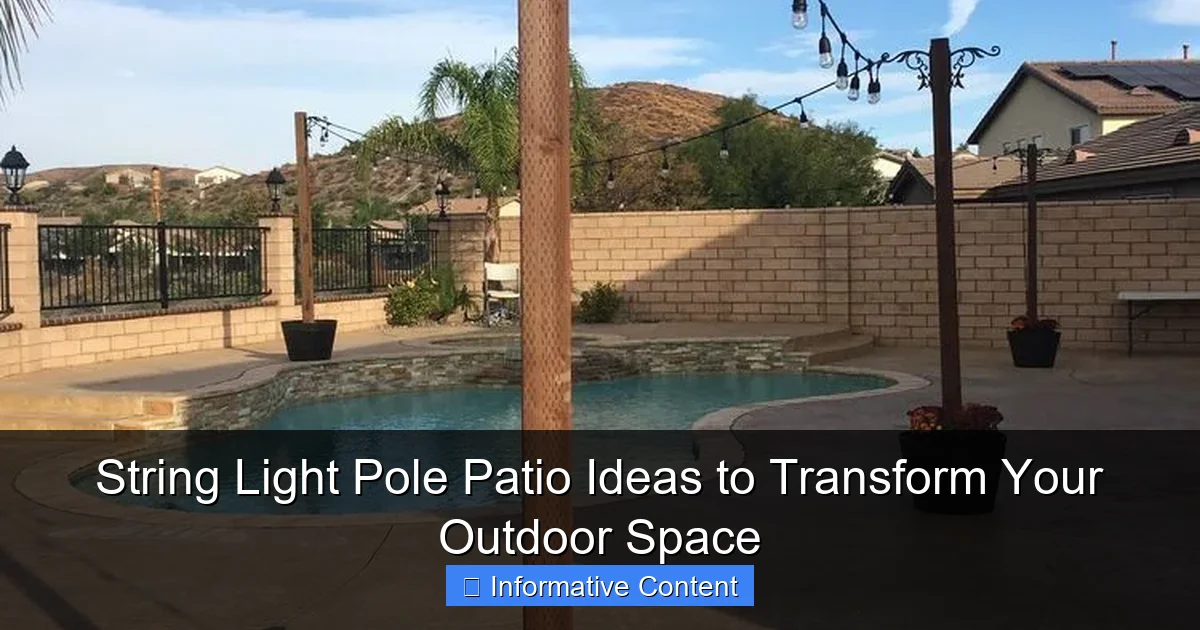
Visual guide about string light pole patio
Image source: i.pinimg.com
Types of String Light Poles: Freestanding vs. Permanent
There are two main types of string light poles: freestanding and permanent. Each has its pros and cons, and your decision will depend on your yard layout, soil type, and long-term plans.
- Freestanding poles are great for renters, renters, or anyone who doesn’t want to commit to digging holes or pouring concrete. These poles often come with weighted bases (like sand-filled stands) and can be moved seasonally. They’re easy to set up and take down, but they may not be as sturdy in windy conditions. I used freestanding poles in my first apartment patio, and they worked well—until a gusty spring night sent one toppling over (thankfully, no damage).
- Permanent poles are anchored into the ground with concrete footings or bolted to a deck. They’re more durable and stable, ideal for year-round use. If you’re planning a long-term outdoor setup, permanent poles are worth the extra effort. Just make sure you’re okay with committing to their location—once set, they’re not easily moved.
Pro tip: If you’re unsure, start with freestanding poles. You can always upgrade to permanent ones later.
Materials Matter: Metal, Wood, and Composite Options
The material of your poles affects both aesthetics and durability. Here’s a quick breakdown:
- Steel or aluminum: Rust-resistant, lightweight, and sleek. Powder-coated finishes help prevent corrosion. These are ideal for modern or industrial-style patios. I love the matte black metal poles I installed last year—they blend into the shadows during the day but stand out at night.
- Wood (cedar, redwood, or pressure-treated pine): Offers a natural, warm look. Great for rustic, farmhouse, or cottage-style yards. But wood needs regular sealing or staining to avoid rot and warping. If you go this route, make sure the poles are rated for outdoor use and treated for moisture.
- Composite or PVC: Low maintenance and highly durable. Won’t rot, rust, or splinter. These are perfect for families with kids or pets. They can look a bit plastic-y, though, so choose a model with a wood-grain texture for a more natural appearance.
Tip: Match your pole material to your existing outdoor furniture and decking for a cohesive look.
Height and Spacing: Getting the Proportions Right
How high should your poles be? How far apart? These questions matter more than you think.
- Height: Most string light poles range from 7 to 10 feet tall. For a standard patio, 8 feet is ideal—high enough to walk under but low enough to create intimacy. If you’re hanging lights over a dining table, aim for 8–9 feet so the glow is at eye level when seated.
- Spacing: Poles should be spaced 10–15 feet apart, depending on the length of your light strands. Too close, and the lights look cluttered. Too far, and you lose the cozy effect. For a rectangular patio, use 3–4 poles in a zigzag or diagonal pattern to create visual interest.
One mistake I made early on was placing poles too far apart. The lights sagged in the middle, and the glow felt thin. After adjusting the spacing to 12 feet, everything changed—the lights draped beautifully, and the space felt more inviting.
Designing Your String Light Pole Layout: Creative Ideas That Work
Now that you’ve chosen your poles, it’s time to design your layout. This is where the fun begins. A well-thought-out design doesn’t just provide light—it tells a story, defines zones, and guides the eye.
Classic Grid Pattern: Simple and Symmetrical
The grid pattern is the most common and easiest to execute. Imagine a series of poles forming a rectangle or square, with lights running horizontally and vertically between them. This works especially well for:
- Rectangular patios
- Dining areas
- Spaces with a central focal point (like a fire pit or grill)
I used this layout in my own backyard, with four poles forming a 15×20 foot rectangle. I ran two horizontal strands and two vertical ones, creating a “web” of light. It’s simple, but effective. The symmetry makes the space feel balanced and intentional.
Tip: Use a laser level or string line to ensure your poles are perfectly aligned. A crooked pole is hard to unsee.
Zigzag or Criss-Cross Design: Dynamic and Eye-Catching
If you want something more playful, try a zigzag or criss-cross pattern. Instead of straight lines, run lights diagonally from one pole to another, creating a dynamic, star-like effect. This works well for:
- Irregularly shaped yards
- Spaces with trees or architectural features
- Entertaining areas where you want a festive vibe
I once helped a friend install a zigzag layout in her L-shaped patio. We used five poles—two at the ends, three staggered in the middle. The lights crisscrossed like a net, catching the breeze and shimmering in the wind. It felt like a secret garden at night.
Canopy or “Halo” Effect: Floating Light Above
For a truly magical look, try creating a canopy. Hang lights from the tops of your poles, forming a “halo” or dome over your patio. This works best with:
- Freestanding poles with extended arms or crossbars
- Multiple poles arranged in a circle or oval
- Outdoor dining or conversation areas
I saw this design at a friend’s wedding reception—four tall poles with curved arms, all connected at the top with a central hub. String lights radiated outward like spokes on a wheel. It was breathtaking, like dining under a constellation.
Note: This style requires more planning and stronger poles. Make sure your setup can handle the tension.
Layered Lighting: Combine String Lights with Other Fixtures
Don’t stop at string lights. Combine them with other outdoor lighting for depth and functionality.
- Path lights along walkways
- Spotlights to highlight trees or architectural features
- Fairy lights on railings or planters
- LED candles on tables
I use a mix of string lights and solar-powered path markers. The string lights provide ambient glow, while the path lights ensure safety. At night, it looks like the yard is gently lit from within.
Installation Tips: From Planning to Power
Installing string light poles can feel intimidating, but with the right approach, it’s totally doable—even for DIY beginners. Here’s how to do it right.
Step-by-Step Installation Guide
1. Map your layout: Sketch your patio and mark pole locations. Use stakes and string to visualize the design.
2. Prepare the ground: For permanent poles, dig holes 18–24 inches deep. For freestanding poles, clear the area and level the base.
3. Set the poles: For permanent poles, insert the pole, level it, and pour concrete. Let cure for 24–48 hours. For freestanding, attach the base and fill with sand or water for weight.
4. Attach mounting hardware: Most poles come with hooks, eye bolts, or crossbars. Install these at the top and midpoints.
5. Hang the lights: Start from one end and work your way across. Use S-hooks or zip ties to secure the lights. Avoid over-tightening—lights should have a gentle sag for a relaxed look.
6. Test the lights: Plug them in before finalizing. Check for dim spots or broken bulbs.
Powering Your String Lights: Wired vs. Solar vs. Battery
How you power your lights affects convenience, cost, and reliability.
- Wired (plug-in): Most common. Requires an outdoor GFCI outlet. Reliable and bright, but limits placement. Use a heavy-duty extension cord if needed.
- Solar: Eco-friendly and easy to install. Panels charge during the day, lights turn on at dusk. Great for areas far from outlets. But they may not be as bright or consistent, especially in winter.
- Battery-operated: Portable and flexible. Ideal for temporary setups or renters. Use rechargeable batteries to save money. Look for models with timers to conserve power.
I use a mix: plug-in lights for the main canopy and solar fairy lights for the planters. It gives me the best of both worlds.
Weatherproofing and Maintenance
Outdoor lighting takes a beating. Rain, wind, UV rays—your lights need to handle it all.
- Choose weather-resistant lights with IP65 or higher ratings.
- Use outdoor-rated extension cords and surge protectors.
- Inspect poles and connections monthly. Tighten loose bolts, check for rust, and clean dirt or debris.
- Store or cover lights in extreme weather (hurricanes, heavy snow).
I learned this the hard way when a sudden downpour shorted out my first set of lights. Now I always use waterproof connectors and store the lights in a dry shed during winter.
Top String Light Pole Kits and Accessories (2024)
Not all string light poles are created equal. Here are some of the best options on the market, based on real-world use, durability, and design.
| Product | Type | Height | Material | Best For | Price Range |
|---|---|---|---|---|---|
| Brightech Arch Pole Set | Freestanding | 9 ft | Steel (powder-coated) | Large patios, entertaining | $120–$150 |
| Outdoor GreatRoom Co. Cedar Pole | Permanent | 8 ft | Redwood | Rustic, farmhouse styles | $100–$130 |
| Sunforce Solar Light Pole | Freestanding | 7.5 ft | Aluminum + solar panel | Off-grid, eco-friendly setups | $80–$100 |
| Hampton Bay Adjustable Crossbar Pole | Permanent | 8–10 ft (adjustable) | Steel | Custom layouts, canopy designs | $140–$170 |
| EcoSmart Composite Pole Kit | Freestanding | 8 ft | Composite | Families, low maintenance | $90–$110 |
Note: Prices vary by retailer and region. Always check for included accessories (hooks, anchors, lights).
I’ve used the Brightech Arch Pole Set in my own yard for two years. The poles are sturdy, the crossbars are easy to adjust, and the black finish blends beautifully. My only gripe? The included lights are a bit dim. I swapped them out for higher-lumen LEDs, and now it’s perfect.
Real-Life Inspiration: String Light Pole Patio Transformations
Seeing is believing. Here are a few real-world examples of how string light pole patios have transformed ordinary spaces into extraordinary ones.
Urban Balcony: Small Space, Big Impact
Sarah, a city dweller with a 10×12 ft balcony, used two freestanding poles to create a cozy dining nook. She hung warm-white string lights in a criss-cross pattern and added a bistro set. “It feels like a rooftop restaurant,” she says. “I eat dinner out there every night in the summer.”
Backyard Oasis: From Dull to Dreamy
Mike and Jen transformed their plain backyard with four permanent cedar poles and a grid layout. They added a fire pit, outdoor rug, and potted plants. “The lights make the space usable after dark,” Mike says. “We’ve had movie nights, game nights, even yoga under the stars.”
Garden Wedding Venue: DIY Elegance
For her sister’s wedding, Lisa used six adjustable steel poles to create a canopy over the ceremony site. She draped fairy lights and white tulle between the poles. “It looked like a fairy tale,” she says. “And the best part? We reused the poles for our own patio afterward.”
Family-Friendly Patio: Safe and Stylish
With two young kids, Priya wanted lighting that was safe and fun. She used composite poles with low-hanging, shatterproof LED lights. “The kids love running under the ‘light tunnel,’” she says. “And I don’t worry about broken glass.”
Final Thoughts: Light Up Your Life—Literally
A string light pole patio isn’t just about aesthetics—it’s about experience. It’s about creating a space where you want to linger, laugh, and relax. Whether you’re going for simple and serene or bold and festive, the right lighting can make all the difference.
I’ve seen backyards transformed, balconies elevated, and even rental patios feel like home—all thanks to a few poles and some well-placed lights. The best part? It doesn’t have to be perfect. A little sag, a slightly crooked pole, a bulb that flickers—those quirks add character. What matters is that the space feels like yours.
So go ahead. Sketch your layout, pick your poles, and hang those lights. Step back at night, take a deep breath, and let the glow wash over you. You’ve just created something beautiful—one string light at a time.
Frequently Asked Questions
What are the best string light pole patio ideas for small spaces?
For compact patios, consider minimalist designs like single-pole installations with vertical string lights or geometric shapes. Use slim, foldable poles or wall-mounted options to save floor space while creating a cozy ambiance.
How do I install string light poles on a patio without drilling into concrete?
Opt for freestanding weighted bases or sandbag anchors to secure poles without permanent installation. You can also use heavy planters or clamp-on brackets for railings and existing structures.
Can string light poles withstand wind and weather?
Most string light pole patio systems are made of weather-resistant materials like stainless steel or powder-coated aluminum. For high-wind areas, choose poles with thicker gauges and secure them with ground stakes or heavy bases.
What spacing works best between string light poles?
Aim for 6–10 feet between poles for even light distribution without sagging. Tighter spacing (4–6 feet) is better for heavier bulb styles, while wider spacing suits delicate fairy lights.
How do I power string lights on a pole without visible cords?
Use poles with built-in cord channels or hide cords under outdoor-rated conduit. Solar-powered string lights or low-voltage LED options with discreet wiring keep your patio looking tidy.
Are there string light pole patio ideas that double as decor?
Absolutely! Choose poles with built-in planters, lanterns, or decorative finials. Some designs incorporate hooks for hanging plants or sheer curtains to create a multifunctional outdoor feature.

