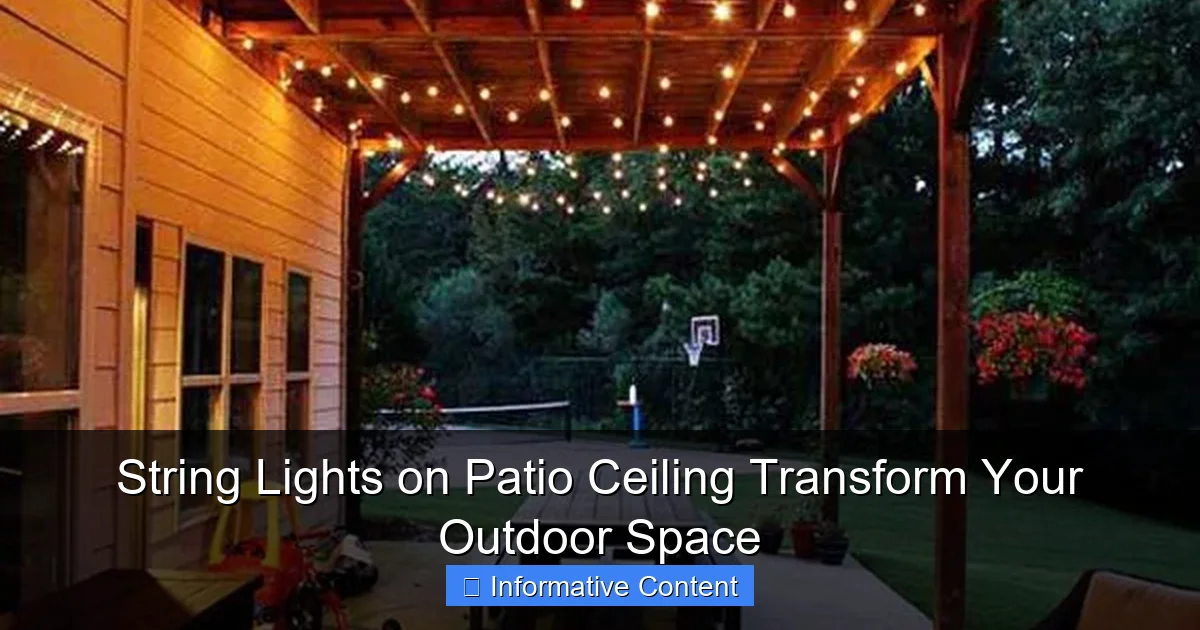
Featured image for string lights on patio ceiling
Image source: homemydesign.com
String lights on patio ceilings instantly elevate your outdoor ambiance, turning any backyard into a cozy, inviting retreat. These versatile lights provide soft, ambient illumination perfect for dining, entertaining, or unwinding after dark, while adding a touch of elegance to your space. Easy to install and customizable in length and style, they’re a simple yet impactful upgrade for year-round outdoor enjoyment.
Key Takeaways
- Choose weatherproof lights: Ensure durability with IP65-rated or outdoor-certified string lights.
- Plan layout first: Map spacing and power sources before installation to avoid gaps.
- Use dimmers: Adjust brightness to set the perfect mood for any occasion.
- Mix bulb types: Combine LED and incandescent for warmth and energy efficiency.
- Secure with clips: Use adhesive or screw-in hooks for safe, long-lasting setup.
- Layer lighting: Pair with lanterns or spotlights for balanced ambiance.
📑 Table of Contents
- The Magic of String Lights on Patio Ceiling: Your Backyard’s Best Friend
- Why String Lights on Patio Ceiling Work So Well
- Choosing the Right String Lights for Your Patio Ceiling
- Installation Tips for a Flawless Setup
- Creative Ways to Use String Lights on Patio Ceiling
- Maintenance and Longevity: Keeping Your Lights Shining Bright
- Final Thoughts: Your Patio, Your Paradise
The Magic of String Lights on Patio Ceiling: Your Backyard’s Best Friend
Picture this: it’s a warm summer evening, the sun has dipped below the horizon, and your patio is glowing with a soft, golden light. You’re sipping your favorite drink, surrounded by friends or family, and the atmosphere feels almost magical. What’s the secret behind that cozy, inviting vibe? String lights on patio ceiling—simple, affordable, and surprisingly transformative.
Adding string lights on patio ceiling isn’t just about lighting up a space. It’s about creating a mood. Whether you’re hosting a dinner party, enjoying a quiet night with a book, or just unwinding after a long day, the right lighting can turn your patio from a plain outdoor area into your personal sanctuary. And the best part? You don’t need to be an electrician or a design pro to pull it off. With a few tips and a little creativity, you can create a space that feels warm, welcoming, and uniquely yours.
Why String Lights on Patio Ceiling Work So Well
They’re Versatile for Any Patio Style
One of the biggest perks of string lights on patio ceiling is their adaptability. Whether your patio is rustic, modern, bohemian, or minimalist, string lights can fit right in. For a farmhouse vibe, try warm white Edison bulbs draped across wooden beams. For a sleek, contemporary look, opt for cool white LEDs in a geometric pattern. And if you love a boho aesthetic, mix in colored or globe-shaped bulbs for a playful touch.
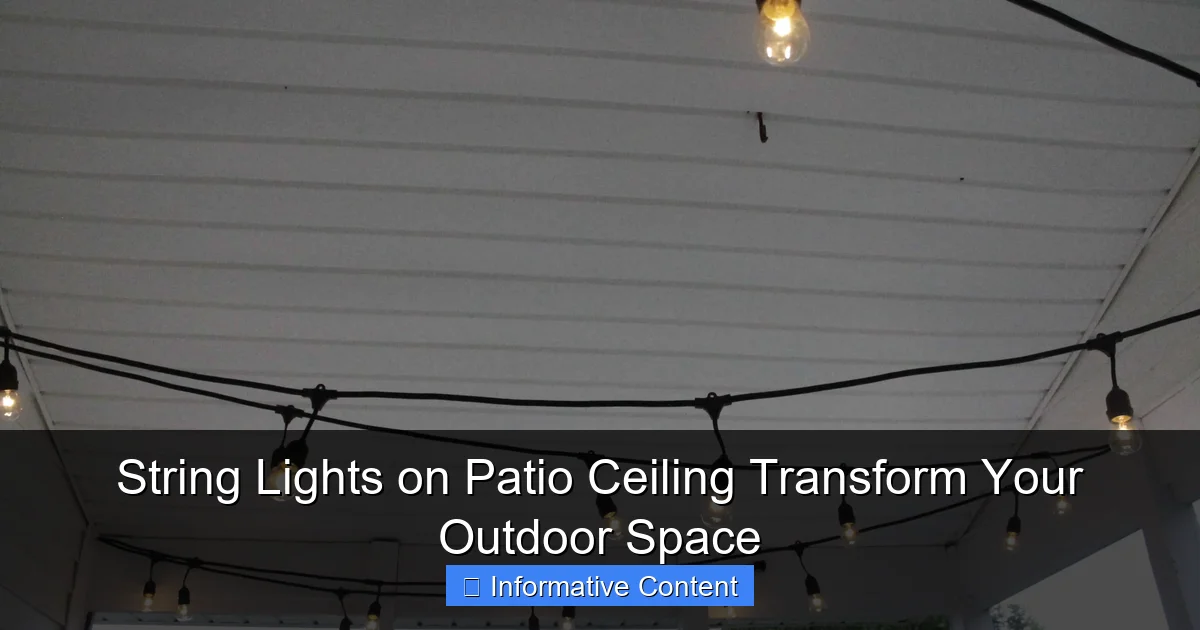
Visual guide about string lights on patio ceiling
Image source: charlestoncrafted.com
For example, my neighbor has a small concrete patio with a metal pergola. She hung string lights on patio ceiling in a crisscross pattern, and now it feels like a chic outdoor lounge. Meanwhile, my sister used vintage-style bulbs on her wooden deck, and it instantly became a cozy, romantic spot for evening chats. The point is: no matter your style, there’s a string light setup that’ll work.
They Create Ambiance Without Breaking the Bank
Outdoor lighting can get expensive—think recessed fixtures, landscape spotlights, or custom installations. But string lights on patio ceiling are a budget-friendly alternative that delivers big results. You can find a decent set for under $20, and the impact is huge. Plus, many are energy-efficient LED bulbs, so your electricity bill won’t take a hit.
I once helped a friend set up her patio on a tight budget. We spent $50 on lights and a few hooks, and the transformation was incredible. The space went from “meh” to “wow” in just a few hours. It’s proof that you don’t need a big budget to make a big difference.
They’re Easy to Install (Really!)
If you’ve ever avoided outdoor projects because they seemed too complicated, string lights on patio ceiling will change your mind. Most setups require just a few basic tools—like hooks, zip ties, or adhesive clips—and can be installed in under an hour. No wiring, no permits, no stress.
Here’s a quick tip: if your patio has a roof or pergola, use screw-in hooks or eye bolts to secure the lights. For open spaces, try attaching them to trees, fences, or even a freestanding frame. And if you’re renting or don’t want to drill holes, adhesive clips or tension rods work just as well. The key is to plan your layout first—measure the space and sketch out where you want the lights to go. Trust me, a little prep saves a lot of hassle later.
Choosing the Right String Lights for Your Patio Ceiling
Bulb Type: LEDs vs. Incandescent
When shopping for string lights on patio ceiling, you’ll notice two main bulb types: LED and incandescent. Here’s the breakdown:
- LEDs: Energy-efficient, long-lasting (often 20,000+ hours), and cooler to the touch. They’re a bit more expensive upfront but save money over time. Great for year-round use.
- Incandescent: Warm, classic glow but less energy-efficient and shorter lifespan (around 1,000 hours). Cheaper to buy but may need replacing more often.
I recommend LEDs for most patios—they’re more durable, safer, and better for the environment. But if you love the vintage look of incandescent bulbs, go for it! Just keep them on a timer to extend their life.
Bulb Shape and Size
The shape and size of the bulbs affect the overall vibe. Here are a few options:
- Mini bulbs: Tiny, delicate, and perfect for a subtle glow. Ideal for small patios or adding accents to existing decor.
- Edison bulbs: Exposed filaments with a retro, industrial look. Great for patios with exposed beams or a rustic aesthetic.
- Globe bulbs: Round, playful, and often come in colors. Perfect for a fun, festive atmosphere.
- Fairy lights: Tiny LEDs on thin wire—ideal for wrapping around railings or creating a twinkling canopy effect.
For my own patio, I used a mix of Edison and mini bulbs. The Edison bulbs add character, while the mini bulbs give a soft, ambient glow. It’s the best of both worlds!
Length and Spacing
Measure your patio ceiling area before buying lights. You’ll want enough length to cover the space with a little extra for draping or loops. As a rule of thumb, plan for 1.5 to 2 times the linear footage of your ceiling.
Spacing matters too. Tighter spacing (6-8 inches between bulbs) creates a bright, even glow—great for dining areas. Wider spacing (12+ inches) gives a more relaxed, starry-night effect—perfect for lounging. And if you’re feeling creative, try clustering bulbs in certain spots (like over a seating area) for a custom look.
Installation Tips for a Flawless Setup
Planning Your Layout
Before you start hanging lights, sketch out a plan. Think about:
- Ceiling height: Taller ceilings may need longer strings or layered lights.
- Furniture placement: Make sure lights aren’t directly above dining tables (glare can be annoying).
- Power source: Position the end of the string near an outlet or use an outdoor-rated extension cord.
- Pattern: Crisscross, zigzag, or straight lines? Each creates a different vibe.
I once made the mistake of not planning the pattern first. I ended up with lights that looked random instead of intentional. Lesson learned: always sketch it out!
Securing the Lights
How you attach the lights depends on your patio’s structure:
- Pergola or roof beams: Use screw-in hooks, eye bolts, or zip ties. For wooden beams, stainless steel hooks are durable and weather-resistant.
- Open ceiling (no beams): Try a tension rod or freestanding frame. Or, attach lights to trees, fences, or railings and drape them overhead.
- Rental-friendly options: Adhesive clips (like Command hooks) or magnetic mounts work great for no-damage installation.
Pro tip: leave a little slack in the lights so they can sway slightly in the breeze. It adds movement and makes the space feel alive.
Weatherproofing and Safety
Outdoor lights need to withstand rain, wind, and sun. Here’s how to keep them safe and functional:
- Use outdoor-rated lights: Look for an IP rating of 44 or higher (this means they’re weather-resistant).
- Seal connections: Use silicone sealant or waterproof tape on plug connections to prevent water damage.
- Check cords: Replace frayed or damaged cords immediately—safety first!
- Use a GFCI outlet: This cuts power if there’s a ground fault, reducing the risk of shocks.
I learned the hard way to check cords regularly. One summer, a storm knocked out my lights because a plug had gotten wet. Now I inspect everything before turning them on.
Creative Ways to Use String Lights on Patio Ceiling
Layering for Depth and Drama
Want to take your lighting to the next level? Layer multiple strings or types of lights. For example:
- Hang a crisscross pattern of warm white Edison bulbs for the main glow.
- Add a second set of cool white mini lights for a starry effect.
- Wrap fairy lights around railings or furniture for a soft, twinkling accent.
This works especially well on larger patios. My friend has a huge covered porch, and she used three different types of lights—Edison, mini, and fairy—to create a cozy, multi-dimensional space. It’s like a party every night!
Highlighting Key Areas
Use lights to draw attention to specific spots:
- Dining area: Hang lights directly above the table for a warm, inviting glow.
- Seating nook: Drape lights around a corner or over a pergola to create a cozy hideaway.
- Bar or grill: Add a string of lights to illuminate your cooking or serving area.
I love this trick for small patios. It makes the space feel bigger and more functional by dividing it into zones.
Adding Color and Themes
Colored lights aren’t just for holidays! Try:
- Blue or green: For a cool, refreshing vibe (great for poolside patios).
- Pink or purple: For a romantic, dreamy atmosphere.
- Multicolor: For a playful, festive look (perfect for parties).
And for special occasions, swap in themed lights—like pumpkins for Halloween or snowflakes for winter. It’s an easy way to change the mood without buying new furniture.
Maintenance and Longevity: Keeping Your Lights Shining Bright
Regular Cleaning
Dust, pollen, and weather can dull your lights over time. To keep them sparkling:
- Wipe bulbs with a damp cloth: Do this every few months to remove grime.
- Check for debris: Clean out leaves or cobwebs that might get stuck in the strings.
- Inspect for damage: Look for cracked bulbs, frayed cords, or loose connections.
I clean my lights twice a year—once in spring and once in fall. It takes 10 minutes and makes a huge difference in how bright they look.
Storing for Winter
If you live in a cold climate, consider taking down your lights for winter. Here’s how:
- Coil them carefully: Wrap lights around a piece of cardboard or a reel to prevent tangles.
- Store in a dry place: Keep them in a garage or basement to avoid moisture damage.
- Label the sets: Use masking tape to note which lights go where—it’ll save time next season.
Some people leave lights up year-round, but I prefer to take them down. It extends their life and keeps them looking fresh.
Replacing Bulbs and Cords
Even the best lights need occasional fixes. Keep a few spare bulbs and a pack of waterproof tape on hand. And if a cord gets damaged, replace it ASAP—don’t risk an electrical hazard.
| Issue | Solution | Prevention Tip |
|---|---|---|
| Flickering lights | Check bulb connections and tighten any loose bulbs | Use bulbs with secure sockets and avoid overhandling |
| Dim lights | Clean bulbs and check for voltage drops (use shorter cords) | Use LED lights and avoid daisy-chaining too many strings |
| Water damage | Seal connections with silicone and replace damaged cords | Use outdoor-rated lights and GFCI outlets |
| Tangled cords | Unravel carefully or cut and rewire if necessary | Store lights properly and use a reel for wrapping |
Final Thoughts: Your Patio, Your Paradise
Adding string lights on patio ceiling isn’t just about lighting—it’s about creating a space where you love to be. Whether you’re hosting friends, enjoying a quiet night, or just soaking in the sunset, the right lights can make every moment feel special. And the best part? It’s a project anyone can do.
I’ll never forget the first time I turned on my own patio lights. The soft glow, the warm ambiance, the way the space transformed—it was magical. And it didn’t cost a fortune or take weeks to set up. With a little planning, some basic tools, and a few strings of lights, you can create the same magic in your own backyard.
So grab your lights, sketch out a plan, and get started. Your patio is waiting to be transformed. And trust me—once you see how string lights on patio ceiling can change your space, you’ll wonder how you ever lived without them.
Frequently Asked Questions
How do I install string lights on my patio ceiling without damaging it?
Use adhesive hooks, removable clips, or tension rods designed for outdoor use to hang string lights on your patio ceiling without drilling or permanent damage. Ensure the hooks are rated for the weight of your lights and weather-resistant for long-term durability.
What type of string lights on patio ceiling work best for outdoor use?
Opt for LED string lights with an IP65 or higher weatherproof rating, as they’re designed to withstand rain, wind, and UV exposure. Solar-powered options are also great for energy efficiency and easy installation.
Can I leave patio ceiling string lights up year-round?
Yes, if you choose commercial-grade, weatherproof string lights with UV-resistant bulbs and cords. Regularly inspect for wear and tear, especially after extreme weather, to ensure safety and longevity.
How do I power string lights on a patio ceiling without nearby outlets?
Use solar-powered string lights or battery-operated ones for cord-free convenience. Alternatively, extend reach with a heavy-duty outdoor extension cord routed safely along walls or railings.
What spacing works best for string lights on patio ceiling for even lighting?
For even coverage, space lights 12–18 inches apart in a grid or crisscross pattern, depending on your patio size. Adjust spacing based on bulb brightness (measured in lumens) to avoid overly dim or harsh areas.
How do I style string lights on my patio ceiling for a cozy ambiance?
Layer lights in zigzag, canopy, or spiral patterns to create depth and warmth. Pair with dimmable bulbs or warm white LEDs (2700K–3000K) for a soft, inviting glow perfect for entertaining.

