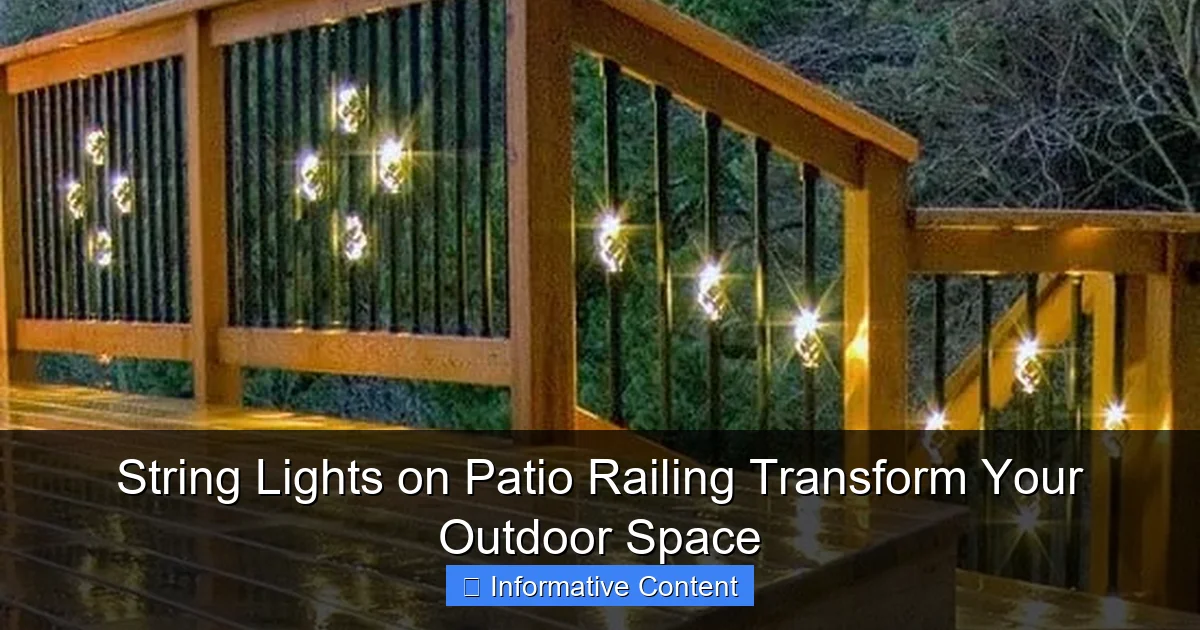
Featured image for string lights on patio railing
Image source: nextluxury.com
String lights on patio railings instantly elevate your outdoor ambiance, blending safety with stunning visual appeal. These versatile, easy-to-install lights create a warm, inviting glow perfect for entertaining or relaxing after dark. With weather-resistant options and energy-efficient LEDs, they offer a durable, stylish upgrade that transforms ordinary railings into captivating nighttime focal points.
Key Takeaways
- Choose weatherproof lights: Ensure durability with IP65-rated string lights for year-round patio use.
- Measure railing length: Buy 10-20% extra lights for secure, non-stretched installation.
- Use adhesive clips: Install damage-free with removable hooks for renters or delicate surfaces.
- Layer lighting: Combine rail lights with lanterns for ambient depth and visual interest.
- Opt for LEDs: Save energy with long-lasting, cool-to-touch bulbs in warm white tones.
- Time it right: Automate with timers to turn lights on at sunset, off at bedtime.
📑 Table of Contents
- Why String Lights on Patio Railing Are a Game-Changer
- Choosing the Right String Lights for Your Patio Railing
- Installation Tips for a Seamless Look
- Design Ideas to Elevate Your Patio
- Maintenance and Longevity: Keeping Your Lights Shining
- Real-Life Examples and Inspiration
- The Final Glow: Why You’ll Love Your Lighted Railing
Why String Lights on Patio Railing Are a Game-Changer
Picture this: it’s a warm summer evening. The sun has just dipped below the horizon, leaving a soft orange glow in the sky. You’re sitting on your patio with a glass of wine, surrounded by the gentle hum of conversation and the flicker of tiny lights dancing along the railing. There’s something magical about string lights on patio railing—they’re not just decoration; they’re mood-setters, space-definers, and instant mood-boosters. Whether you’re hosting a backyard barbecue or enjoying a quiet night alone, these little lights have a way of making your outdoor space feel cozier, more inviting, and undeniably special.
I’ll never forget the first time I strung up lights along my own patio railing. It was a simple DIY project—just a strand of warm white LEDs—but the transformation was immediate. The once-dull balcony suddenly felt like a secret garden hideaway. My guests noticed it too. “It feels like a vacation spot,” one friend said. That’s the power of lighting: it doesn’t just illuminate, it transforms. And when you hang string lights on your patio railing, you’re not just adding light—you’re creating an atmosphere, a vibe, a story. In this guide, I’ll walk you through everything you need to know to make your outdoor space shine, from choosing the right lights to installation tips, design ideas, and even how to keep them looking great all year round.
Choosing the Right String Lights for Your Patio Railing
Types of String Lights: LEDs, Incandescent, and Solar
Not all string lights are created equal. The first decision you’ll face is what type of lighting to use. Let’s break it down:
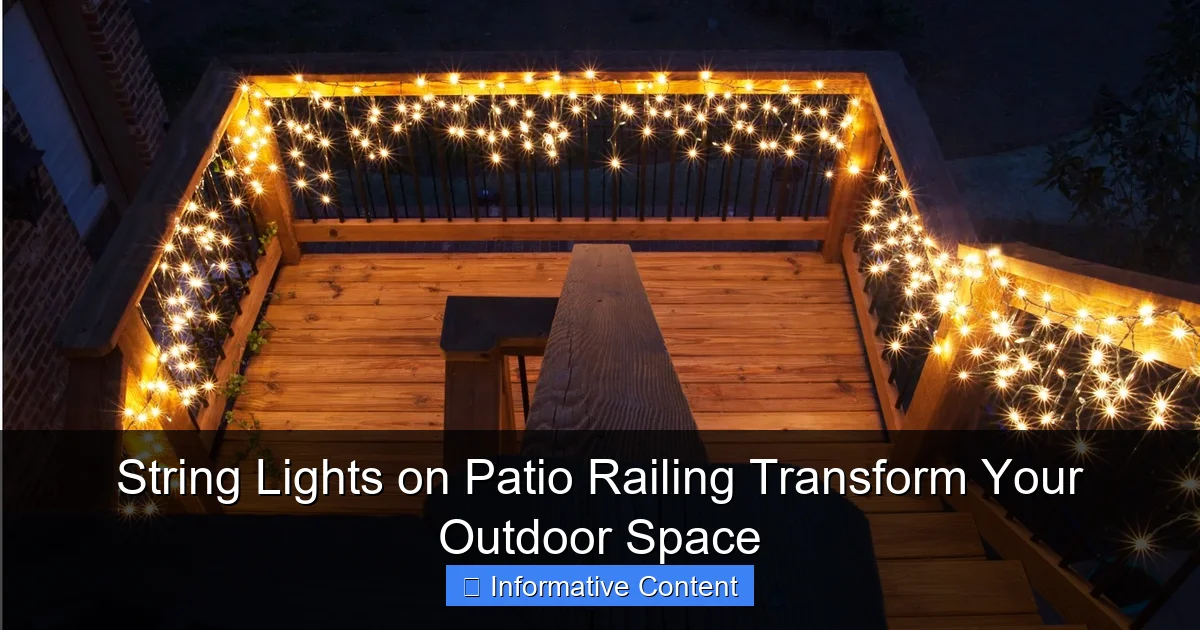
Visual guide about string lights on patio railing
Image source: yardenvy.com
- LED String Lights: These are the most popular (and for good reason). They’re energy-efficient, last up to 50,000 hours, and stay cool to the touch. They come in warm white, cool white, color-changing, and even smart options that sync with music or apps. I’ve used LEDs on my railing for three years now, and I’ve only had to replace one bulb—and that was because I accidentally snagged it with a garden tool.
- Incandescent String Lights: These give off a classic, nostalgic glow—think vintage café lighting. But they use more energy, get hot, and burn out faster (about 1,000–3,000 hours). I tried these once for a party, and within a month, half the strand was out. Great for short-term events, not ideal for permanent use.
- Solar String Lights: No outlet? No problem. Solar lights charge during the day and turn on automatically at dusk. They’re eco-friendly and easy to install, but they’re not as bright and can be inconsistent in cloudy climates. I’ve used solar lights on a shaded side of my patio, and while they’re charming, they don’t last as long into the night as plug-in LEDs.
Pro tip: For most patio railings, I recommend warm white LED string lights. They’re bright enough to be functional, soft enough to be romantic, and durable enough to last for years. Look for “dimmable” or “smart” versions if you want extra control.
Bulb Shape, Spacing, and Length
Once you’ve chosen the type, consider the details:
- Bulb Shape: Classic Edison-style bulbs (with exposed filaments) add vintage charm. Globe lights feel modern and cozy. Mini lights are discreet and work well for subtle accents. I love the look of Edison bulbs on my railing—they cast a soft, golden glow that feels like candlelight.
- Bulb Spacing: Closer spacing (every 4–6 inches) gives a continuous glow, while wider spacing (8–12 inches) creates a more spaced-out, twinkling effect. For a full railing, I go with 6-inch spacing. It’s just right—cozy without being overwhelming.
- Length: Measure your railing first! Add 10–15% extra to account for wrapping around posts or corners. A 20-foot railing? Get a 24-foot strand. Nothing’s worse than coming up short mid-installation.
Weather Resistance and Safety
Your lights will face sun, rain, wind, and maybe even snow. Make sure they’re up for the job:
- Look for an IP44 or higher weather resistance rating (this means they’re protected from splashes and dust).
- Use outdoor-rated extension cords and timers. I learned this the hard way when I used an indoor cord—it melted after one rainy night.
- For metal railings, avoid lights with metal hooks that could scratch the finish. I use soft rubber clips instead.
Installation Tips for a Seamless Look
Planning Your Layout
Before you start hanging, sketch out your plan. Ask yourself:
- Will the lights go along the top of the railing, underneath, or wrapped around posts?
- Do you want them to frame the entire perimeter or just highlight a seating area?
- Where will the plug or solar panel go? (You’ll need access to an outlet or direct sunlight for solar.)
I like to hang my lights just below the top rail—it keeps them visible but out of the way when I’m leaning on the railing. For a more dramatic effect, I’ll wrap them around the posts in a spiral pattern. It’s like giving your railing a hug.
Tools and Hardware You’ll Need
Here’s my go-to toolkit for a clean, damage-free install:
- Zip ties: Perfect for metal or vinyl railings. I use clear ones so they’re barely visible.
- Adhesive clips: Great for wood railings (no nails!). Just stick them on and loop the lights through.
- Twist ties or rubber bands: For a temporary look, like for a party.
- Measuring tape and level: To keep everything straight.
- Outdoor-rated extension cord or timer: So you don’t have to run an indoor cord outside.
Pro tip: Test the lights before you install them. I once spent an hour wrapping my railing only to realize the strand was half-dead. Save yourself the headache—plug them in first!
Step-by-Step Installation Guide
Here’s how I do it (in under 30 minutes):
- Measure and mark: Use chalk or tape to mark where each clip or tie will go. I space mine every 12 inches for a balanced look.
- Secure the clips/ties: Attach them along the railing. For zip ties, thread them through the railing’s gaps or around posts.
- Hang the lights: Start at the plug end and work your way around. Loop the lights through the clips or zip ties, keeping tension even.
- Wrap posts (optional): For a whimsical touch, wrap the lights around each post in a spiral. I use about 3 wraps per post.
- Hide the cord: Tuck the plug end behind a planter or under a bench. I use a discreet outdoor outlet box to keep it safe.
- Test and adjust: Plug it in! Fix any sagging or misaligned bulbs.
Design Ideas to Elevate Your Patio
Classic vs. Creative Layouts
The way you arrange your lights can change the whole vibe of your space. Here are a few ideas I’ve tried:
- Classic Top Rail: Simple, timeless. Lights run straight along the top of the railing. Works with any style.
- Under-Railing Glow: Hang lights under the railing to cast a soft upward glow. Great for highlighting plants or furniture.
- Post-Wrapping: Wrap lights around each post in a spiral. Adds movement and whimsy. I love this for summer parties.
- Double Row: Hang two strands—one at the top, one lower down. Creates depth and brightness.
- Zigzag or Wave Pattern: Instead of straight lines, zigzag the lights between posts. Feels playful and modern.
Color and Theme Inspiration
Want to go beyond white? Try these:
- Warm White: Cozy, inviting. My go-to for everyday use.
- Cool White: Crisp and modern. Great for a minimalist look.
- Multicolor: Festive and fun. I use these for holidays or kids’ parties.
- Pastel or Tinted Bulbs: Soft pink, blue, or gold bulbs add a dreamy touch. I’ve used pink for a romantic dinner setup.
- Smart Lights: Sync with music, change colors, or set schedules. I use a smart strand that fades from warm to cool as the night goes on.
Layering with Other Lighting
Don’t stop at the railing! Layer your lighting for a professional look:
- Path lights: Line walkways with solar stakes.
- Table lamps or lanterns: Add warm pools of light around seating.
- Uplighting: Place LED spotlights under trees or planters to cast shadows on the railing.
- Fairy lights in planters: Wrap small strands around potted plants for a magical glow.
Maintenance and Longevity: Keeping Your Lights Shining
Seasonal Care Tips
String lights are tough, but they need a little TLC:
- Spring/Summer: Wipe bulbs with a damp cloth to remove dust. Check for loose clips or frayed wires.
- Fall: Trim any branches that might snag the lights in wind. I learned this after a storm pulled down half my strand.
- Winter: In freezing climates, consider taking down non-weatherproof lights. I leave my LEDs up year-round (they’re rated for -4°F), but I cover the plug with a waterproof cap.
Troubleshooting Common Issues
Even the best lights can have hiccups:
- Half the strand is out? Check for loose bulbs, frayed wires, or a bad plug. I keep a spare bulb set just in case.
- Flickering lights? Try replacing the fuse in the plug (most LED strands have one).
- Sagging strands? Add more clips or ties. I use clear fishing line to “invisible” support long runs.
- Solar lights not charging? Wipe the panel clean and make sure it’s in direct sunlight.
When to Replace vs. Repair
Most LED strands last 5+ years. But if you’re seeing:
- More than 20% of bulbs dead
- Frequent flickering or power issues
- Visible damage to wires or plugs
…it’s probably time to replace them. I keep my old strands for spare parts or DIY crafts (like making a light-up wreath).
Real-Life Examples and Inspiration
Small Balcony Makeover
My friend Sarah has a 10-foot balcony with a metal railing. She hung a single strand of warm white LEDs along the top rail and added a few solar path lights below. Now, it’s her favorite spot for morning coffee. “It feels like a treehouse,” she says.
Backyard Entertaining Space
For my patio (20 feet long), I used a double row of Edison-style LEDs—one at the top, one 12 inches below. I wrapped the lights around each post and added a timer so they turn on at sunset. It’s perfect for dinner parties. Guests always ask, “Where’d you get these lights?”
Coastal Cottage Vibe
I visited a beach house where the owner used blue-tinted string lights on the railing, paired with white globe lanterns. It felt like a seaside resort. The lights reflected off the ocean—magical.
Urban Rooftop Retreat
My neighbor in the city hung multicolor smart lights in a zigzag pattern. He controls them with an app and changes colors for different moods (red for parties, blue for chill nights). It’s a tiny oasis in the middle of the city.
| Lighting Setup | Best For | Cost (Approx.) | Installation Time |
|---|---|---|---|
| Single strand, top rail | Small balconies, minimalist look | $20–$50 | 15–30 mins |
| Double row, post-wrapped | Entertaining, large patios | $60–$120 | 45–60 mins |
| Solar lights, under-rail | No outlet, eco-friendly | $30–$80 | 20–40 mins |
| Smart lights, color-changing | Tech lovers, mood lighting | $70–$150 | 30–60 mins |
The Final Glow: Why You’ll Love Your Lighted Railing
Adding string lights on patio railing isn’t just about aesthetics—it’s about creating a space that feels like you. It’s the difference between a plain backyard and a cozy retreat, between a dark balcony and a starlit hideout. I’ve hosted countless dinners, read books, and shared quiet moments under my lights, and they’ve become a signature part of my home.
But beyond the magic, it’s also practical. The right lighting makes your patio safer (no tripping in the dark), extends usable hours (you can enjoy it after sunset), and boosts curb appeal (great if you ever sell). And the best part? It’s one of the easiest, most affordable upgrades you can make. You don’t need an electrician or a big budget—just a few hours, some creativity, and a love for the outdoors.
So go ahead: measure your railing, pick your favorite lights, and give it a try. Start simple if you want, or go all-out with colors and patterns. There’s no “wrong” way to do it—just your way. And when you’re sitting there, glass in hand, watching those little lights dance in the breeze? You’ll know you made the right choice. Because sometimes, the smallest changes make the biggest difference. And that’s the beauty of string lights on patio railing: they don’t just light up your space—they light up your life.
Frequently Asked Questions
How do I attach string lights to my patio railing without damaging it?
Use non-invasive methods like zip ties, adhesive hooks, or wrap-around clips designed for railings. These options secure the string lights while keeping your railing intact and scratch-free.
Are string lights on patio railing safe for year-round use?
Yes, if you choose outdoor-rated, weatherproof string lights with durable insulation. Look for IP65-rated products to ensure resistance to rain, wind, and temperature changes.
What type of string lights work best for patio railings?
LED string lights are ideal—they’re energy-efficient, long-lasting, and emit minimal heat. For a cozy vibe, opt for warm white or soft amber bulbs with a clear or black wire.
Can I install string lights on a metal railing without tools?
Absolutely! Magnetic clips, twist ties, or flexible silicone straps let you install string lights on metal railings in minutes, no tools or drilling required.
How many string light strands do I need for my patio railing?
Measure your railing’s length and add 10-20% extra for draping or swags. For example, a 20-foot railing may need two 12-foot strands with some overlap for full coverage.
Do string lights on patio railing require a power source nearby?
Most plug-in string lights need an outdoor outlet, but battery-powered or solar options offer more flexibility. Solar lights charge during the day and automatically turn on at dusk.

