Featured image for stringing lights on a patio
Image source: img.yardenvy.com
Transform your patio into a captivating retreat by mastering the art of stringing lights—start by planning a layout that highlights key features like railings, pergolas, or trees for balanced illumination. Use durable, weather-resistant lights and secure them with hooks or zip ties to ensure safety and longevity, avoiding sagging or tangles. With the right spacing, power source, and dimmable controls, you’ll create a customizable ambiance perfect for any occasion.
Key Takeaways
- Plan your layout first: Sketch light placement to avoid gaps and ensure even coverage.
- Choose weatherproof lights: Opt for outdoor-rated LEDs to withstand sun, rain, and wind.
- Use secure mounting: Install hooks, clips, or tension wires to prevent sagging or damage.
- Measure before buying: Calculate patio dimensions to purchase the right length of lights.
- Layer for depth: Combine string lights with lanterns or uplights for dynamic ambiance.
- Test before installing: Check all bulbs and connections to troubleshoot issues early.
- Time it right: Use timers or smart plugs for automatic, energy-efficient lighting.
📑 Table of Contents
- How to Master Stringing Lights on a Patio for Perfect Ambiance
- Choosing the Right Lights for Your Patio
- Planning Your Layout: Where and How to Hang the Lights
- Tools and Hardware: What You’ll Need for Installation
- Step-by-Step Installation Guide
- Maintenance and Safety: Keeping Your Lights in Top Shape
- Data Table: Comparing Popular Patio Light Options
- Conclusion: Light Up Your Patio with Confidence
How to Master Stringing Lights on a Patio for Perfect Ambiance
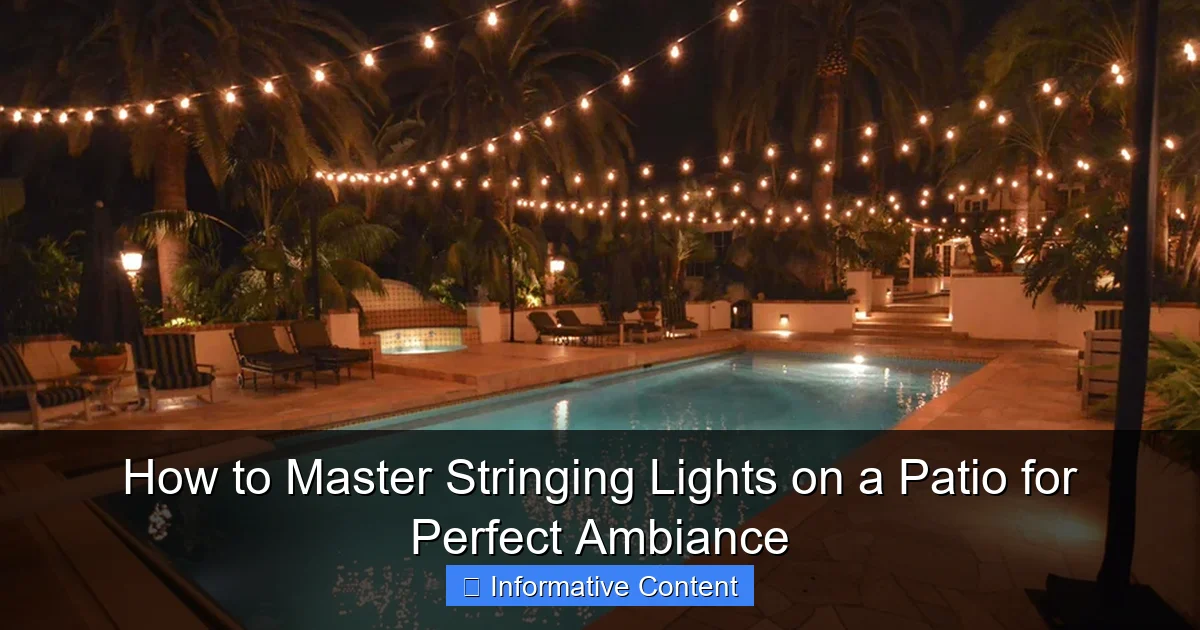
Imagine this: it’s a warm summer evening. The sun has just dipped below the horizon, painting the sky in soft hues of orange and pink. You’re sitting on your patio, a cool drink in hand, laughter filling the air, and above you, a canopy of twinkling lights casts a warm, inviting glow. That’s the magic of stringing lights on a patio—it transforms a simple outdoor space into a cozy, enchanting retreat. Whether you’re hosting a dinner party or enjoying a quiet night under the stars, the right lighting can elevate the mood and make your patio feel like an extension of your living room.
But let’s be real—stringing lights isn’t always as simple as it looks. If you’ve ever wrestled with tangled strands, struggled to find the right placement, or ended up with a dimly lit corner, you know how frustrating it can be. The good news? With a little planning, the right tools, and a few insider tips, you can master the art of stringing lights on a patio and create a space that’s both beautiful and functional. In this guide, we’ll walk you through everything from choosing the right lights to installation tricks and maintenance tips. So grab a cup of coffee (or a glass of wine), and let’s dive in.
Choosing the Right Lights for Your Patio
Before you start hammering hooks or climbing ladders, take a moment to think about the type of lights that will work best for your patio. Not all lights are created equal, and the right choice depends on your space, style, and needs.
Visual guide about stringing lights on a patio
Image source: m.media-amazon.com
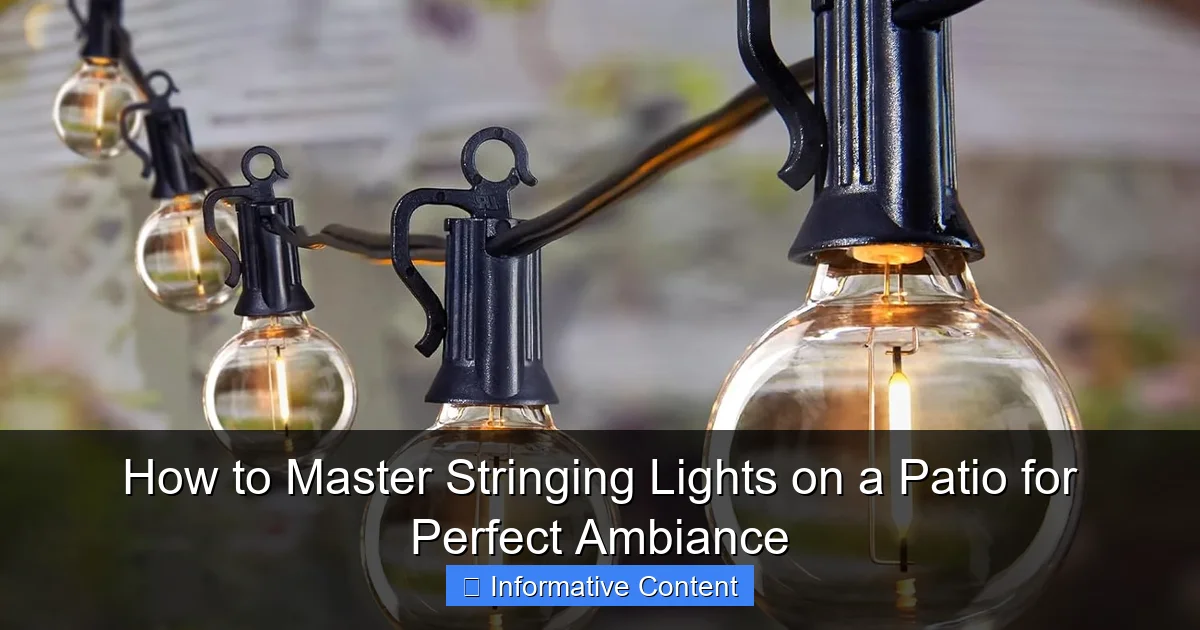
Types of String Lights
- Incandescent: These are the classic, warm-toned bulbs you might associate with holiday lights. They’re affordable and create a cozy glow, but they’re less energy-efficient and have a shorter lifespan compared to LEDs.
- LED: LEDs are the modern go-to for outdoor lighting. They’re energy-efficient, last longer (often up to 50,000 hours), and come in a variety of colors and brightness levels. Plus, they’re safer because they don’t get as hot as incandescent bulbs.
- Smart Lights: If you love tech, consider smart LED lights. These can be controlled via an app, allowing you to change colors, set schedules, or even sync with music. Great for mood lighting, but they’re usually pricier.
- Edison Bulbs: For a vintage, boho, or industrial look, Edison bulbs with exposed filaments are a stylish choice. They’re often used in café-style string lights and work well for patios with a rustic or eclectic vibe.
Key Features to Consider
- Weather Resistance: Since your lights will be outdoors, make sure they’re rated for wet or damp conditions (look for IP44 or higher). This ensures they’ll withstand rain, humidity, and temperature changes.
- Length and Spacing: Measure your patio and decide how much coverage you need. Some lights come in 25-foot strands, while others go up to 100 feet or more. Also, check the spacing between bulbs—closer spacing gives a denser glow, while wider spacing creates a more subtle effect.
- Power Source: Decide whether you want plug-in lights (great for patios near outlets) or solar-powered ones (ideal for off-grid areas). Solar lights are eco-friendly but may not be as bright or reliable in cloudy climates.
Pro Tip: If you’re unsure which lights to buy, start with a small strand and test it on your patio. You can always add more later, but it’s easier to adjust than to remove an overdone setup.
Planning Your Layout: Where and How to Hang the Lights
Now that you’ve picked your lights, it’s time to plan your layout. This step is crucial—it determines how your patio will look and feel when the lights are on. A well-thought-out layout ensures even coverage, avoids dark spots, and creates the perfect ambiance.
Assess Your Space
First, take a good look at your patio. Are there existing structures like railings, beams, or trees? These can be natural anchor points for your lights. If not, you’ll need to create your own (more on that later).
Ask yourself:
- Where do you want the focus to be? (e.g., over a dining table, along a seating area, or framing the entire patio?)
- Do you want a symmetrical or organic look? (e.g., crisscrossing for a canopy effect or straight lines for a minimalist vibe?)
- Are there any obstacles? (e.g., planters, furniture, or uneven surfaces that might affect hanging?)
Popular Layout Ideas
- Canopy Effect: String lights diagonally across the patio, crisscrossing to create a web-like canopy. This works best for larger patios with anchor points at different heights (e.g., between posts or trees).
- Perimeter Lighting: Hang lights along the edges of your patio, following railings, fences, or eaves. This creates a defined, cozy space and is great for smaller patios.
- Zigzag or “Z” Pattern: Run lights in a zigzag pattern between two points (e.g., from a house to a pergola). This adds visual interest without overwhelming the space.
- Cluster Lighting: Group multiple strands in one area (e.g., above a dining table) for a focal point. Use a dimmer or remote to adjust brightness for different moods.
Real-Life Example: One of my friends has a small backyard patio with a wooden pergola. She hung lights along the perimeter of the pergola, then added a single strand diagonally from the house to a tree for a whimsical touch. The result? A warm, inviting space that feels larger than it is.
Sketch It Out
Grab a piece of paper or use a design app (like SketchUp or even a simple drawing tool) to sketch your patio and mark where you’ll hang the lights. This helps you visualize the final look and avoid last-minute changes. Don’t forget to account for plug locations—you don’t want cords running across your patio!
Tools and Hardware: What You’ll Need for Installation
Once you’ve planned your layout, it’s time to gather your tools and hardware. The right equipment makes installation easier, safer, and more durable. Here’s what you’ll need:
Essential Tools
- Measuring Tape: For precise spacing and length measurements.
- Drill (if needed): If you’re attaching lights to wood or masonry, a drill with the right bits is a must.
- Ladder: A sturdy, non-slip ladder is essential for reaching high points. Make sure it’s on level ground.
- Pliers or Wire Cutters: Useful for adjusting hooks or cutting zip ties.
- Extension Cord (if needed): For plug-in lights, use an outdoor-rated extension cord with a GFCI (Ground Fault Circuit Interrupter) for safety.
Hardware for Hanging
- Hooks or Screw Eyes: Small metal hooks work well for wooden surfaces. For concrete or brick, use masonry anchors or toggle bolts.
- Eye Screws or Cup Hooks: These are great for creating anchor points on walls, railings, or beams. Choose stainless steel for durability.
- Zip Ties: For quick, temporary fixes (e.g., attaching lights to a railing or tree branch). Use outdoor-rated ties to prevent degradation.
- Turnbuckles or Tensioners: If you’re stringing lights over a long distance, these help keep the strands taut and prevent sagging.
- Adhesive Hooks or Clips: For a no-drill option, look for outdoor-rated adhesive hooks. Just make sure they’re rated for the weight of your lights.
Safety Tips
- Always turn off power before working near outlets or wiring.
- Use a ladder with a spotter for stability.
- Check local building codes if you’re making permanent installations (e.g., drilling into a house).
- Keep cords away from high-traffic areas to avoid tripping hazards.
Pro Tip: If you’re using a lot of hooks, buy them in bulk—it’s cheaper and ensures uniformity. And don’t skimp on quality. Cheap hooks can rust or fail, leaving your lights dangling (or worse, falling).
Step-by-Step Installation Guide
Now comes the fun part: actually hanging the lights! Follow these steps for a smooth, stress-free installation.
Step 1: Test Your Lights
Before you start hanging, plug in your lights and make sure they work. There’s nothing worse than finishing installation only to find a dead strand. If you’re using multiple strands, connect them first to check for compatibility (some LED brands don’t play well together).
Step 2: Install Anchor Points
Using your layout sketch, mark where you’ll place hooks or screws. For wood, drill pilot holes slightly smaller than the screw diameter to prevent splitting. For masonry, use a hammer drill with a masonry bit. Install hooks at the same height for a clean, even look.
Tip: If you’re creating a canopy, stagger the hooks slightly to avoid a “grid” look. For example, offset the hooks by 6-12 inches for a more natural feel.
Step 3: Hang the Lights
Start by attaching the first strand to your anchor points. For a canopy, begin at one corner and work diagonally. Use S-hooks or zip ties to secure the lights—don’t pull too tight, as this can damage the wiring.
If you’re using multiple strands, connect them end-to-end (most outdoor lights have male/female plugs) or use a power strip with multiple outlets. Avoid daisy-chaining more than 3-4 strands (check the manufacturer’s guidelines) to prevent overloading.
Step 4: Adjust and Secure
Once the lights are up, step back and check the spacing. If a strand sags, tighten it with a turnbuckle or add a support hook. Use zip ties to bundle excess cord and keep things tidy.
For a polished look, tuck cords behind railings or into planters. If you’re running a cord to an outlet, use a cord cover (available at hardware stores) to protect it from weather and tripping.
Step 5: Add Finishing Touches
Turn on the lights and admire your work! Adjust brightness or colors if you’re using smart lights. For a cozy feel, dim the lights or add a timer to turn them on at sunset.
Real-Life Example: I once helped a neighbor install lights over his deck. We used a mix of hooks and zip ties to create a crisscross pattern, then added a dimmer switch. The result? A warm, golden glow that transformed his deck into an outdoor living room.
Maintenance and Safety: Keeping Your Lights in Top Shape
Great lighting isn’t just about installation—it’s about keeping it looking good year-round. Here’s how to maintain your patio lights and avoid common pitfalls.
Regular Cleaning
- Bulbs: Wipe down bulbs with a dry cloth to remove dust and grime. Avoid harsh chemicals, which can damage coatings.
- Strands: Check for frayed wires or loose connections. If you find damage, replace the strand—don’t try to repair it.
- Hooks and Hardware: Inspect for rust or loosening. Tighten screws or replace hooks as needed.
Seasonal Care
- Winter: If you live in a cold climate, consider removing lights during winter to prevent damage from snow and ice. Store them in a dry place to avoid tangling.
- Summer: Check for UV damage, especially if your lights are exposed to direct sunlight. Some bulbs fade or crack over time.
Safety Checks
- Overheating: LED lights run cool, but incandescent bulbs can get hot. Keep them away from flammable materials like curtains or paper lanterns.
- Cords: Inspect cords for fraying or exposed wires. Replace any damaged cords immediately.
- Weatherproofing: Make sure all connections (e.g., plugs, splices) are covered with weatherproof caps or electrical tape.
Upgrades and Repairs
As your patio evolves, so can your lighting. Add new strands for a brighter look, switch to smart lights for more control, or change colors for seasonal decor. If a bulb burns out, replace it promptly—most LED strands have individual bulb replacement options.
Data Table: Comparing Popular Patio Light Options
| Light Type | Lifespan (Hours) | Energy Use (Watts) | Weather Resistance | Best For |
|---|---|---|---|---|
| Incandescent | 1,000-2,000 | 5-10 per bulb | IP44 | Classic, warm glow; budget-friendly |
| LED | 25,000-50,000 | 0.5-2 per bulb | IP65 | Energy efficiency; long-term use |
| Smart LED | 25,000-50,000 | 1-3 per bulb | IP65 | Color-changing; app control |
| Solar-Powered | 10,000-20,000 | 0 (solar) | IP65 | Off-grid areas; eco-friendly |
Conclusion: Light Up Your Patio with Confidence
Stringing lights on a patio isn’t just about adding brightness—it’s about creating a mood, a vibe, a place where memories are made. Whether you’re going for a romantic glow, a festive party atmosphere, or a cozy nook for quiet evenings, the right lighting can transform your outdoor space into something magical.
Remember, the key to mastering stringing lights on a patio is planning, patience, and a little creativity. Start with the right lights for your needs, sketch out your layout, use quality hardware, and don’t rush the installation. And once your lights are up, take the time to maintain them—it’ll save you headaches (and replacement costs) down the road.
So go ahead—grab those lights, gather your tools, and get to work. Your patio is waiting to shine. And when you’re sitting under that twinkling canopy, sipping your favorite drink, and soaking in the ambiance, you’ll know it was all worth it. Happy lighting!
Frequently Asked Questions
How do I choose the right type of string lights for my patio?
For the best results, opt for LED string lights with a warm white or soft glow, as they’re energy-efficient and create a cozy ambiance. Ensure they’re rated for outdoor use and consider shatterproof bulbs if your patio is high-traffic. Matching the bulb shape and spacing to your patio’s style enhances the overall look.
What’s the best way to string lights on a patio without damaging walls?
Use removable hooks, adhesive clips, or tension rods designed for outdoor use to avoid drilling or nailing. These methods securely hold lights while protecting surfaces, making them ideal for rentals or delicate finishes. For freestanding options, consider shepherd’s hooks or poles.
How can I string lights on a patio with no overhead support?
Anchor lights to vertical structures like railings, fences, or posts using zip ties or hooks. Create a zigzag pattern between opposite sides of the patio or use a pergola or umbrella stand as a central support. This approach ensures even coverage without needing a ceiling.
What spacing and layout work best when stringing lights on a patio?
Space lights 12–18 inches apart for balanced brightness, adjusting based on bulb size and patio dimensions. For a grid layout, run parallel lines across the space, or use a crisscross pattern for added visual interest. Always test the layout with the lights off first.
How do I safely power outdoor patio string lights?
Use outdoor-rated extension cords and a GFCI outlet to prevent electrical hazards. If running multiple strands, check the manufacturer’s wattage limits to avoid overloading circuits. Solar-powered lights are a great alternative for areas without easy access to outlets.
Can I leave patio string lights up year-round?
Only if the lights are specifically rated for year-round outdoor use and your climate isn’t extreme. Regularly inspect for frayed wires or damage, and consider removable options for easy storage. For longevity, take them down during harsh winter months or heavy storms.

