
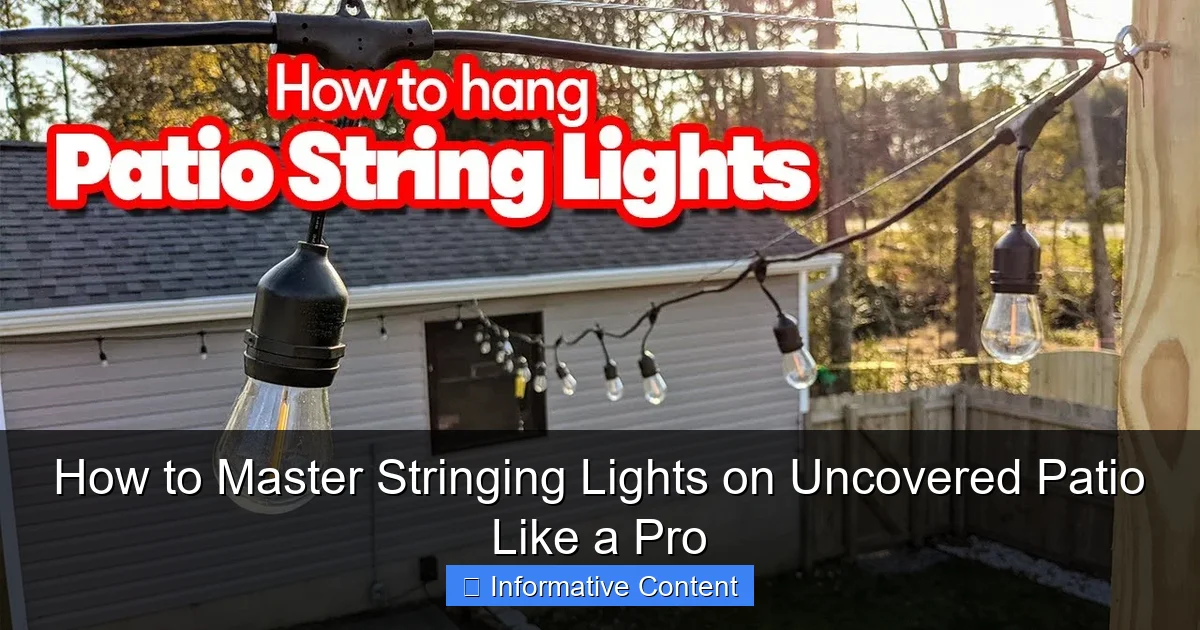
Featured image for stringing lights on uncovered patio
Image source: garden.eco
Transform your uncovered patio into a stunning nighttime retreat by mastering the art of string light placement—start by planning a layout that highlights architectural features and ensures even coverage. Use durable, outdoor-rated lights and secure them with weather-resistant hooks or zip ties for a professional, polished look that withstands the elements. With the right spacing, tension, and power source strategy, you’ll create a warm, inviting ambiance effortlessly.
Key Takeaways
- Plan your layout first: Sketch light placement to avoid mid-project changes.
- Use weatherproof lights: Ensure durability with outdoor-rated, waterproof string lights.
- Secure with proper hardware: Use hooks, clips, or zip ties for safe, stable installation.
- Measure twice, install once: Confirm spacing and length before mounting lights.
- Layer lighting for depth: Combine string lights with lanterns or spotlights for ambiance.
- Test before finalizing: Check bulbs and connections early to troubleshoot issues.
📑 Table of Contents
- How to Master Stringing Lights on Uncovered Patio Like a Pro
- 1. Choosing the Right Lights for Your Uncovered Patio
- 2. Planning Your Layout for Maximum Impact
- 3. Tools and Materials You’ll Need
- 4. Step-by-Step Installation Process
- 5. Maintaining and Troubleshooting Your Lights
- 6. Creative Ideas to Elevate Your Patio Lighting
How to Master Stringing Lights on Uncovered Patio Like a Pro
There’s something magical about stepping onto your patio at night, the soft glow of lights weaving through the air like stars that decided to stay a little closer to Earth. Whether you’re hosting a summer barbecue, enjoying a quiet evening with a book, or sharing a meal under the open sky, stringing lights on an uncovered patio can transform your outdoor space into a cozy, inviting retreat. I remember the first time I tried it—I was excited but also overwhelmed. I didn’t know where to start, how to plan the layout, or which lights would survive the elements. After a few trial runs (and one tangled mess that took an hour to untangle), I finally got the hang of it. Now, I want to share what I’ve learned so you can skip the frustration and go straight to the glow.
Stringing lights isn’t just about aesthetics—it’s about creating an atmosphere. The right lighting can make your patio feel warm and welcoming, even on the chilliest nights. But it’s not as simple as hanging a few bulbs and calling it a day. You need to consider spacing, power sources, durability, and how the lights will look from every angle. In this guide, I’ll walk you through every step, from choosing the right lights to troubleshooting common issues. By the end, you’ll be able to string lights on your uncovered patio like a pro, without the stress or the tangled mess.
1. Choosing the Right Lights for Your Uncovered Patio
Before you start hammering nails or tying knots, take a moment to think about what kind of lights will work best for your space. Not all lights are created equal, and picking the wrong ones can leave you with a dim, flickering mess—or worse, a fire hazard.
Visual guide about stringing lights on uncovered patio
Image source: i.ytimg.com
Types of Outdoor String Lights
- LED String Lights: These are the gold standard for outdoor lighting. They’re energy-efficient, durable, and come in a variety of colors and styles. Plus, they last for years, so you won’t be replacing them every season. Look for LED lights with a weatherproof rating of IP44 or higher for uncovered patios.
- Edison-Style Bulbs: If you love vintage charm, these are perfect. They’re larger and more decorative, but make sure they’re rated for outdoor use. Some models are fragile, so handle them with care.
- Fairy Lights: These delicate, twinkling lights are great for a soft, romantic glow. They’re usually battery-powered, so they’re easy to install, but they may not be bright enough for larger patios.
- Net Lights: Ideal for covering large areas quickly, like pergolas or railings. They’re a bit more expensive, but they save time and create a uniform look.
Key Features to Look For
- Weather Resistance: Your lights need to withstand rain, wind, and UV exposure. Look for “outdoor-rated” or “weatherproof” labels.
- Length and Spacing: Measure your patio first. Lights typically come in 24-foot, 48-foot, or 100-foot strands. For a cozy look, space bulbs 6-12 inches apart.
- Power Source: Decide if you want plug-in, solar, or battery-powered lights. Plug-in lights are brighter and more reliable, but they require access to an outlet. Solar lights are eco-friendly but may dim on cloudy days.
- Color Temperature: Warm white (2700K-3000K) is the most popular for patios—it feels inviting. Cool white or colored lights can be fun for parties, but they’re less versatile.
Pro Tip: Buy one extra strand than you think you’ll need. It’s always better to have a little extra than to run short and ruin the symmetry.
2. Planning Your Layout for Maximum Impact
Now that you’ve picked your lights, it’s time to plan how they’ll look. A good layout can make your patio feel spacious and balanced, while a bad one can look cluttered or uneven. Here’s how to get it right.
Measure Your Space
Grab a tape measure and note the dimensions of your patio. Pay attention to key features like railings, pergolas, trees, and furniture. You’ll use these as anchor points for your lights.
Sketch a Layout
Draw a rough sketch of your patio on paper or use a free design app. Mark where you want the lights to go. Here are some popular layout ideas:
- Perimeter Stringing: Run lights along the edges of your patio, either on railings or posts. This creates a defined, cozy space.
- Criss-Cross Pattern: String lights diagonally across your patio from posts, trees, or walls. This adds depth and drama.
- Overhead Grid: Create a “ceiling” of lights by running them in straight lines from one side to the other. Great for larger patios.
- Focal Point Highlighting: Focus on a specific area, like a seating nook or dining table, with a cluster of lights.
Consider the View
Think about how the lights will look from every angle—inside your home, from the yard, and from different spots on the patio. You want them to be visible but not overwhelming. For example, if you’re stringing lights from a pergola to a tree, make sure they’re high enough not to block the view but low enough to feel intimate.
Example: On my patio, I used a mix of perimeter stringing and a criss-cross pattern. The perimeter lights (on the railing) created a soft glow around the edges, while the criss-cross lights (from pergola to fence) added a starry effect overhead. It felt like a cozy outdoor room.
3. Tools and Materials You’ll Need
You don’t need a full toolkit to string lights, but having the right supplies will save you time and frustration. Here’s what I recommend:
Essential Tools
- Measuring Tape: For precise spacing and length.
- Sturdy Ladder: For reaching high anchor points.
- Drill and Screws (or Hooks): For securing lights to wood, metal, or masonry. Use stainless steel or outdoor-rated screws to prevent rust.
- Zip Ties or Cable Clips: Great for temporary installations or securing lights to railings.
- Extension Cords (if needed): Make sure they’re outdoor-rated and long enough to reach your power source.
- Timer or Smart Plug: Automate your lights to turn on at dusk and off at bedtime.
Optional but Helpful
- Light Hanging Kit: Some kits include specialized hooks, tensioners, and clips designed for outdoor string lights.
- String Light Hangers: These are small plastic or metal clips that snap onto railings or posts. They’re reusable and easy to install.
- Weatherproof Electrical Box: If you’re plugging in lights, protect the connection from rain.
Pro Tip: If you’re using screws or hooks, pre-drill holes to avoid splitting wood. For masonry, use anchors to keep screws secure.
4. Step-by-Step Installation Process
Now comes the fun part—actually stringing the lights! Follow these steps for a smooth, professional-looking installation.
Step 1: Install Anchor Points
Decide where you’ll attach the lights (posts, railings, pergola, etc.). For permanent installations, screw in hooks or eyelets. For temporary setups, use zip ties or clips. Space anchor points 6-12 feet apart, depending on your layout.
Step 2: Test Your Lights
Before hanging, plug in your lights to make sure they work. It’s much easier to troubleshoot on the ground than halfway up a ladder.
Step 3: Hang the Lights
Start at one end and work your way to the other. If you’re using multiple strands, connect them with a waterproof connector or plug them into an outdoor-rated extension cord. For a criss-cross pattern, use a tension wire or fishing line to support the lights and prevent sagging.
Step 4: Secure the Cords
Use zip ties, clips, or hooks to secure the cords along the anchor points. Keep them tight enough to look neat but loose enough to allow for movement in the wind. Avoid sharp bends or kinks in the cord.
Step 5: Adjust the Height
Make sure the lights are high enough to walk under but low enough to feel cozy. A good rule of thumb is 7-8 feet for overhead lights, but adjust based on your patio’s size and furniture.
Step 6: Test the Layout
Turn on the lights and walk around to check the view from different angles. Adjust any sagging strands or misaligned bulbs.
Example: When I installed my criss-cross lights, I used a tension wire to keep them straight. I attached the wire to the pergola on one end and the fence on the other, then hung the lights from the wire. It looked clean and professional.
5. Maintaining and Troubleshooting Your Lights
Once your lights are up, you’ll want them to last. Here’s how to keep them shining year after year.
Seasonal Maintenance
- Winter Storage: If you live in a cold climate, take down your lights before the first frost. Store them in a dry place, coiled loosely in a box or bag. Don’t leave them outside, as snow and ice can damage the cords.
- Summer Cleaning: Wipe down bulbs and cords with a damp cloth to remove dust and debris. Check for loose connections or frayed wires.
- Bulb Replacement: If a bulb burns out, replace it ASAP to keep the rest of the strand bright. Some LED strands have shunts, so one dead bulb won’t affect the others.
Common Issues and Fixes
- Flickering Lights: This usually means a loose bulb or connection. Tighten the bulb or check the plug.
- Sagging Lights: Add more anchor points or use a tension wire to support the strand.
- Water in Connectors: Dry the connection with a towel and cover it with a weatherproof cap.
- Too Dim: Try adding more strands or switching to brighter bulbs.
Pro Tip: Keep a small repair kit with spare bulbs, zip ties, and electrical tape. You’ll be glad you did when a bulb burns out or a cord gets loose.
6. Creative Ideas to Elevate Your Patio Lighting
Now that you’ve mastered the basics, it’s time to get creative! Here are some ideas to take your stringing lights on an uncovered patio to the next level.
Layered Lighting
Combine string lights with other light sources, like lanterns, candles, or path lights. For example, hang string lights overhead and place lanterns on tables for a warm, multi-dimensional glow.
Themed Lighting
Match your lights to the season or occasion. Use white lights for everyday, colored lights for holidays, and fairy lights for a romantic dinner.
Interactive Lighting
Install smart lights that change color or brightness with a tap on your phone. Some even sync to music for a party-ready vibe.
Natural Integration
Weave lights through trees, bushes, or vines for a magical, organic look. Use green zip ties to blend the cords into the foliage.
DIY Decorations
Attach paper lanterns, mason jars, or fabric shades to your lights for a custom touch. Just make sure they’re weatherproof!
| Idea | Best For | Estimated Cost |
|---|---|---|
| Perimeter Stringing | Small to Medium Patios | $20-$50 |
| Criss-Cross Pattern | Large Patios or Pergolas | $40-$80 |
| Layered Lighting | Entertaining or Relaxation | $30-$70 |
| Smart Lights | Tech-Savvy Homeowners | $50-$100 |
Stringing lights on your uncovered patio isn’t just a project—it’s an investment in your home’s ambiance. With the right lights, a well-planned layout, and a little creativity, you can create a space that’s perfect for relaxing, entertaining, or just enjoying the night sky. So grab your tools, pick your favorite lights, and get ready to glow. Before you know it, you’ll be the envy of the neighborhood—and the proud owner of a patio that’s always ready for a party (or a quiet night in).
Remember, the key is to have fun with it. Don’t stress about perfection—your patio is a place to unwind, after all. Even if your lights aren’t perfectly symmetrical or your first strand ends up tangled, you’ll still have a space that feels warm and inviting. And that’s what really matters.
Frequently Asked Questions
How do I hang string lights on an uncovered patio without drilling holes?
Use adhesive hooks, tension rods, or freestanding poles designed for outdoor use. These options provide sturdy support while preserving your patio’s structure and are ideal for renters or temporary setups.
What type of string lights work best for an uncovered patio?
Opt for weatherproof, commercial-grade LED string lights with shatterproof bulbs. These are durable, energy-efficient, and designed to withstand sun, rain, and temperature changes for long-term outdoor use.
How far apart should I space the hooks when stringing lights on uncovered patio?
Space hooks or mounting points 2–4 feet apart, depending on the wire’s weight and sag tolerance. For heavier bulbs or long runs, use closer spacing to prevent drooping and ensure a polished look.
Can I leave my patio string lights up year-round?
Only if they’re rated for year-round outdoor use and protected from extreme weather. Regularly inspect connections and bulbs, and consider removable covers or timers to extend lifespan during harsh seasons.
How do I power string lights on a large uncovered patio?
Use outdoor-rated extension cords and GFCI outlets, and plan your layout to minimize cord length. For large areas, connect multiple light strands with a power source in the center or use a weatherproof power stake.
What’s the easiest way to create a professional look when stringing lights on uncovered patio?
Use a zigzag or crisscross pattern between anchor points for visual depth, and secure lights tautly to avoid sagging. Hide cords with clips or conduit, and add dimmers or smart controls for ambiance.

