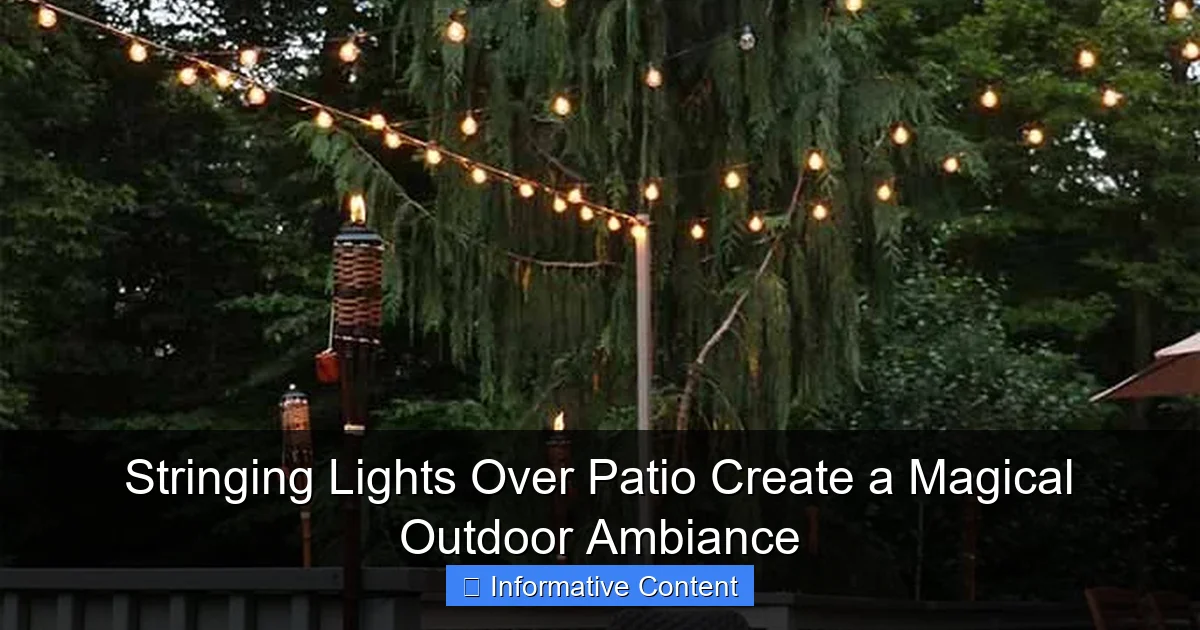
Featured image for stringing lights over patio
Image source: woohome.com
Stringing lights over your patio instantly transforms it into a captivating, magical retreat perfect for entertaining or unwinding. With endless styles—from classic Edison bulbs to solar-powered LEDs—outdoor string lights enhance ambiance while adding safety and charm to any evening gathering.
Key Takeaways
- Plan your layout: Measure patio dimensions before hanging lights for balanced coverage.
- Choose durable lights: Opt for weatherproof, outdoor-rated string lights to ensure longevity.
- Use strategic anchor points: Secure lights to sturdy structures like posts or eaves.
- Mix lighting layers: Combine string lights with lanterns or candles for depth.
- Time it right: Install lights at golden hour for instant magical ambiance.
- Add dimmers: Control brightness to match the mood or occasion effortlessly.
📑 Table of Contents
- Why Stringing Lights Over Patio Transforms Your Outdoor Space
- Choosing the Right Lights for Your Patio
- Planning Your Layout: Design Tips for a Balanced Look
- Installation Tips: Safety, Tools, and Step-by-Step Guide
- Creative Ideas to Elevate Your Patio Lighting
- Maintenance and Longevity: Keeping Your Lights Glowing
- Data Table: Popular String Light Options Compared
- Final Thoughts: Light Up Your Evenings
Why Stringing Lights Over Patio Transforms Your Outdoor Space
Imagine this: It’s a warm summer evening. The sun has just dipped below the horizon, painting the sky in soft hues of orange and purple. You’re sitting outside with a cold drink in hand, the air filled with laughter and the faint sound of music. Above you, a canopy of twinkling lights stretches across the patio, casting a warm, inviting glow. This isn’t a scene from a movie—it’s something you can create right in your own backyard.
Stringing lights over patio areas isn’t just about adding illumination. It’s about crafting a mood, a moment, a memory. Whether you’re hosting a dinner party, enjoying a quiet night with a book, or sharing stories with family, those tiny bulbs can turn an ordinary outdoor space into something truly magical. And the best part? You don’t need to be an electrician or a design expert to pull it off. With a little planning, the right tools, and a dash of creativity, you can transform your patio into a cozy, enchanting retreat.
Choosing the Right Lights for Your Patio
Not all string lights are created equal. The type you choose will depend on your patio’s size, layout, power access, and the kind of ambiance you want to create. Let’s break down the options so you can pick the perfect fit.
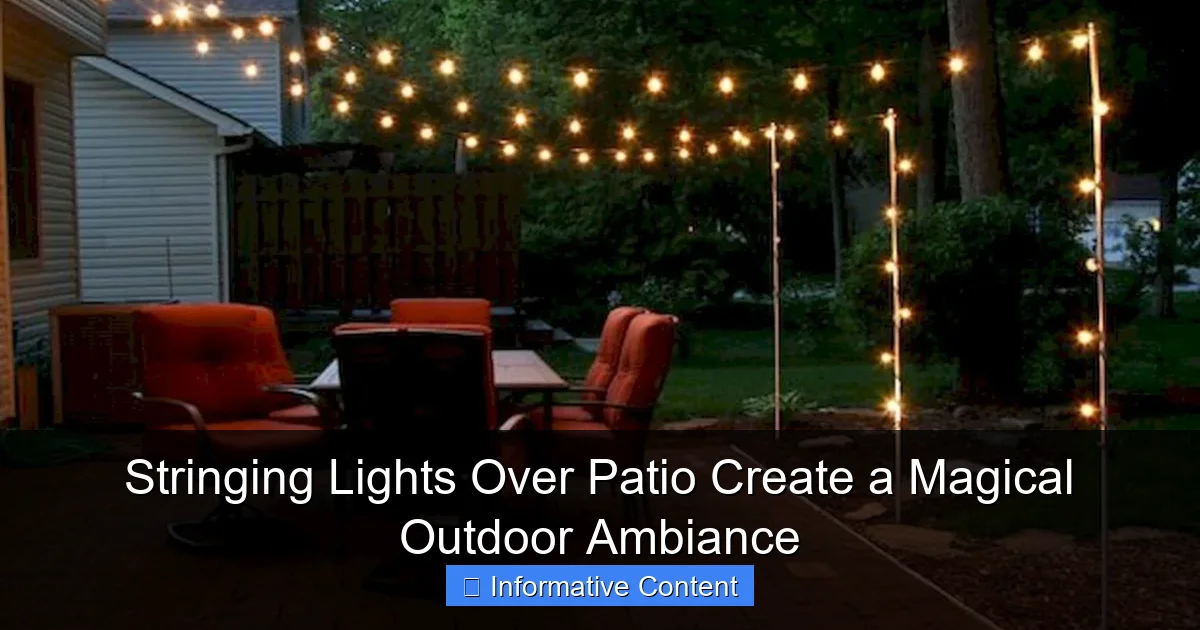
Visual guide about stringing lights over patio
Image source: i.pinimg.com
Types of String Lights
When you walk into a store or browse online, you’ll see a dizzying array of string lights. Here are the most common types and when they work best:
- Incandescent Edison Bulbs: These vintage-style lights give off a warm, golden glow. They’re perfect for rustic or industrial patios. But keep in mind—they use more energy and don’t last as long as LEDs.
- LED String Lights: Energy-efficient, long-lasting, and cooler to the touch. They come in warm white, cool white, multicolor, and even color-changing versions. Great for year-round use.
- Fairy Lights: Tiny, delicate bulbs on thin wire. Ideal for wrapping around railings, draping from trees, or weaving through pergolas. They add a whimsical, ethereal feel.
- Net Lights: A grid of lights that you can drape over bushes, fences, or low structures. Super easy to install and perfect for quick coverage.
- Curtain Lights: Vertical strands that hang like a waterfall of light. Perfect for covering a wall, balcony, or pergola side.
- Smart Lights: Wi-Fi-enabled lights you can control with an app. You can change colors, set schedules, or sync with music. A bit pricier, but worth it if you love tech and convenience.
Warm vs. Cool Light: Setting the Mood
This is more important than you might think. Warm light (2700K–3000K) mimics candlelight and firelight. It’s cozy, inviting, and perfect for relaxation. Cool light (4000K–5000K) feels more energizing and is better for task areas like outdoor kitchens. For a magical ambiance, stick with warm white or amber. It makes people feel at ease and enhances the natural colors of your outdoor space.
Length, Spacing, and Wattage
Measure your patio’s perimeter or the area you want to cover. Most string lights come in 24-foot, 48-foot, or 100-foot strands. If you’re covering a large area, you’ll likely need to connect multiple strands. But be careful—most lights can only be safely connected up to 3–5 strands in a series. Check the manufacturer’s guidelines to avoid overloading.
Spacing matters too. Lights spaced 3–6 inches apart create a dense, glowing canopy. Wider spacing (8–12 inches) gives a more open, starry-night effect. And if you’re using incandescent bulbs, make sure your outdoor outlets can handle the wattage. A typical 48-foot strand uses about 20–40 watts. LEDs use far less—often under 10 watts for the same length.
Planning Your Layout: Design Tips for a Balanced Look
Before you start drilling holes or climbing ladders, take a step back and plan. A well-thought-out layout ensures even coverage, avoids dark spots, and makes the most of your space.
Map Out Your Patio’s Key Features
Start by sketching your patio on paper or using a simple app. Mark where the seating area, dining table, grill, and walkways are. Then, identify your anchor points—places where you can attach the lights. These might include:
- House eaves or soffits
- Pergola beams or posts
- Fence posts
- Railings or columns
- Trees or shrubs (use tree-friendly clips)
Think of these anchor points as the “pillars” of your light canopy. You’ll run your strings between them to create a grid, zigzag, or crisscross pattern.
Popular Layout Styles
- Grid Pattern: Run lights horizontally and vertically to form a checkerboard effect. Great for square or rectangular patios. Gives a clean, structured look.
- Zigzag or Crisscross: String lights diagonally from one anchor to another. This creates dynamic movement and fills the space more efficiently.
- Hanging Canopy: Suspend lights from a central point (like a pergola or tree) and let them drape down like a chandelier. Ideal for circular or central seating areas.
- Perimeter Lighting: Run lights around the edges of your patio. This frames the space and creates a cozy, enclosed feel. Works well with fairy lights or net lights.
- Layered Design: Combine different types of lights. For example, use a grid of Edison bulbs overhead and fairy lights wrapped around the railings. Adds depth and texture.
Consider Height and Spacing
Hang lights high enough so no one bumps into them—ideally 7 to 8 feet above the ground. If your patio has a low roof or pergola, you can hang them slightly lower, but make sure they’re still out of head height.
Spacing between strings should be 12–18 inches for a full canopy. Closer spacing = more light. Wider spacing = more sparkle. If you’re going for a “starry night” look, you can go as wide as 24 inches.
Installation Tips: Safety, Tools, and Step-by-Step Guide
Now comes the fun part—installing your lights. With the right tools and a little patience, you can do this in a weekend.
Tools You’ll Need
- Measuring tape
- Pencil or chalk
- Drill and drill bits (if mounting into wood or stucco)
- Outdoor-rated screws, hooks, or eye bolts
- Extension cords (rated for outdoor use)
- Timer or smart plug (optional but recommended)
- Ladder or step stool
- Zip ties or light clips (plastic, not metal—metal can damage wires)
- Gloves (to protect your hands)
Step-by-Step Installation
- Test Your Lights: Plug in each strand before hanging. Replace any burnt-out bulbs or faulty wires.
- Mark Anchor Points: Use a pencil to mark where you’ll install hooks or screws. Space them 12–18 inches apart, depending on your layout.
- Install Hooks or Bolts: Use a drill to secure outdoor-rated hooks into wood, stucco, or masonry. For trees, use soft rubber tree clips or zip ties—never nails or wire, which can harm the tree.
- Start from the Power Source: Begin hanging the first strand near your outdoor outlet. This reduces the need for long extension cords.
- Hang the Strings: Attach each end of the light strand to the hooks. For longer spans, use zip ties or light clips every 12–18 inches to support the weight and prevent sagging.
- Connect Multiple Strands: If using multiple strands, connect them end-to-end. Don’t exceed the manufacturer’s maximum connection limit (usually 3–5 strands).
- Secure Extension Cords: Use clips or tape to keep cords off the ground and away from foot traffic. Never run cords under rugs or furniture—this creates a tripping hazard and can overheat.
- Add a Timer: Plug your lights into a weatherproof timer or smart plug. Set them to turn on at dusk and off at bedtime. Saves energy and ensures consistency.
Safety First
Outdoor electrical work requires caution. Here are a few safety tips:
- Always use outdoor-rated lights and cords. Indoor lights aren’t waterproof and can short out.
- Never overload circuits. Use a power strip with surge protection if connecting multiple strands.
- Avoid running cords through wet areas or standing water.
- If you’re unsure about electrical safety, consult a licensed electrician—especially if you’re installing permanent fixtures or running wiring through walls.
Creative Ideas to Elevate Your Patio Lighting
Now that your lights are up, it’s time to get creative. A few extra touches can take your patio from “nice” to “wow.”
Layer Your Lighting
String lights are the star, but they don’t have to work alone. Add layers with:
- Path Lights: Small solar or LED stakes along walkways. Guide guests safely and add sparkle to the ground.
- Uplighting: Place spotlights at the base of trees or shrubs to highlight greenery. Creates a dramatic effect.
- Accent Lights: Use lanterns, candles, or LED candles in glass jars on tables. Adds warmth and intimacy.
- Under-Table Lighting: Place battery-powered LED strips under your dining table. Creates a glowing base.
Incorporate Natural Elements
Weave lights through:
- Climbing Vines: If you have a trellis with ivy or jasmine, wrap fairy lights around the vines. The lights will peek through the leaves.
- Branches or Twigs: Create a DIY chandelier by suspending a bundle of birch branches from your pergola and wrapping them with lights.
- Water Features: If you have a small fountain or pond, place submersible LED lights in the water. The reflection doubles the magic.
Seasonal Swaps
Change your lights with the seasons for a fresh look:
- Summer: Warm white or soft yellow. Add citronella candles for ambiance and bug control.
- Fall: Amber or orange lights. Pair with pumpkins and mums.
- Winter: Cool white or blue. Use icicle lights or net lights on the roofline.
- Spring: Pastel-colored LEDs or fairy lights in clear bulbs. Add floral garlands.
Interactive Lighting
For a fun twist, try:
- Color-Changing Lights: Let guests pick their favorite color with a remote or app.
- Music-Syncing Lights: Use smart lights that pulse to the beat of your playlist.
- DIY Light Art: Hang a large wire frame (like a hoop or star) and wrap it with lights. It becomes a glowing sculpture.
Maintenance and Longevity: Keeping Your Lights Glowing
Good news: string lights are low-maintenance. But a little care goes a long way in keeping them looking great year after year.
Seasonal Care
- Spring & Summer: Wipe down bulbs with a damp cloth to remove dust and pollen. Check for loose connections or frayed wires.
- Fall: Remove leaves and debris that might get tangled in the strings. Trim any overgrown branches that could snag the wires.
- Winter: If you live in a cold climate, consider taking down your lights during heavy snow or ice storms. Ice can weigh down the strands and damage sockets. If you leave them up, use weatherproof covers over outlets and connections.
Storage Tips
If you do take your lights down, store them properly:
- Wrap each strand around a piece of cardboard or a reel to prevent tangles.
- Label the box with the length and type of lights.
- Store in a cool, dry place—away from moisture and extreme temperatures.
- Keep bulbs intact. Don’t remove them unless they’re damaged.
When to Replace
Even the best lights don’t last forever. Here’s when to consider a refresh:
- More than 30% of bulbs are out (especially with incandescent).
- Wires are cracked, frayed, or exposed.
- Sockets are loose or corroded.
- The light color has shifted (LEDs can fade over time).
LEDs typically last 25,000–50,000 hours (that’s 5–10 years with nightly use). Incandescent bulbs last 1,000–2,000 hours—about 1–2 seasons.
Data Table: Popular String Light Options Compared
| Type | Lifespan | Energy Use | Best For | Pros | Cons |
|---|---|---|---|---|---|
| LED Edison | 25,000+ hrs | Low (5–10W/48ft) | Vintage, cozy patios | Long-lasting, energy-efficient, warm glow | Higher upfront cost |
| Incandescent Edison | 1,000–2,000 hrs | High (20–40W/48ft) | Occasional use, rentals | Classic look, affordable | Short lifespan, hot bulbs, high energy use |
| Fairy Lights | 15,000–20,000 hrs | Very low (2–5W/24ft) | Wrapping, draping, accents | Delicate, versatile, safe for kids | Less bright, fragile wires |
| Net Lights | 10,000–15,000 hrs | Low to medium | Fences, bushes, low coverage | Quick install, even coverage | Limited height, less flexible |
| Smart LED | 30,000+ hrs | Low | Tech lovers, frequent users | Remote control, color change, scheduling | Expensive, requires Wi-Fi |
As you can see, LEDs are the clear winner for long-term use. But if you’re going for a specific aesthetic or only use your patio a few times a year, incandescent or fairy lights might be just right.
Final Thoughts: Light Up Your Evenings
Stringing lights over patio areas is more than a design choice—it’s a way to extend your living space into the night. It’s about creating a place where you want to linger, where conversations flow, and where the outside world feels a little softer, a little kinder.
I remember my first attempt—I bought cheap lights, didn’t measure properly, and ended up with a lopsided, sagging mess. But I learned. I adjusted. I added more hooks, replaced a few bulbs, and suddenly, it all came together. That night, I sat outside with my partner, sipping wine under our glowing canopy, and I thought, “This is exactly what I wanted.”
You don’t need perfection. You don’t need to spend a fortune. All you need is a few strands of light, a plan, and the willingness to try. Whether you’re wrapping a simple railing or building a full pergola canopy, the result is the same: a space that feels magical.
So go ahead. String those lights. Invite your friends. Light a fire. Pour a drink. And when the sun goes down, let your patio shine. Because every great evening starts with a little sparkle.
Frequently Asked Questions
How do I safely string lights over a patio without damaging my roof or walls?
Use removable hooks, adhesive clips, or tension wires designed for outdoor use to avoid drilling into surfaces. Ensure lights are rated for outdoor use and keep cords away from high-traffic areas to prevent tripping.
What type of lights work best for stringing lights over a patio?
LED string lights with weatherproof (IP65 or higher) ratings are ideal for durability and energy efficiency. Opt for warm white or soft yellow bulbs to enhance the cozy, magical ambiance.
Can I install string lights over a large patio without multiple power sources?
Yes, use LED lights (which consume less power) and connect multiple strands end-to-end, staying within the manufacturer’s recommended strand limit. Alternatively, position a central power source and run cords strategically.
How high should I hang string lights over a patio for optimal effect?
Aim for 8–10 feet above the ground to ensure clearance and even light distribution. Adjust slightly based on your patio’s size and furniture layout, keeping lights visible but out of the way.
Do I need permits or HOA approval for stringing lights over a patio?
Check local building codes and HOA rules, especially for permanent installations or if lights extend over property lines. Temporary setups usually don’t require permits, but confirm with your community guidelines.
How can I make string lights over my patio last longer?
Use high-quality, weather-resistant lights and store them during extreme weather. Install a timer or smart plug to limit usage hours and reduce wear on bulbs and wiring.

