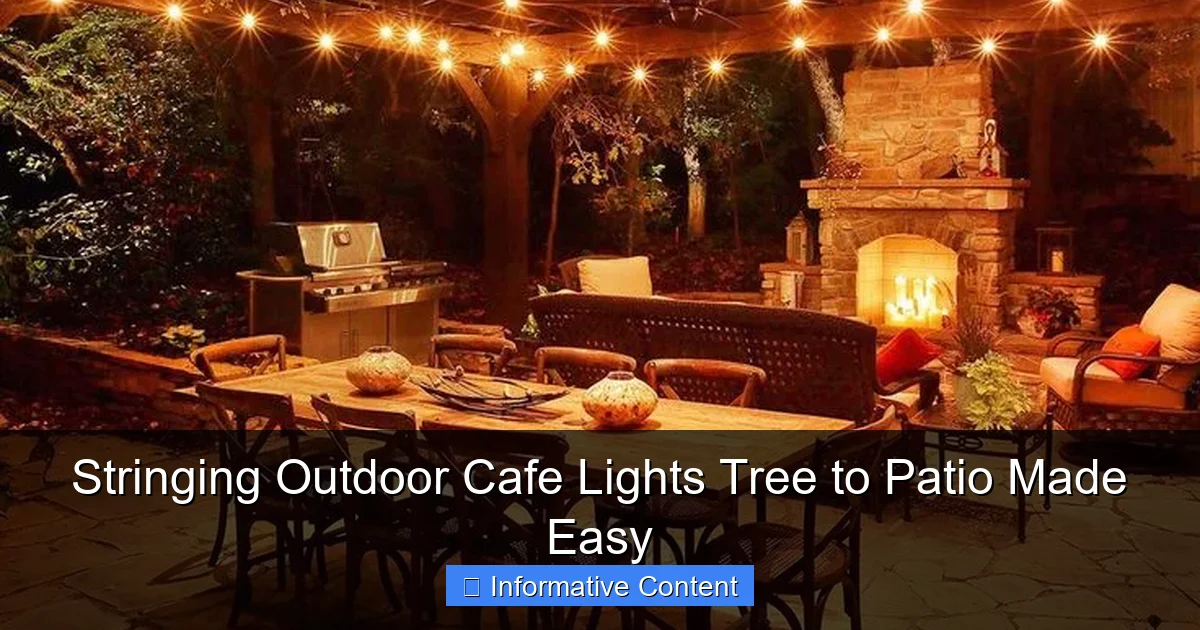
Featured image for stringing outdoor cafe lights tree to patio
Image source: i.pinimg.com
Transform your patio into a magical outdoor retreat by effortlessly stringing cafe lights from tree to patio with our simple, step-by-step guide. No professional help needed—just durable lights, secure anchors, and a few clever techniques to create a warm, inviting ambiance perfect for entertaining or relaxing.
Key Takeaways
- Plan your layout first: Sketch the area to ensure even spacing and avoid overbuying lights.
- Use durable, weatherproof lights: Choose LED or solar-powered lights for longevity and energy efficiency.
- Secure with adjustable hooks: Install sturdy hooks or zip ties to prevent sagging or damage.
- Measure twice, hang once: Double-check distances between trees and patio edges for a balanced look.
- Test lights before hanging: Verify functionality to avoid re-climbing ladders or restringing later.
- Anchor safely: Ensure all connections are tight and cords are tucked away to prevent tripping.
📑 Table of Contents
- Why Stringing Outdoor Cafe Lights Tree to Patio Is the Ultimate Backyard Upgrade
- Planning Your Cafe Light Layout: Where to Start
- Choosing the Right Cafe Lights: Types, Bulbs, and Features
- Tools and Materials You’ll Need (and Where to Get Them)
- Step-by-Step Installation: From Tree to Patio
- Maintenance, Safety, and Seasonal Tips
- Real-World Examples and Inspiration
Why Stringing Outdoor Cafe Lights Tree to Patio Is the Ultimate Backyard Upgrade
There’s something magical about stepping outside on a warm summer night and being greeted by the soft, golden glow of cafe lights strung from tree to patio. It’s like your backyard transforms into a cozy, intimate bistro—no reservation needed. Whether you’re hosting a dinner party, enjoying a quiet evening with a book, or just unwinding with a glass of wine, the right lighting can make all the difference. I remember the first time I strung up lights in my own backyard. I was skeptical at first—would it look tacky? Would the wires be a mess? But within minutes of flipping the switch, my entire outdoor space felt elevated, inviting, and just plain *happy*.
If you’ve ever dreamed of creating that same ambiance, you’re in the right place. Stringing outdoor cafe lights from a tree to your patio isn’t just about aesthetics—it’s about crafting a mood, a vibe, a memory. And the best part? It’s easier than you think. With the right tools, a little planning, and some practical know-how, you can turn your yard into a luminous retreat. In this guide, I’ll walk you through everything you need to know, from choosing the right lights to securing them safely and beautifully. Whether you’re a DIY newbie or a seasoned backyard tinkerer, this step-by-step approach will make stringing outdoor cafe lights tree to patio feel like a breeze.
Planning Your Cafe Light Layout: Where to Start
Before you even touch a light strand, it’s essential to plan your layout. A well-thought-out design ensures your lights look balanced, are easy to install, and actually work once you plug them in. Think of this step as the blueprint for your outdoor glow-up.
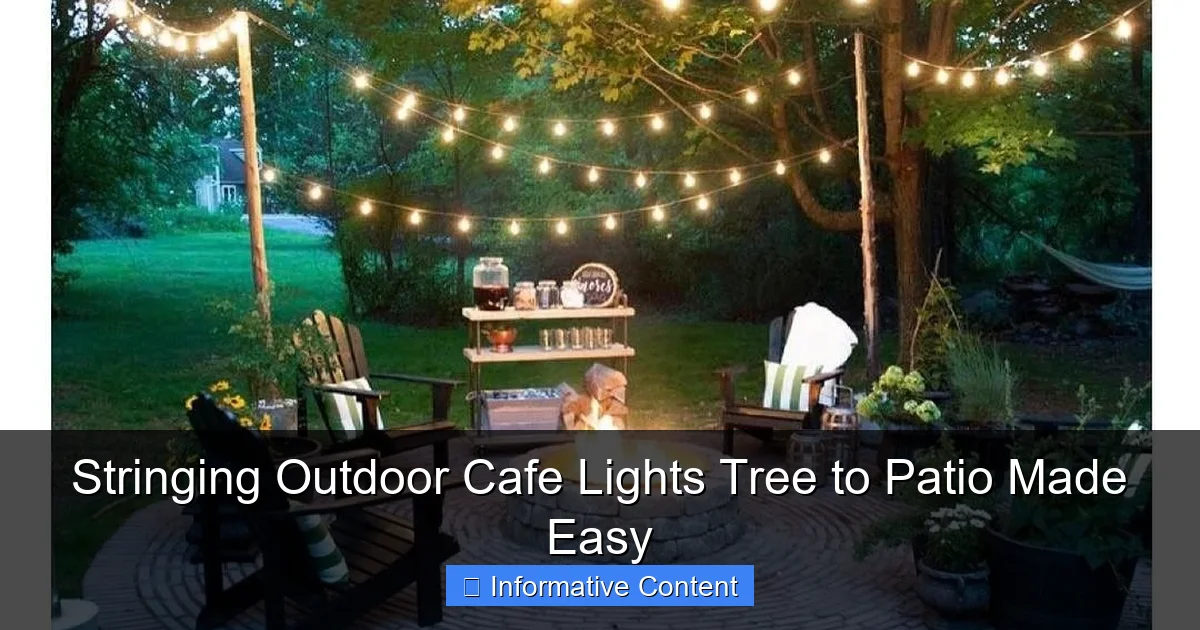
Visual guide about stringing outdoor cafe lights tree to patio
Image source: themprojects.com
Measure Your Space Accurately
Grab a measuring tape and get to work. Measure the distance from the tree trunk (or a sturdy branch) to your patio edge. Then, measure the height of the tree branch and the height of your patio roof or support point. Why? Because these numbers determine how much slack you’ll need in your lights and how high you should hang them. For example, if your tree branch is 12 feet high and your patio support is 8 feet, you’ll need a diagonal run of lights—not a straight horizontal line. A general rule of thumb: aim for a 10–20% sag in the middle. This gives a gentle, natural drape and prevents the lights from pulling too tightly on the ends.
Pro tip: Sketch a simple diagram on paper. Label the tree, patio, and key distances. This visual guide helps you visualize the final look and avoid costly mistakes like buying lights that are too short.
Choose Your Anchor Points Wisely
Your anchor points are where the lights connect—typically a tree and a patio post, eave, or pergola. For the tree, look for a sturdy branch at least 2 inches in diameter, preferably one that’s horizontal or slightly downward-angled. Avoid weak, young, or dead branches. On the patio side, consider whether you have a gutter, fascia board, or a solid post. If your patio has a roof, you can use the eaves. If it’s open, you might need to install a temporary or permanent hook on a post or railing.
One thing I learned the hard way: don’t rely on flimsy plastic hooks or adhesive mounts for heavy-duty lights. They’ll fall in the first windstorm. Instead, use stainless steel eye hooks or tree-friendly cable clamps (more on those later). These hold up to weather and weight, and they’re easy to install with a drill or hand tools.
Decide on Light Spacing and Pattern
Do you want a single straight run? A crisscross pattern? A canopy? The spacing between lights also matters. Most cafe lights are spaced 6–12 inches apart. Closer spacing creates a denser glow—great for intimate areas. Wider spacing works for broader coverage. I like a 10-inch spacing for a balanced look. If you’re going for a canopy, plan multiple runs in parallel or a zigzag pattern across the patio.
Example: My backyard has a 20-foot run from a large maple tree to my pergola. I used three parallel strands, spaced 3 feet apart, to create a soft, layered glow. It looks like a starry sky, not a single line of bulbs.
Choosing the Right Cafe Lights: Types, Bulbs, and Features
Not all cafe lights are created equal. With so many options on the market, it’s easy to get overwhelmed. But once you know what to look for, picking the right set becomes simple—and fun.
Incandescent vs. LED: The Bright Debate
Incandescent bulbs give off that classic warm, yellow glow—think vintage Parisian cafes. They’re nostalgic and cozy. But they use more energy, get hot, and burn out faster (around 1,000–2,000 hours). LEDs, on the other hand, last up to 25,000 hours, use 80% less energy, and stay cool to the touch. They also come in a variety of color temperatures—warm white, soft white, daylight—so you can match the mood.
My recommendation? Go with LED cafe lights. They’re more durable, safer (especially around kids and pets), and better for the planet. Plus, many now mimic the soft flicker of incandescent bulbs. Look for “dimmable” and “weather-resistant” models for extra flexibility.
Bulb Shape and Size: Edison, Globe, or Mini?
Edison bulbs (those vintage-style filaments) are trendy and stylish, but they’re larger and can be fragile. Globe bulbs (round, opaque) diffuse light more evenly and are great for ambient glow. Mini bulbs are compact and ideal for long runs—they’re less bulky and easier to manage.
I use globe-shaped LED bulbs in my setup. They’re 1.5 inches in diameter, spaced 10 inches apart, and give off a soft, even light. They’re also shatterproof—important when you’re stringing them high in a tree.
Length, Connectivity, and Power Source
Measure your run and add 10–15% extra for sag and connections. Most cafe lights come in 24-, 48-, or 96-foot strands. If your run is 30 feet, buy a 48-foot strand—you’ll have room for slack and can even add a small loop or curve. Look for end-to-end connectors so you can link multiple strands. This is crucial if you’re creating a canopy or multiple runs.
Power source matters too. Most lights plug into a standard outdoor outlet. Make sure your outlet is GFCI-protected (ground fault circuit interrupter) for safety. If you’re far from an outlet, consider solar-powered lights or a heavy-duty outdoor extension cord rated for wet conditions.
Bonus tip: Some lights come with a remote control or timer. I love having a remote—no more crawling under the tree to flip a switch. A timer is also great for automatically turning lights on at dusk and off at bedtime.
Tools and Materials You’ll Need (and Where to Get Them)
You don’t need a full workshop, but having the right tools makes the job faster, safer, and more professional-looking. Here’s what I keep in my “café light kit”:
- Measuring tape – For accurate spacing and length
- Drill and drill bits – For installing eye hooks and anchors
- Stainless steel eye hooks (¼” or ½”) – Rust-resistant and strong
- Tree-friendly cable clamps or tree straps – These wrap around the tree without damaging bark
- Zip ties (UV-resistant) – For securing wires and managing slack
- Outdoor extension cord (14-gauge, 15-amp, weatherproof) – Never use indoor cords outside
- Wire clips or gutter hooks – For attaching lights to eaves or railings
- Ladder (6–8 feet) – For reaching tree branches and high points
- Gloves and safety glasses – Safety first, especially when working at height
Where to Buy
Most of these items are available at hardware stores like Home Depot, Lowe’s, or Ace Hardware. Online, check Amazon or specialty outdoor lighting retailers like 1000Bulbs or Outdoor Lighting Store. For tree straps, I recommend Arborist-approved tree guards—they’re wider and distribute weight to prevent damage.
One thing I wish I knew earlier: buy extra zip ties and clips. You’ll always need more than you think. And keep a small toolkit in a waterproof bag—nothing worse than losing a screwdriver in the grass at night.
Step-by-Step Installation: From Tree to Patio
Now comes the fun part—installing your lights. This is where your planning pays off. Follow these steps, and you’ll have a professional-looking setup in under two hours.
Step 1: Install Anchor Points
Start with the tree. If you’re using a branch, wrap a tree strap around it (not too tight—you want to leave room for the tree to grow). Attach an eye hook to the strap. If you’re using the trunk, drill a pilot hole and screw in an eye hook at the desired height. On the patio side, install an eye hook into a post, fascia board, or eave. Make sure it’s secure—wiggle it to test.
Pro tip: Use a level to ensure both hooks are at the same height. This keeps your lights straight and prevents sagging on one side.
Step 2: Run a Guide Wire (Optional but Recommended)
For longer runs (over 20 feet), consider using a galvanized steel guide wire. Run it between the two anchor points and secure it tightly. Then, attach your light strands to the wire using zip ties or S-hooks. This takes the weight off the light cords and prevents sagging or breakage. It also makes future bulb changes easier.
I used a guide wire for my 25-foot run, and it’s been rock-solid for three years—no droops, no tangles.
Step 3: Hang the Lights
Unroll your light strand and plug it in (yes, test it first!). Start at the tree end. Hook one end of the strand to the eye hook using a carabiner or zip tie. Then, gently pull the strand toward the patio, allowing a slight sag in the middle. Secure the other end to the patio anchor. If you’re using a guide wire, attach the light strand to it every 12–18 inches with zip ties.
For multiple strands (canopy style), repeat the process, spacing each strand evenly. Use a measuring tape to ensure consistency.
Step 4: Secure and Tidy Up
Use wire clips or zip ties to secure any loose cords to posts, railings, or the guide wire. Tuck the power cord behind the tree or along a post to keep it out of sight. If the cord runs across the yard, bury it under mulch or use a cord cover.
One mistake I made early on: leaving cords loose. A strong wind knocked one strand loose, and I spent an hour restringing it. Now, I zip-tie every 12 inches—peace of mind.
Step 5: Test and Adjust
Turn on the lights and step back. Look for uneven sagging, dim bulbs, or tangled wires. Adjust as needed. If a bulb is out, replace it immediately—most strands have replaceable bulbs.
Maintenance, Safety, and Seasonal Tips
Great lighting isn’t a “set it and forget it” project. A little maintenance keeps your setup looking fresh and safe year-round.
Seasonal Care: When to Take Them Down (or Leave Them Up)
If you live in a mild climate (Zone 7 or higher), you can leave lights up year-round. Just check them monthly for damage, frayed wires, or loose connections. In colder climates, consider taking them down in winter. Ice, snow, and freezing temps can damage cords and bulbs.
I leave mine up from April to October. In November, I carefully unplug, coil, and store them in a dry, labeled bin. It takes 30 minutes and saves me time next spring.
Safety First: Avoid Common Hazards
Never overload an outlet. Use a GFCI outlet and a circuit checker to ensure proper grounding. Avoid running cords across walkways—use cord covers or bury them. Keep lights away from flammable materials (dry leaves, furniture). And always unplug before making adjustments.
One scary moment: I once used an indoor extension cord outside. It shorted in a rainstorm and tripped the breaker. Lesson learned—only use outdoor-rated cords.
Troubleshooting Common Issues
- Flickering lights? Check for loose bulbs or a bad connection.
- One section not working? Test each bulb—replace as needed.
- Sagging too much? Add more support points or tighten the guide wire.
- Birds nesting in lights? Install a bird deterrent (fake owl, reflective tape).
Real-World Examples and Inspiration
To give you a better idea, here’s a quick comparison of three popular setups I’ve seen (and tried):
| Setup Type | Best For | Materials Used | Estimated Cost | Installation Time |
|---|---|---|---|---|
| Single Straight Run | Small patios, intimate spaces | 48-ft LED strand, 2 eye hooks, zip ties | $40–$60 | 1 hour |
| Canopy (3 Parallel Strands) | Large patios, dining areas | 3x 48-ft strands, guide wire, 4 eye hooks, clips | $100–$150 | 2 hours |
| Zigzag Pattern | Creative, artistic spaces | 96-ft strand, 4 anchor points, S-hooks | $80–$100 | 2.5 hours |
Each has its charm. The straight run is classic and simple. The canopy feels luxurious—perfect for dinner parties. The zigzag? It’s playful and eye-catching, great for a boho or modern aesthetic.
I’ve hosted countless gatherings under my canopy setup. Guests always ask, “Where did you get the lights?” and I just smile—because I know it’s not about the product, it’s about the feeling it creates.
Stringing outdoor cafe lights from tree to patio isn’t just a DIY project—it’s an act of love for your outdoor space. It’s about creating a place where memories are made, laughter echoes, and the world feels a little softer. Whether you’re a first-timer or a backyard pro, the process is rewarding from start to finish. With the right plan, tools, and a little patience, you’ll have a glowing oasis in no time. So grab your lights, gather your tools, and get ready to light up your nights. Your patio—and your soul—will thank you.
Frequently Asked Questions
How do I safely string outdoor cafe lights from a tree to my patio?
Use weather-resistant lights and durable mounting hardware like zip ties or screw hooks. Ensure the lights are rated for outdoor use and maintain proper tension to avoid sagging or damage to the tree. Always follow local regulations for overhead installations.
What’s the best way to plan the layout when stringing outdoor cafe lights tree to patio?
Measure the distance between your tree and patio, then choose lights with adequate length (include extra for loops or slack). Plan anchor points on the patio (e.g., railings, posts) and tree branches to ensure even spacing and avoid tripping hazards.
Can I install outdoor cafe lights without damaging my tree?
Yes! Use non-invasive methods like reusable zip ties, tree-friendly clips, or nylon cord to secure lights without harming bark. Avoid staples or nails, and check the tree periodically to ensure no girdling occurs as it grows.
How do I power outdoor cafe lights when connecting a tree to a patio?
Use a heavy-duty outdoor extension cord connected to a GFCI outlet for safety. If outlets are far away, consider a solar-powered or battery-operated string light system to simplify setup and reduce tripping risks.
What type of lights work best for stringing from a tree to a patio?
Opt for LED string lights with a waterproof rating (IP65 or higher) for durability and energy efficiency. Choose bulbs with warm white or amber hues to create a cozy ambiance while minimizing glare.
How do I keep outdoor cafe lights taut and tangle-free?
Use a turnbuckle or tension wire kit to tighten the line before attaching lights. For longer runs, anchor the lights to a guide wire first, then clip them on to maintain even tension and prevent sagging.

