Featured image for stringing patio lights under a deck
Image source: nestingwithgrace.com
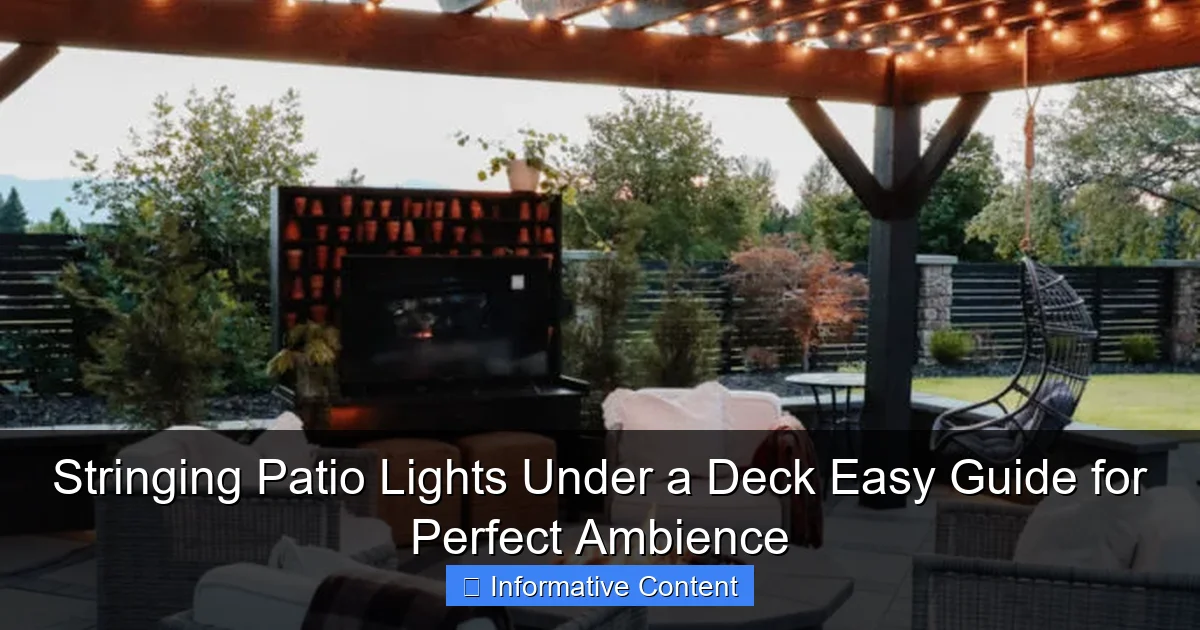
Stringing patio lights under a deck transforms unused space into a cozy, inviting retreat with minimal effort. By choosing weather-resistant LED string lights and securing them with durable clips or hooks along the deck’s joists or railings, you create a warm, ambient glow perfect for evening relaxation. This simple DIY upgrade enhances safety, extends outdoor enjoyment, and elevates your backyard’s atmosphere year-round.
Key Takeaways
- Plan spacing carefully: Mark light positions before installing for even, balanced coverage.
- Use outdoor-rated lights: Ensure durability and safety in damp, shaded deck environments.
- Secure with proper hardware: Use hooks, clips, or cable ties designed for outdoor use.
- Hide cords neatly: Route wires along beams or under railings to maintain clean aesthetics.
- Test before finalizing: Check brightness and connections prior to permanent installation.
- Consider power sources: Use GFCI outlets or solar options for safe, accessible energy.
📑 Table of Contents
- Why Stringing Patio Lights Under a Deck is a Game-Changer
- Planning Your Under-Deck Lighting Setup
- Tools and Materials You’ll Need
- Step-by-Step Installation Guide
- Creative Lighting Ideas for Under-Deck Spaces
- Maintenance, Safety, and Long-Term Tips
- Data Table: Recommended Patio Lights for Under-Deck Use
- Final Thoughts: Light Up Your Life
Why Stringing Patio Lights Under a Deck is a Game-Changer
Imagine this: It’s a warm summer evening. The sun has just dipped below the horizon, and the first fireflies are beginning their dance. You’re sitting outside, maybe with a book or a glass of wine, enjoying the cool air. But something’s missing. The space under your deck is dark, almost forgotten. That’s when it hits you—what if you could turn that shadowy area into a magical, inviting retreat?
Stringing patio lights under a deck isn’t just about adding light; it’s about transforming unused space into a cozy extension of your home. Whether you’re hosting a backyard barbecue, enjoying a quiet night with family, or just want a better-lit path to your outdoor storage, under-deck lighting can make all the difference. And the best part? It’s easier than you think. With the right tools, a little planning, and some creative flair, you can create a space that feels like a private oasis—no contractor required.
Planning Your Under-Deck Lighting Setup
Assess Your Space and Lighting Needs
Before you start hanging lights, take a good look at the area under your deck. Is it fully enclosed, partially open, or completely exposed to the elements? This will determine the type of lights and mounting hardware you’ll need. For example, if the space is fully under a roof (like a second-story deck), you can use more decorative, less weather-resistant lights. But if it’s exposed to rain or wind, you’ll need weatherproof or waterproof patio lights—look for an IP rating of at least IP65.
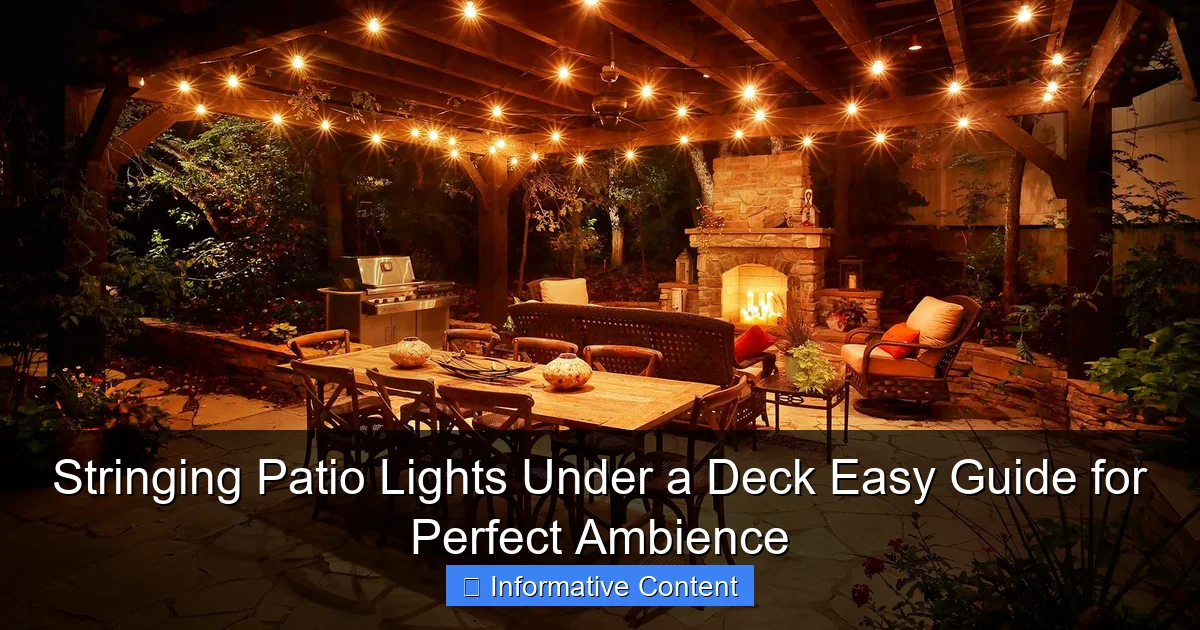
Visual guide about stringing patio lights under a deck
Image source: warisanlighting.com
Also, think about how you use the space. Do you want ambient lighting for relaxing, task lighting for cooking or grilling, or accent lighting to highlight plants or architectural features? A mix of all three often works best. For instance, string lights overhead create a warm glow, while LED puck lights under shelves or benches provide functional brightness.
Choose the Right Type of Patio Lights
Not all string lights are created equal. Here are the most common types and where they work best:
- LED string lights: Energy-efficient, long-lasting, and available in warm white, cool white, and color-changing options. Great for general ambiance.
- Edison bulb lights: Vintage-style bulbs with exposed filaments. Perfect for a rustic or industrial look.
- Fairy lights (micro LEDs): Tiny, delicate bulbs on thin wire. Ideal for wrapping around beams or creating a starry-sky effect.
- Solar-powered lights: Eco-friendly and easy to install—no wiring needed. Best for areas with good sun exposure during the day.
- Plug-in lights: More reliable for consistent brightness, especially in shaded or enclosed areas.
Pro tip: If you’re unsure, start with a 25- to 50-foot strand of warm white LED string lights. They’re versatile, widely available, and easy to expand later.
Measure and Map Your Layout
Grab a measuring tape and sketch a rough layout of the space. Note the distance between beams, the height of the deck, and any obstacles like posts or furniture. You’ll want to plan where each light strand will go—whether it’s in a zigzag, crisscross, or parallel pattern.
For example, if your deck is 10 feet high and 12 feet deep, you might run two parallel strands along the length, spaced 3 feet apart, starting 2 feet down from the top. Or, for a more dynamic look, create a grid pattern with lights every 2–3 feet. The key is to avoid overcrowding—too many lights can feel overwhelming, while too few won’t provide enough coverage.
Tools and Materials You’ll Need
Essential Hardware for Secure Installation
You don’t need a full workshop to hang patio lights under a deck, but having the right tools makes all the difference. Here’s what I always keep in my kit:
- Measuring tape: For precise spacing and layout.
- Pencil or chalk: To mark drill points or clip locations.
- Drill and drill bits: For wood, metal, or masonry, depending on your deck structure.
- Screwdriver (or drill with screwdriver bit): For attaching clips or hooks.
- Extension ladder: Make sure it’s stable and tall enough to reach the deck underside.
- Work gloves: Protect your hands from splinters or sharp edges.
- Stud finder (optional): Helpful if you’re drilling into wood to hit joists for extra support.
Mounting Options: Clips, Hooks, and More
How you attach the lights depends on the surface. Here are the most effective methods:
- Adhesive clips: Great for smooth surfaces like painted wood or metal. Look for outdoor-rated, UV-resistant clips. They’re easy to install but may loosen over time in extreme heat or cold.
- Screw-in hooks: Ideal for wood or composite decking. They’re more secure and can hold heavier strands. Use stainless steel or galvanized hooks to prevent rust.
- Zip ties: Quick and cheap, but not always the most attractive. Use them for temporary setups or to secure extra wire. For a cleaner look, opt for black or clear ties.
- Eye screws or turnbuckles: For tensioned lines. These let you stretch lights taut across long distances, preventing sagging.
- Clamp-on hooks: Perfect for metal railings or beams. No drilling required.
My go-to combo: I use screw-in hooks for the main anchor points (start, end, and every 4–6 feet) and adhesive clips in between for a seamless look. This gives me both strength and flexibility.
Power Source and Extension Cords
Where will your lights plug in? If there’s an outdoor outlet nearby, you’re in luck. If not, you’ll need an outdoor-rated extension cord or a power strip. Make sure it’s GFCI-protected (Ground Fault Circuit Interrupter) for safety—this shuts off power if it detects moisture or a short.
For longer runs, consider a timer or smart plug. This lets you automate when the lights turn on and off. I love using a dusk-to-dawn sensor—set it once, and the lights come on automatically when it gets dark.
Important: Never daisy-chain multiple extension cords. It’s a fire hazard. Instead, use a single heavy-duty cord rated for outdoor use and plug it directly into a GFCI outlet.
Step-by-Step Installation Guide
Prep the Area and Test Your Lights
Before you start drilling, lay out all your lights and test them indoors. Plug in each strand to make sure all bulbs work. There’s nothing worse than hanging 50 feet of lights only to find one bulb is out.
Then, clean the area under the deck. Remove cobwebs, leaves, and debris. This not only makes installation easier but also helps your lights last longer by reducing moisture buildup.
Install Mounting Points
Start by marking your anchor points with a pencil or chalk. For a parallel layout, mark the starting and ending points on opposite sides of the deck, plus additional points every 4–6 feet along the path. Use a level to keep your marks straight.
Drill pilot holes (especially in wood) to prevent splitting, then screw in your hooks or clips. If you’re using adhesive clips, clean the surface first with rubbing alcohol to improve adhesion.
Pro tip: For a zigzag pattern, install hooks on alternating sides of the deck, creating a diagonal path. This adds visual interest and spreads light more evenly.
Hang the Lights
Now comes the fun part! Start at one end and work your way across, attaching each light strand to the hooks or clips. If you’re using a single long strand, run it continuously from one anchor to the next. For multiple strands, connect them with a waterproof connector or use a power strip with multiple outlets.
Keep the lights taut but not stretched too tight. A little slack prevents strain on the wires and bulbs. If you’re using fairy lights or thin wire, you can gently wrap them around beams or posts for a softer look.
For a professional finish, tuck any excess wire behind the lights or secure it with zip ties. Avoid letting cords dangle—this can look messy and create tripping hazards.
Secure the Power Source
Once the lights are up, plug them into your extension cord or power strip. Route the cord along the deck edge or beam, using clips or ties to keep it neat. If the cord runs across the ground, use a cord cover or bury it in a shallow trench (if allowed by local codes).
Test the lights again. If everything works, set your timer or smart plug. I like to set mine for 30 minutes before sunset to 11 p.m.—just enough time to enjoy the evening without wasting energy.
Creative Lighting Ideas for Under-Deck Spaces
Pattern and Layout Inspiration
Don’t be afraid to get creative! Here are some of my favorite layouts:
- Grid pattern: Crisscross lights in a checkerboard design. Perfect for large, open spaces.
- Zigzag: Diagonal lines from one side to the other. Adds movement and drama.
- Parallel lines: Simple and classic. Great for narrow or enclosed areas.
- Starburst: Lights radiate from a central point (like a post or beam). Ideal for highlighting a focal area.
- Layered lighting: Combine string lights overhead with puck lights under benches or shelves. This creates depth and functionality.
Real-life example: I once helped a friend install lights under their deck. They had a small outdoor kitchen with a grill and prep area. We ran two parallel strands above the cooking zone for task lighting, then added a grid pattern over the seating area for ambiance. The result? A space that felt like a cozy outdoor living room.
Color, Temperature, and Effects
Warm white lights (2700K–3000K) are the most popular—they mimic candlelight and create a relaxing vibe. But don’t be afraid to experiment:
- Cool white (4000K–5000K): Brighter and more modern. Great for task areas.
- Color-changing lights: Perfect for parties or holidays. Use a remote to switch between colors or set a slow fade.
- Flicker effects: Some LED bulbs mimic the soft flicker of real flames. Adds a cozy, campfire feel.
- Twinkle or flash modes: Fun for kids or festive occasions, but use sparingly to avoid overstimulation.
I recommend starting with warm white and adding color accents later. For example, use warm white for the main strands and add a few red or blue fairy lights for a holiday touch.
Integrating with Landscaping and Decor
Your under-deck lighting doesn’t exist in a vacuum. Tie it into the rest of your outdoor space:
- Use lights to highlight plants, water features, or sculptures.
- Match the light color to your outdoor furniture or decor.
- Add string lights to nearby trees or railings to create a cohesive look.
- Use dimmable lights to adjust brightness for different moods.
Tip: If you have outdoor speakers, consider syncing your lights to music for a party-ready setup. Some smart lights even have built-in sound sensors.
Maintenance, Safety, and Long-Term Tips
Regular Cleaning and Inspection
Like any outdoor feature, your lights need a little TLC. Every few months, turn off the power and wipe down the bulbs and wires with a damp cloth. Check for loose clips, frayed wires, or water damage. Replace any damaged bulbs or strands right away.
If you live in a snowy climate, gently brush off snow from the lights after storms. Ice buildup can strain the wires and shorten their lifespan.
Weatherproofing and Storage
Even weatherproof lights can degrade over time. To extend their life:
- Use silicone sealant around plug connections to prevent moisture.
- Store lights indoors during extreme weather (hurricanes, blizzards).
- If you’re using temporary lights for a season, take them down after use.
For permanent installations, consider investing in commercial-grade lights with thicker wires and better insulation.
Safety First: Electrical and Structural Considerations
Safety should always come first. Here are a few key rules:
- Never overload circuits. Check the wattage of your lights and make sure your outlet and extension cord can handle it.
- Keep cords away from high-traffic areas to prevent tripping.
- Use outdoor-rated fixtures and cords—indoor lights aren’t built for moisture.
- If you’re unsure about electrical work, consult a licensed electrician.
Remember: Water and electricity don’t mix. Always turn off the power before making adjustments or repairs.
Data Table: Recommended Patio Lights for Under-Deck Use
| Light Type | Best For | Weather Resistance | Power Source | Lifespan (Hours) | Price Range (25 ft) |
|---|---|---|---|---|---|
| LED String Lights (Warm White) | Ambient lighting, general use | IP65 (weatherproof) | Plug-in or solar | 25,000–50,000 | $20–$40 |
| Edison Bulb Lights | Rustic, vintage aesthetic | IP65 | Plug-in | 20,000–30,000 | $30–$60 |
| Fairy Lights (Micro LEDs) | Accent lighting, wrapping beams | IP65 | Plug-in or battery | 10,000–20,000 | $15–$35 |
| Solar String Lights | Eco-friendly, no wiring | IP65 | Solar panel | 15,000–25,000 | $25–$50 |
| Commercial-Grade LED | Long-term, high-traffic areas | IP67 (waterproof) | Plug-in | 50,000+ | $50–$100 |
Final Thoughts: Light Up Your Life
Stringing patio lights under a deck might seem like a small project, but the impact is huge. It’s one of those upgrades that doesn’t just improve your outdoor space—it changes how you use it. Suddenly, that dark, forgotten corner becomes a place you want to spend time in. Whether you’re reading a book, sharing a meal, or just unwinding after a long day, the right lighting sets the tone.
And the best part? It’s totally doable. With a little planning, the right tools, and a few creative ideas, you can create a space that feels magical every single night. So grab your ladder, pick your favorite lights, and get started. Your perfect ambience is just a few strands away.
Frequently Asked Questions
How do I safely string patio lights under a deck without damaging the structure?
Use adhesive-backed clips, hooks, or zip ties designed for outdoor use to secure lights without drilling. Avoid overloading circuits and opt for low-voltage LED lights to minimize heat and electrical risks while creating the perfect ambience.
What type of patio lights work best for under-deck stringing?
LED string lights or solar-powered fairy lights are ideal due to their energy efficiency, durability, and soft glow. Choose weather-resistant, IP65-rated lights for long-term outdoor use under a deck.
Can I install under-deck string lights myself, or do I need an electrician?
Most DIY-friendly patio light setups (battery/solar-powered or plug-in) can be installed without professional help. Only hire an electrician if hardwiring lights or modifying your home’s electrical system.
How do I hide the wires when stringing patio lights under a deck?
Use wire clips, raceways, or conduit channels to keep cords tidy and out of sight. For a seamless look, run wires along existing beams or railings and secure them with UV-resistant ties.
What spacing should I use for patio lights under a deck for balanced brightness?
Space bulbs 6–12 inches apart for even illumination without harsh gaps. Adjust based on your deck’s size and the lights’ brightness (measured in lumens) for a cozy, ambient effect.
Are solar-powered patio lights reliable for under-deck areas with limited sunlight?
Solar lights with high-efficiency panels and long-lasting batteries can work if they receive indirect sunlight. For shady decks, opt for models with detachable solar panels placed in sunnier spots.

