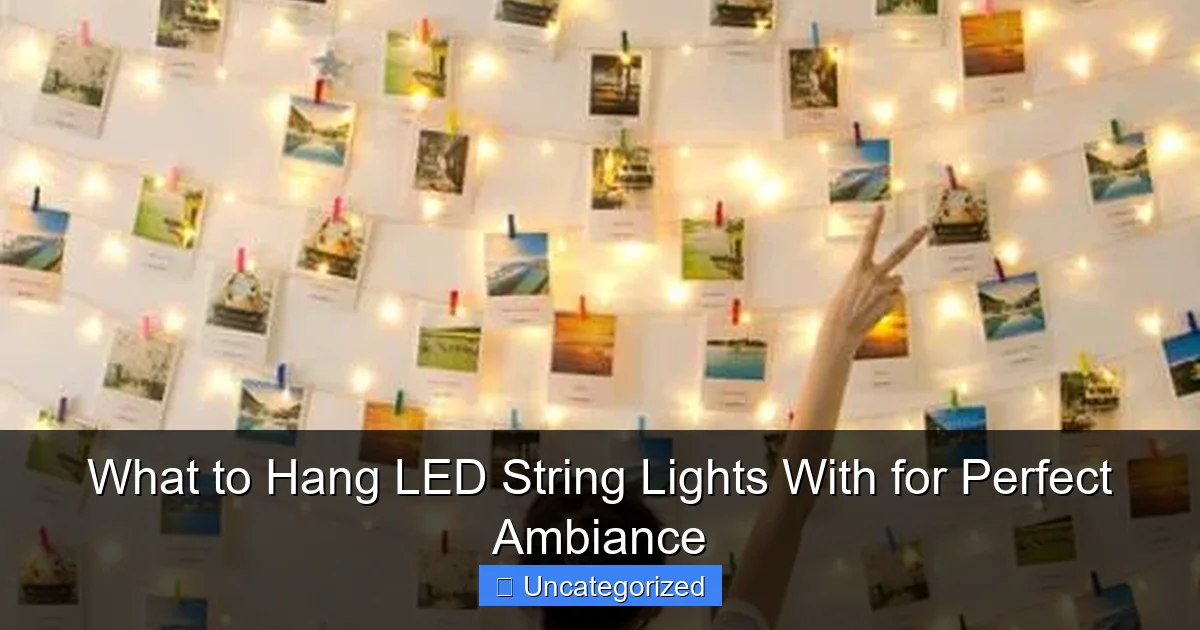
Featured image for what to hang led string lights with
Image source: oillampman.com
Use adhesive hooks, clips, or transparent fishing line to hang LED string lights securely and nearly invisibly for a flawless ambiance. These methods preserve aesthetics while offering strong support on walls, ceilings, or outdoor surfaces—no nails or damage required. For longer runs or heavier lights, combine with wall anchors or tension rods for added stability without sacrificing style.
Key Takeaways
- Use adhesive hooks: Ideal for smooth surfaces without damage.
- Try tension rods: Perfect for quick, adjustable indoor setups.
- Opt for clips or clothespins: Secure lights to fabric or thin edges.
- Install ceiling anchors: Ensure stability for long-term outdoor displays.
- Choose magnetic strips: Effortless hanging on metal surfaces indoors.
- Wrap around branches: Create natural, whimsical outdoor ambiance safely.
📑 Table of Contents
- The Magic of LED String Lights: Creating the Perfect Ambiance
- Understanding Your Space and Surface
- Top Tools and Hardware for Hanging LED String Lights
- Creative Hanging Ideas for Every Room and Occasion
- Step-by-Step Installation Guide: From Planning to Perfection
- Product Comparison: Top Hanging Solutions for LED String Lights
- Conclusion: Illuminate Your World with Confidence
The Magic of LED String Lights: Creating the Perfect Ambiance
There’s something undeniably enchanting about the soft, twinkling glow of LED string lights. Whether draped across a patio, woven through a headboard, or suspended above a dining table, these versatile lighting fixtures have the power to transform any space into a warm, inviting sanctuary. From cozy bedrooms to festive holiday displays, LED string lights are a favorite for creating ambiance, enhancing mood, and adding a touch of whimsy to both indoor and outdoor settings. But as anyone who’s tried to hang them knows, the magic can quickly fade if the lights don’t stay put or look uneven. The key to a flawless installation lies in choosing the right tools and methods to hang them securely and beautifully.
With so many options available—from adhesive hooks to tension rods, zip ties to command strips—it’s easy to feel overwhelmed. What works for a delicate bedroom canopy may not hold up under the weight of outdoor lights in windy weather. The material of your wall, the surface texture, and even the climate can all influence your choice. In this guide, we’ll explore the best ways to hang LED string lights, ensuring your lighting setup is not only stunning but also safe and long-lasting. Whether you’re a DIY beginner or a seasoned decorator, you’ll find practical tips, creative ideas, and expert advice to help you achieve the perfect glow.
Understanding Your Space and Surface
Assessing Indoor vs. Outdoor Environments
Before selecting a hanging method, it’s crucial to evaluate where you plan to install your LED string lights. Indoor and outdoor spaces present different challenges and require tailored approaches. Indoor installations typically involve drywall, wood, glass, or plaster—materials that are generally stable and protected from the elements. This allows for more delicate solutions like adhesive hooks or picture nails. However, indoor spaces may have limitations like low ceilings, furniture placement, or the need to avoid permanent damage.
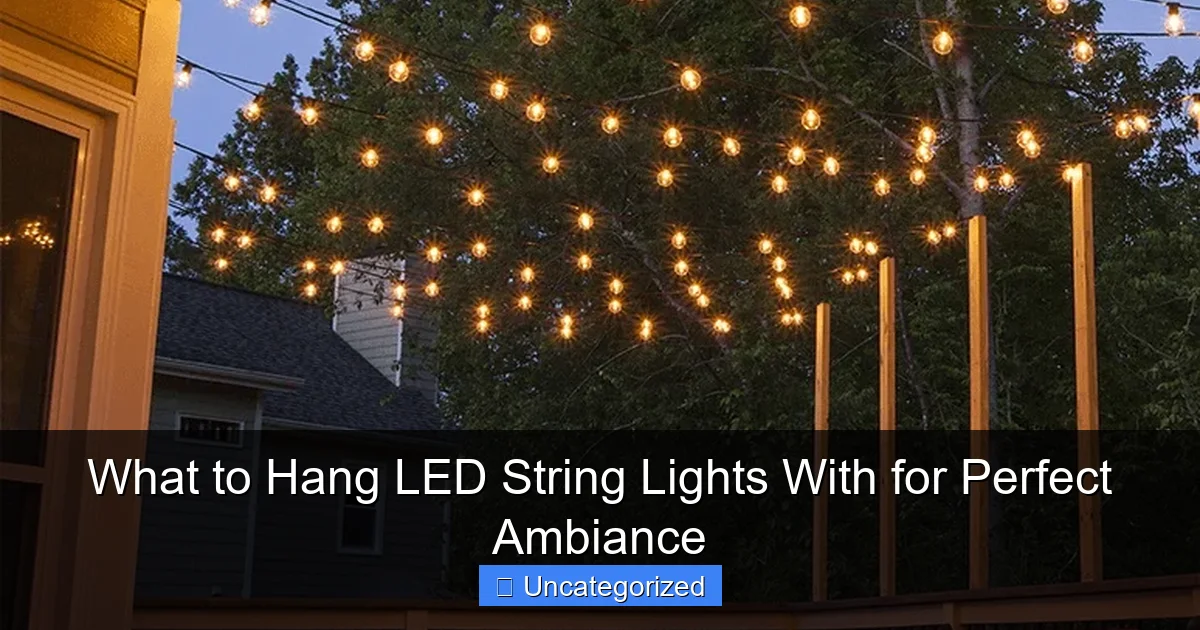
Visual guide about what to hang led string lights with
Image source: kanglight.com
On the other hand, outdoor installations must withstand wind, rain, humidity, and temperature fluctuations. Surfaces like brick, stucco, vinyl siding, or metal require weather-resistant hardware. For example, adhesive products that work indoors may peel off in high humidity or direct sunlight. Outdoor-rated hooks, stainless steel fasteners, and UV-resistant zip ties are essential for durability. Always check the IP (Ingress Protection) rating of your lights—IP44 or higher is ideal for outdoor use—and ensure your hanging method complements this protection.
Surface Type and Material Compatibility
Not all walls or structures are created equal. The surface material determines what kind of anchor or adhesive will work best. Here’s a quick breakdown:
- Drywall/Plaster: Use lightweight picture hooks, push pins, or adhesive hooks rated for 5–10 lbs. Avoid over-tightening screws to prevent cracking.
- Wood/Paneling: Ideal for screws, nails, or cup hooks. Wood can support heavier loads, making it perfect for dense light strands or garlands.
- Glass/Mirrors: Use suction cups with rubberized grips or clear adhesive hooks. Ensure the surface is clean and dry for maximum adhesion.
- Brick/Stone: Requires masonry anchors, concrete screws, or specialized brick clips. Avoid nails—they can crack the surface.
- Metal/Siding: Use magnetic hooks (for steel surfaces), zip ties with metal clips, or outdoor-rated adhesive strips.
Pro Tip: Test your chosen method on a small section first. Hang a short strand for 24 hours to check stability and surface impact before committing to the full installation.
Top Tools and Hardware for Hanging LED String Lights
Adhesive Hooks and Strips: The No-Damage Solution
Adhesive hooks and strips are a go-to for renters, minimalists, and anyone who wants to avoid drilling holes. Brands like 3M Command offer a wide range of options designed specifically for lighting. For example, Command Clear Wire Clips are nearly invisible and hold up to 0.5 lbs—perfect for delicate fairy lights. Medium Picture Hanging Strips can support up to 5 lbs, ideal for heavier strands or multiple lights.
To use adhesive hooks effectively:
- Clean the surface with rubbing alcohol and let it dry completely.
- Apply the adhesive and press firmly for 30 seconds.
- Wait at least one hour before hanging lights to ensure full adhesion.
- For outdoor use, choose UV-resistant or outdoor-rated versions (e.g., Command Outdoor Light Clips).
Example: Create a starry ceiling in a bedroom by placing clear adhesive clips in a grid pattern and weaving lights through them. The result is a floating effect with no visible hardware.
Hanging Hooks, Nails, and Screws: For Permanent or Heavy-Duty Installations
When you need strength and longevity, traditional hardware is the answer. Here’s what to use based on weight and surface:
- Cup Hooks: Screw into wood or drywall. Hold up to 10–20 lbs. Ideal for draping lights over a mantel or along a fence.
- Picture Hooks/Nails: Use with a wall anchor for drywall. Support 5–15 lbs. Great for outlining a window or doorway.
- Eye Screws: For heavy strands or outdoor use. Can hold 20+ lbs. Use with a drill for precision.
- Masonry Anchors: For brick, concrete, or stone. Use a hammer drill to set anchors, then attach hooks or screws.
Pro Tip: Use a stud finder to locate wall studs for extra support. Hanging lights from studs (rather than drywall) can handle significantly more weight.
Zip Ties, Tension Rods, and Clips: Creative Alternatives
Sometimes, the best solutions are the simplest. Zip ties, tension rods, and specialty clips offer flexibility and ease of use.
- Zip Ties: Use UV-resistant, outdoor-rated ties for patios or trees. Thread them through the light’s wire loops or around branches. For a cleaner look, cut off the tail and use clear ties.
- Tension Rods: Perfect for windows or door frames. Install a rod, then drape lights over it. No tools or damage required.
- Alligator Clips or Binder Clips: Attach lights to fabric, curtains, or even a headboard. Use large clips (2–3 inches) for better grip.
- Clothesline Clips: Designed for outdoor use, these grip lights securely without damaging the wires.
Example: Hang lights above a dining table by installing a tension rod across the ceiling. Drape the lights over it and secure with zip ties at the ends for a bistro-style glow.
Creative Hanging Ideas for Every Room and Occasion
Bedrooms and Living Rooms: Cozy Canopies and Accent Lighting
Transform your bedroom into a dreamy retreat with a light canopy. Use adhesive hooks to create a grid on the ceiling, then weave lights diagonally or in a starburst pattern. For a softer effect, drape lights over a sheer fabric (like tulle or voile) attached to the ceiling with push pins.
In living rooms, accent lighting adds warmth. Try these ideas:
- Behind the TV: Use adhesive clips to outline the back of your TV. This reduces glare and adds ambiance.
- Along Shelves: Tuck lights under floating shelves or inside bookcases. Use clear clips to keep them hidden.
- Under a Floating Mantel: Screw cup hooks into the mantel’s underside and loop lights through them.
Pro Tip: Use warm white or soft white LEDs (2700K–3000K) for a cozy feel. Avoid cool white (4000K+) in bedrooms.
Patios, Balconies, and Outdoor Spaces: Weather-Resistant Designs
Outdoor lighting should be both functional and magical. For patios:
- Along Railings: Use zip ties with metal clips to secure lights to metal or wooden rails. Space clips every 12–18 inches.
- On Trees: Wrap lights around trunks or branches using spiral techniques. Secure with UV-resistant zip ties.
- On a Pergola: Install outdoor-rated hooks or eye screws along the beams. Create a crisscross pattern for a starry effect.
For balconies, tension rods or adhesive hooks work well on railings or walls. If you have a retractable awning, attach lights to the frame with alligator clips.
Special Occasions: Weddings, Parties, and Holidays
LED string lights are a staple for celebrations. For weddings, drape lights over an arch or arbor using zip ties or floral wire. In photo booths, hang lights behind a backdrop with tension rods.
During holidays, use:
- Window Grids: Adhesive clips or suction cups to outline windows.
- Stair Railings: Wrap lights around the balusters with zip ties.
- Front Porch: Install cup hooks along the eaves and create a cascading waterfall effect.
Example: For a rustic-chic wedding, hang lights from tree branches using twine and alligator clips. Add mason jars with candles for a magical glow.
Step-by-Step Installation Guide: From Planning to Perfection
Planning Your Layout: Measuring and Mapping
Before you start hanging, plan your layout. Measure the space and calculate how much lighting you need. A general rule: 1 foot of string lights per 1 square foot of space. For example, a 10×10 ft patio needs 100 feet of lights.
Use painter’s tape to mark hook positions on the wall or floor. This helps you visualize the pattern and spacing. For outdoor installations, consider wind patterns—avoid placing lights where they’ll flap against surfaces.
Securing the Lights: Best Practices for a Flawless Finish
Follow these steps for a professional-looking installation:
- Install anchors first: Set all hooks, clips, or screws before hanging lights.
- Start from the power source: Begin at the outlet and work outward. This prevents tangles.
- Use even spacing: Keep hooks 12–18 inches apart for consistent drape.
- Secure the ends: Attach the first and last light to a hook or tie it off.
- Test the lights: Plug them in to ensure all bulbs work before finalizing.
Pro Tip: For long strands, use a “zigzag” pattern instead of a straight line. This adds visual interest and hides any sagging.
Maintaining Your Lights: Safety and Longevity
Proper maintenance ensures your lights last for years. Here’s how to care for them:
- Inspect annually: Check for frayed wires, loose bulbs, or corroded connections.
- Clean gently: Wipe bulbs with a dry cloth. Avoid water near electrical components.
- Store properly: Coil lights around a cardboard tube or use a storage reel. Keep in a dry, cool place.
- Replace batteries (if applicable): For battery-powered lights, use fresh alkaline batteries to prevent leakage.
Product Comparison: Top Hanging Solutions for LED String Lights
| Product | Best For | Weight Capacity | Surface Compatibility | Price Range |
|---|---|---|---|---|
| 3M Command Clear Wire Clips | Delicate fairy lights, indoor use | 0.5 lbs | Drywall, glass, tile | $5–$10 (pack of 16) |
| Cup Hooks (Stainless Steel) | Heavy strands, outdoor use | 10–20 lbs | Wood, drywall, masonry | $3–$8 (pack of 20) |
| UV-Resistant Zip Ties | Patios, trees, railings | 15 lbs | Metal, wood, vinyl | $6–$12 (pack of 100) |
| Outdoor Tension Rods | Windows, doorways | 20 lbs | Metal, wood frames | $10–$20 |
| Masonry Anchors + Hooks | Brick, concrete, stone | 25+ lbs | Brick, stucco, concrete | $8–$15 (kit) |
| Alligator Clips (Large) | Fabric, curtains, headboards | 5 lbs | Fabric, wood, metal | $5–$10 (pack of 10) |
Conclusion: Illuminate Your World with Confidence
Hanging LED string lights doesn’t have to be a daunting task. With the right tools, a bit of planning, and a touch of creativity, you can create a lighting masterpiece that enhances any space. Whether you’re aiming for a romantic bedroom glow, a festive patio party, or a serene outdoor oasis, the key is matching your hanging method to your environment, surface, and aesthetic goals. From no-damage adhesive hooks to heavy-duty masonry anchors, there’s a solution for every need and surface.
Remember, the best installations are both beautiful and functional. Take the time to measure, test, and secure your lights properly—your future self will thank you when the lights stay put season after season. And don’t forget to experiment! Try mixing methods, like combining tension rods with zip ties, or using adhesive clips for a floating canopy. The only limit is your imagination. So go ahead, gather your tools, plug in your lights, and let the ambiance begin. Your perfect glow awaits.
Frequently Asked Questions
What can I use to hang LED string lights without damaging my walls?
You can use adhesive hooks, removable mounting strips, or tension rods to hang LED string lights without leaving marks or holes. These options are ideal for renters or those who want a damage-free setup.
What’s the best way to hang LED string lights on an outdoor patio?
For outdoor use, opt for weather-resistant materials like zip ties, stainless steel hooks, or outdoor-rated clips. Ensure your hardware is rust-proof and securely anchored to withstand wind and rain.
How do I hang LED string lights from a ceiling without nails?
Try using clear fishing line, removable ceiling clips, or adhesive putty to hang LED string lights from the ceiling. These methods are simple, discreet, and won’t damage surfaces.
Can I use command hooks to hang LED string lights?
Yes, Command™ hooks are a popular choice for hanging LED string lights, especially on smooth surfaces like walls or windows. Just ensure the weight of the lights is within the hook’s weight limit.
What tools do I need to hang LED string lights in a backyard?
For backyard setups, use shepherd’s hooks, zip ties, or guide wires anchored to posts or trees. These tools provide sturdy support and help create a balanced, professional-looking display.
How do I hang LED string lights on a sheer curtain or fabric?
Use small binder clips, curtain tiebacks, or decorative pins to attach LED string lights to sheer fabric. These lightweight options keep the lights secure without tearing delicate material.

