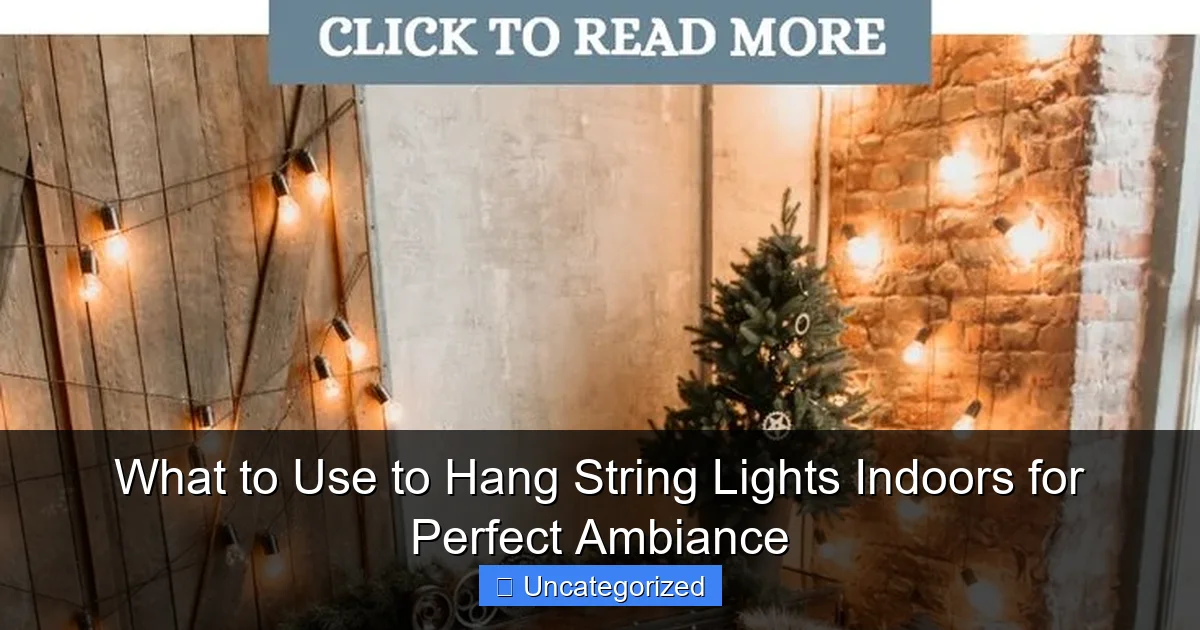
Featured image for what to use to hang string lights indoors
Image source: i.pinimg.com
Use adhesive hooks or removable mounting strips to hang string lights indoors—they’re damage-free, easy to install, and perfect for renters. For a sturdier hold on walls or ceilings, opt for small nails, picture hangers, or tension rods that blend seamlessly with your decor. These simple tools ensure a secure, stylish setup for a cozy, ambient glow.
Key Takeaways
- Use adhesive hooks: Ideal for renters; no damage and easy to remove.
- Try tension rods: Perfect for windows or corners without nails.
- Opt for removable clips: Secure lights without harming walls or ceilings.
- Choose command strips: Strong hold for heavier string lights, leaves no residue.
- Install picture ledges: Stylish and functional for long-term light displays.
- Utilize existing fixtures: Drape lights over curtain rods or shelves effortlessly.
📑 Table of Contents
- What to Use to Hang String Lights Indoors for Perfect Ambiance
- 1. Understanding Your Space and String Lights
- 2. Damage-Free Hanging Solutions (Renter-Friendly & Reusable)
- 3. Hardware-Based Hanging Methods (Permanent or Semi-Permanent)
- 4. Creative and Furniture-Based Hanging Ideas
- 5. Safety, Maintenance, and Pro Tips
- 6. Conclusion: Create Your Perfect Indoor Glow
What to Use to Hang String Lights Indoors for Perfect Ambiance
There’s something undeniably magical about string lights. Whether they’re twinkling above a cozy reading nook, framing a gallery wall, or cascading from the ceiling in a bedroom, they have the unique ability to transform any indoor space into a warm, inviting sanctuary. The soft, ambient glow of string lights evokes feelings of comfort, romance, and celebration—making them a favorite decor choice for homes, apartments, and even office spaces. But while the aesthetic payoff is undeniable, many people struggle with the practical side: what to use to hang string lights indoors without damaging walls, ceilings, or furniture.
The good news is that there’s no shortage of creative, damage-free, and effective solutions. From adhesive hooks to tension rods, from ceiling-mounted tracks to clever furniture hacks, the options are as diverse as the spaces you want to illuminate. The key lies in understanding your room’s layout, ceiling height, wall material, and the type of string lights you’re using. In this comprehensive guide, we’ll explore the best tools, techniques, and tips for hanging indoor string lights—ensuring you achieve that dreamy ambiance without the stress of drilling holes, peeling paint, or unstable installations. Whether you’re decorating for a holiday, a special event, or just everyday coziness, this guide has you covered.
1. Understanding Your Space and String Lights
Assess Your Room Layout and Ceiling Height
Before you even purchase hooks or tape, take a moment to assess your space. Consider the dimensions of the room: Is it a small bedroom, a large living area, or a high-ceilinged loft? The height of your ceiling will influence how high you can hang lights and what tools are necessary. For example, a 9-foot ceiling gives you more vertical space to work with, allowing for cascading or draped effects. In contrast, a low 7-foot ceiling may require more strategic placement to avoid a cluttered or claustrophobic feel.
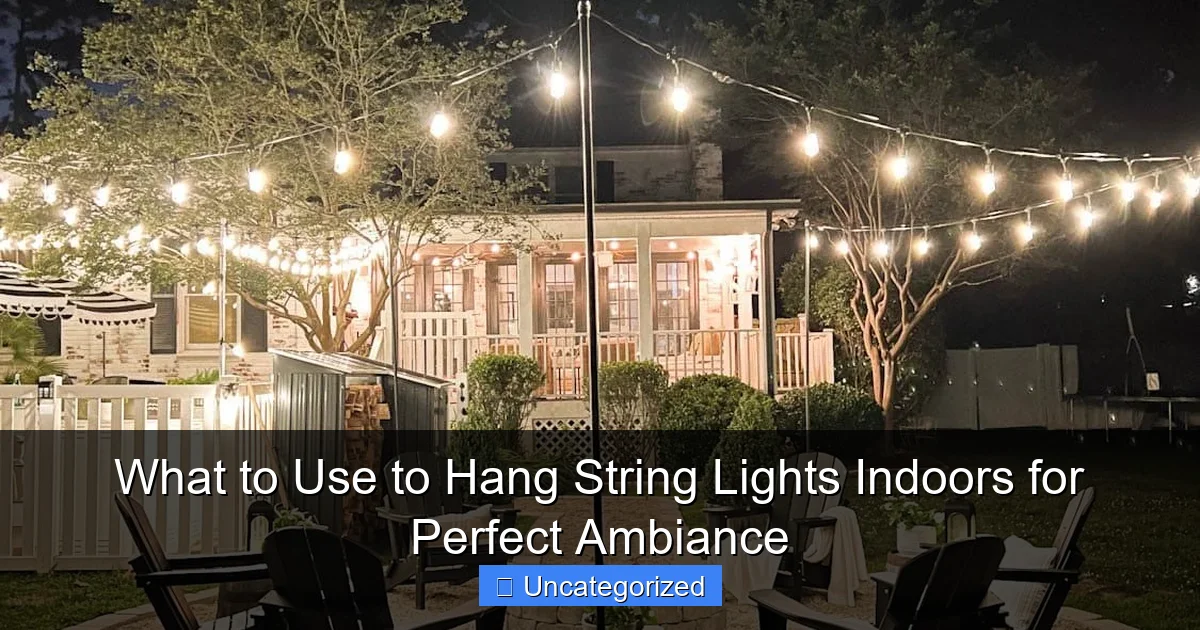
Visual guide about what to use to hang string lights indoors
Image source: blesserhouse.com
Also, identify the natural focal points in your room—windows, mirrors, headboards, bookshelves, or architectural features like beams or moldings. These can serve as anchor points for your lights, reducing the need for wall-mounted hardware. For instance, wrapping string lights around a floor lamp or draping them across a mantel can create beautiful ambient lighting with minimal installation.
Know Your String Light Type
Not all string lights are created equal. Understanding the type you’re working with is crucial for choosing the right hanging method:
- Plug-in lights: These require access to an outlet, so plan your layout around available power sources. Consider using extension cords (safely) or power strips with surge protection.
- Battery-operated lights: Ideal for areas without outlets or for renters who want temporary installations. They offer flexibility but require periodic battery changes.
- Smart string lights: These can be controlled via app or voice assistant (e.g., Alexa, Google Assistant). They often have heavier cords or integrated electronics, so ensure your hanging method supports the weight.
- LED vs. incandescent: LEDs are cooler, more energy-efficient, and often lighter, making them easier to hang. Incandescent lights generate more heat and may require more secure mounting.
Additionally, check the wire gauge and bulb spacing. Thicker wires (lower gauge numbers) are sturdier but heavier. Bulbs spaced closely together (e.g., 4 inches apart) create a denser glow but may require more support than widely spaced bulbs.
Consider Wall and Ceiling Materials
The surface you’re attaching to matters. Drywall, plaster, wood, concrete, and tile each require different hanging solutions:
- Drywall: Use adhesive hooks rated for the weight of your lights, or opt for removable mounting strips (e.g., 3M Command™). Avoid nails or screws unless you’re okay with patching holes later.
- Plaster: More brittle than drywall. Use wide-based adhesive hooks or low-tack tape to prevent cracking.
- Wood and molding: Ideal for screws, nails, or even small eye hooks. Wooden beams or trim can be drilled into with minimal damage.
- Tile and glass: Use suction cups, adhesive hooks designed for smooth surfaces, or magnetic clips (for metal-framed windows).
Always test a small area first to ensure your chosen method won’t leave residue or damage the finish.
2. Damage-Free Hanging Solutions (Renter-Friendly & Reusable)
Adhesive Hooks and Strips
For renters or those who want a no-drill solution, adhesive hooks and mounting strips are the gold standard. Brands like 3M Command™ offer a range of products specifically designed for hanging string lights:
- Command™ Clear Mini Hooks: Perfect for lightweight LED lights. Hold up to 0.5 lbs and are virtually invisible.
- Command™ Medium Wire Hooks: Support up to 2 lbs—ideal for denser or plug-in lights.
- Command™ Picture Hanging Strips: Use these to create a “track” along a wall or ceiling edge. Attach one side to the wall, the other to a wooden dowel or thin rod, then drape lights over it.
Pro Tip: Clean the surface with rubbing alcohol before applying. Let the adhesive cure for 1 hour before hanging lights. To remove, pull the tab straight down slowly—don’t yank!
Removable Tape and Putty
For temporary setups or delicate surfaces, consider:
- Double-sided foam tape: Holds well on smooth surfaces. Use sparingly to avoid residue.
- Museum putty (e.g., Blu-Tack): Reusable and moldable. Great for holding light strands in place on walls or furniture edges.
- Washi tape: Decorative and low-tack. Wrap around light strands and tape to walls for a boho-chic look.
These options work best for lightweight, battery-powered lights. Avoid heavy plug-in strands, as tape may fail over time.
Suction Cups and Magnetic Clips
For glass surfaces (windows, mirrors, glass doors), suction cups are a no-brainer. Look for heavy-duty suction cups with hooks (rated for at least 1–2 lbs). For metal-framed windows, magnetic clips offer a secure, adjustable grip. You can also use magnetic strips on the back of a light strand to attach it directly to a metal surface.
Example: Hang string lights across a window using suction cups at the top corners, then drape them down in gentle swags. This creates a romantic, “starry sky” effect in bedrooms or living rooms.
3. Hardware-Based Hanging Methods (Permanent or Semi-Permanent)
Ceiling Hooks and Eye Screws
If you’re comfortable with minor drilling (or own your home), ceiling hooks and eye screws offer a sturdy, long-term solution. Use:
- Self-tapping drywall anchors: For hollow walls. Insert into a pilot hole, then screw in the hook.
- Toggle bolts: For heavy loads (e.g., multiple strands of plug-in lights). They expand behind the drywall for maximum support.
- Eye screws: Screw directly into wooden beams or molding. Ideal for exposed ceiling joists or rustic interiors.
Installation Tip: Use a stud finder to locate ceiling joists. If you can’t hit a joist, use anchors rated for the weight. For a “curtain” effect, install multiple hooks along a ceiling edge and string lights between them.
Tension Rods and Curtain Rods
Tension rods (also called spring rods) are a brilliant hack for hanging lights without drilling. They fit between two walls or within a window frame and can support light strands draped over or wrapped around them. Use:
- Decorative tension rods: Choose rods with finials or metallic finishes to blend into your decor.
- Curtain rods with rings: Thread light strands through the rings for a layered, cascading look.
Example: In a bedroom, place a tension rod between two walls above the headboard. Hang string lights from the rod in a “U” shape, creating a glowing canopy.
Tracks and Rails (For Professional-Looking Installations)
For a polished, gallery-style setup, consider installing a picture rail or ceiling track system. These allow you to hang lights with S-hooks, carabiners, or clips, and reposition them easily. Picture rails are mounted just below the ceiling and can support multiple light strands. Tracks (like those used for track lighting) let you slide lights along a rail for dynamic effects.
Best for: Large living rooms, home offices, or spaces where you want to change the lighting layout seasonally.
4. Creative and Furniture-Based Hanging Ideas
Use Existing Furniture as Anchors
Your furniture can do double duty as a light hanger. Try:
- Wrapping lights around a floor lamp: Drape them around the pole or base for a glowing centerpiece.
- Draping over a bookshelf: Run lights along the top or weave them through shelves for a cozy library vibe.
- Hanging from a coat rack or ladder: Lean a wooden ladder against a wall and drape lights over the rungs.
- Framing a headboard: Attach lights to the top or sides of a headboard with clips or tape.
Pro Tip: Use zip ties or fabric clips to secure lights to furniture without damaging it. For a seamless look, choose ties or clips in a matching color.
Mirror and Window Frame Hacks
Mirrors and window frames are natural light reflectors. Hang lights:
- Along the edge of a large mirror: Use adhesive hooks or putty to create a glowing frame.
- Across a window: Attach suction cups to the top corners and drape lights down in swags.
- Behind a sheer curtain: Hang lights between the window and curtain for a diffused, ethereal glow.
Example: In a bathroom, hang string lights around a mirror using waterproof adhesive hooks. The reflection doubles the light, creating a spa-like atmosphere.
DIY Hanging Structures
For a custom look, build your own hanging system:
- Wooden dowel “canopy”: Cut a dowel to fit your space. Attach adhesive strips to the wall, press the dowel into place, then drape lights over it.
- Macramé hangers: Use knotted ropes to suspend lights from the ceiling. Ideal for bohemian or rustic decor.
- Wire grid panels: Mount a metal grid (like a pegboard) on the wall and clip lights to the wires.
These DIY options add personality and can be customized to fit any room.
5. Safety, Maintenance, and Pro Tips
Prioritize Electrical Safety
Never compromise on safety when hanging lights. Follow these guidelines:
- Check for frayed wires or damaged sockets before hanging.
- Don’t overload outlets: Follow the manufacturer’s recommendations for how many strands can be connected in series.
- Use GFCI outlets in damp areas (bathrooms, kitchens).
- Keep cords away from foot traffic to prevent tripping. Use cord covers or run them behind furniture.
Pro Tip: For long-term installations, consider hiring an electrician to install a dedicated outlet or dimmer switch.
Maintain Your Lights and Hanging System
To keep your lights shining bright:
- Clean bulbs and wires with a dry cloth to prevent dust buildup.
- Inspect hooks and adhesives monthly. Replace any that show wear.
- Store lights properly: Coil them loosely around a piece of cardboard or a light reel to prevent tangling.
For battery-operated lights, keep spare batteries on hand. For smart lights, ensure your app and firmware are up to date.
Data Table: Hanging Method Comparison
| Method | Best For | Max Weight | Damage Risk | Installation Time | Cost |
|---|---|---|---|---|---|
| Adhesive Hooks | Drywall, plaster, wood | 0.5–2 lbs | Very Low | 2–5 mins per hook | $0.50–$2 per hook |
| Tension Rods | Walls, windows | 5–10 lbs | None | 5–10 mins | $10–$25 |
| Ceiling Hooks | Wood, joists, anchors | 5–20 lbs | Low (if patched) | 10–15 mins per hook | $1–$5 per hook |
| Suction Cups | Glass, tile | 1–2 lbs | None | 3–5 mins | $2–$8 per cup |
| Furniture Clips | Shelves, lamps, headboards | 1–3 lbs | None | 2–4 mins | $3–$10 per pack |
| Picture Rail | Long-term installations | 10+ lbs | Low (if patched) | 30–60 mins | $20–$50 |
Pro Tips for Flawless Installations
- Plan your layout first: Use painter’s tape to mark where hooks or rods will go. Step back and adjust before committing.
- Use a level: Ensure hooks or rods are straight for a professional look.
- Mix methods: Combine adhesive hooks with tension rods for a layered effect.
- Hide cords creatively: Run them behind curtains, along baseboards, or through a cord cover.
- Test before finalizing: Turn lights on during installation to check spacing and brightness.
6. Conclusion: Create Your Perfect Indoor Glow
Hanging string lights indoors doesn’t have to be a stressful, permanent, or damaging process. With the right tools and techniques, you can create a warm, inviting ambiance that enhances any room—whether you’re a renter, homeowner, or DIY enthusiast. From adhesive hooks and tension rods to ceiling tracks and furniture hacks, the options are endless. The key is to match your hanging method to your space, light type, and desired aesthetic.
Remember to prioritize safety, plan your layout, and don’t be afraid to experiment. A little creativity can turn a simple strand of lights into a breathtaking centerpiece. Whether you’re illuminating a cozy nook, framing a mirror, or creating a canopy over your bed, the glow of string lights has the power to transform your indoor space into a haven of warmth and wonder. So grab your lights, pick your favorite method, and start hanging—your perfect ambiance awaits.
Frequently Asked Questions
What can I use to hang string lights indoors without damaging walls?
Adhesive hooks, removable mounting strips (like Command™ strips), or tension rods are excellent damage-free options. These solutions provide strong support while keeping your walls intact.
How do I hang string lights on indoor ceilings or high spaces?
Use ceiling-mounted hooks, adhesive clips, or attach lights to a removable backdrop like a tapestry rod. For a seamless look, opt for clear fishing line tied to secure anchor points.
What to use to hang string lights indoors on windows or mirrors?
Small adhesive hooks, suction cup clips, or curtain rod hangers work well for windows and mirrors. These options avoid drilling while ensuring the lights stay securely in place.
Can I use nails or screws to hang string lights indoors?
Yes, but only if you’re comfortable with minor wall damage. Use small picture-hanging nails or screws for a permanent, sturdy hold, especially for heavier light strands.
Are there creative ways to hang string lights without hooks?
Absolutely! Drape lights around indoor plants, bookshelves, or headboards for a decorative touch. You can also use washi tape or twist ties for a temporary, no-tools approach.
What’s the best method for hanging string lights along indoor staircases?
Try adhesive hooks spaced evenly on railings or use a staple gun (for wood surfaces) to secure the lights discreetly. For renters, tension rods with clips offer a non-permanent solution.

