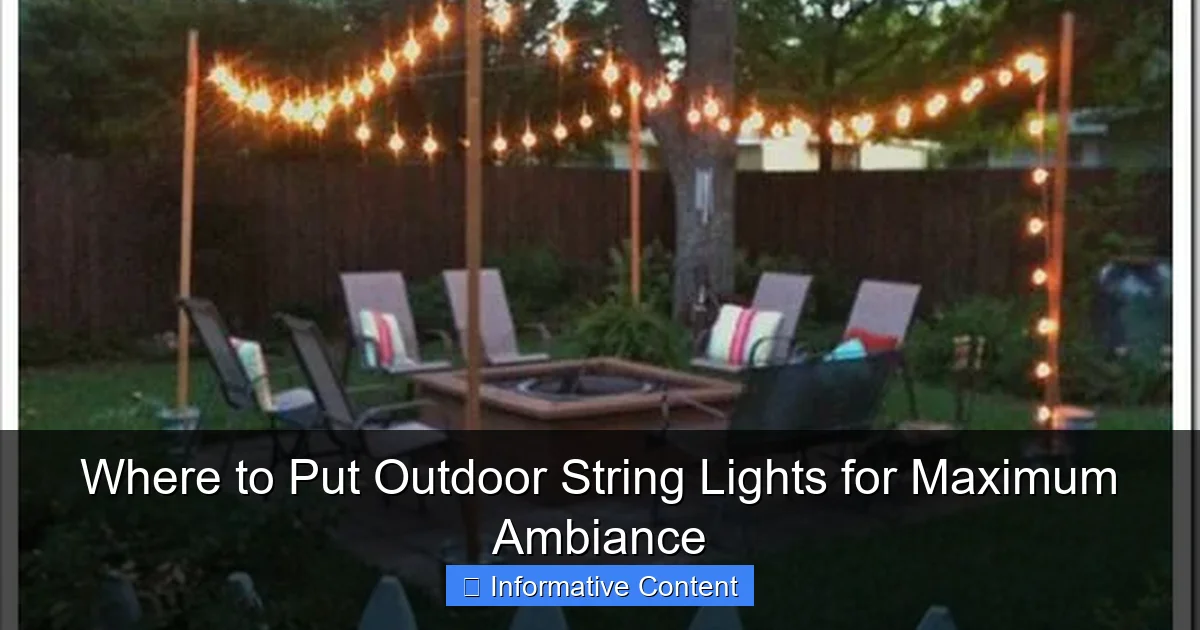
Featured image for where to put outdoor string lights
Image source: landscapelightingguru.com
Hang outdoor string lights along pergolas, fences, or tree canopies to instantly transform your space into a warm, inviting retreat. For maximum ambiance, layer lights at varying heights and use dimmable LEDs to control brightness and mood. Focus on high-traffic areas like dining patios, entryways, or poolside zones to blend functionality with enchanting atmosphere.
Key Takeaways
- Hang along fences to define boundaries and add vertical interest.
- Drape over patios for intimate, overhead lighting and cozy vibes.
- Weave through trees to highlight natural shapes and create depth.
- Frame doorways to enhance entryways and guide guests effortlessly.
- Layer with plants to blend lights seamlessly into your landscape.
- Space evenly to avoid dark spots and maintain balanced brightness.
📑 Table of Contents
- Where to Put Outdoor String Lights for Maximum Ambiance
- 1. Define Your Outdoor Zones: Start with Purpose
- 2. Structural Mounting: Where to Anchor Your Lights
- 3. Creative Layouts: Patterns That Wow
- 4. Light Quality and Bulb Choices: The Secret to Ambiance
- 5. Seasonal and Temporary Setups: Flexibility Matters
- 6. Real-World Examples: Inspiration from Real Yards
Where to Put Outdoor String Lights for Maximum Ambiance
Remember that magical summer night when you sat in your backyard, sipping lemonade under a canopy of twinkling lights? The air was warm, the music was soft, and the glow from those string lights made everything feel… just right. That’s the power of outdoor string lights. They’re not just for holidays or special events. When placed thoughtfully, they can transform your outdoor space into a cozy, inviting retreat—any night of the year.
But here’s the thing: not all placements are created equal. Hang them too high, and they feel distant. Too low, and they’re in the way. The wrong spacing? Now you’ve got a dim, uneven glow that doesn’t do justice to your beautiful patio or garden. So, where *should* you put outdoor string lights for maximum ambiance? It’s not just about aesthetics—it’s about function, safety, and creating the right mood. In this guide, we’ll walk you through the best spots, practical tips, and real-life examples to help you nail the look and feel you’re after. Whether you’re hosting a dinner party, enjoying a quiet evening, or just want to feel like you’re living in a Pinterest board, the right lighting makes all the difference.
1. Define Your Outdoor Zones: Start with Purpose
Before you even pick up a hammer or drill, take a step back and ask: *What do I want this space to feel like?* Ambiance starts with intention. Are you creating a romantic nook? A lively dining area? A peaceful reading corner? Each zone has different lighting needs, and your string light placement should match that purpose.
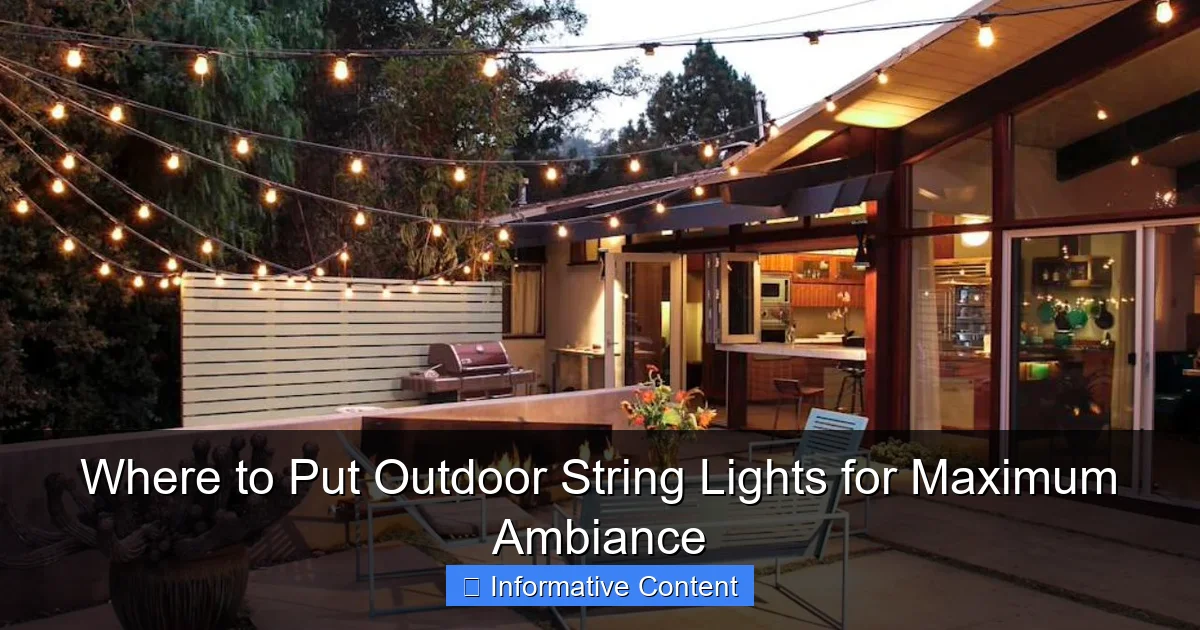
Visual guide about where to put outdoor string lights
Image source: cdn.homedit.com
Identify Key Activity Areas
Think about how you use your outdoor space. Most backyards have a few natural zones:
- Dining area: A table for meals or entertaining. You’ll want lights that illuminate the table without blinding guests.
- Conversation nook: A seating area with chairs or a sectional. Soft, warm lighting works best here to encourage intimacy.
- Pathways and walkways: Safety is key. Low-hanging lights or ground-level string lights can guide the way.
- Entertainment zones: Fire pits, grills, or game areas. You’ll need a balance of ambient and task lighting.
- Relaxation spots: Hammocks, lounge chairs, or reading corners. Dim, warm lights create a serene vibe.
Match Lighting to Function
Once you’ve mapped out your zones, consider the lighting needs:
- Dining areas: Hang lights 7–8 feet above the table. This keeps them out of the way but close enough to see food and faces. A zigzag pattern or a grid over the table adds visual interest.
- Seating areas: Drape lights 6–7 feet high in a gentle arc or canopy. This creates a “room” effect, enclosing the space without feeling claustrophobic.
- Pathways: Use string lights along fences, railings, or low trees. Keep them 4–5 feet high so they’re visible but not a tripping hazard.
- Entertainment zones: Combine overhead lights with task lighting (like under-cabinet LEDs near a grill). String lights can frame the space, but don’t rely on them for visibility.
- Relaxation spots: Go low and soft. Drape lights just above a hammock or around a small tree. The goal is to feel wrapped in light, not lit up like a stage.
Pro tip: Take photos of your space during the day and night. Sketch out zones and lighting ideas. It’s easier to visualize placement when you can see how light interacts with shadows and obstacles.
2. Structural Mounting: Where to Anchor Your Lights
Now that you know *why* you’re lighting each area, it’s time to figure out *where* to hang the lights. The anchor points are everything—they determine stability, safety, and how the lights look. The good news? You don’t need a professional installer. With a few smart choices, you can create a stunning setup using what’s already in your yard.
Use Existing Structures (The Easy Win)
Most backyards have built-in anchor points. Use them to your advantage:
- Fences: A classic spot. Use S-hooks or zip ties to attach lights to fence posts or rails. For a clean look, run lights horizontally along the top rail or diagonally between posts. Tip: Space bulbs 8–12 inches apart for even glow.
- Eaves and gutters: If you have a covered patio or pergola, eaves are perfect for overhead lighting. Use gutter hooks or adhesive clips (for temporary setups). Avoid drilling into gutters—it can cause leaks.
- Patio covers and pergolas: These are ideal for a “ceiling” of lights. Hang a grid or zigzag pattern. Use eye screws in beams for permanent mounting, or tension rods for a no-damage option.
- Trees: Wrap lights around trunks or branches. Use zip ties or light clips. For a natural look, follow the tree’s shape—don’t force a straight line. Caution: Avoid damaging tree bark. Use wide, flat straps for large branches.
Create Your Own Support (For Open Spaces)
No fence? No problem. You can still create a stunning display:
- Install posts: Use metal or wooden posts (4x4s work well) driven into the ground or set in concrete. Paint them to match your decor. These are great for patios without eaves.
- Use tension cables: Stretch a steel cable between two sturdy points (trees, posts, or walls). Hang lights from the cable. This works for large open areas and gives a clean, modern look.
- Freestanding poles: Portable lighting poles or shepherd’s hooks can hold lights over tables or seating areas. Great for renters or temporary setups.
Safety First: Avoid Common Mistakes
- Don’t overload circuits: Check your string light wattage and your outlet’s capacity. As a rule, don’t connect more than three standard strands in a series.
- Use outdoor-rated hardware: Indoor hooks, nails, or clips will rust or fail. Use galvanized or stainless steel for outdoor mounting.
- Protect cords: Keep cords off the ground to prevent tripping. Use cord clips or run them along railings or under decking.
- Check local codes: Some areas have rules about overhead wiring. If you’re using cables or poles, make sure they’re safe and up to code.
3. Creative Layouts: Patterns That Wow
Now for the fun part: the *design*. The layout of your outdoor string lights can make or break the ambiance. A straight line? Boring. A random tangle? Messy. But with a few intentional patterns, you can create a look that’s both functional and Instagram-worthy.
The Canopy (or “Cloud”) Effect
This is the gold standard for ambiance. It mimics the look of stars in the sky—perfect for patios, pergolas, or open yards.
- How to: Hang lights in a crisscross grid or zigzag pattern. Use multiple anchor points to create depth. For a “cloud,” vary the height—some lines higher, some lower.
- Best for: Dining areas, conversation zones, and large patios.
- Pro tip: Use warm white or amber bulbs. Cool white can feel clinical. Add a few twinkle or fairy lights for extra magic.
Horizontal Lines (The Classic Look)
Simple but effective. Horizontal lines are easy to install and create a clean, modern feel.
- How to: Run lights parallel between two anchor points (fence to tree, post to post). Space lines 12–18 inches apart.
- Best for: Fences, pathways, and small patios.
- Variation: Add a second layer of lights below the first for depth. Or use two colors—warm white on top, soft yellow below.
Diagonal or Chevron Patterns
Add visual interest with angles. Diagonal lines draw the eye and make small spaces feel larger.
- How to: Hang lights from a high point (e.g., a tree) to a low point (e.g., a fence corner). Repeat in a zigzag or chevron.
- Best for: Long patios, L-shaped decks, or spaces with architectural features.
- Pro tip: Use a laser level to keep lines straight. Or, for a rustic look, let them be slightly uneven.
Tree Wraps and Branch Canopies
Let nature do the work. Trees are natural light fixtures.
- How to: Wrap lights around the trunk and major branches. For a canopy, hang lights from higher branches to lower ones (or to the ground).
- Best for: Gardens, wooded yards, and spaces with mature trees.
- Variation: Use net lights for even coverage. Or, mix string lights with lanterns for a layered look.
Floating “Islands”
Create intimate pockets of light in open areas.
- How to: Use poles or shepherd’s hooks to hang lights over a single table, hammock, or lounge chair.
- Best for: Reading nooks, meditation spots, or small balconies.
- Pro tip: Add a sheer fabric canopy (like voile) for soft diffusion.
4. Light Quality and Bulb Choices: The Secret to Ambiance
You’ve nailed the placement. Now, let’s talk about the lights themselves. Not all string lights are created equal. The bulb type, color, and spacing can dramatically affect the mood—and your guests’ experience.
Bulb Type: LEDs vs. Incandescent
- LEDs: Energy-efficient, long-lasting (up to 25,000 hours), and cooler to the touch. Great for permanent setups. Look for “warm white” (2700K–3000K) for a cozy feel.
- Incandescent: Softer, warmer glow—like candlelight. But they use more energy and burn out faster. Best for short-term or seasonal use.
Verdict: For most people, LEDs are the way to go. But if you want that vintage, nostalgic vibe, mix in a few incandescent strands.
Color Temperature: Warm vs. Cool
- Warm white (2700K–3000K): Creates a cozy, inviting atmosphere. Ideal for dining, lounging, and socializing.
- Cool white (4000K+): Bright and modern, but can feel clinical. Use sparingly—maybe for a kitchen area or task lighting.
- Soft white (3000K–3500K): A happy medium. Great for mixed-use spaces.
Pro tip: Avoid cool white for ambient lighting. It can make people feel alert—not relaxed.
Bulb Spacing and Density
- Tight spacing (4–6 inches): Creates a bright, even glow. Good for task lighting or small areas.
- Wide spacing (8–12 inches): More ambient, with visible “twinkles.” Best for large spaces or a starry effect.
- Net lights: Perfect for covering large surfaces (like a pergola) quickly. But they can look flat—add string lights for depth.
Special Effects: Twinkle, Fade, and Smart Lights
- Twinkle bulbs: Add sparkle. Use in moderation—too many can feel chaotic.
- Fading/color-changing: Fun for parties, but not for everyday ambiance. Stick to warm white for daily use.
- Smart lights: Control brightness, color, and timing via app. Great for automation, but can be overkill for simple setups.
5. Seasonal and Temporary Setups: Flexibility Matters
Not everyone wants permanent lights. Renters, renters, or those who like to change things up might prefer temporary or seasonal setups. The good news? You can still create maximum ambiance without drilling a single hole.
No-Damage Hanging Solutions
- Adhesive hooks and clips: Use outdoor-rated adhesive strips (like 3M) for fences, walls, or railings. Remove easily in winter.
- Weighted bases: For freestanding poles, use sandbags or concrete-filled planters. No digging required.
- Magnets: For metal surfaces (like a metal fence), magnetic hooks are a quick, removable option.
Portable Lighting Systems
- Shepherd’s hooks: Place in planters or drive into soft ground. Great for tables or pathways.
- Lighting poles: Telescoping poles can be set up in minutes. Some even have built-in stakes for grass.
- String light stands: Freestanding frames that hold lights in a canopy shape. Perfect for patios without anchor points.
Seasonal Adjustments
- Winter: Use weatherproof lights (look for “wet-rated”). Add a few strands to trees or railings for holiday magic. But don’t overdo it—keep it simple and cozy.
- Summer: Go all out with canopies and pathways. Use solar-powered lights to save energy.
- Spring/Fall: Use softer, dimmable lights. These seasons have more daylight, so you need less brightness.
Pro tip: Store lights properly. Wrap them around cardboard or a reel to prevent tangles. Use a labeled bin for easy setup next year.
6. Real-World Examples: Inspiration from Real Yards
Theory is great, but seeing it in action is even better. Here are three real-life setups that nail the ambiance game—and the lessons you can steal.
Example 1: The Cozy Patio (Urban Backyard)
Space: 12’ x 12’ concrete patio with a small dining table and two lounge chairs.
Setup:
- Horizontal lines: Two rows of warm white LEDs, 8 inches apart, hung 7 feet high between a fence and a pergola.
- Table focus: A third strand in a zigzag over the table, 6 feet high.
- Pathway: Low-hanging lights along the fence edge (4 feet high).
Result: A warm, intimate space that feels like a private bistro. Guests love the soft glow and easy conversation flow.
Example 2: The Forest Canopy (Wooded Yard)
Space: 20’ x 30’ yard with mature trees and a fire pit.
Setup:
- Tree wraps: Warm white LEDs wrapped around three main trees, with strands connecting them in a loose canopy.
- Fire pit: A single “island” of lights hung from a shepherd’s hook over the pit.
- Pathway: Net lights along a stone path.
Result: A magical, natural feel—like sitting in a fairy grove. The lights highlight the trees without overpowering them.
Example 3: The Rooftop Retreat (City Apartment)
Space: 10’ x 15’ rooftop with a small table and two chairs.
Setup:
- Freestanding poles: Two poles with a tension cable between them. Lights hung in a canopy shape.
- Railings: Adhesive hooks with low-hanging lights along the edge.
- Table: A single strand in a loop over the table.
Result: A chic, low-maintenance setup that’s easy to install and remove. Perfect for renters.
| Setup Type | Best For | Pros | Cons |
|---|---|---|---|
| Canopy (Grid/Zigzag) | Patios, pergolas, large yards | High ambiance, covers large areas | More anchor points needed |
| Horizontal Lines | Fences, small patios, pathways | Easy to install, clean look | Less depth/visual interest |
| Tree Wraps | Gardens, wooded areas | Uses natural features, low cost | Seasonal (leaves block light) |
| Freestanding Poles | Renters, temporary setups | No damage, portable | Less stable in wind |
Outdoor string lights aren’t just a decorative touch—they’re an invitation to spend more time outside. Whether you’re hosting a dinner party, reading a book, or just enjoying the sunset, the right placement can turn an ordinary night into something special. Remember: start with purpose, use what you have, and don’t be afraid to experiment. A little trial and error is part of the fun.
The key to maximum ambiance? It’s not about perfection. It’s about creating a space that feels like *you*—warm, inviting, and just a little bit magical. So grab your lights, sketch out your zones, and start hanging. The stars are waiting. And this time, they’re on your terms.
Frequently Asked Questions
Where should I hang outdoor string lights for the best ambiance?
For maximum ambiance, drape outdoor string lights along pergolas, fences, or tree branches to create a warm, layered glow. Focus on high-traffic areas like patios or dining spaces to enhance usability and visual appeal.
Can I install outdoor string lights on a balcony or small space?
Absolutely! On balconies, wrap lights around railings, hang them overhead in zigzag patterns, or mount them along walls to maximize vertical space. Use outdoor string lights with adjustable lengths for a custom fit.
What are creative ways to use outdoor string lights in trees?
Weave lights through tree branches in a spiral pattern or hang them like fairy lights for a magical canopy effect. Ensure bulbs are rated for outdoor use and secure cords safely to avoid tripping hazards.
Where to put outdoor string lights if I don’t have a covered patio?
Use shepherd’s hooks, poles, or umbrellas as anchor points to create a freestanding lighting setup. For open yards, suspend lights between trees or install ground-mounted fixtures for a starry-night effect.
How do I light up a pathway with outdoor string lights?
Line pathways by attaching lights to nearby structures like fences or low-hanging branches, spacing them evenly for balanced illumination. Alternatively, use solar-powered outdoor string lights along borders for a hassle-free glow.
Can I hang string lights on a pergola or gazebo?
Yes! Wrap lights around pergola beams, hang them in parallel rows overhead, or zigzag them diagonally for a dynamic look. Secure cords with hooks or zip ties to avoid sagging and ensure weatherproof connections.

