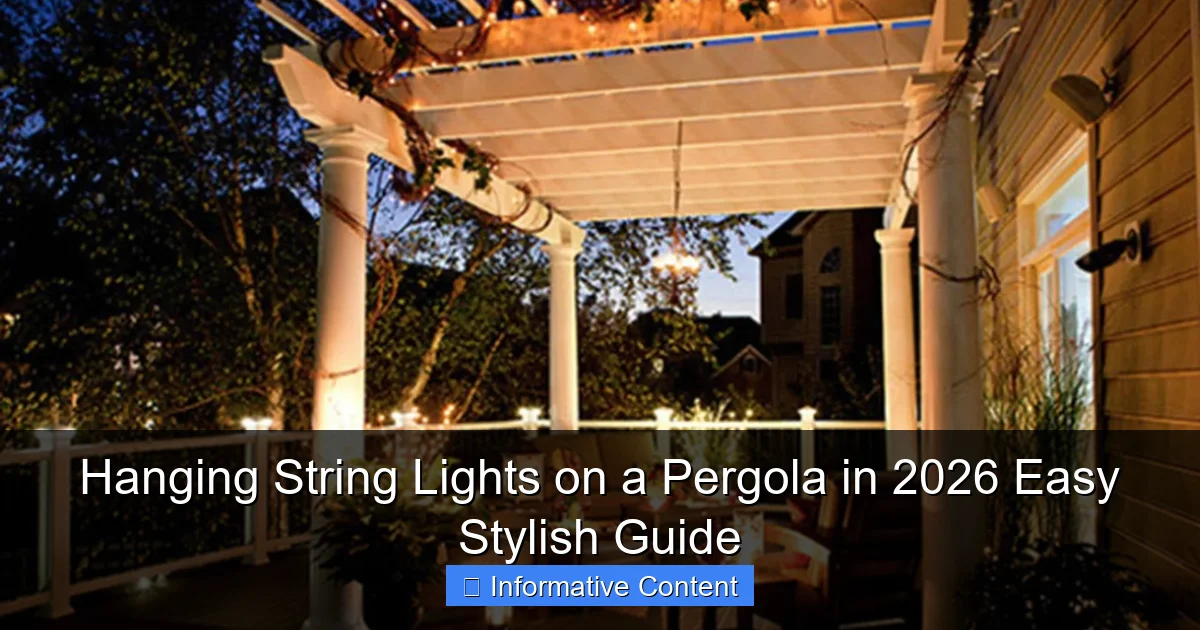
Featured image for hanging string lights on a pergola
Image source: themprojects.com
Transform your pergola into a stunning nighttime oasis in 2026 with weather-resistant, solar-powered string lights that blend effortless installation with modern style. Use adjustable tension wires or discreet mounting clips to create a seamless glow without damaging your structure—perfect for year-round entertaining.
Key Takeaways
- Plan spacing first: Map light placement for balanced, even coverage.
- Use outdoor-rated lights: Ensure weatherproofing for year-round durability.
- Anchor securely: Install hooks or clips rated for outdoor weight loads.
- Hide cords neatly: Tuck wiring along beams for a clean, safe look.
- Layer lighting: Combine string lights with task lights for ambiance and function.
- Test before hanging: Check bulbs and connections to avoid mid-install fixes.
📑 Table of Contents
- Why Hanging String Lights on a Pergola Is the Ultimate Outdoor Upgrade
- Choosing the Right String Lights for Your Pergola
- Planning Your Layout: Design and Spacing Tips
- Tools and Materials You’ll Actually Need (No Fancy Gear Required)
- Step-by-Step: How to Hang String Lights on a Pergola
- Maintaining Your Pergola Lights: Keep Them Glowing Year After Year
- Data Table: Comparing String Light Options for Pergolas (2026)
- Final Thoughts: Light Up Your Life (Literally)
Why Hanging String Lights on a Pergola Is the Ultimate Outdoor Upgrade
There’s something magical about stepping into a backyard at night and being greeted by a warm, twinkling glow. If you’ve ever stood under a pergola lit with string lights, you know exactly what I mean. The soft shimmer casts a cozy ambiance, transforming your outdoor space into a private retreat perfect for summer dinners, late-night chats, or even a quiet moment with a book. In 2026, hanging string lights on a pergola isn’t just a trend—it’s a lifestyle upgrade embraced by homeowners, renters, and design lovers alike.
But here’s the thing: while the end result looks effortlessly stylish, the process can feel a bit overwhelming if you’re doing it for the first time. Where do you start? How do you keep the lights from sagging? What kind of lights work best? And how do you do it without turning your backyard into a DIY disaster? I’ve been there—tangled in extension cords, balancing on a wobbly ladder, and questioning my life choices. But after hanging (and re-hanging) lights on multiple pergolas, I’ve learned the tricks that make the process simple, safe, and surprisingly fun.
Choosing the Right String Lights for Your Pergola
Before you even grab a ladder, the first step is picking the right lights. Not all string lights are created equal, and the wrong choice can lead to dim lighting, frequent bulb replacements, or even electrical hazards. Let’s break it down.
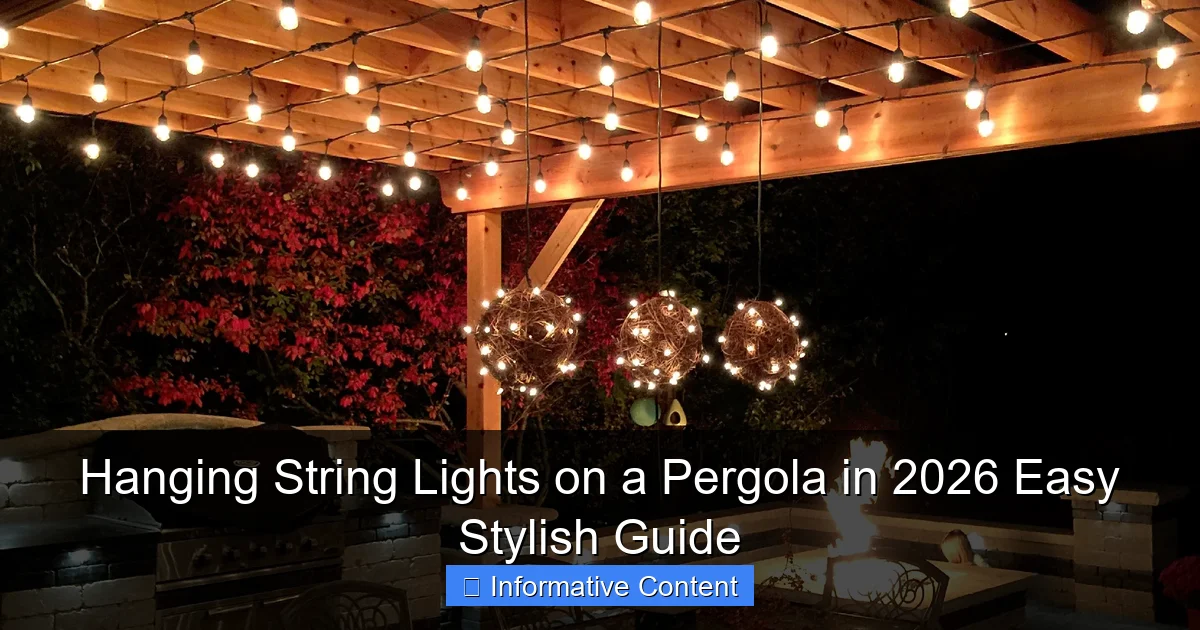
Visual guide about hanging string lights on a pergola
Image source: themprojects.com
Types of String Lights: LED vs. Incandescent
LED string lights are the clear winner in 2026. They’re energy-efficient, last up to 25,000 hours, and stay cool to the touch—perfect for outdoor use. Incandescent lights, while nostalgic and warm, burn out faster and use more electricity. I once used incandescent lights for a party, and by the end, half the strand was dark. Not ideal.
Look for outdoor-rated LED string lights with a waterproof rating of IP44 or higher. This ensures they can handle rain, humidity, and temperature swings. Bonus: many LED sets are dimmable and come with remote controls or app integration, letting you set the mood with a tap.
Bulb Style and Spacing
Bulbs come in three main styles: globe, fairy (tiny LEDs on thin wire), and Edison (exposed filament). Globe lights offer a classic, warm glow—great for a romantic vibe. Fairy lights are delicate and ethereal, ideal for a boho or whimsical look. Edison bulbs give off a vintage, industrial feel, perfect for modern-rustic pergolas.
Spacing matters too. Lights spaced 4–6 inches apart provide even coverage without looking cluttered. If your pergola is 10 feet long, aim for a strand with 20–30 bulbs to avoid gaps. For a dramatic effect, try layering—hang a dense strand near the top and a sparse fairy light strand lower down.
Power Source: Plug-in vs. Solar vs. Battery
- Plug-in: Most reliable. Use a GFCI outlet and outdoor extension cords. Ideal for permanent installations.
- Solar: Eco-friendly and easy to install—no wires. But performance drops on cloudy days. Best for areas with 5+ hours of direct sunlight.
- Battery: Portable and flexible, but batteries need frequent replacing. Great for temporary setups or hard-to-reach spots.
Pro tip: If you’re using plug-in lights, map your power sources first. Nothing ruins the vibe like realizing your outlet is 15 feet away with no way to reach it safely.
Planning Your Layout: Design and Spacing Tips
Great lighting starts with a smart layout. A poorly planned design can leave your pergola looking uneven or overly bright. Here’s how to get it right.
Measure Your Pergola (Yes, Really)
Grab a tape measure and write down the dimensions. Most pergolas are 10×12 feet, but sizes vary. For a 10-foot span, you’ll need about 20–30 feet of lights to create a gentle drape (more on that in a sec). Measure the height from the ground to the top beam—this helps you choose the right ladder and plan for any obstacles (like plants or furniture).
Choose Your Hanging Style
There are three main ways to hang lights on a pergola:
- Straight lines: Run lights horizontally between beams. Clean and modern. Use clips or hooks every 12–18 inches to prevent sagging.
- X-pattern (crisscross): Create an “X” between diagonal beams. Adds visual interest and spreads light evenly. Best for square or rectangular pergolas.
- Curtain or drape: Let lights hang vertically from the top beam to the lower rail. Creates a romantic, cascading effect. Works well on pergolas with open sides.
I love the curtain style for intimate gatherings. It feels like dining under a canopy of stars. But if you have low-hanging furniture, go with straight lines to avoid snagging.
Spacing and Symmetry
For straight lines, space each strand 12–18 inches apart. Use painter’s tape to mark positions before hanging. For X-patterns, start at the top corner and work diagonally. Keep the lines taut—sagging lights look sloppy. A tension wire (like a thin steel cable) hidden behind the lights can help maintain even spacing.
Example: On a 12-foot pergola, I used three straight strands spaced 16 inches apart. The result? Balanced lighting that didn’t overwhelm the space.
Tools and Materials You’ll Actually Need (No Fancy Gear Required)
You don’t need a workshop full of tools to hang string lights. Here’s what I’ve found works best—and what you can skip.
Essential Tools
- Ladder: A stable 6-foot step ladder is ideal. For taller pergolas, use an extension ladder with a stabilizer.
- Measuring tape and marker: For planning layout and spacing.
- Outdoor-rated hooks or clips: Use plastic or metal hooks designed for outdoor use. Avoid nails or staples—they can damage wood and create fire hazards.
- Extension cords and power strips: Choose ones rated for outdoor use (look for “SJTW” on the label). Use cord clips to secure loose wires.
- Zip ties (optional): For bundling excess cord or securing lights to beams.
I once tried using regular picture hooks—big mistake. They rusted after a few rains and the lights fell. Learn from my fail: use outdoor-specific hardware.
Optional but Helpful
- String light tensioner kit: Includes turnbuckles and wire to keep lines tight.
- Drill with small bit: If you’re installing permanent hooks (e.g., eye screws), a drill saves time.
- Smart plug: Lets you control lights with an app or voice assistant.
Don’t overcomplicate it. For a simple setup, hooks, clips, and a ladder are all you need.
Safety First
Always turn off power to outdoor outlets before connecting lights. Use a voltage tester to confirm. Never run extension cords through water or high-traffic areas. If you’re unsure about electrical safety, consult an electrician.
Step-by-Step: How to Hang String Lights on a Pergola
Now for the fun part—actually hanging the lights. Follow these steps, and you’ll have a glowing pergola in under an hour.
Step 1: Test Your Lights
Plug in the string lights before hanging. Check for dead bulbs or frayed wires. Nothing worse than climbing a ladder only to realize the strand is broken.
Step 2: Install Hooks or Clips
Start at one end of the pergola. Place hooks or clips every 12–18 inches along the beam. For straight lines, align them horizontally. For X-patterns, place hooks at the top corners and midpoints. Use a level to keep them straight—crooked hooks = crooked lights.
Tip: If your pergola has metal beams, use adhesive hooks or magnetic clips. For wood, screw-in hooks work best.
Step 3: Hang the Lights
For straight lines: Clip the lights into the hooks, starting at one end. Keep tension even—don’t pull too hard or the bulbs may pop out. For X-patterns: Attach one end of the strand to a top corner hook, run it diagonally to the opposite corner, then back. Secure with a hook at the midpoint to prevent sagging.
Example: On my pergola, I used 24-inch plastic clips spaced 16 inches apart. The lights stayed taut and looked professional.
Step 4: Manage the Power Source
Run the power cord along the beam, securing it with zip ties or cord clips. Keep it hidden behind the lights if possible. Plug into a GFCI outlet—this cuts power if it detects a fault. Use a weatherproof outlet cover.
Pro tip: If the outlet is far away, use a heavy-duty extension cord. Avoid daisy-chaining multiple cords—this can overload the circuit.
Step 5: Adjust and Refine
Step back and check the layout. Are the lights even? Any sagging? Adjust hooks or add extra clips as needed. Turn on the lights at dusk to see the full effect. I always make small tweaks after dark—the lighting changes everything.
Step 6: Secure Loose Ends
Bundle excess cord with zip ties or a cord organizer. Tuck it behind a beam or use a decorative sleeve. Safety and aesthetics both matter.
Maintaining Your Pergola Lights: Keep Them Glowing Year After Year
Great lighting isn’t a one-and-done project. A little maintenance keeps your pergola shining bright.
Seasonal Care
- Spring: Check for damage after winter. Replace burnt-out bulbs. Clean dust with a microfiber cloth.
- Summer: Trim back vines or branches that block lights. Wipe down bulbs to remove pollen and grime.
- Fall: Inspect for frayed wires. Store battery-powered lights indoors if you won’t use them.
- Winter: In snowy climates, consider removing lights or using a protective cover. Heavy snow can damage strands.
I leave my lights up year-round, but I add a plastic tarp over them during blizzards. It’s saved me from replacing strands more than once.
Bulb Replacement and Troubleshooting
Most LED strands have replaceable bulbs. Keep spares on hand. If a whole section goes out, check the fuse (usually in the plug) or look for a loose connection. For solar lights, clean the panel monthly to ensure full charging.
One winter, half my lights stopped working. Turned out a mouse chewed through the cord. Now I use a rodent-proof conduit for outdoor wiring.
Upgrade Your Setup
In 2026, many homeowners are adding smart features: dimmers, color-changing LEDs, or motion sensors. I added a smart plug last year—now I control the lights from my phone or with Alexa. Game-changer for movie nights.
Data Table: Comparing String Light Options for Pergolas (2026)
| Type | Best For | Lifespan (Hours) | Energy Use | Weather Resistance | Price Range (per 25 ft) |
|---|---|---|---|---|---|
| LED Globe | Classic, warm ambiance | 25,000 | Low (3–5W) | IP44+ (waterproof) | $20–$40 |
| Fairy LED | Delicate, romantic look | 10,000–20,000 | Very low (1–2W) | IP65 (heavy rain) | $15–$30 |
| Edison LED | Vintage, industrial style | 20,000 | Medium (5–7W) | IP44 | $25–$50 |
| Solar String | Eco-friendly, no wiring | 5,000–10,000 | None (solar-powered) | IP65 | $30–$60 |
| Incandescent | Nostalgic, warm glow | 1,000–2,000 | High (25–40W) | IP44 | $10–$20 |
Note: Prices vary by brand and retailer. Always check customer reviews for real-world performance.
Final Thoughts: Light Up Your Life (Literally)
Hanging string lights on a pergola is more than a design choice—it’s an invitation to spend more time outdoors. Whether you’re hosting a dinner party, reading under the stars, or just enjoying a quiet evening, the right lighting transforms your space. In 2026, with so many hanging string lights on a pergola options, there’s no reason to settle for a dark backyard.
Remember: start with quality lights, plan your layout, use the right tools, and don’t rush the process. A little patience goes a long way. And if something doesn’t work? That’s okay. I’ve rehung lights more times than I can count—each time learning a little more. The goal isn’t perfection. It’s creating a space that feels like *you*.
So grab those lights, call a friend, and get to work. Your pergola is waiting. And when you finally flip that switch? Trust me—you’ll be glad you did.
Frequently Asked Questions
How do I hang string lights on a pergola without drilling holes?
Use adhesive hooks, zip ties, or tension rods to secure the lights without damaging the structure. This method is ideal for renters or those who want a temporary setup for their pergola string lights.
What type of string lights work best for a pergola in 2026?
LED string lights with weatherproof ratings (IP65 or higher) are top choices for 2026, offering durability, energy efficiency, and smart features like app control. Opt for warm white or tunable RGB lights to match your outdoor ambiance.
How far apart should I space the lights on my pergola?
Space string lights 12–18 inches apart along the pergola beams for even illumination. For a layered effect, hang two staggered rows or drape them in a zigzag pattern to enhance coverage.
Can I leave pergola string lights up year-round?
Yes, but only if they’re rated for outdoor, all-weather use. Check the packaging for terms like “weather-resistant” or “all-season” to ensure they can withstand rain, snow, and sun exposure.
How do I power string lights on a pergola without nearby outlets?
Use solar-powered string lights or a heavy-duty outdoor extension cord routed discreetly along the pergola beams. For longer distances, consider a weatherproof battery pack with a timer function.
What’s the easiest way to create a professional look when hanging pergola lights?
Plan your layout with painter’s tape first, then use clips or hooks to secure lights tautly without sagging. For a polished finish, conceal cords with cable raceways or tuck them under beam covers.

