Featured image for how to hang old fashioned led string lights
Image source: tomneon.com
Hang old-fashioned LED string lights by securing them with removable hooks or adhesive clips along walls, mantels, or ceilings to instantly create a warm, nostalgic glow. For a cozy ambiance, drape them loosely in gentle waves—avoid tight tension—and layer with sheer curtains or greenery to enhance the vintage charm. Always check bulb spacing and power source accessibility before final placement to ensure even illumination and safe, hassle-free setup.
“`html
How to Hang Old Fashioned LED String Lights for Cozy Ambiance
Key Takeaways
- Plan your layout first: Sketch light placement to avoid over- or under-lighting key areas.
- Use removable hooks: Protect walls and easily adjust lights with damage-free adhesive hooks.
- Measure spacing evenly: Keep bulbs 6–12 inches apart for balanced, cozy illumination.
- Anchor ends securely: Fix start and end points tightly to prevent sagging or drooping.
- Layer with existing decor: Weave lights through plants, shelves, or frames for depth.
- Opt for warm white LEDs: Choose 2200K–2700K for a vintage, inviting glow.
Why This Matters / Understanding the Problem
There’s something magical about old fashioned LED string lights—the soft glow, the nostalgic feel, the way they turn a plain wall into a dreamy escape. Whether you’re setting up for a holiday party, creating a romantic corner on your patio, or just adding warmth to your living room, knowing how to hang old fashioned LED string lights for cozy ambiance can make all the difference.
Many people struggle with uneven spacing, tangled cords, or lights that fall down mid-party. Others worry about damaging walls or outdoor surfaces. The good news? With the right approach, you can create a warm, inviting space that feels like a page out of a storybook—without the stress.
Whether you’re using vintage-style Edison bulbs or classic round LEDs, the key is in the placement, support, and style. This guide walks you through every step to achieve that perfect, soft-lit glow that makes every moment feel special. From indoor nooks to outdoor pergolas, we’ll show you how to do it right—safely, beautifully, and with lasting results.
Pro Tip: The goal isn’t just to hang lights—it’s to create a mood. Think about where people gather, where shadows fall, and how light can guide the eye. That’s how you achieve true cozy ambiance.
What You Need
Before you start, gather the right tools and materials. Having everything ready saves time and prevents mid-project frustration. Here’s your checklist for how to hang old fashioned LED string lights for cozy ambiance:
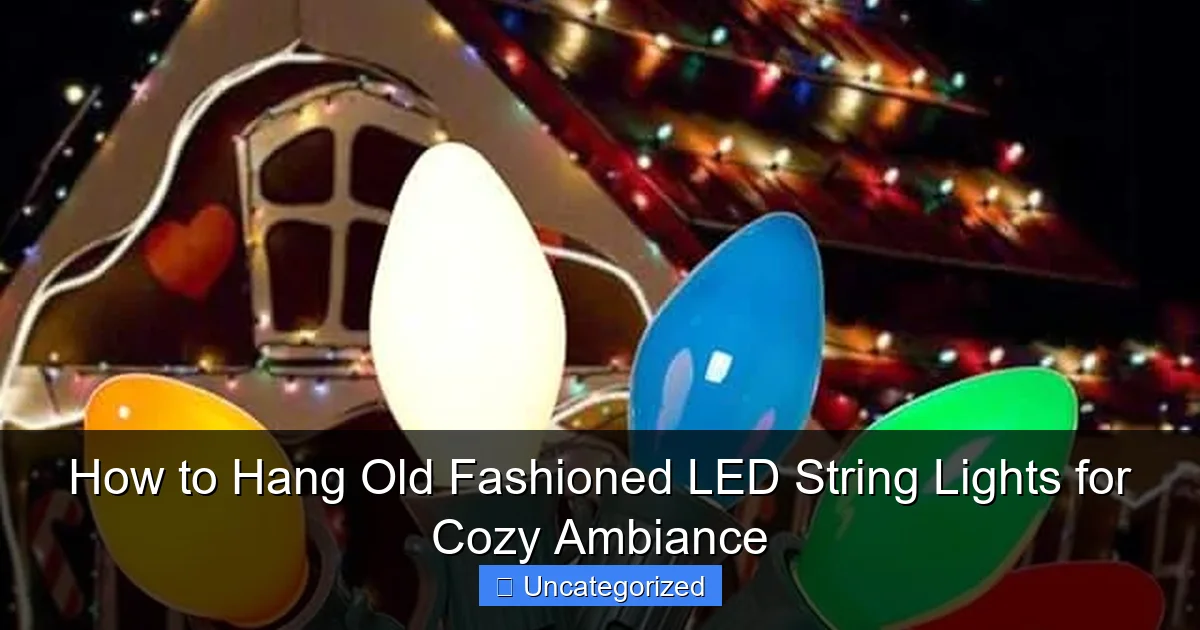
Visual guide about how to hang old fashioned led string lights
Image source: m.media-amazon.com
- Old fashioned LED string lights (indoor/outdoor rated, depending on location)
- Measuring tape (to ensure even spacing)
- Light clips or hooks (e.g., adhesive clips, screw-in hooks, gutter hooks, or cup hooks)
- Extension cord (if needed, rated for your environment)
- Power source (outlet or battery pack)
- Timer or smart plug (optional, for automatic on/off)
- Ladder or step stool (for higher placements)
- Scissors or wire cutters (to trim zip ties or adjust cords)
- Zip ties or twist ties (for securing excess cord)
- Pencil or marker (for marking placement)
- Drill or screwdriver (if using permanent hooks)
Warning: Always check that your lights are rated for your space. Indoor lights can’t handle rain, and outdoor lights may be too bright or bulky for delicate indoor use.
Bonus: If you’re using battery-powered LED string lights, you’ll skip the need for outlets—perfect for tree branches, bookshelves, or headboards. Just make sure the batteries are fresh and the switch is accessible.
Step-by-Step Guide to How to Hang Old Fashioned LED String Lights for Cozy Ambiance
Step 1: Choose Your Location and Plan the Layout
Start by deciding where you want the lights to shine. Popular spots include:
- Above a dining table or kitchen island
- Along a bedroom headboard or ceiling
- On a patio, pergola, or fence
- Wrapping around a tree trunk or branches
- Along a hallway, bookshelf, or window frame
Once you’ve picked the spot, map out the path your lights will take. Use a measuring tape to mark key points—like where each bulb or clip should go. For example, if you’re hanging lights along a wall, space clips every 12–18 inches for even distribution.
Sketch a quick diagram on paper or use painter’s tape to mark the route. This helps avoid over-hanging or gaps. Remember: the how to hang old fashioned LED string lights for cozy ambiance secret is in the planning—not just the hanging.
Pro Tip: For a cascading effect, hang lights in a gentle “S” curve instead of a straight line. It softens the look and adds visual interest.
Step 2: Test the Lights and Power Source
Before installing anything, plug in your string lights and test every bulb. Nothing ruins the mood faster than discovering a dead section after you’ve spent an hour hanging them.
Check for:
- Flickering or dim bulbs
- Damaged wires or frayed ends
- Proper voltage and compatibility with your outlet
If your lights are battery-powered, turn them on and make sure they last at least a few hours. Swap batteries if needed.
Next, locate your nearest power source. If it’s far, use an extension cord—but keep it hidden or secured to avoid tripping hazards. For outdoor use, use a GFCI outlet or a weatherproof extension cord.
Pro tip: Place the plug end of the lights near the outlet, not at the end of the line. This reduces cord tension and makes plugging in easier.
Step 3: Select the Right Hanging Method for Your Surface
Not all surfaces are the same. The way you hang your lights depends on what they’re going on. Here’s how to match your method to your space:
For drywall or painted walls (indoor):
Use adhesive light clips (like Command™ Outdoor Light Clips). They hold up to 1 lb and leave no marks. Press firmly for 30 seconds and wait 1 hour before hanging lights.
For wood, brick, or concrete (indoor/outdoor):
Use screw-in cup hooks or stainless steel eye hooks. Pre-drill small pilot holes to avoid cracking. These are perfect for patios, pergolas, or basement beams.
For gutters or eaves (outdoor):
Use gutter hooks that clip over the edge. No drilling needed—just snap them on. Great for holiday lights or year-round ambiance.
For trees or fences:
Use zip ties (for temporary) or tree-friendly clips (for long-term). Avoid nails or screws—they can damage bark and invite pests.
For ceilings (indoor):
Use ceiling hooks or adhesive ceiling clips. For vaulted ceilings, use a ladder and work from the center outward.
Choose clips that match your light style. Vintage-style bulbs often need wider clips to avoid touching and overheating.
Step 4: Mark and Install Hooks or Clips
Now it’s time to put in the support points. Use your measuring tape and pencil to mark where each clip or hook goes.
For straight lines (like along a wall or ceiling):
- Measure the total length of your light strand.
- Divide by 12–18 inches to find how many clips you need.
- Mark every 12–18 inches along the path.
For curves or corners:
- Place clips more frequently (every 8–10 inches) to maintain shape.
- Use flexible clips or zip ties to bend around edges.
Install each clip or hook according to its instructions. For adhesive clips, clean the surface with rubbing alcohol first. For screw-in hooks, tighten just enough—over-tightening can crack wood or drywall.
Pro tip: Install all clips before hanging lights. This lets you adjust spacing without struggling with a dangling strand.
Step 5: Hang the Lights with Proper Tension
Start at the power end—the plug side—and work your way to the end. This keeps the cord from pulling on the clips.
Hang each bulb or socket into the clip. Don’t stretch the lights too tight—this can damage wires or pull clips loose. Aim for a slight sag between clips, like a gentle wave.
For vintage-style bulbs with wider bases:
- Use clips with wider openings.
- Make sure bulbs don’t touch each other or the surface—this prevents overheating.
If you’re wrapping lights around a tree or post:
- Start at the base and spiral upward.
- Use zip ties every 12 inches to secure the strand.
- Keep spacing even—don’t bunch up at the bottom.
For ceiling installations:
- Use a ladder to reach high points.
- Have a helper hand you the lights as you go.
- Check for evenness from different angles.
Step 6: Manage Cords and Hide Wires
Exposed cords break the cozy vibe. Here’s how to keep them tidy:
For wall-to-outlet runs:
Use cord clips or adhesive raceways to run the cord along the baseboard or wall. Paint them to match your trim for a seamless look.
For ceiling drops:
Use invisible cord covers or tuck the cord behind crown molding. For exposed beams, wrap the cord in twine or burlap for a rustic touch.
For outdoor use:
Use weatherproof cord covers or run the cord through PVC conduit. Keep it off the ground to avoid tripping and moisture damage.
Use zip ties to bundle excess cord at the end of the strand. Cut off the tails with scissors. For a cleaner look, hide the bundle behind furniture or in a planter.
Pro tip: Leave a small loop near the plug so you can unplug without pulling on the lights.
Step 7: Add a Timer or Smart Control
To make your lights feel effortless, add a timer or smart plug. This is a game-changer for how to hang old fashioned LED string lights for cozy ambiance—you’ll never forget to turn them off again.
Options include:
- Plug-in timer: Set to turn on at dusk and off at midnight.
- Smart plug: Control via app or voice (Alexa, Google Home).
- Sunrise/sunset settings: Automatically adjusts with daylight.
For battery-powered lights, use a timer switch or choose a model with a built-in timer.
Bonus: Set your lights to dim or change color (if compatible) for different moods—warm white for dinner, soft amber for reading.
Step 8: Test and Adjust for the Perfect Glow
Step back and admire your work—but don’t stop there. Turn on the lights and look for:
- Uneven spacing or sagging sections
- Bulbs that are too bright or too dim
- Cords that are still visible
- Areas that feel too dark or too bright
Make small adjustments: tweak a clip, add a dimmer, or reposition a bulb. Sometimes moving one light an inch changes the whole feel.
Ask yourself: Does this feel cozy? Inviting? Relaxing? If not, tweak until it does.
Pro Tips & Common Mistakes to Avoid
Even the best plans can go sideways. Here are expert insights to keep your old fashioned LED string lights looking perfect:
Pro Tip 1: Use warm white (2700K–3000K) or amber LEDs for true cozy ambiance. Cool white feels clinical, not cozy.
Pro Tip 2: Layer your lights. Combine string lights with candles, lanterns, or floor lamps for depth. One light source is flat; multiple sources feel rich.
Pro Tip 3: For outdoor use, choose IP65-rated lights. They’re waterproof and dustproof—perfect for rain or snow.
Pro Tip 4: Use a light dimmer (if compatible) to control brightness. Too bright kills the cozy vibe.
Common Mistakes:
- Hanging too tightly: Stretching the cord damages internal wires and pulls clips loose.
- Ignoring power source location: Running cords across walkways is dangerous and unsightly.
- Using indoor lights outdoors: They’ll short out in rain or humidity.
- Overcrowding bulbs: Too many lights in one spot feels chaotic, not cozy.
- Forgetting to test first: A dead strand is frustrating—test before you hang!
- Using nails on trees: They harm the bark and can cause disease. Use zip ties or tree-safe clips instead.
Bonus: For a vintage farmhouse look, hang lights on a clothesline across your patio with mason jars or paper lanterns in between. It’s rustic, charming, and totally Instagram-worthy.
FAQs About How to Hang Old Fashioned LED String Lights for Cozy Ambiance
Q: Can I hang old fashioned LED string lights on a brick wall?
Yes! Use stainless steel cup hooks or masonry screws. Drill a small pilot hole first, then insert the hook. Avoid hammering nails—they can crack the brick. Adhesive clips also work for temporary setups.
Q: How do I prevent string lights from sagging?
Space your clips every 12–18 inches and avoid overloading one section. Use a lightweight strand (under 5 lbs total) for adhesive clips. For longer runs, add extra support in the middle. A slight sag is okay—it adds softness!
Q: Are LED string lights safe to leave on overnight?
Yes, LEDs generate very little heat and are safe for extended use. However, always use a timer to avoid wasting energy and to prevent wear on the circuit. Never leave them on if you’re away for days.
Q: Can I connect multiple strands together?
Only if they’re designed for it. Check the packaging for “end-to-end” or “connectable” labels. Most old fashioned LED string lights support 2–4 strands max. Overloading can burn out the first strand.
Q: How do I hang lights on a high ceiling without a ladder?
Use a light-hanging pole (like a paint roller extension) with a clip attachment. Or, hire a professional for safety. Never stand on a wobbly chair or table.
Q: What’s the best way to store string lights?
Wrap them around a piece of cardboard or a light reel to prevent tangling. Store in a dry, cool place. Label the box with the length and style (e.g., “25 ft warm white vintage”).
Q: Can I use old fashioned LED lights for year-round decor?
Absolutely! Choose a neutral design (like clear bulbs or warm white) and avoid holiday-specific colors. Hang them in a living room, bedroom, or outdoor dining area for everyday coziness.
Final Thoughts
Hanging old fashioned LED string lights isn’t just about decoration—it’s about crafting a feeling. A warm glow over your dining table. A soft shimmer above your bed. A twinkle in the trees as you sip coffee on a cool morning.
Now that you know how to hang old fashioned LED string lights for cozy ambiance, you can create spaces that invite conversation, relaxation, and joy. Remember: plan your layout, choose the right clips, manage cords, and add a timer for effortless magic.
Start small. Try one corner of your room or a single tree branch. Once you see how the light transforms the space, you’ll be hooked—just like everyone else who’s discovered the power of soft, vintage-style glow.
So grab your lights, your clips, and a ladder. Turn off the harsh overheads. Plug in. And let the cozy begin.
Action Step: Pick one area tonight—your bedroom headboard, a bookshelf, or a porch railing—and hang your first strand. See how it feels. Then expand. One light at a time, you’ll build a home that feels like a hug.
“`

