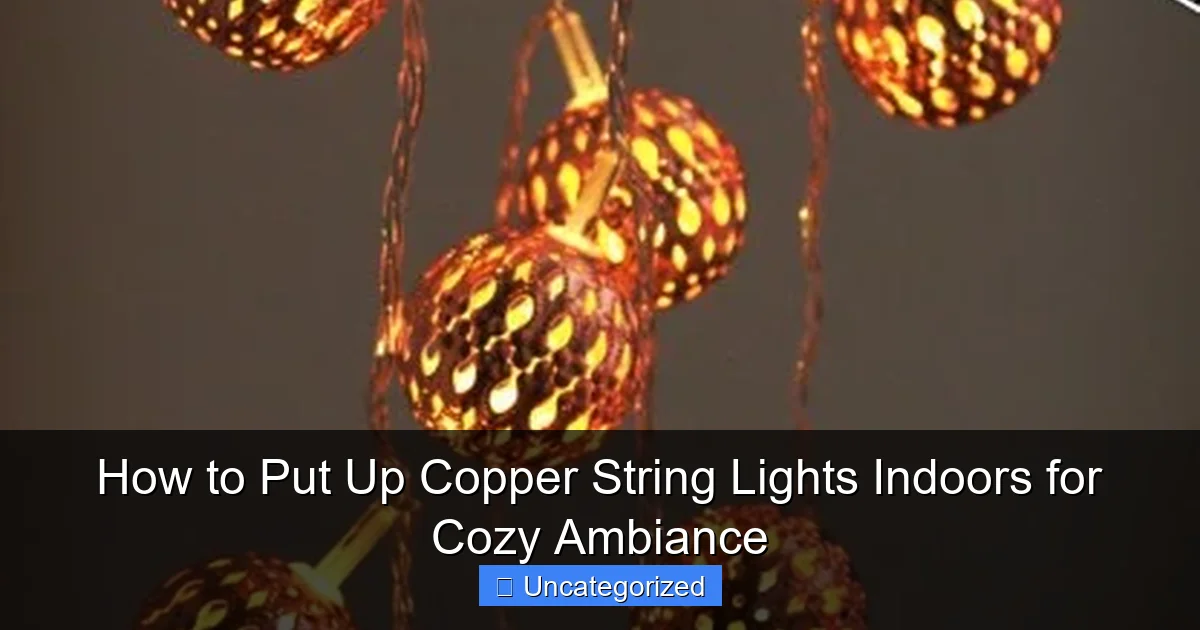
Featured image for how to put up copper string lights indoors
Image source: glow.co.uk
Transform your indoor space with copper string lights by choosing a strategic layout—along walls, ceilings, or furniture—for maximum cozy ambiance. Use adhesive hooks, nails, or clips to secure the lights safely, ensuring even spacing and avoiding overstretching the delicate copper wires. Plug into a dimmer or smart outlet to effortlessly control brightness and set the perfect mood.
Key Takeaways
- Plan your layout first: Sketch light placement to avoid mid-installation changes.
- Use adhesive hooks: Secure lights without damaging walls or ceilings.
- Measure twice, hang once: Ensure even spacing and desired coverage.
- Hide cords creatively: Tuck wires behind shelves or moldings for clean look.
- Layer with other lighting: Boost ambiance by pairing with lamps or candles.
- Test lights before hanging: Check bulbs and connections for full functionality.
📑 Table of Contents
- The Magic of Copper String Lights: Creating Indoor Ambiance
- Choosing the Right Copper String Lights for Your Space
- Planning Your Installation: Design and Safety First
- Step-by-Step Installation Techniques for Different Surfaces
- Styling Your Copper String Lights for Maximum Impact
- Maintenance, Troubleshooting, and Long-Term Care
The Magic of Copper String Lights: Creating Indoor Ambiance
There’s something undeniably magical about the warm glow of copper string lights. Unlike harsh overhead lighting, these delicate strands of light transform ordinary spaces into inviting sanctuaries of comfort and style. The soft, amber radiance of copper lights has the unique ability to make a room feel simultaneously cozy and sophisticated, whether you’re curling up with a good book, entertaining guests, or simply unwinding after a long day. As interior designers increasingly turn to layered lighting techniques, copper string lights have emerged as a versatile tool for adding that final, finishing touch to any indoor space.
From minimalist modern apartments to rustic farmhouse kitchens, copper string lights adapt effortlessly to various design aesthetics. Their metallic finish complements wood, stone, and fabric textures while adding a touch of warmth that cool-toned LEDs often lack. More than just decorative elements, these lights serve functional purposes too—creating task lighting over kitchen islands, defining spaces in studio apartments, or providing gentle illumination for nighttime navigation. In this comprehensive guide, we’ll explore how to put up copper string lights indoors to achieve that perfect ambiance while avoiding common installation pitfalls. Whether you’re a DIY novice or an experienced decorator, you’ll discover creative solutions for every room in your home.
Choosing the Right Copper String Lights for Your Space
Understanding Different Light Types
Before you start hanging your lights, it’s crucial to understand the different types of copper string lights available. LED copper string lights dominate the market due to their energy efficiency, cool operation, and long lifespan—typically lasting 25,000 to 50,000 hours. These come in various styles:
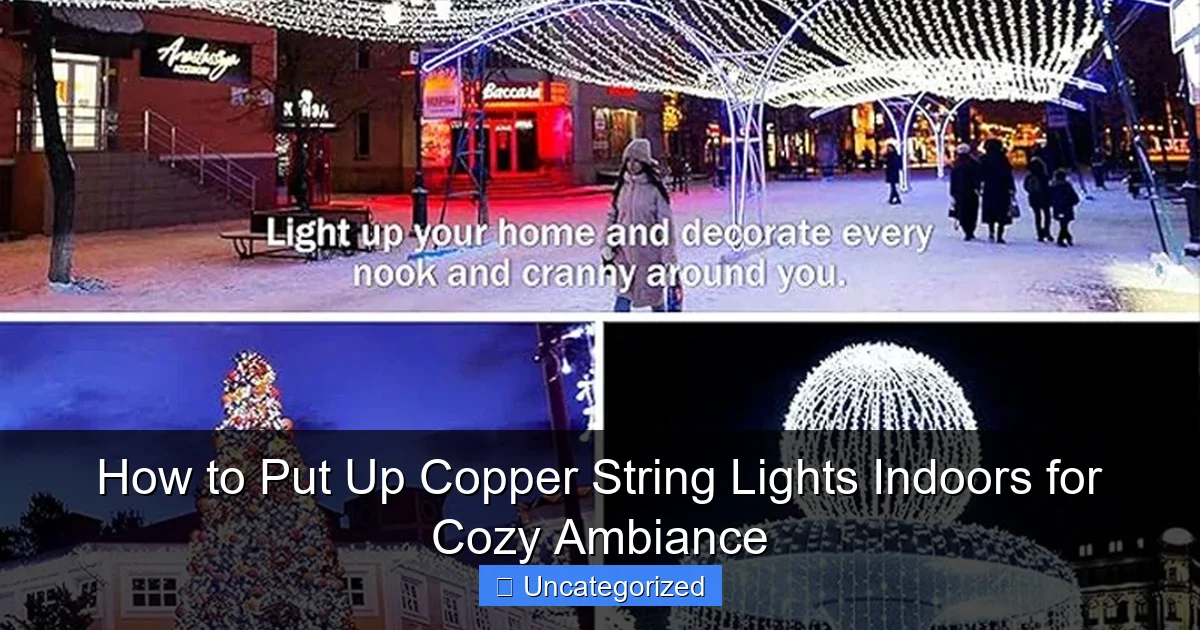
Visual guide about how to put up copper string lights indoors
Image source: cdn.shopify.com
- Fairy lights: Ultra-fine wires with tiny bulbs spaced 2-4 inches apart, perfect for delicate installations like draping over shelves or weaving through plants.
- Mini lights: Slightly larger bulbs (about 5mm) with more visible illumination, ideal for general room ambiance.
- Edison bulbs: Vintage-style exposed filaments that create a nostalgic, industrial-chic look when clustered together.
- Orb lights: Spherical bulbs offering 360-degree illumination, great for creating focal points.
For those who prefer the classic glow of incandescence, traditional copper wire lights with filament bulbs are available, though they consume more energy and get warmer during operation. Consider your room’s function—kitchen lights might need higher lumens for task lighting, while bedroom lights can be softer and more diffused.
Length, Spacing, and Power Considerations
When calculating how much lighting you need, measure your installation area and add 10-20% extra for draping effects. For example, a 16-foot wall might require a 20-foot strand for proper coverage. Bulb spacing significantly impacts the final look:
- 2-3 inch spacing: Creates a dense, twinkling effect
- 4-6 inch spacing: Provides balanced illumination with visible negative space
- 8+ inch spacing: Works for outlining structures or architectural features
Power sources also matter. Battery-operated lights offer flexibility for temporary installations but require regular battery changes. Plug-in models need accessible outlets, though extension cords can help. Some premium options feature USB power, allowing connection to power banks or smart home systems. Always check the maximum number of strands you can connect end-to-end—most manufacturers recommend no more than 3-5 connected strands to avoid overloading circuits.
Quality Indicators to Look For
Not all copper string lights are created equal. High-quality options will have:
- Copper-clad or pure copper wiring (check product descriptions)
- Weatherproof ratings (IP44 or higher for bathroom use)
- UL or ETL certification for electrical safety
- Replaceable bulbs (if applicable)
- Low-voltage transformers (for plug-in models)
Read reviews to check for common issues like bulbs burning out prematurely, wires tangling easily, or connectors failing. A good test is to gently bend the wire—quality copper should flex without kinking or breaking.
Planning Your Installation: Design and Safety First
Mapping Your Lighting Layout
Successful installations begin with thoughtful planning. Start by sketching your room and marking where you want lights. Consider these common applications:
- Ceiling perimeter: Creates a halo effect that makes rooms feel larger
- Behind furniture: Adds depth and definition to sofas, beds, or headboards
- Along architectural features: Highlights crown molding, beams, or stair railings
- Window treatments: Woven through curtains or draped along the frame
- Focal points: Clustered over dining tables, reading nooks, or entryways
Use painter’s tape to temporarily mark your planned path on walls or furniture. This “dry run” helps visualize the final look and identify potential obstacles like vents, outlets, or artwork. For ceiling installations, measure the distance from your planned starting point to the nearest outlet, adding 1-2 feet for plug clearance.
Electrical Safety Essentials
Safety should never be compromised for aesthetics. Follow these critical precautions:
- Check wattage: Never exceed 80% of your circuit’s capacity. Most household circuits handle 15-20 amps (1800-2400 watts). Calculate total wattage of connected devices.
- Use proper extension cords: If needed, choose cords rated for the total wattage of your lights, with the same or larger gauge (lower number) as the original cord.
- Inspect before installing: Look for frayed wires, loose bulbs, or damaged insulation. Discard any faulty sets.
- Avoid overloading: Don’t daisy-chain more than the manufacturer’s recommended number of strands.
- Keep away from water: Even “waterproof” lights shouldn’t be installed where they’ll get direct water exposure.
For permanent installations, consider hiring an electrician to add dedicated outlets or low-voltage lighting systems. This is especially important for high-usage areas like kitchens or media rooms where lights might be on for extended periods.
Choosing the Right Installation Method
Your installation approach will depend on your surface type and desired permanence:
- Removable options: Adhesive hooks, removable putty, or tension rods work well for renters or temporary installations
- Semi-permanent: Nail-in hooks, screw-in anchors, or picture rail systems provide more stability
- Permanent solutions: Hardwiring requires professional installation but offers the cleanest look
Consider the weight of your light strand—most copper string lights are lightweight (under 1lb for 20ft), but heavier Edison-style bulbs may need stronger support. For textured walls, use anchors or longer screws to ensure secure mounting.
Step-by-Step Installation Techniques for Different Surfaces
On Walls and Ceilings
Walls and ceilings offer the most flexibility for copper string light installations. For smooth surfaces like drywall or plaster:
- Clean the surface with isopropyl alcohol and let dry completely.
- Use clear adhesive hooks (rated for at least 1lb) spaced every 12-18 inches. For heavier strands, use small nails or screws with plastic anchors.
- For a seamless look, run lights along the ceiling-wall junction, using hooks every 2-3 feet.
- Create a “draped” effect by installing hooks in a zig-zag pattern rather than straight lines.
- Secure the plug end near an outlet, using additional hooks to manage excess cord.
For textured walls, use picture hanging strips (like Command strips) or small finishing nails. The key is to distribute weight evenly—avoid placing all stress on a single hook. For ceiling installations, consider using invisible fishing line threaded through the copper wire’s loops for a “floating” effect.
On Furniture and Architectural Features
Furniture lighting adds dimension and focus. For wooden furniture:
- Use small brad nails or wood screws with cup hooks along the back edges of headboards, bookshelves, or dressers.
- For delicate pieces, try museum putty or non-permanent adhesive clips.
- Weave lights through the slats of a headboard or along the top of a bookshelf, securing every 6-8 inches.
- For glass or metal furniture, use magnetic clips or removable suction hooks.
Architectural features like crown molding, beams, or stair railings can be illuminated by:
- Using bendable copper wire to follow curves and contours
- Installing mini track lighting clips along linear features
- Creating a “frame” effect around doorways or windows with lights
Creative Solutions for Challenging Spaces
Not all spaces are lighting-friendly. Here are solutions for common challenges:
- No nearby outlets: Use battery-operated lights or install a discreet extension cord along baseboards (secured with cord clips).
- High ceilings: Use a telescoping pole with a hook attachment to install ceiling lights, or focus on wall installations.
- Rental restrictions: Try tension rod systems in windows or doorways, or use adhesive hooks that leave no residue.
- Curved surfaces: Opt for flexible copper wire lights or break the installation into multiple straight sections.
- Large open spaces: Create a “lighting grid” with multiple strands crisscrossing the room at different heights.
For rooms with many obstacles, consider cluster installations—several small groupings of lights rather than one continuous strand. This approach works well in living rooms with multiple seating areas or bedrooms with separate functional zones.
Styling Your Copper String Lights for Maximum Impact
Layering with Other Light Sources
Copper string lights work best when integrated into a layered lighting scheme. Combine them with:
- Ambient lighting: Overhead fixtures or floor lamps provide base illumination
- Task lighting: Desk lamps or under-cabinet lights for functional areas
- Accent lighting: Spotlights or picture lights to highlight artwork
For example, in a bedroom, use copper lights along the headboard (accent), a floor lamp in the corner (ambient), and a reading light on the nightstand (task). This layering creates depth and allows you to adjust lighting for different activities. A good rule is to have your copper lights provide about 20-30% of your room’s total light output.
Creating Focal Points and Visual Interest
Strategic placement can transform ordinary spaces into showpieces. Try these techniques:
- Backlit panels: Install lights behind a sheer curtain, fabric panel, or translucent screen to create a soft, diffused glow.
- Canopy effects: Drape lights from the ceiling over a dining table or bed, creating a “tent” of light.
- Wall art integration: Weave lights through a gallery wall or around a large mirror for added dimension.
- Staircase drama: Run lights along the handrail or underneath steps for a magical effect.
- Plant enhancement: Wrap lights around potted plants or hang them in front of a green wall.
For seasonal decor, consider using copper lights as a base that you can modify with additional elements—add paper snowflakes in winter, pastel garlands in spring, or seashells in summer. The copper glow provides a consistent foundation that works year-round.
Color Temperature and Bulb Style Pairings
The warmth of copper lights (typically 2200K-3000K) pairs beautifully with certain colors and materials:
- Wood tones: Light maple, walnut, or reclaimed wood enhance the warm glow
- Textiles: Linen, wool, and velvet fabrics absorb and reflect the light beautifully
- Metals: Pair with brass, gold, or black iron fixtures for a cohesive look
- Paint colors: Deep blues, warm grays, and earthy greens make copper lights pop
For a modern twist, try contrasting copper lights against cool colors like navy, emerald, or charcoal. The warm/cool contrast creates visual interest while maintaining coziness. In minimalist spaces, let the lights be the focal point by keeping surrounding decor simple.
Maintenance, Troubleshooting, and Long-Term Care
Cleaning and Storage
Proper maintenance extends the life of your copper string lights. For routine cleaning:
- Unplug lights and let cool completely
- Use a soft, dry microfiber cloth to wipe bulbs and wires
- For stubborn grime, lightly dampen the cloth with isopropyl alcohol
- For copper wire, use a copper cleaner to restore shine (test on a small area first)
- Never submerge lights or use abrasive cleaners
For storage between seasons:
- Wind lights around a cardboard template or light storage reel to prevent tangling
- Store in a cool, dry place away from direct sunlight
- Use sealed plastic bags to prevent dust accumulation
- Label strands by room and length for easy retrieval
Common Issues and Solutions
Even quality lights can develop problems. Here’s how to troubleshoot:
| Problem | Possible Cause | Solution |
|---|---|---|
| Flickering lights | Loose bulb, faulty connection, or power fluctuation | Check all bulbs are secure; test with different outlet; replace damaged bulbs |
| Partial strand not working | Broken wire or short circuit | Inspect for damaged insulation; replace entire strand if repair isn’t possible |
| Copper wire turning green | Oxidation (normal for real copper) | Use copper cleaner; consider clear coat sealant for future strands |
| Overheating | Overloaded circuit or poor ventilation | Unplug immediately; reduce number of connected strands; ensure proper airflow |
| Adhesive hooks falling | Surface not cleaned properly or weight exceeds rating | Clean surface again; use stronger hooks or alternative mounting method |
For LED lights, if one bulb fails, it often affects the entire strand due to series wiring. Some premium models have “shunt” technology that allows the rest of the strand to work even if one bulb fails—worth considering for high-maintenance installations.
Upgrading and Expanding Your System
As your lighting needs evolve, consider these enhancements:
- Smart controls: Add Wi-Fi or Bluetooth controllers to adjust brightness and set timers
- Color-changing bulbs: Use RGB LEDs with copper housings for versatility
- Modular systems: Install track lighting with copper wire sections that can be rearranged
- Outdoor integration: Use weatherproof copper lights to create seamless indoor/outdoor lighting schemes
For permanent installations, consider having an electrician install low-voltage copper lighting tracks in ceilings or walls. These provide the cleanest look and easiest maintenance for whole-home lighting schemes.
With proper installation and care, copper string lights can provide years of warm, inviting illumination. Whether you’re creating a cozy reading nook, romantic bedroom ambiance, or festive gathering space, these versatile lights offer endless possibilities for enhancing your indoor environment. The key is thoughtful planning, safe installation, and creative styling that complements your unique space and personal taste. By following these guidelines, you’ll achieve that perfect glow that makes every room feel like a sanctuary.
Frequently Asked Questions
How do I hang copper string lights indoors without damaging walls?
Use removable adhesive hooks, nails, or picture hangers for a damage-free setup. For a secure hold, position hooks under wall studs or use sticky strips rated for the lights’ weight.
Where should I place copper string lights for the best ambiance?
Drape them along headboards, windows, or shelves to create a warm, cozy glow. Avoid high-traffic areas to prevent accidental snagging or damage to the delicate copper wires.
Can I use copper string lights indoors on a ceiling?
Yes, but use ceiling hooks or adhesive clips designed for overhead mounting. Ensure the lights are UL-listed for indoor use and secure them tightly to avoid sagging or falling.
How do I power copper string lights in the middle of a room?
Use an extension cord with a low-profile plug or a power strip to reach outlets discreetly. Conceal cords under rugs or baseboards for a tidy look while avoiding tripping hazards.
Are copper string lights safe for indoor use around fabrics?
Yes, as long as the lights are cool to the touch (LEDs are safest) and kept away from direct contact with flammable materials like curtains. Opt for battery-powered options for added safety.
How do I style copper string lights indoors for a minimalist look?
Hang them in straight lines or geometric patterns using clear fishing line or tiny hooks. Stick to shorter strands or cluster them in small groups to maintain a clean, subtle aesthetic.

