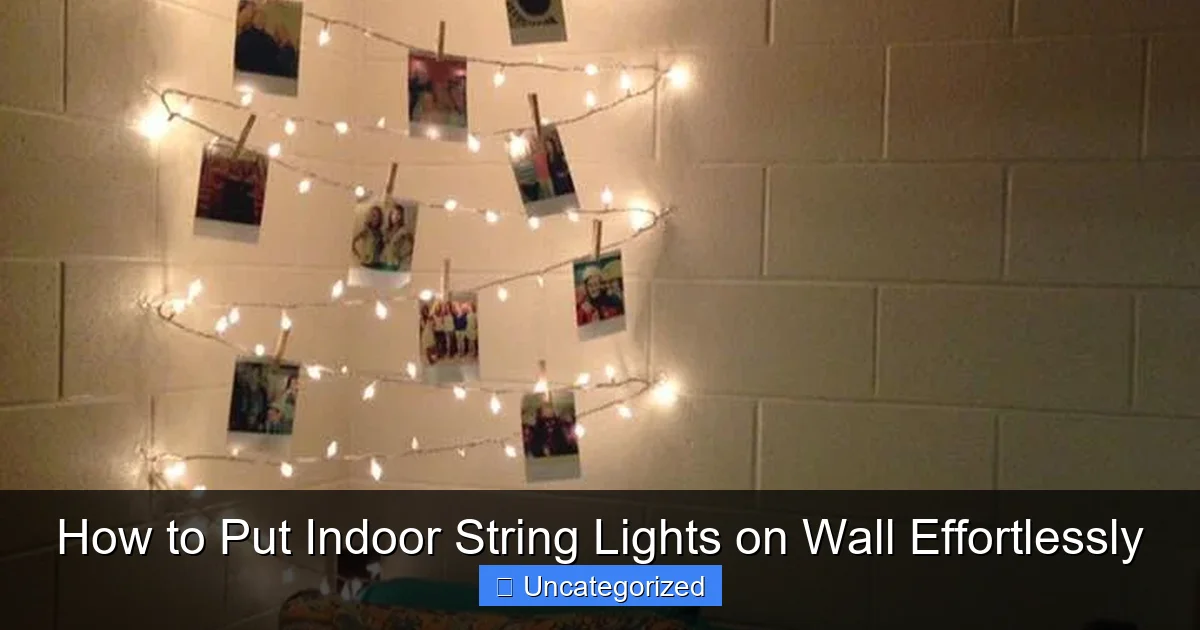
Featured image for how to put indoor string lights on wall
Image source: homebnc.com
Transform your space in minutes by using adhesive hooks or removable mounting strips to hang indoor string lights—no nails, no damage, no hassle. Simply plan your layout, secure the lights at key points, and plug in for instant ambiance. This effortless method works on any wall type and keeps your decor flexible and renter-friendly.
Key Takeaways
- Plan your layout first: Sketch light placement to avoid uneven spacing or gaps.
- Use adhesive hooks: Secure lights without damaging walls or paint.
- Measure cord length: Ensure enough reach for outlets and desired coverage.
- Anchor with clips: Keep lights taut and straight for a clean look.
- Test before installing: Check bulbs and connections to avoid rework later.
- Hide cords creatively: Use molding or fabric to conceal wires neatly.
📑 Table of Contents
- How to Put Indoor String Lights on Wall Effortlessly
- Choosing the Right Type of Indoor String Lights
- Essential Tools and Materials for Installation
- Step-by-Step Installation Methods
- Creative Layout Ideas and Design Tips
- Maintaining and Removing Your String Lights
- Data Table: Recommended Hardware by Wall Type and Light Weight
How to Put Indoor String Lights on Wall Effortlessly
Imagine transforming your living room, bedroom, or home office into a cozy, inviting sanctuary with the soft, warm glow of indoor string lights. These versatile decorative elements have become a staple in modern interior design, offering an affordable and easy way to elevate any space. Whether you’re aiming for a minimalist aesthetic, a boho-chic vibe, or a festive holiday atmosphere, string lights can instantly add charm and personality to your walls. But while the end result is undeniably beautiful, the process of hanging them can feel daunting—especially if you’re unsure of the best methods, tools, or techniques to use without damaging your walls or creating a tangled mess.
The good news? With the right approach, putting indoor string lights on your wall can be simple, safe, and even enjoyable. From choosing the right type of lights and hardware to mastering creative layouts and ensuring long-term durability, this guide will walk you through every step of the process. Whether you’re a DIY novice or a seasoned decorator, you’ll discover practical tips, expert advice, and innovative ideas to help you achieve a professional-looking installation. Say goodbye to crooked lines, falling lights, and unsightly nail holes—this is your comprehensive blueprint for effortlessly enhancing your space with indoor string lights.
Choosing the Right Type of Indoor String Lights
Before you even pick up a hammer or adhesive hook, it’s crucial to select the right kind of string lights for your space and needs. Not all string lights are created equal, and the type you choose will directly impact how easy—or difficult—the installation process will be.
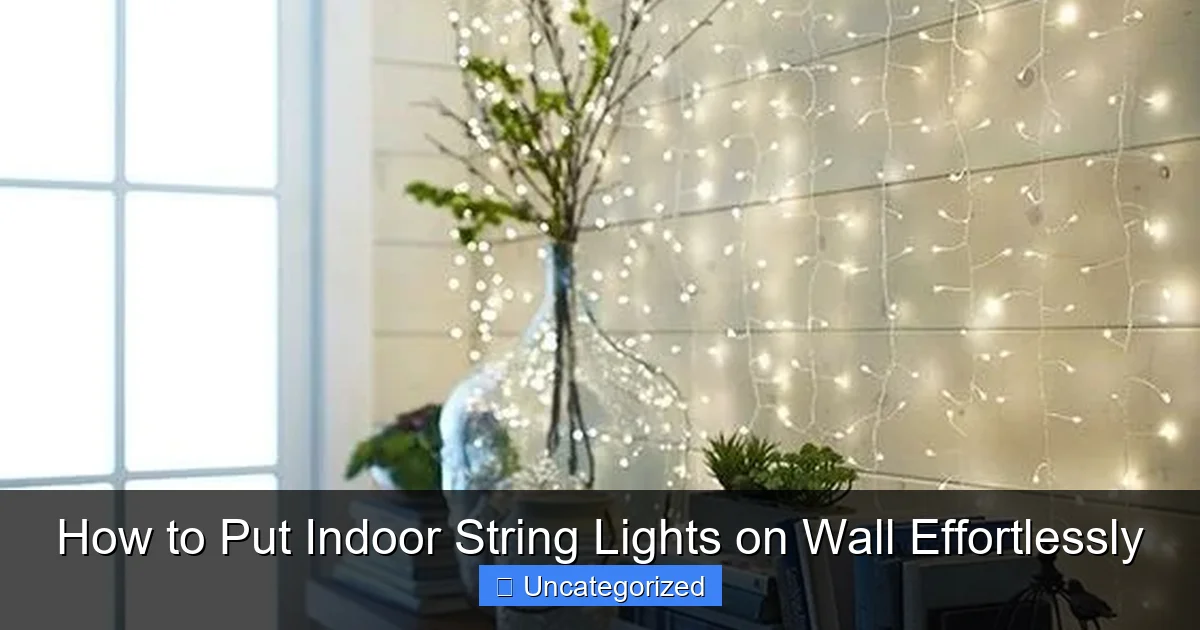
Visual guide about how to put indoor string lights on wall
Image source: digsdigs.com
Types of Indoor String Lights
There are several popular varieties of indoor string lights, each with unique features:
- LED String Lights: Energy-efficient, cool to the touch, and available in a range of colors and brightness levels. Ideal for year-round use and safe near fabrics or paper.
- Incandescent String Lights: Offer a warm, nostalgic glow but generate more heat and consume more power. Best for short-term or seasonal use.
- Fairy Lights: Delicate, small-bulb strings perfect for subtle ambiance. Often battery-operated, making them ideal for renters or temporary setups.
- Smart String Lights: Wi-Fi or Bluetooth-enabled, allowing you to control brightness, color, and timing via smartphone apps. Great for tech-savvy decorators.
- Curtain Lights: Multiple strands hanging vertically from a single header, creating a cascading effect—perfect for windows or behind headboards.
Key Features to Consider
When evaluating your options, keep these factors in mind:
- Length: Measure your wall space carefully. A 20-foot string might sound generous, but if you’re creating a zigzag pattern or covering a large area, you may need multiple strands or a longer one.
- Power Source: Plug-in lights offer consistent brightness but require access to an outlet. Battery-powered lights offer flexibility but need regular battery changes.
- Bulb Spacing: Lights with bulbs spaced 4-6 inches apart provide even illumination. Closer spacing creates a denser glow, while wider spacing offers a more minimalist look.
- Water Resistance: Even for indoor use, look for lights rated for indoor/outdoor use. They’re typically more durable and better sealed against dust and moisture.
- Connectivity: Some string lights can be connected end-to-end (up to 5-10 strands, depending on the model), allowing you to cover larger areas without multiple power sources.
Example Scenario: Bedroom Makeover
Suppose you’re decorating a 12-foot-wide bedroom wall behind your bed. You want a romantic, ambient glow for nighttime reading and relaxation. In this case, a 20-foot warm white LED string light with 6-inch bulb spacing and a dimmer switch would be ideal. If you have a headboard, consider curtain lights that drape over it. For a bohemian touch, mix fairy lights with larger globe bulbs in a staggered pattern.
Essential Tools and Materials for Installation
Once you’ve selected your lights, gather the right tools and hardware. Using the proper equipment not only makes installation easier but also ensures your lights stay securely in place without damaging your walls.
Basic Installation Tools
- Measuring Tape: Essential for planning layout and ensuring symmetry.
- Pencil or Painter’s Tape: Use to mark anchor points or outline your design before installing hardware.
- Level (optional): For straight, horizontal lines or symmetrical patterns.
- Scissors or Wire Cutters: For trimming excess cord or cutting adhesive strips.
- Extension Cord or Power Strip (if needed): To reach distant outlets without overloading circuits.
Hardware and Fasteners
The choice of hardware depends on your wall type and how permanent you want the installation to be:
- Adhesive Hooks (Command Strips or Hooks): The go-to choice for renters and those who want a damage-free solution. Available in various weight ratings (e.g., 0.5 lb, 1 lb, 3 lb). Ideal for lightweight LED or fairy lights.
- Push Pins or Thumbtacks: Quick and easy for temporary setups. Best for drywall or plaster walls. Use sparingly to avoid excessive holes.
- Small Nails or Picture Hangers: Suitable for permanent installations or heavier string lights. Use fine-gauge nails (e.g., 18-gauge) to minimize wall damage.
- Wall Anchors (for drywall): If using screws, install anchors first to prevent pulling out under load.
- Clips and Cable Clamps: Transparent or white plastic clips designed specifically for string lights. They snap onto the wire and attach via adhesive or nail.
- Zip Ties or Twist Ties: For bundling excess cord or securing lights to frames, shelves, or furniture.
<
Wall Type Considerations
Different wall materials require different approaches:
- Drywall/Plaster: Adhesive hooks or small nails work well. Avoid over-tightening screws.
- Concrete or Brick (indoor walls): Use masonry screws or heavy-duty adhesive strips rated for rough surfaces.
- Wood Paneling or Wainscoting: Small nails or screws are safe and secure. Pre-drill holes to prevent splitting.
- Painted Walls: Always test adhesive hooks on a small area first to ensure paint won’t peel.
Pro Tip: Test Before You Commit
Before installing any hardware, test your lights by temporarily taping them to the wall with painter’s tape. This allows you to visualize the layout, check bulb spacing, and ensure the brightness is right. It also helps you determine exactly where to place hooks or nails.
Step-by-Step Installation Methods
Now that you have your lights and tools ready, it’s time to install. Below are several proven methods, each suited to different design goals and wall types.
Method 1: Adhesive Hooks for a Clean, Damage-Free Look
This is the most popular method for renters and those who want a temporary or easily removable setup.
- Plan your layout. Decide whether you want horizontal lines, vertical drops, a zigzag pattern, or a geometric shape (e.g., triangle, square).
- Use a measuring tape and pencil to mark hook locations. For a straight line, space hooks every 12–18 inches. For curves or angles, place hooks at key turning points.
- Clean the wall surface with rubbing alcohol to remove dust and grease, ensuring better adhesion.
- Remove the backing from the adhesive hook and press it firmly against the wall for 30 seconds. Let it cure for at least 1 hour before hanging lights (follow package instructions).
- Hang the string lights by looping the wire over each hook. For extra security, use small zip ties to fasten the wire to the hook.
- Plug in the lights and adjust the layout as needed.
Method 2: Push Pins for Quick and Simple Setup
Ideal for lightweight fairy lights or temporary holiday decorations.
- Mark pin locations with a pencil. Space pins 6–10 inches apart for even distribution.
- Gently press pins into the wall at a 45-degree angle to prevent slipping.
- Loop the string light wire over each pin. For added grip, wrap the wire around the pin once.
- Use a level to ensure horizontal lines are straight.
- For longer runs, secure the power cord to the wall with additional pins or clips.
Method 3: Nails or Screws for a Permanent Installation
Best for heavy-duty lights or long-term decor.
- Mark nail locations with a pencil. Use a level for straight lines.
- Hammer small nails (or screw in picture hangers) into the wall. For drywall, use anchors if the lights exceed 2 lbs.
- Leave the nail head slightly protruding (about 1/4 inch) so the wire can loop over it.
- Hang the lights, ensuring the wire is taut but not stretched.
- Use wire clips every 2–3 feet for extra support.
Method 4: Curtain or Canopy Style Behind Furniture
Perfect for headboards, shelves, or above desks.
- Install adhesive hooks or nails along the top edge of the wall, directly above the furniture.
- Hang curtain lights so the strands drape vertically, covering the wall surface.
- Secure the bottom of each strand with a small hook or pin to prevent sagging.
- For a fuller effect, layer two sets of lights with different lengths.
Pro Tip: Use the “S” Pattern for Extra Coverage
If you have a long wall and a single strand of lights, create an “S” pattern by zigzagging the lights from top to bottom. This fills the space more evenly and hides excess wire. Just ensure your hardware can support the added weight and tension.
Creative Layout Ideas and Design Tips
String lights aren’t just for straight lines. With a little creativity, you can transform your wall into a stunning focal point. Here are some design ideas and expert tips to inspire you.
Geometric Shapes and Patterns
- Triangle or Pyramid: Great for above a bed or sofa. Start at the top center point, then create downward lines to form a triangle.
- Square or Rectangle: Outline a wall mirror, artwork, or TV frame for a gallery effect.
- Heart Shape: Ideal for bedrooms or Valentine’s Day. Use a template drawn in pencil first, then follow the outline with lights.
- Spiral or Swirl: Begin at the center and spiral outward for a dynamic, artistic look.
Layered and Multi-Directional Designs
Combine different types of lights for depth and dimension:
- Hang fairy lights in a crisscross pattern, then overlay larger globe lights in a straight line.
- Use curtain lights on one side of a window and horizontal string lights above the window frame.
- Create a “starry sky” effect by randomly placing small hooks and looping lights in a scattered, organic pattern.
Integrate with Other Decor
String lights work beautifully with other wall elements:
- Behind a Floating Shelf: Install lights behind a shelf to create a glowing backdrop for books or plants.
- Along a Picture Ledge: Drape lights along the top or bottom of a picture ledge to highlight your gallery wall.
- Inside a Shadow Box: Place string lights inside a deep frame for a 3D, illuminated art piece.
- With Greenery: Weave lights through ivy, eucalyptus, or faux vines for a nature-inspired look.
Color and Theme Coordination
Match your lights to your room’s color palette:
- Warm White: Timeless and cozy—works in any room.
- Cool White: Modern and crisp—ideal for offices or kitchens.
- Color-Changing: Use for themed parties or to match seasonal decor.
- Pastel Tones: Soft pinks, blues, or yellows for nurseries or bedrooms.
Pro Tip: Use a Template for Complex Shapes
For intricate designs like stars, letters, or logos, create a paper template first. Tape it to the wall, then trace the outline with your lights. This ensures precision and symmetry.
Maintaining and Removing Your String Lights
Even the best installation needs upkeep. Proper maintenance ensures your lights last longer and look great year-round.
Regular Maintenance Tips
- Check for Loose Hooks: Every few weeks, gently tug on hooks to ensure they’re still secure.
- Clean Bulbs and Wires: Use a microfiber cloth to wipe away dust. Avoid water or cleaning sprays near electrical components.
- Inspect for Damaged Wires: Look for fraying, exposed copper, or flickering bulbs. Replace damaged strands immediately.
- Store Battery-Powered Lights Properly: Remove batteries when not in use for long periods to prevent corrosion.
- Use Timers or Smart Plugs: Automate on/off times to reduce wear and save energy.
Removing Hardware Without Damage
When it’s time to take down your lights, follow these steps to protect your walls:
- Adhesive Hooks: Gently pull the tab straight down (not outward) to release the adhesive. If stuck, use a hair dryer to warm the adhesive for 10–15 seconds.
- Push Pins and Nails: Pull straight out. Fill small holes with spackle or toothpaste, then touch up paint if needed.
- Wall Anchors: Remove screws first, then use a small tool to gently pry out the anchor. Fill the hole with drywall patching compound.
Storing Lights for Future Use
- Wrap lights around a piece of cardboard or a light reel to prevent tangling.
- Store in a cool, dry place away from direct sunlight.
- Label each strand with its length and color for easy retrieval.
Data Table: Recommended Hardware by Wall Type and Light Weight
| Wall Type | Light Weight (per 10 ft) | Recommended Hardware | Max Recommended Load | Notes |
|---|---|---|---|---|
| Drywall | 0.5 lb | 3M Command Clear Mini Hooks | 1 lb per hook | Damage-free removal; ideal for renters |
| Drywall | 1.5 lb | Picture Hangers (18-gauge nail) | 3 lb per hanger | Use anchors for loads over 2 lb |
| Plaster | 0.8 lb | Push Pins or Thumbtacks | 0.5 lb per pin | Best for temporary setups; avoid overuse |
| Concrete/Brick | 2 lb | Masonry Screws + Anchors | 10 lb per anchor | Use a masonry bit for drilling |
| Wood Paneling | 1 lb | Small Finishing Nails | 5 lb per nail | Pre-drill to prevent splitting |
| All Types | 0.3 lb | Transparent Cable Clips | 1 lb per clip | Great for securing power cords |
With the right planning, tools, and techniques, putting indoor string lights on your wall can be a simple, rewarding project that instantly enhances your home’s ambiance. Whether you’re going for a subtle glow or a bold statement, the key is to choose lights and hardware that suit your space, install them carefully, and maintain them regularly. From adhesive hooks for a damage-free look to creative geometric patterns, the possibilities are endless. So grab your measuring tape, pick your favorite string lights, and start transforming your walls into a luminous work of art. Your dream space is just a few twinkles away.
Frequently Asked Questions
How do I hang indoor string lights on a wall without damaging it?
Use removable adhesive hooks, painter’s tape, or command strips designed for lightweight decor. These options provide a secure hold while leaving no marks or residue on your walls. Perfect for renters or temporary setups.
What’s the easiest way to put indoor string lights on wall corners?
For corners, use L-shaped adhesive hooks or bendable wire clips that follow the wall’s angle. Drape the lights around the clips in a zigzag or wave pattern for a seamless look. This method avoids drilling and keeps tension even.
Can I use nails or screws to install indoor string lights on walls?
Yes, but only if you’re okay with minor wall damage. Use small picture-hanging nails or screws with wall anchors for heavier light strands. Always check for electrical wires or pipes behind the wall first.
How do I hide the cords when putting indoor string lights on wall?
Route cords behind furniture, use cord covers, or tuck them under removable molding. For a clean look, choose lights with clear or white wires that blend into the wall. This keeps the focus on the lights, not the cables.
What tools do I need to put up indoor string lights on wall securely?
Basic tools include adhesive hooks, a level (for straight lines), and a measuring tape. For permanent setups, use a drill, anchors, and screws. Always ensure the wall surface is clean and dry before applying adhesives.
How can I style indoor string lights on wall for a cozy atmosphere?
Create a geometric pattern (hexagons, triangles) or drape them loosely in cascading waves. Use clips or hooks to secure the lights at varying heights. Warm-white bulbs enhance the cozy vibe—ideal for bedrooms or living rooms.

