Featured image for how to use micro-led string lights
Image source: img1.wsimg.com
Transform any space instantly with micro-LED string lights by draping, wrapping, or hanging them strategically for maximum glow. These energy-efficient, versatile lights are perfect for accentuating shelves, headboards, patios, or holiday décor—just plug in, arrange, and enjoy a customizable ambiance. Use battery-powered or USB options for wire-free placement and easy control via timers or remotes.
How to Use Micro-LED String Lights – Brighten Your Space
Key Takeaways
- Plan your layout: Measure space first for perfect placement.
- Use adhesive clips: Secure lights neatly without damage.
- Layer for depth: Combine with other lights for ambiance.
- Control brightness: Opt for dimmable models to set mood.
- Power smartly: Use batteries or USB for flexible setup.
- Weatherproof outdoors: Choose IP65-rated lights for durability.
Why This Matters / Understanding the Problem
Ever walked into a room and felt something was missing? Maybe it’s too dark, too flat, or just meh. That’s where micro-LED string lights come in. These tiny, energy-efficient lights add instant warmth, style, and personality to any space—whether it’s your bedroom, patio, or holiday decor.
But here’s the catch: using them wrong can lead to tangled messes, short lifespans, or even fire hazards. Many people just drape them randomly or overload circuits, missing out on their full potential. That’s why knowing how to use micro-LED string lights – brighten your space properly is key to getting the most beauty, safety, and longevity from your lights.
Unlike old-school incandescent strings, micro-LEDs are cool to the touch, use less power, and last for years. But they still need smart placement, safe power sources, and thoughtful design. Whether you’re decorating for a wedding, creating a cozy reading nook, or just sprucing up your living room, this guide will show you exactly how to do it right.
We’ll walk through everything from choosing the right type to installing them like a pro—no electrician needed. By the end, you’ll know how to use micro-LED string lights – brighten your space without the guesswork or frustration.
What You Need
Before you start wrapping lights around your headboard or hanging them in the backyard, gather these essential tools and materials. Having the right supplies makes the process faster, safer, and way more satisfying.
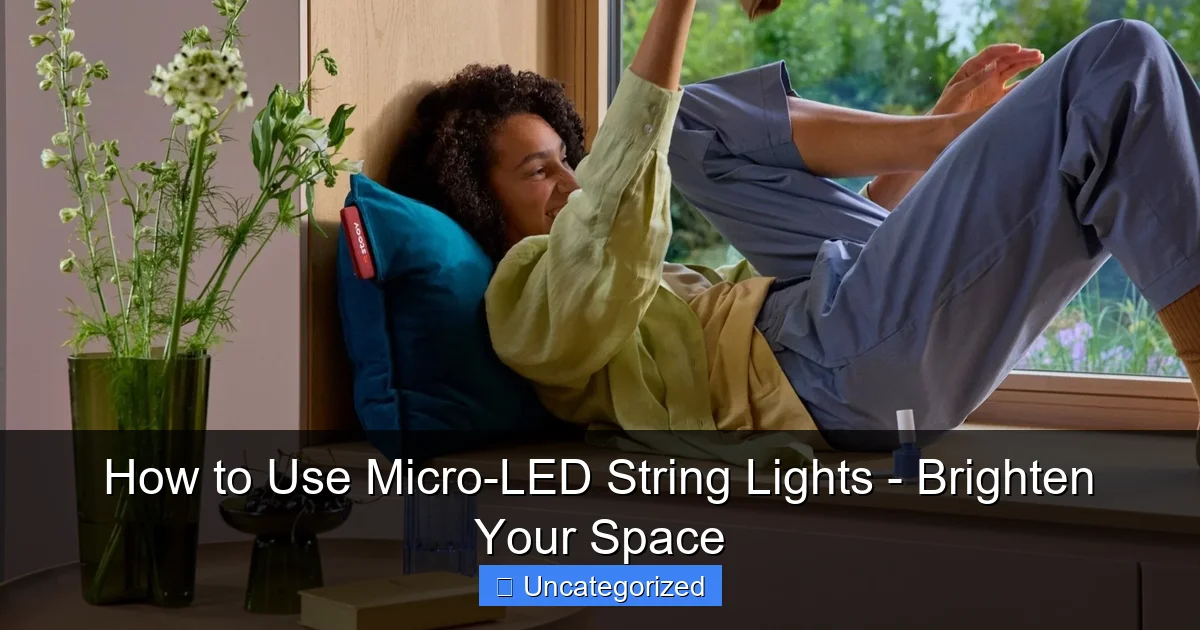
Visual guide about how to use micro-led string lights
Image source: de.stoov.com
- Micro-LED string lights (choose warm white, cool white, or color-changing based on mood)
- Measuring tape (to plan spacing and length)
- Command hooks or adhesive clips (for damage-free hanging on walls, mirrors, or furniture)
- Zip ties or twist ties (great for outdoor use or securing around poles)
- Extension cords or power strips (rated for indoor/outdoor use as needed)
- Timer or smart plug (optional but highly recommended for automatic on/off)
- Scissors or wire cutters (for trimming zip ties or adjusting lengths)
- Weatherproof sealant or silicone tape (only if using outdoors and splicing wires)
- Step ladder (for high areas like ceilings or trees)
Pro tip: Always check the total wattage of your string lights and make sure your power source can handle the load. For example, a 24-foot string with 100 LEDs typically uses under 5 watts—perfect for daisy-chaining multiple strings.
Also, pick the right bulb style:
- Fairy lights (tiny, delicate, ideal for draping or wrapping)
- Mini LEDs (slightly larger, more visible, great for accent lighting)
- Twinkle or color-shifting models (perfect for parties and holidays)
Now that you’ve got your gear, let’s dive into how to use micro-LED string lights – brighten your space with confidence.
Step-by-Step Guide to How to Use Micro-LED String Lights – Brighten Your Space
Step 1: Plan Your Layout Before Unboxing
Don’t just tear open the package and start hanging. Take 10 minutes to sketch your space or walk around with a measuring tape. This saves time and prevents costly mistakes.
For example: Want to line your bedroom headboard? Measure its length and height. If it’s 6 feet long and 3 feet high, you’ll need at least 12–15 feet of lights to create a gentle zigzag or wave pattern.
Use painter’s tape to mark anchor points on walls or furniture. This helps you visualize spacing and ensures symmetry. For outdoor use, check for overhangs, gutters, or tree branches where lights can be secured.
Tip: Sketch your layout on paper or use a free app like RoomSketcher to test different configurations before installation.
Planning also lets you decide whether you need one long strand or multiple shorter ones. Most micro-LED strings are connectable (daisy-chainable), but don’t exceed the manufacturer’s limit—usually 3–5 strings per outlet.
Remember: the goal is to use micro-LED string lights – brighten your space without overwhelming it. Less can be more. A few well-placed strands often look better than a chaotic tangle.
Step 2: Choose the Right Power Source
Micro-LEDs run on low voltage (usually 3V, 5V, or 12V), but they still need a safe, reliable power source. Never plug them into a standard 120V outlet unless the transformer is built into the plug.
Most come with an AC adapter or battery pack. Battery-powered lights are great for temporary setups (like weddings or photo shoots), but they need frequent charging or fresh batteries. For permanent installations, go with plug-in models.
If using outdoors, make sure the adapter and plug are rated for IP44 or higher (splash-proof). Never leave a standard indoor plug exposed to rain or snow.
For convenience, pair your lights with a smart plug or timer. Set them to turn on at sunset and off at midnight. No more forgetting to switch them off!
Warning: Avoid overloading circuits. If you’re using multiple light strands, plug them into different outlets or use a power strip with surge protection.
Also, keep cords tucked behind furniture or under rugs (but never under thick carpets where they can overheat). Use cord organizers to prevent tripping hazards.
Choosing the right power setup is crucial when learning how to use micro-LED string lights – brighten your space safely and efficiently.
Step 3: Install Hooks or Clips (No Nails Required)
One of the best things about micro-LEDs? You don’t need to hammer nails or drill holes. Use Command hooks, adhesive clips, or magnetic strips for a damage-free finish.
For walls: Stick adhesive clips every 6–12 inches. Press firmly for 30 seconds to ensure they hold. These work on painted walls, wood, tile, and even glass.
For ceilings: Use ceiling hooks or clear adhesive mounts. Make sure they’re rated for the weight (most micro-LED strings are under 1 lb).
For furniture (like bookshelves or mirrors): Use small binder clips or mini suction cups. They’re removable and won’t scratch surfaces.
Outdoors? Use stainless steel S-hooks or zip ties for trees, fences, or pergolas. Avoid staples—they can damage wires and void warranties.
Pro tip: Test each clip with a little tug before hanging the lights. You don’t want your display crashing down mid-party!
Install all clips first, then hang the lights. This keeps the wire straight and reduces tangling. It’s a small step, but it makes a big difference when you’re figuring out how to use micro-LED string lights – brighten your space neatly.
Step 4: Hang the Lights with Purpose
Now comes the fun part—hanging the lights! Start from the power source and work outward. This keeps the cord short and reduces voltage drop.
For a bedroom headboard: Drape the string in a gentle wave or zigzag. Clip every 6 inches for even distribution. Let the end hang slightly for a floating effect.
For a bookshelf: Run the lights along the back edge, weaving them through shelves. Use clips to hold them in place. The glow will make your books look like they’re glowing from within.
For outdoor use: Wrap around tree trunks (spiral upward, not too tight), line fence posts, or outline a patio roof. Use zip ties every foot to secure.
For holiday decor: Outline windows, doors, or mantels. Use clips at the top and bottom for a clean frame.
For creative displays:
- Hang them in a canopy from the ceiling (like a starry sky)
- Place inside a glass jar or vase for table centerpieces
- Wrap around curtain rods for a dreamy effect
- Suspend in a net pattern over a bed or couch
Always leave a little slack between clips—don’t pull the wire too tight. This prevents stress on the connections and makes adjustments easier.
As you hang, think about how to use micro-LED string lights – brighten your space in a way that feels intentional, not random. Every strand should serve a purpose: to highlight, to guide, or to enchant.
Step 5: Connect Multiple Strings (If Needed)
Most micro-LED strings have end-to-end connectors, so you can link them for longer runs. But don’t go overboard.
Check the product manual: Most brands recommend connecting no more than 3–5 strings in a single circuit. More than that can cause dimming, flickering, or overheating.
To connect: Plug the male end of one string into the female end of the next. Make sure the connection is snug and protected from moisture (especially outdoors).
For outdoor use, wrap the connection with weatherproof tape or silicone sealant. This keeps water out and prevents short circuits.
If you need a longer run than the limit allows, use a splitter plug to power two separate chains from one outlet. This keeps each circuit within safe limits.
Warning: Never splice or cut the wires unless you’re experienced. DIY modifications can void warranties and create fire hazards.
When connecting, test each section as you go. Turn on the lights after every 2–3 strings. If one doesn’t light, you’ll know exactly where the issue is.
Connecting strings is a smart way to scale up your design while learning how to use micro-LED string lights – brighten your space without overloading your system.
Step 6: Add Controls for Convenience and Ambiance
Micro-LEDs are awesome, but they’re even better with smart controls. Here are three easy upgrades:
- Timer: Set lights to turn on at dusk and off at 10 PM. Saves energy and ensures you never forget to switch them off.
- Remote control: Turn on/off, change brightness, or switch modes from your couch. Great for movie nights or mood lighting.
- Smart plug: Use with Alexa, Google Assistant, or Apple Home. Say “Hey Google, turn on the fairy lights” and bam—magic.
For color-changing models, use the remote to switch between warm white, cool white, red, blue, or rainbow modes. Save your favorite settings for quick access.
Dimmer switches are also available for some models. Lower the brightness for a cozy evening or crank it up for a party.
Place the remote or timer in an easy-to-reach spot—like your nightstand or coffee table. No more fumbling in the dark.
These controls make it effortless to use micro-LED string lights – brighten your space on your terms, whether it’s for relaxation, romance, or celebration.
Step 7: Test, Adjust, and Secure
Once everything’s in place, plug in the lights and test the whole system. Walk around and check:
- Are all bulbs working?
- Are the clips secure?
- Are cords hidden or protected?
- Is the brightness right for the mood?
If a section is too bright, add a sheer fabric cover or move the lights slightly. If it’s too dim, shorten the run or add another strand.
Adjust clips to smooth out any sagging. Tighten zip ties or add extra hooks if needed.
For outdoor setups, check after rain or wind. Re-secure any loose ends.
Finally, tuck cords behind furniture, use cord covers, or run them under rugs (safely). A clean look enhances the glow.
This final check ensures your setup is safe, stable, and stunning—exactly how you imagined when you decided how to use micro-LED string lights – brighten your space.
Step 8: Store Properly for Longevity
When the season ends (or you’re ready for a change), don’t just toss the lights in a box. Store them right to avoid tangles and damage.
Use a light reel or cardboard organizer: Wrap the string around a piece of cardboard or a plastic reel. This prevents knots.
Label the box with the type (e.g., “Warm White 100 LEDs”) and where you used it (“Bedroom Headboard”).
Store in a cool, dry place—not the attic or garage where heat and moisture can degrade the wires.
Remove batteries from battery-powered models to prevent corrosion.
Good storage means your lights will last for years. You’ll be ready to reuse them next season, making it easy to use micro-LED string lights – brighten your space again and again.
Pro Tips & Common Mistakes to Avoid
Pro Tip 1: Use mirrors or reflective surfaces to amplify the glow. A strand behind a mirror creates a magical halo effect.
Pro Tip 2: Layer lights with other decor. Pair micro-LEDs with plants, photos, or art for a gallery wall with depth.
Pro Tip 3: For outdoor use, elevate the plug off the ground with a brick or planter. Prevents water damage.
Common Mistake 1: Overloading circuits. Just because you can connect 5 strings doesn’t mean you should. Stick to 3 for reliability.
Common Mistake 2: Hanging lights in direct sunlight. UV rays can fade colors and weaken plastic coatings over time. Use under cover or in shade.
Common Mistake 3: Forgetting about maintenance. Clean bulbs with a dry cloth every few months. Dust buildup can dim the glow.
Common Mistake 4: Using indoor lights outside. Always check the IP rating. Indoor-only lights can short out in rain.
Pro Tip 4: Use a light diffuser (like a sheer curtain) to soften harsh LEDs and create a warmer glow.
Avoid these pitfalls, and you’ll get the most from your lights. Knowing how to use micro-LED string lights – brighten your space isn’t just about hanging them—it’s about doing it smart.
FAQs About How to Use Micro-LED String Lights – Brighten Your Space
Q1: Can I leave micro-LED string lights on overnight?
Yes, but with caution. Micro-LEDs are energy-efficient and generate little heat, but it’s best to use a timer or smart plug to turn them off after 6–8 hours. This prevents unnecessary wear and saves power.
Q2: How many strings can I connect together?
It depends on the brand, but most allow 3–5 strings. Check the product label or manual. Exceeding the limit can cause dimming or damage. When in doubt, use a splitter to create two separate circuits.
Q3: Are micro-LED string lights safe for children and pets?
Absolutely. They’re cool to the touch and use low voltage, making them much safer than traditional incandescent lights. Just keep cords tucked away to prevent chewing or tripping.
Q4: Can I cut or shorten a micro-LED string?
No—unless the manufacturer specifically says it’s safe. Most strings are sealed and cutting them will break the circuit. Instead, buy the right length or use multiple short strings.
Q5: Do micro-LEDs work in cold weather?
Yes, most are rated for temperatures down to -20°F (-29°C). But make sure they’re labeled for outdoor use. Cold can make plastic brittle, so handle gently.
Q6: How do I fix a section that won’t light?
First, check the connections and power source. Then, gently wiggle the wire near the dark section. If it flickers, the wire is damaged. If not, a bulb may be loose. Replace the string if needed—micro-LEDs aren’t easily repairable.
Q7: What’s the best way to use micro-LEDs for photography or videography?
Use warm white or color-adjustable strings. Place them behind the subject or around the backdrop for soft, diffused lighting. Avoid direct exposure to the camera lens to prevent glare.
Final Thoughts
Micro-LED string lights are more than just decoration—they’re mood makers, space enhancers, and instant mood boosters. When you know how to use micro-LED string lights – brighten your space the right way, you unlock their full potential: safety, style, and long-term enjoyment.
Start small. Try one strand on your nightstand or around a mirror. See how the soft glow changes the room. Then expand to larger projects—your porch, your bookshelf, your holiday tree.
Remember: plan first, power smart, hang with care, and store properly. Avoid overloading, direct sunlight, and DIY modifications. Use timers, remotes, and smart plugs to make it effortless.
Most importantly, have fun. There’s no “right” way to decorate. Let your creativity shine—literally. Whether you’re creating a cozy nook, a party backdrop, or a year-round glow, micro-LEDs are your secret weapon.
So go ahead. Grab your lights, follow this guide, and transform your space one tiny LED at a time. Your brighter, more beautiful home is just a string away.

