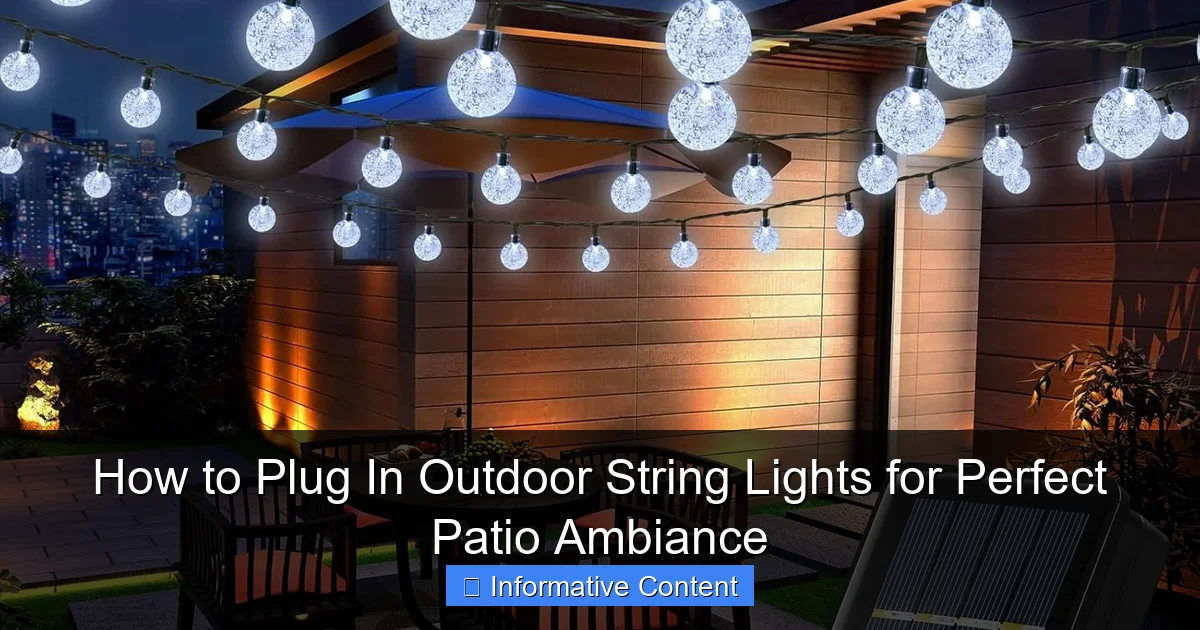
Featured image for how to plug in outdoor string lights
Image source: tatalux.com
Always plug outdoor string lights into a GFCI outlet to ensure safety and prevent electrical hazards. Use outdoor-rated extension cords and position connections off the ground, ideally under eaves or in covered areas, to protect against moisture and tripping. For a seamless look, hide cords behind furniture or along pathways while avoiding overloading circuits for long-lasting, worry-free ambiance.
Key Takeaways
- Plan your layout first: Measure space and outlets before installation.
- Use outdoor-rated extension cords: Ensure safety and weather resistance.
- Check for GFCI outlets: Prevent shocks with proper outdoor electrical protection.
- Secure lights with clips: Avoid damage using manufacturer-recommended hardware.
- Test before finalizing: Confirm all bulbs and connections work properly.
- Angle lights downward: Enhance ambiance and reduce glare effectively.
- Unplug during storms: Protect lights and home from electrical surges.
📑 Table of Contents
- How to Plug In Outdoor String Lights for Perfect Patio Ambiance
- 1. Choose the Right Power Source for Your Outdoor String Lights
- 2. Use the Right Extension Cords and Connectors
- 3. Plan Your Layout for Safety and Aesthetics
- 4. Protect Your Setup from Weather and Damage
- 5. Troubleshoot Common Issues and Maintain Your Lights
- 6. Data Table: Recommended Products and Specifications
- Final Thoughts: Create Your Perfect Patio Ambiance
How to Plug In Outdoor String Lights for Perfect Patio Ambiance
Imagine this: a warm summer evening, the sun dipping below the horizon, and your backyard transformed into a cozy, twinkling oasis. Outdoor string lights cast a gentle glow over your patio, creating the perfect atmosphere for a quiet dinner, a lively party, or just unwinding with a glass of wine. There’s something magical about how a simple string of lights can elevate your outdoor space, turning it into a retreat you actually want to spend time in.
But here’s the thing—getting those lights up and running isn’t always as simple as it seems. You’ve got the lights, the extension cords, maybe even a timer or two, but suddenly you’re standing in your yard, staring at a tangle of wires, wondering, “How do I plug in outdoor string lights without turning this into a safety hazard?” Trust me, I’ve been there. I’ve tripped over extension cords, accidentally unplugged half the lights, and once even managed to short-circuit an entire strand because I didn’t check the weatherproofing. The good news? With a little planning and the right approach, you can plug in your outdoor string lights safely, efficiently, and in a way that actually enhances your space. In this guide, I’ll walk you through everything you need to know—from choosing the right power source to troubleshooting common issues—so you can create that perfect patio ambiance without the headache.
1. Choose the Right Power Source for Your Outdoor String Lights
Before you even think about hanging lights, you need to figure out how to power them. This is the foundation of your entire setup, and getting it right means fewer headaches down the road. Let’s break it down.
Visual guide about how to plug in outdoor string lights
Image source: m.media-amazon.com
Outdoor Electrical Outlets: The Most Reliable Option
If you have an outdoor electrical outlet near your patio, you’re in luck. This is the easiest and most reliable way to plug in outdoor string lights. But here’s the catch: not all outdoor outlets are created equal. You need to make sure yours is:
- Weatherproof: Look for an outlet with a cover that closes over the plug, protecting it from rain and debris.
- GFCI-Protected: GFCI (Ground Fault Circuit Interrupter) outlets shut off power if there’s a short, which is crucial for outdoor safety. Test it monthly by pressing the “test” and “reset” buttons.
- Accessible: The outlet should be within reach of your extension cords without creating tripping hazards or forcing you to drape cords over sharp edges.
Example: My patio has an outlet on the side of the house, about 10 feet from where I hang my lights. I use a 25-foot outdoor-rated extension cord to reach it. I always check the GFCI before plugging anything in—it’s saved me from a few close calls during sudden rainstorms.
Indoor Outlets: A Temporary (and Risky) Solution
No outdoor outlet? Don’t run a cord through a window or door. It’s a common mistake, but it’s also a fire hazard and can let in bugs or rain. Instead, consider these safer alternatives:
- Install an outdoor outlet: A licensed electrician can add one to your home’s exterior. It’s an investment, but it pays off in safety and convenience.
- Use a weatherproof extension cord cover: If you must run a cord from indoors, use a heavy-duty cord and a cord cover that seals the connection. But this should be a last resort—only for short-term use.
Solar-Powered String Lights: A Cord-Free Alternative
For a truly hassle-free setup, solar-powered string lights are a game-changer. They charge during the day and turn on automatically at dusk. No cords, no outlets, no worries. But they’re not perfect:
- Pros: No electricity cost, easy to install, eco-friendly.
- Cons: Brightness varies by sunlight, battery life degrades over time, not ideal for cloudy climates.
Tip: If you go solar, place the panel in direct sunlight and clean it regularly. I tried solar lights once, but after a week of rain, they barely lit up. Now I use them for accent lighting, not the main glow.
2. Use the Right Extension Cords and Connectors
Once you’ve got your power source figured out, it’s time to choose the right cords and connectors. This step is often overlooked, but it’s critical for safety and performance.
Outdoor-Rated Extension Cords: Don’t Skip This
Indoor extension cords are not safe for outdoor use. They’re not waterproof, and the insulation can crack in cold weather. Always use:
- Outdoor-rated cords: Look for labels like “SJTW” or “SJEOOW” (the “T” stands for thermoplastic, which resists moisture).
- Heavy-duty gauge: For longer runs (over 25 feet) or multiple lights, use 14-gauge or 12-gauge cords to prevent voltage drop.
- Proper length: Measure the distance from your outlet to the lights, then add 10–15% extra to avoid tension on the cord.
Example: I use a 25-foot, 14-gauge outdoor cord for my patio lights. It’s thick enough to handle the load but flexible enough to coil neatly when not in use.
Weatherproof Connectors and Covers
Even the best cord can fail if the connection isn’t protected. Use:
- Weatherproof cord covers: These slip over the plug and socket, sealing them from rain and debris.
- Twist-lock connectors: For permanent setups, these lock the cord in place and resist moisture.
Tip: I keep a few spare covers in my toolbox. They’re cheap, and I’ve used them to fix a friend’s setup when their connection got soaked during a storm.
Smart Power Strips and Timers
Want to automate your lights? A smart power strip or timer is a must. Here’s how to use them:
- Timers: Set your lights to turn on at sunset and off at bedtime. No more forgetting to switch them off!
- Smart plugs: Control lights from your phone or voice assistant (e.g., “Hey Google, turn on the patio lights”).
- Outdoor-rated models: Make sure the timer or plug is designed for outdoor use.
My setup: I use a simple mechanical timer for my main string lights and a smart plug for my accent lights. The timer is reliable, and the smart plug lets me adjust the mood remotely.
3. Plan Your Layout for Safety and Aesthetics
Now for the fun part: deciding where to hang your lights. But before you start draping them everywhere, take a moment to plan. A good layout balances safety, functionality, and beauty.
Map Out Your Lighting Zones
Think of your patio as different “zones” that need different types of lighting:
- Dining area: Bright, even light for eating (e.g., string lights hung 8–10 feet high).
- Seating area: Soft, ambient light for conversation (e.g., lights draped in a zigzag pattern).
- Walkways: Low-level lights to guide guests safely (e.g., fairy lights in jars or along railings).
Example: My patio has a dining table, a fire pit, and a path to the garden. I use one long strand over the table, a second for the fire pit, and small battery-operated lights along the path.
Calculate Total Wattage and Cord Length
Overloading your circuit can trip breakers or even start fires. Here’s how to avoid it:
- Check the wattage: Add up the wattage of all your lights. Most outdoor outlets handle 15–20 amps (1,800–2,400 watts). Stay below 80% of that (1,440–1,920 watts) for safety.
- Measure cord runs: Plan your layout on paper, then measure each section. Buy cords slightly longer than needed to avoid tension.
Tip: I keep a spreadsheet with my light wattages and cord lengths. It helps me avoid overloading the circuit when I add new lights.
Hanging Techniques for Different Surfaces
How you hang the lights depends on your patio’s structure:
- Wooden beams or pergolas: Use outdoor-rated hooks or zip ties. Avoid nails—they can damage wood and create sharp edges.
- Metal railings: Use magnetic hooks or plastic clips that won’t scratch the finish.
- Concrete or brick walls: Use adhesive hooks (e.g., 3M Command) or drill-in hooks with anchors.
My trick: I use clear, removable hooks for seasonal lights. They’re nearly invisible and don’t leave marks when I take them down.
4. Protect Your Setup from Weather and Damage
Outdoor string lights are tough, but they’re not indestructible. Rain, wind, UV rays, and curious animals can all shorten their lifespan. Here’s how to protect them.
Weatherproof Your Connections
Even with outdoor-rated cords, connections are vulnerable. Protect them with:
- Weatherproof cord covers (as mentioned earlier).
- Silicone sealant: Apply a small bead around the plug and socket for extra protection.
- Elevate cords: Don’t lay cords on wet grass or pavement. Use hooks or clips to keep them off the ground.
Example: After a storm once, I found my lights flickering. The connection had gotten wet. Now I always use a cord cover and sealant, even on sunny days.
Wind-Proof Your Lights
Strong winds can snap cords, pull out hooks, or even break light bulbs. Prevent this by:
- Securing the cord: Use clips or hooks every 2–3 feet to prevent flapping.
- Choosing sturdy bulbs: LED bulbs are more durable than incandescent.
- Taking them down in storms: If a hurricane or tornado is forecast, unplug and store the lights.
UV Protection for Longevity
Sunlight can fade cords and plastic sockets over time. To extend their life:
- Use UV-resistant cords: Look for labels like “UV-stabilized” or “sunlight resistant.”
- Rotate lights: If you leave them up year-round, move them slightly each season to avoid constant sun exposure.
- Store properly: When not in use, coil cords loosely and store in a dry, dark place.
5. Troubleshoot Common Issues and Maintain Your Lights
Even the best setup can have hiccups. Here’s how to fix the most common problems.
Half the Lights Are Out
This is usually caused by a:
- Blown bulb: Replace it with a compatible bulb.
- Loose connection: Check all plugs and sockets. Tighten or reseat them.
- Faulty section: Use a continuity tester to find the break in the string.
Tip: I keep a spare bulb and a continuity tester in my patio toolkit. It’s saved me from buying a whole new string more than once.
Cords Are Overheating
Overheating is a serious fire hazard. If your cord feels warm, unplug it immediately and check for:
- Overloading: Too many lights on one circuit.
- Damaged cord: Look for fraying, melting, or discoloration.
- Poor ventilation: Don’t cover cords with rugs or furniture.
Timer or Smart Plug Isn’t Working
If your timer or smart plug isn’t turning on the lights:
- Check the power source: Is the outlet working? Test it with a lamp.
- Reset the device: Unplug it for 30 seconds, then plug it back in.
- Update firmware: For smart plugs, check the app for updates.
Maintenance Schedule
To keep your lights in top shape, follow this simple maintenance routine:
- Monthly: Test GFCI outlets, clean solar panels, check for loose connections.
- Seasonally: Inspect cords for damage, replace bulbs, reapply sealant.
- Yearly: Take down and store lights (or at least unplug them) during winter.
6. Data Table: Recommended Products and Specifications
| Product Type | Recommended Model | Key Features | Price Range |
|---|---|---|---|
| Outdoor Extension Cord | Southwire 25-Foot 14-Gauge | Weatherproof, GFCI compatible, 15-amp rating | $20–$30 |
| Weatherproof Cord Cover | GE 2-Pack Outdoor Cord Cover | Seals connections, UV-resistant | $10–$15 |
| Outdoor Timer | BN-LINK 7-Day Digital Timer | Waterproof, programmable, 2 outlets | $15–$20 |
| Smart Plug | Kasa Outdoor Smart Plug | Weatherproof, voice control, app scheduling | $25–$35 |
| String Lights | Brightown 48-Foot LED String Lights | Weatherproof, shatterproof bulbs, 50,000-hour life | $30–$40 |
Final Thoughts: Create Your Perfect Patio Ambiance
Plugging in outdoor string lights isn’t just about making your patio look pretty—it’s about creating a space where you want to spend time. Whether you’re hosting a party, enjoying a quiet night, or just unwinding after work, the right lighting sets the mood. And with the tips in this guide, you can do it safely, efficiently, and in a way that lasts.
Remember, the key is to plan ahead. Choose the right power source, use the proper cords and connectors, protect your setup from the elements, and maintain it regularly. Don’t cut corners—especially when it comes to safety. A little extra effort now means years of beautiful, hassle-free lighting.
So go ahead, grab your lights, and get started. Your patio’s transformation is just a plug away. And when you see those first twinkles of light at sunset, you’ll know it was worth every step. Happy lighting!
Frequently Asked Questions
How do I safely plug in outdoor string lights without overloading circuits?
Always check the wattage of your lights and ensure the total doesn’t exceed 80% of your outdoor outlet’s capacity (typically 15-20 amps). Use a GFCI-protected outlet and avoid daisy-chaining more than 3 sets of lights to prevent hazards.
Can I plug outdoor string lights into an indoor outlet using an extension cord?
No—only use outdoor-rated extension cords with weatherproof connectors. Indoor cords lack insulation for moisture, creating a fire risk. For permanent setups, consider installing an outdoor-rated outlet.
How to plug in outdoor string lights if my patio lacks outlets?
Use a heavy-duty outdoor extension cord to reach the nearest exterior outlet, or install a weatherproof outlet with professional help. For flexibility, opt for solar-powered or battery-operated outdoor string lights.
Do I need special plugs for connecting multiple string lights?
Yes, use end-to-end connectors rated for outdoor use and check manufacturer guidelines for maximum connections. Ensure all plugs are elevated and shielded from rain using drip loops.
How can I hide the plugs and cords for a cleaner look?
Route cords under outdoor rugs, use cord covers, or attach them discreetly to walls with clips. For a seamless appearance, choose outdoor string lights with low-profile plugs or built-in connectors.
Are there safety tips for leaving outdoor lights plugged in overnight?
Use a timer or smart plug to automate shutoff and reduce energy use. Always unplug during storms or extreme weather, and inspect cords regularly for fraying or water damage.

