Featured image for can i shorten a string of led christmas lights
Image source: brightlighthub.com
Yes, you can shorten a string of LED Christmas lights—but only if they’re designed for it. Look for cut marks or modular connectors on the wiring, and never cut standard non-modular strings, as this can damage the circuit and create fire hazards. Always follow the manufacturer’s guidelines to ensure safe, effective customization.
Key Takeaways
- Check manufacturer guidelines: Always verify if your LED lights are designed for shortening.
- Use insulated tools: Prevent short circuits with proper wire cutters and strippers.
- Cut at marked points: Only trim at designated cut lines to avoid damage.
- Seal connections safely: Use heat-shrink tubing or waterproof tape for exposed wires.
- Test before reinstalling: Power the lights after shortening to confirm functionality.
- Avoid overloading circuits: Calculate total wattage to prevent electrical hazards.
📑 Table of Contents
- The Magic and Mystery of Christmas Lights: A Modern Holiday Tradition
- Understanding LED Christmas Light Technology
- When and Why You Should (and Shouldn’t) Shorten LED Lights
- Step-by-Step Guide to Safely Shortening Cuttable LED Strips
- Advanced Techniques: Modifying Non-Cuttable Strings
- Data Table: LED String Shortening Compatibility
- Conclusion: Safety, Precision, and the Joy of Customization
The Magic and Mystery of Christmas Lights: A Modern Holiday Tradition
The glow of LED Christmas lights has become an inseparable part of the holiday season, transforming homes, trees, and neighborhoods into dazzling winter wonderlands. With their energy efficiency, vibrant colors, and longevity, LED lights have overtaken traditional incandescent bulbs in popularity over the past decade. According to the National Christmas Tree Association, over 80% of Americans who decorate use some form of LED lighting, a trend driven by both cost savings and environmental awareness. Yet, as homeowners strive to create the perfect holiday display, one question frequently arises: Can I shorten a string of LED Christmas lights safely?
Whether you’re dealing with a string that’s too long for your mantel, staircase, or front porch, the desire to customize your lighting setup is understandable. After all, a perfectly proportioned display enhances curb appeal and personal satisfaction. But unlike older incandescent strings, which often allowed for some level of modification, LED lights operate under different electrical principles—making the idea of cutting and splicing a bit more complex. This guide will walk you through everything you need to know about shortening LED Christmas lights, from understanding their circuitry to executing safe modifications and avoiding costly mistakes. Whether you’re a DIY enthusiast or a cautious decorator, you’ll learn how to achieve the perfect fit without compromising safety or performance.
Understanding LED Christmas Light Technology
How LED Lights Differ from Incandescent Bulbs
Before attempting any modification, it’s essential to understand how LED Christmas lights function compared to traditional incandescent strings. Incandescent bulbs produce light by heating a filament until it glows, a process that generates significant heat and consumes more energy. In contrast, LEDs (Light Emitting Diodes) produce light through electroluminescence—a process where electrons recombine with electron holes in a semiconductor, releasing energy in the form of photons. This makes LEDs far more energy-efficient, lasting up to 25 times longer than incandescent bulbs and using up to 80% less electricity.
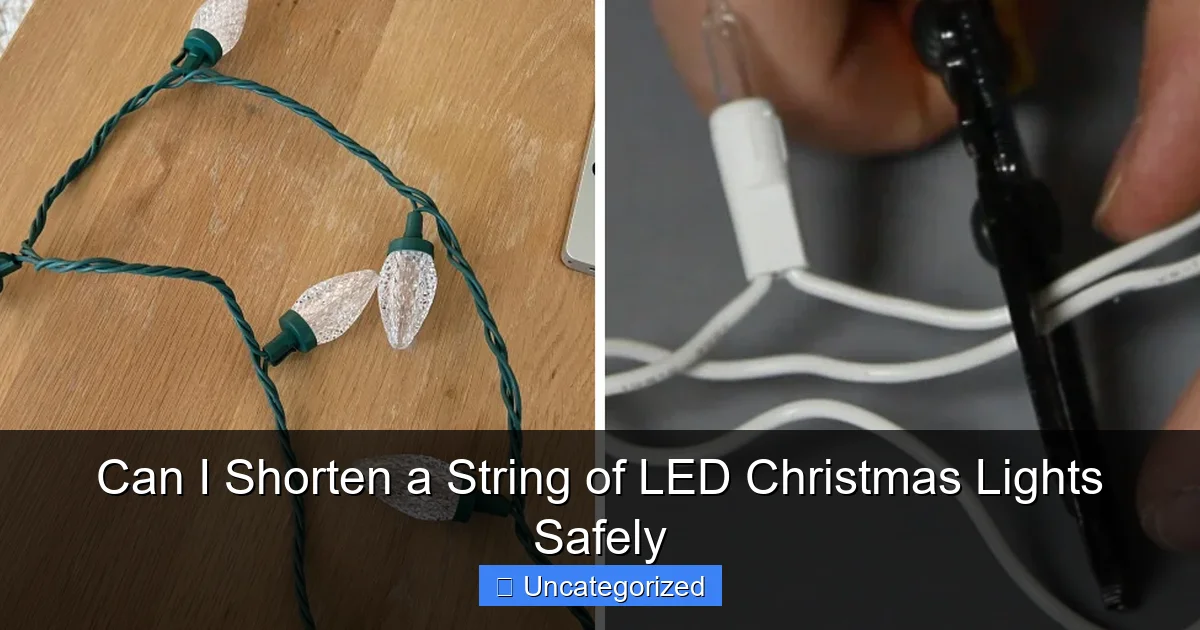
Visual guide about can i shorten a string of led christmas lights
Image source: i.ytimg.com
Another key difference lies in their electrical design. Most incandescent strings use a simple parallel circuit, where each bulb operates independently. If one bulb burns out, the others typically continue to function. However, many LED strings use a series-parallel circuit configuration, meaning the lights are grouped into segments connected in series, with multiple segments wired in parallel. This allows for better voltage distribution and prevents total string failure from a single bulb outage—but it also complicates modifications.
Voltage, Current, and the Role of Drivers
LEDs operate at low voltages (typically 3–12 volts) and require precise current regulation to prevent overheating and burnout. Unlike incandescent bulbs, which can tolerate slight voltage fluctuations, LEDs are highly sensitive to changes in current. This is why LED strings include a built-in driver or rectifier—a small electronic component that converts household AC power (120V in the U.S.) to the low DC voltage needed by the LEDs.
When you shorten a string, you’re altering the total load (resistance) on the circuit. If you remove too many LEDs, the driver may push excess current through the remaining bulbs, causing premature failure or even fire hazards. Conversely, removing too few bulbs may not significantly impact performance, but it defeats the purpose of shortening. Understanding this balance is crucial for safe modification.
Types of LED Light Strings: Which Are Modifiable?
Not all LED strings are created equal. The modifiability of your lights depends largely on their construction:
- Plug-and-Play (Pre-Wired) Strings: These are the most common and typically not recommended for shortening. They have a sealed plug, integrated driver, and rigid internal wiring, making modifications difficult and potentially unsafe.
- Cuttable or Solderable LED Strips: Often used for under-cabinet or architectural lighting, these strips have designated cut points (marked with a scissor icon) every few inches. They’re designed for customization and can be safely shortened if done correctly.
- Modular Strings with End Connectors: Some high-end or commercial-grade LED strings feature end connectors that allow you to join multiple strings or remove segments. These may be shortened by disconnecting at designated points, but only if the manufacturer specifies this feature.
- DIY or Kit-Based LED Strings: These are designed for user assembly and are ideal for shortening, as they allow you to add or remove bulbs as needed.
For the average homeowner, cuttable LED strips or modular strings with end connectors offer the best balance of safety and flexibility. If your lights don’t fall into these categories, proceed with extreme caution—or consider alternative solutions (covered later).
When and Why You Should (and Shouldn’t) Shorten LED Lights
Common Scenarios for Shortening
There are several practical reasons why someone might want to shorten a string of LED Christmas lights:
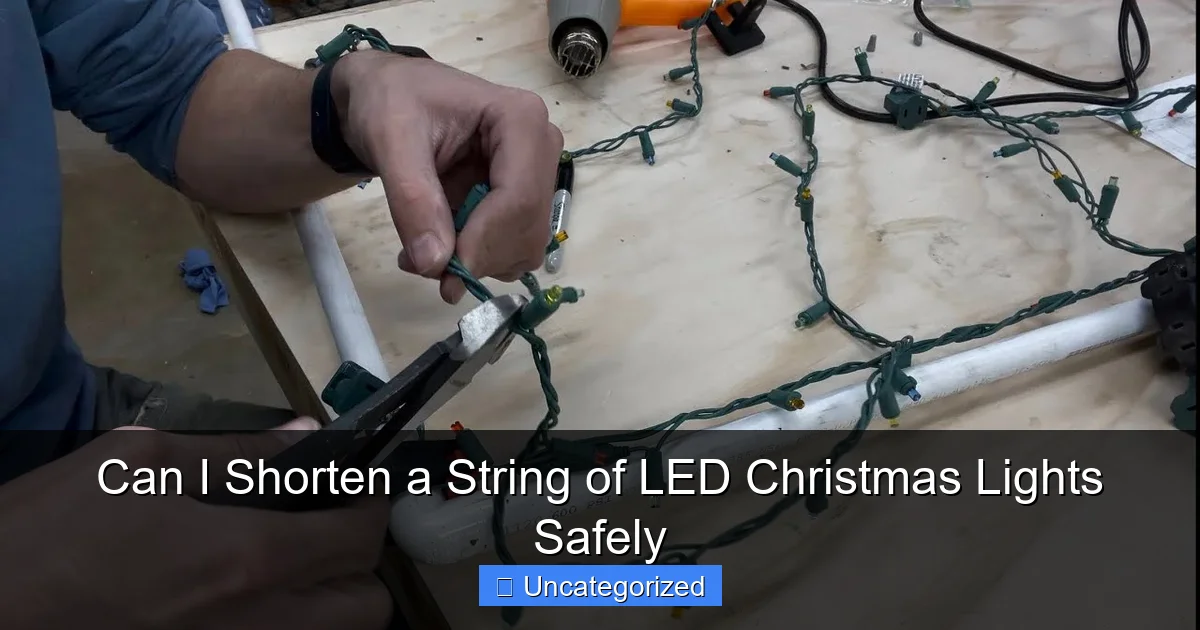
Visual guide about can i shorten a string of led christmas lights
Image source: i.ytimg.com
- Perfect Fit for Decor: A 10-foot string may be too long for a 6-foot mantel, causing excess wire to drape unattractively.
- Reducing Clutter: Longer strings can create tangled messes, especially around windows or door frames.
- Custom Displays: Creating unique shapes (e.g., a heart, snowflake, or tree outline) often requires precise lengths.
- Energy Efficiency: Shorter strings draw less power, which can be beneficial for large displays or off-grid setups (e.g., solar-powered lights).
- Repairing Damaged Sections: If a portion of the string is damaged (e.g., frayed wires, water damage), removing it and rejoining the ends can restore functionality.
For example, imagine you’re decorating a 7-foot Christmas tree with a 12-foot string of warm white LEDs. The extra 5 feet might wrap around the tree multiple times, creating uneven lighting and visible wire loops. Shortening the string to match the tree’s height ensures a cleaner, more professional look.
Risks and Red Flags: When Not to Shorten
Despite the benefits, there are compelling reasons not to shorten certain LED strings:
- Voiding the Warranty: Most manufacturers explicitly state that modifications void the warranty. If your lights fail, you may be on your own.
- Electrical Hazards: Improper splicing can create short circuits, overheating, or fire risks—especially if you use incorrect wire gauges or insulation.
- Dimming or Flickering: Altering the circuit can cause voltage imbalances, leading to inconsistent brightness or flickering.
- Irreversible Damage: Once cut, a string can’t be restored to its original length, limiting future use.
- Non-Cuttable Designs: If the string lacks marked cut points or has a sealed plug, modification is impractical and dangerous.
Consider this real-world scenario: You have a 20-light LED string with a built-in timer and remote control. The lights are connected in a complex series-parallel circuit with a proprietary driver. Cutting this string could disable the timer, cause the remote to malfunction, or overload the remaining LEDs. In such cases, it’s safer to purchase a shorter string or use alternative methods (e.g., tucking excess wire behind furniture).
Alternative Solutions to Shortening
Before reaching for the wire cutters, explore these safer alternatives:
- Use Shorter Strings: Buy multiple shorter strings and connect them end-to-end. Most LED strings allow 2–4 strings to be linked, depending on the total wattage.
- Tuck or Hide Excess: Use twist ties, zip ties, or clips to gather and hide extra wire behind furniture, under garlands, or along baseboards.
- Double-Back Method: Wrap the string back on itself (like a figure-eight) to reduce visible length while maintaining electrical integrity.
- Use Light Hangers or Clips: Specialized clips allow you to secure lights at precise intervals, minimizing slack.
For instance, if you have a 15-foot string for a 10-foot staircase, wrap the extra 5 feet tightly around a post or banister and secure it with a zip tie. This keeps the lights taut and avoids the risks of cutting.
Step-by-Step Guide to Safely Shortening Cuttable LED Strips
Identifying Cuttable LED Strips
Not all LED strips can be safely cut. Look for these key indicators:
- Cut Marks: Most cuttable strips have a small scissors icon or line every 1–3 inches, indicating safe cut points.
- Labeling: The packaging or strip itself may state “Cuttable” or “Cut to Length.”
- Voltage Consistency: Ensure the strip operates at a consistent voltage (e.g., 12V DC) across all cut points.
For example, a 5-meter (16.4 ft) cuttable LED strip with 300 LEDs and cut points every 3 LEDs (1.5 inches) is ideal for customization. Avoid strips without clear cut marks or those labeled “Do Not Cut.”
Tools and Materials You’ll Need
Gather the following before starting:
- Sharp scissors or wire cutters: For clean, precise cuts.
- Wire strippers: To expose copper wires after cutting.
- Soldering iron and solder: For secure connections (or solderless connectors if preferred).
- Heat-shrink tubing or electrical tape: For insulation.
- Multimeter: To test voltage and continuity.
- LED strip connectors (optional): For a tool-free splice.
Tip: Use a non-contact voltage tester to ensure the strip is powered off before cutting.
Cutting and Reconnecting the Strip
Follow these steps carefully:
- Measure and Mark: Determine the desired length and locate the nearest cut point. Mark it with a pen or tape.
- Power Off: Unplug the strip from the power source.
- Cut at the Mark: Use sharp scissors or cutters to sever the strip only at the designated cut point. Avoid cutting between points, as this will damage the circuit.
- Strip the Wires: On both ends, use wire strippers to remove 1/4 inch of insulation from the positive (+) and negative (-) copper pads.
- Reconnect the Ends:
- Option 1 (Soldering): Twist the exposed wires together (positive to positive, negative to negative), then solder. Cover with heat-shrink tubing.
- Option 2 (Solderless Connector): Use a clip-on connector designed for LED strips. Insert both ends and secure the clip.
- Test the Connection: Plug in the strip and check for uniform brightness. Use a multimeter to verify voltage at the splice point.
- Insulate and Protect: Cover all exposed connections with electrical tape or heat-shrink tubing to prevent short circuits.
Example: You have a 10-foot cuttable strip but only need 6 feet. Cut at the 6-foot mark, strip the wires, and use a solderless connector to join the two ends. The result is a seamless, functional 6-foot string.
Troubleshooting Common Issues
If the lights don’t work after splicing, check for:
- Loose Connections: Re-solder or re-clip wires if they’re not securely joined.
- Incorrect Polarity: Ensure positive wires connect to positive and negative to negative. Reversing polarity can damage LEDs.
- Voltage Drop: If the strip dims near the end, the remaining length may be too long for the driver. Shorten further or use a higher-wattage driver.
- Damaged Pads: If copper pads are torn during cutting, use jumper wires to bridge the gap.
Advanced Techniques: Modifying Non-Cuttable Strings
When You Must Modify a Pre-Wired String
Some situations—like repairing a damaged section—may require modifying a non-cuttable string. While riskier, it’s possible with caution:
- Identify the Circuit Type: Use a multimeter to determine if the string is series, parallel, or series-parallel.
- Locate the Driver: Find the small box (usually near the plug) that regulates voltage. Never cut wires connected to it.
- Remove Bulbs Strategically: If the string uses replaceable bulbs, remove excess bulbs (not sockets) to reduce load. This works best with parallel circuits.
- Splice Wires Between Sockets: Cut the wire between two sockets, remove the desired section, and reconnect the remaining wires. Use solder and heat-shrink for insulation.
Warning: This method is not recommended for beginners. One mistake can ruin the entire string.
Using Jumper Wires and Connectors
For a safer approach, use jumper wires to bypass removed sections:
- Cut the wire between two sockets.
- Strip both ends.
- Attach a short jumper wire (same gauge) between the exposed ends.
- Insulate with heat-shrink or tape.
This maintains circuit continuity without soldering directly to bulbs.
When to Seek Professional Help
If you’re unsure about the circuit type, lack tools, or the lights have advanced features (e.g., color-changing, app control), consult an electrician or contact the manufacturer. Some brands offer modification kits or repair services.
Data Table: LED String Shortening Compatibility
| LED String Type | Cuttable? | Recommended Modification Method | Risk Level | Warranty Impact |
|---|---|---|---|---|
| Cuttable Strips (with marks) | Yes | Cut at marked points, splice with connectors/solder | Low | May void warranty |
| Modular Strings (end connectors) | Yes (at connectors) | Disconnect segments at connectors | Low | Minimal (if manufacturer-approved) |
| Pre-Wired Plug-and-Play | No | Use jumper wires between sockets (advanced) | High | Voided |
| DIY/Kit-Based Strings | Yes | Add/remove bulbs or segments | Low | None |
| Color-Changing/Programmable | Rarely | Not recommended; use shorter strings instead | Very High | Voided |
Conclusion: Safety, Precision, and the Joy of Customization
Shortening a string of LED Christmas lights is possible—but only under the right conditions. By understanding the technology, assessing your lights’ modifiability, and following safe procedures, you can achieve a perfectly tailored display without compromising safety or performance. Remember: not all LED strings are meant to be cut. Cuttable strips and modular designs offer the safest path, while pre-wired or advanced-feature strings should be left intact or replaced with shorter versions.
The key to success lies in preparation, precision, and patience. Always use the right tools, test your connections, and prioritize insulation to prevent hazards. When in doubt, opt for alternative solutions like tucking excess wire or using multiple shorter strings. After all, the goal isn’t just a well-lit space—it’s a joyful, stress-free holiday experience.
As you deck the halls this season, let your creativity shine—but let safety lead the way. With this guide, you’re equipped to make informed decisions, avoid common pitfalls, and enjoy a brighter, safer holiday. Whether you’re a seasoned decorator or a first-time light-hanger, may your displays sparkle with both beauty and peace of mind. Happy holidays!
Frequently Asked Questions
Can I shorten a string of LED Christmas lights without damaging them?
Yes, you can safely shorten a string of LED Christmas lights if they’re designed with removable bulbs or cuttable sections (check the manufacturer’s instructions). Avoid cutting wires randomly, as this may ruin the circuit or pose a fire hazard.
Where should I cut a string of LED Christmas lights to shorten it?
Only cut at designated points, often marked by a scissor icon or indicated in the manual, to maintain circuit integrity. Look for sections between bulbs or at the end of a segment, ensuring no cut disrupts the wiring.
Is it safe to shorten LED Christmas lights on my own?
It’s generally safe if you follow the manufacturer’s guidelines and use insulated tools. Never attempt to shorten non-modular or sealed-end LED light strings, as this can cause electrical risks.
Can shortening a string of LED Christmas lights cause them to stop working?
Yes, improper shortening—like cutting outside designated areas or nicking wires—can break the circuit and disable the lights. Always verify cut points and ensure connections remain secure.
Do I need special tools to shorten LED Christmas lights?
Basic tools like wire cutters or scissors work for cuttable sections, but a wire stripper may help for exposed connections. For non-cuttable strings, use a plug-in extension to adjust length instead.
Can I shorten a string of LED Christmas lights with non-removable bulbs?
Most non-removable bulb strings aren’t designed for shortening, but some have parallel circuits allowing safe cuts between segments. When in doubt, consult the product manual or opt for a shorter pre-made string.

