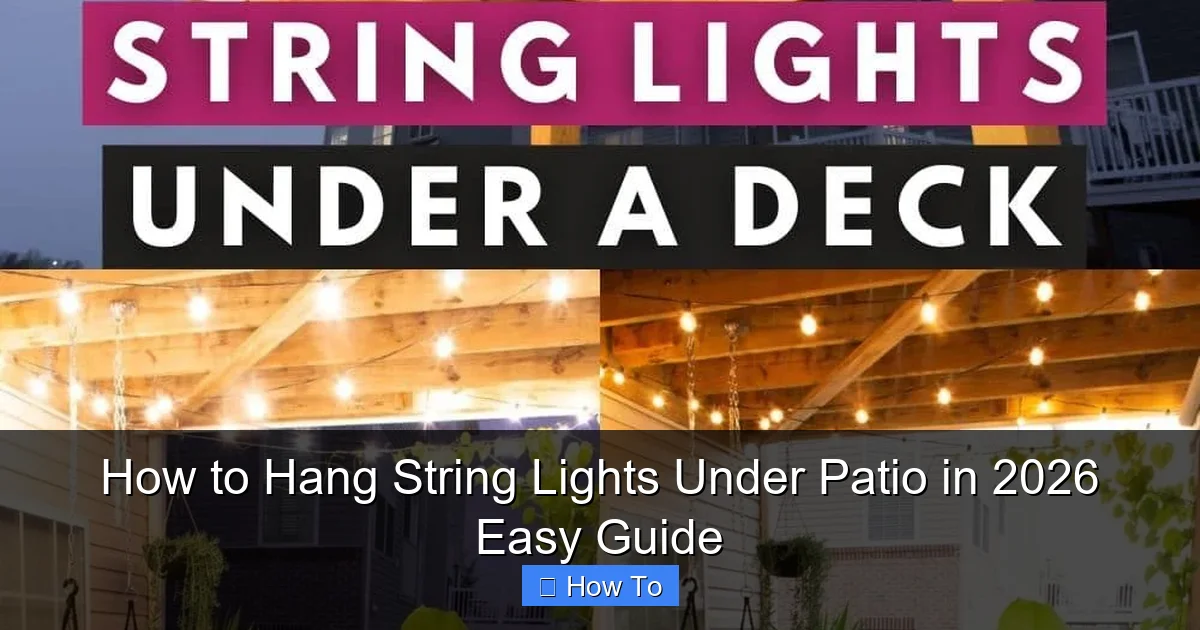
Featured image for how to hang string lights under patio
Image source: i.pinimg.com
Transform your patio into a cozy nighttime retreat by securely mounting string lights under the overhang using weather-resistant hooks or adhesive clips—no drilling required. For a clean, professional look in 2026, plan your layout first, space bulbs evenly, and connect multiple strands safely with outdoor-rated extension cords. Always prioritize safety by using a GFCI outlet and checking for overhead clearance.
How to Hang String Lights Under Patio in 2026 Easy Guide
Key Takeaways
- Plan layout first: Sketch light placement to avoid mid-project changes.
- Use weatherproof lights: Ensure durability with UL-listed, outdoor-rated string lights.
- Secure with hooks: Install screw-in or adhesive hooks every 12-18 inches.
- Measure twice: Confirm spacing and power source proximity before hanging.
- Hide cords neatly: Use cord covers or conduit for a clean look.
- Test before finalizing: Check brightness and connections early to fix issues.
Why This Matters / Understanding the Problem
Let’s be honest—there’s nothing quite like a cozy evening under the stars, sipping wine, and laughing with friends under the soft glow of string lights. But here’s the catch: if you’ve ever tried how to hang string lights under patio in 2026 easy guide without a plan, you’ve probably ended up with tangled wires, uneven spacing, or worse—lights that won’t stay up after a single gust of wind.
I learned this the hard way last summer. I spent an entire Saturday wrestling with zip ties, measuring tape, and a wobbly ladder, only to realize I’d placed the lights too high, too tight, and in a way that looked more “construction site” than “boho backyard.” The good news? It doesn’t have to be this way. With the right approach, hanging patio lights can be simple, stylish, and stress-free—even if you’re not a DIY pro.
Whether you’re upgrading your outdoor space for entertaining, creating a romantic nook, or just want to enjoy your patio after sunset, this guide walks you through exactly how to hang string lights under patio in 2026 easy guide—with zero frustration and maximum charm. We’ll cover tools, techniques, and little-known tricks that pros use (but rarely share).
Pro Insight: The key isn’t just hanging lights—it’s creating a balanced, weather-resistant, and visually pleasing setup that lasts through seasons. Think of it as lighting design, not just installation.
What You Need
Before you start, let’s make sure you have everything you need. The right tools make all the difference—especially when you’re working overhead and want to avoid multiple trips up and down the ladder.

Visual guide about how to hang string lights under patio
Image source: jessicawellinginteriors.com
- String lights (outdoor-rated) – Look for LED, waterproof, and rated for outdoor use. Solar-powered options are great if you lack outlets.
- Measuring tape – For spacing and layout planning.
- Drill and drill bits – For wood or masonry (depending on your patio material).
- Eye hooks, cup hooks, or S-hooks – Stainless steel or weather-resistant to prevent rust.
- Zip ties (UV-resistant) – For temporary or semi-permanent mounting.
- Light clips or adhesive hooks (optional) – For vinyl or metal railings where drilling isn’t ideal.
- Extension cord (outdoor-rated) – With a weatherproof cover if needed.
- Ladder or step stool – Stable and tall enough for your patio height.
- Level (optional but helpful) – To keep lines straight.
- Pencil or marker – For marking drill points.
- Timer or smart plug (optional) – For automatic on/off control.
Quick Tip: If your patio is covered (like a pergola or roofed porch), you’re in luck—you have more mounting options. If it’s open, consider a freestanding frame or ceiling-mounted hooks.
Step-by-Step Guide to How to Hang String Lights Under Patio in 2026 Easy Guide
Now, let’s get into the real meat of this guide. I’ll walk you through each step like we’re standing in your backyard, coffee in hand, figuring it out together. No jargon, no fluff—just practical, real-world advice.
Step 1: Plan Your Layout and Measure
Before touching a single light, plan your layout. This is where most people skip and regret later. Ask yourself: Where do you want the lights? Over the dining table? Along the perimeter? In a zig-zag pattern?
- Use a measuring tape to mark key points—corners, posts, beams, or railings.
- Sketch a rough diagram on paper or use a phone app (like Sketchbook or Notes) to visualize the pattern.
- Decide if you want a straight line, crisscross, grid, or zig-zag design. For beginners, straight lines are easiest.
- Measure the total distance you need to cover. Add 10–15% extra for slack, curves, or plug reach.
For example, if your patio is 16 feet wide and you want lights running parallel on both sides, you’ll need about 35–38 feet of lights (including slack).
Pro Insight: I once skipped this step and ended up with lights that were too short—forcing me to buy another set. Save yourself the hassle: measure twice, hang once.
Step 2: Choose Your Mounting Method
Your patio material determines your best mounting option. Here’s how to pick the right one:
- Wooden beams or pergolas: Use eye hooks or cup hooks. Drill pilot holes first to prevent splitting.
- Concrete or brick walls: Use masonry anchors and screws with plastic wall plugs. A hammer drill works best.
- Metal railings or vinyl: Use adhesive light clips or zip ties with protective pads (to avoid scratching).
- Open patio (no overhead structure): Install freestanding posts (like shepherd’s hooks) or use a tension cable system between trees or poles.
For a covered patio, eye hooks are my go-to—they’re strong, clean, and easy to remove later.
Warning: Avoid nailing directly into wood. It can split and weaken over time. Always drill a pilot hole first!
Step 3: Mark and Install Mounting Points
Now it’s time to mark where your hooks or anchors go. This step is crucial for a balanced, professional look.
- Use your measuring tape and pencil to mark spots every 12–18 inches along the path of your lights.
- For crisscross or zig-zag patterns, mark both ends of each diagonal line.
- Use a level to ensure your marks are aligned—especially important for straight lines.
- Drill pilot holes (slightly smaller than the hook’s screw) into wood or use a masonry bit for concrete.
- Screw in eye hooks, cup hooks, or anchors by hand, then tighten with pliers or a screwdriver.
I recommend spacing hooks no more than 18 inches apart. Closer spacing (12 inches) gives a fuller, more even glow—great for dining areas.
Pro Tip: If you’re using adhesive clips, clean the surface with isopropyl alcohol first. This helps them stick longer—especially in humid climates.
Step 4: Hang the String Lights
Now for the fun part—hanging the lights! Start from the power source and work outward.
- Plug in your lights and test them before hanging. You don’t want to find a dead section halfway through.
- Attach one end of the lights to the first hook (use the built-in loop or an S-hook).
- Unroll the lights slowly, feeding them through each hook or clip as you go.
- For straight lines: keep tension consistent—snug but not tight. Over-tightening can strain wires.
- For zig-zag or crisscross: use a second set of hooks on the opposite side. Run lights diagonally between them, forming an “X” or “V” pattern.
- Leave a small loop at the end for slack and easy removal later.
I like to hang lights slightly below eye level—around 7–8 feet high—so they’re visible but not blinding.
Common Mistake: Don’t stretch lights between two points without support. They’ll sag in the middle, especially with heat or wind. Always use intermediate hooks every 12–18 inches.
Step 5: Secure the Power Source
The power cord is often the weakest link. If it’s dangling or exposed, it can look messy or get damaged.
- Use zip ties or adhesive clips to secure the cord along a beam or railing.
- Keep the plug end accessible—don’t bury it behind furniture or under plants.
- If using an extension cord, place it along the ground with a weatherproof cover (like a cord protector or conduit).
- For a cleaner look, run the cord behind a beam or through a small hole (if drilling is allowed).
Pro tip: Use a smart plug so you can turn lights on/off with your phone or voice. I use mine with Alexa—“Hey Alexa, lights on!” feels like magic.
Safety Note: Never use indoor extension cords outside. They’re not rated for moisture and can overheat or cause fire hazards.
Step 6: Test and Adjust
Once everything’s up, step back and take a look. Turn the lights on at night—this is the real test.
- Check for sagging, uneven spacing, or dark spots.
- Adjust hook positions or add extra clips if needed.
- Trim excess zip ties with scissors (flush, but not so close you cut the wire).
- For crisscross patterns, ensure each “X” is symmetrical.
I once thought my lights were perfect—until I saw them at night. One side was brighter because of uneven bulb density. A quick reposition fixed it.
Pro Insight: Take a photo with your phone. It helps spot issues your eyes might miss in person.
Step 7: Make It Weather-Resistant and Long-Lasting
You want these lights to last more than one season, right? Here’s how to protect your investment.
- Use UV-resistant zip ties and stainless steel hooks to prevent rust and degradation.
- Seal any drilled holes with exterior wood filler or clear silicone to block moisture.
- Store lights in a dry, cool place when not in use (or use a weatherproof storage box).
- Consider a timer or dusk-to-dawn sensor so lights turn on automatically at sunset.
- Inspect annually—replace worn zip ties, tighten loose hooks, and check for frayed wires.
I leave my lights up year-round, but I do a quick “spring check” every March. It takes 15 minutes and saves me from mid-summer surprises.
Bonus Tip: If you live in a windy area, use light clips with rubber padding or add extra zip ties at stress points to prevent snapping.
Step 8: Add Finishing Touches (Optional)
Want to take your setup from “nice” to “wow”? These small upgrades make a big difference.
- Use fairy lights or mini bulbs for a softer, more magical glow.
- Add lanterns or candles on tables for layered lighting.
- Wrap lights around tree trunks or railings for dimension.
- Use color-changing LED lights for special occasions (but stick to warm white for everyday).
- Install motion sensors or dimmers for ambiance control.
I love using warm white (2700K) LEDs—they mimic candlelight and don’t attract bugs as much as cooler tones.
Pro Tips & Common Mistakes to Avoid
After years of trial and error (and a few backyard disasters), here are the real lessons I’ve learned about how to hang string lights under patio in 2026 easy guide.
- Don’t overbuy lights. Measure first. I once bought two sets—only to realize one was enough with better spacing.
- Avoid cheap plastic hooks. They crack in the sun. Spend a few extra bucks on stainless steel.
- Never daisy-chain too many lights. Most outdoor strings can only connect 2–3 sets. Check the manufacturer’s limit.
- Don’t ignore the power source. A dangling plug looks messy and is a tripping hazard.
- Skip the “just nail it” shortcut. Nails bend, pull out, and damage wood. Hooks are better.
- Plan for future changes. Leave extra cord and use removable hooks so you can rearrange later.
- Test in the dark. What looks fine in daylight might look uneven at night.
Real Talk: I once used Command strips for a vinyl railing. They lasted two weeks. Adhesive fails in heat and humidity. Use clips or zip ties instead.
FAQs About How to Hang String Lights Under Patio in 2026 Easy Guide
1. Can I hang string lights without drilling?
Absolutely! Use adhesive light clips (like Command Outdoor Light Clips) or zip ties with protective pads for railings, fences, or pergolas. For open patios, try freestanding shepherd’s hooks or tension cables between trees. Just make sure the surface is clean and dry for best adhesion.
2. How high should I hang patio string lights?
7 to 8 feet is ideal. This keeps them visible but out of the way. If you’re hanging over a dining table, go slightly lower (6.5–7 feet) for a cozy, intimate feel. For open patios, 8–10 feet works well.
3. What kind of lights work best?
Stick with LED string lights rated for outdoor use. They’re energy-efficient, long-lasting, and generate less heat. Look for “IP44” or higher waterproof ratings. Warm white (2700K) is most popular for patios—it’s inviting and bug-friendly.
4. How do I keep lights from sagging?
Use support hooks every 12–18 inches. Never span more than 20 feet without intermediate support. For long runs, consider a support wire (like a thin steel cable) and attach lights to it with clips. This keeps them taut and sag-free.
5. Can I leave my lights up year-round?
Yes—if they’re outdoor-rated and properly secured. But inspect them seasonally. Replace worn zip ties, tighten loose hooks, and store in a dry place during extreme weather (like hurricanes or heavy snow). I leave mine up but unplug during storms.
6. How do I power lights if there’s no outlet nearby?
Use a solar-powered string light set with a separate solar panel. Or run a weatherproof extension cord from the nearest outlet, using a cord cover to protect it. For permanent setups, consider installing an outdoor GFCI outlet (hire an electrician for safety).
7. What’s the easiest pattern for beginners?
Start with straight lines—parallel to the patio edges. It’s simple, clean, and forgiving. Once you’re comfortable, try a zig-zag or crisscross for more visual interest. Avoid complex patterns until you’ve mastered the basics.
Final Thoughts
Hanging string lights under your patio doesn’t have to be a headache. With the right tools, a solid plan, and a little patience, you can create a warm, inviting space that feels like an extension of your home.
The key to how to hang string lights under patio in 2026 easy guide is simplicity. Don’t overcomplicate it. Measure, plan, install, and test. Use quality materials. Think about longevity and safety. And most importantly—enjoy the process.
Your patio is more than just concrete or wood. It’s where memories happen. Where you unwind after work. Where you host friends and toast to life. The right lighting sets the mood, extends your living space, and makes every evening feel special.
So grab your tools, call a friend (or go solo), and get started. In a few hours, you’ll have a glowing oasis that’s not just functional—but magical. And when someone says, “Wow, your patio looks amazing,” you can smile and say, “I did that.”
Now go light it up—literally.

