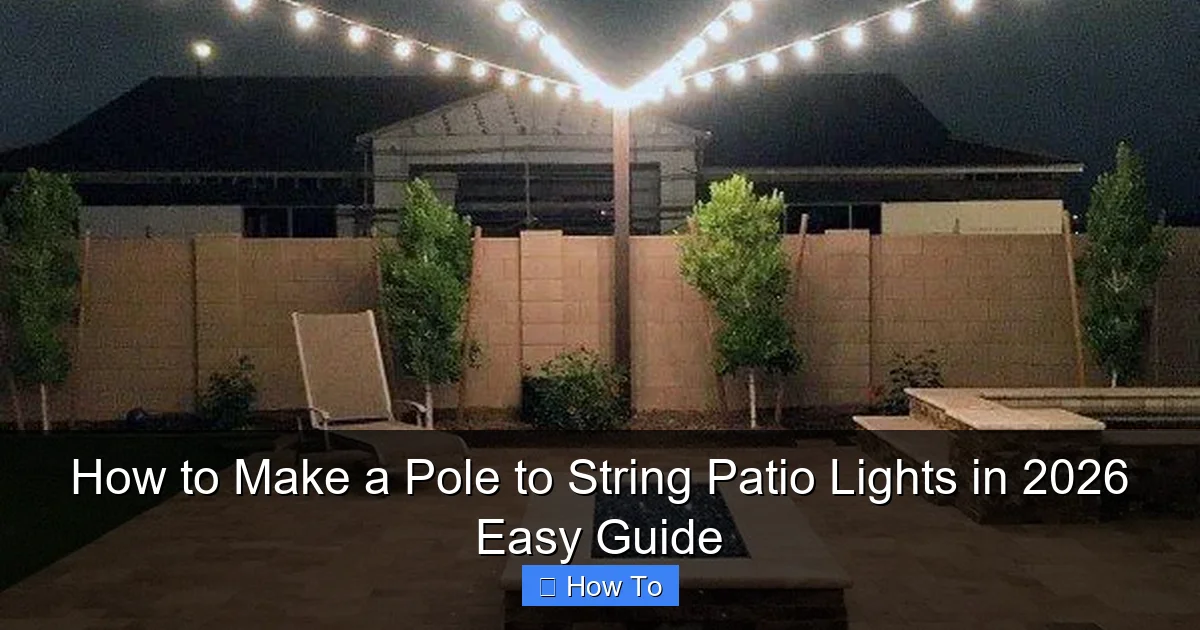
Featured image for how to make a pole to string patio lights
Image source: i.pinimg.com
Transform your outdoor space in minutes by learning how to make a pole to string patio lights with simple, sturdy materials and no electrical expertise. This easy 2026 guide walks you through securing poles, spacing lights evenly, and achieving a professional look using affordable, weather-resistant components. Perfect for renters and homeowners alike—create a cozy, inviting ambiance without permanent installation.
How to Make a Pole to String Patio Lights in 2026 Easy Guide
Key Takeaways
- Choose weather-resistant poles for durability and long-term stability.
- Measure spacing accurately to ensure even light distribution and tension.
- Use stainless steel cables to support lights and prevent sagging.
- Install ground anchors for added pole stability in windy areas.
- Opt for LED string lights to save energy and reduce heat output.
- Secure connections tightly to avoid hazards and maintain a clean look.
Why This Matters / Understanding the Problem
Let’s face it—there’s nothing quite like a warm summer evening on your patio, the air buzzing with cicadas, a cold drink in hand, and soft light dancing above. But what if you don’t have trees to hang string lights from? Or maybe your yard is too open, too flat, or just not suited for permanent fixtures?
That’s where a pole to string patio lights setup comes in. It’s not just a workaround—it’s a stylish, flexible, and surprisingly simple solution. Whether you’re hosting a backyard BBQ, setting up a cozy reading nook, or just want to extend your outdoor living space, poles let you create that magical glow anywhere.
I learned this the hard way. A few years back, I hosted a dinner party under a clear sky, excited to show off my new Edison bulb string lights. But with no trees nearby and a concrete patio, I ended up draping them over a ladder—hardly the ambiance I wanted. That night, I vowed to find a better way. And that’s exactly what this How to Make a Pole to String Patio Lights in 2026 Easy Guide is all about: turning a common backyard challenge into a beautiful, functional reality.
Fun fact: According to a 2025 Outdoor Living Trends Report, over 68% of homeowners say lighting is the #1 factor in creating a welcoming outdoor space. And pole-mounted lights are rising in popularity—especially among renters and urban dwellers.
This guide walks you through building your own pole system—no contractor needed. Whether you’re a DIY newbie or a seasoned tinkerer, you’ll find something useful here. And the best part? You can customize it to fit your space, style, and budget.
What You Need
Before we jump into building, let’s gather your tools and materials. The beauty of this project is that most items are easy to find and affordable. I’ve broken them down into three categories: core materials, tools, and optional upgrades (for those who want a little extra flair).
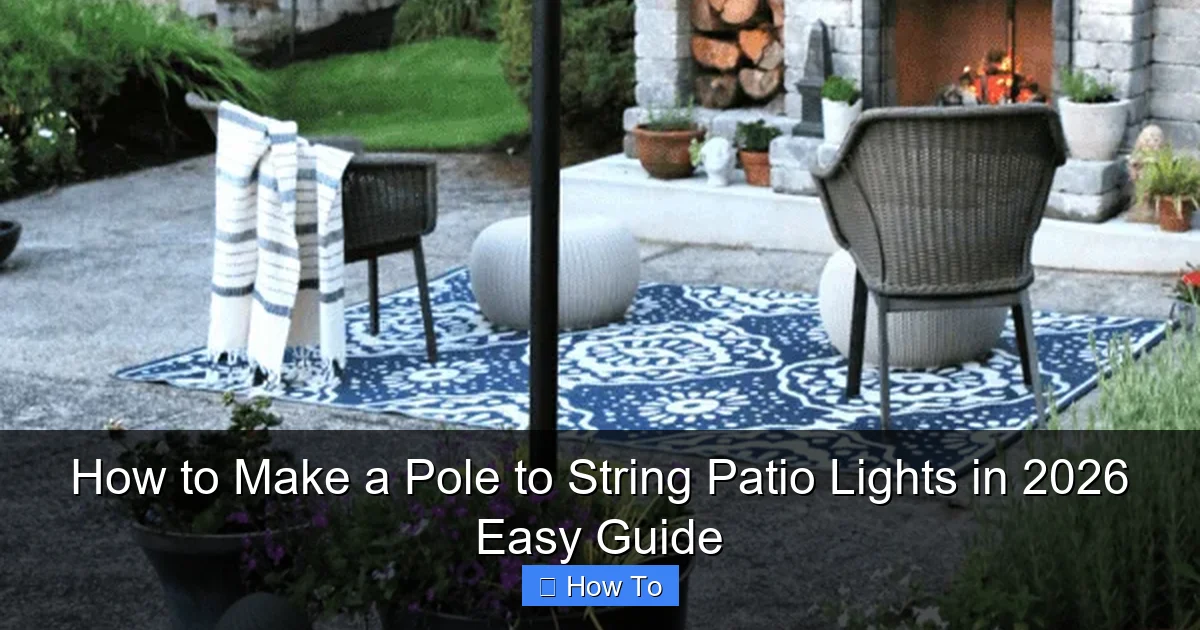
Visual guide about how to make a pole to string patio lights
Image source: todayscreativelife.com
Core Materials
- Two sturdy poles (6–8 ft tall, metal or pressure-treated wood)
- Concrete mix (for securing poles, if using ground anchors)
- Ground anchors or base plates (depending on surface: grass, concrete, or deck)
- String lights (outdoor-rated, LED preferred)
- Eye hooks or screw-in hooks (at least 4, stainless steel for rust resistance)
- Weatherproof extension cords (if needed)
- Zip ties or wire clips (for securing lights)
Tools
- Drill with masonry or wood bit (depending on surface)
- Level (to ensure poles are straight)
- Shovel (for digging holes, if installing in grass)
- Measuring tape
- Wrench (if using base plates with bolts)
- Safety gloves and goggles
Optional Upgrades (For Style & Function)
- Decorative pole covers (PVC sleeves, copper pipe, or painted designs)
- Remote-controlled dimmer switch (for mood lighting)
- Motion sensor (great for security and energy savings)
- Weatherproof junction box (if wiring multiple light strings)
- Planter base (for decks—adds weight and style)
Now, a quick note: You don’t need to buy everything at once. Start with the core list, then add upgrades later. I built my first pole setup with just a couple of old fence posts, eye hooks, and a string of lights—it worked great, and I upgraded it over time.
Pro insight: If you’re on a tight budget, check local hardware stores for “scrap” metal poles or repurpose old deck railings. Just make sure they’re straight and strong enough to support the weight and wind load.
Step-by-Step Guide to How to Make a Pole to String Patio Lights in 2026 Easy Guide
Alright, let’s get into the fun part: building your pole system. I’ll walk you through each step, with real-life tips from my own backyard experiments. This How to Make a Pole to String Patio Lights in 2026 Easy Guide focuses on simplicity, safety, and style.
Step 1: Choose Your Location & Layout
Before you start drilling or digging, stand in your patio space and visualize where the lights should go. Think about:
- Where people gather (table, lounge chairs, grill)
- Natural pathways (so lights don’t block movement)
- Proximity to power source (outlets, GFCI-protected)
I like to lay out painter’s tape on the ground to mark pole positions. For a classic “canopy” effect, place poles 8–12 feet apart. For a linear path (like along a walkway), space them 6–8 feet apart.
Pro tip: Measure from the edge of your patio or deck to avoid tripping hazards. And always check for underground utilities—call 811 (in the U.S.) for a free locate service before digging.
Step 2: Select & Prepare Your Poles
Your poles are the backbone of this setup, so choose wisely.
- Metal poles (galvanized steel or aluminum): Durable, weather-resistant, and sleek. Best for long-term use.
- Wood poles (pressure-treated or cedar): Rustic charm, but require sealing to prevent rot.
For metal, I recommend 1.5–2 inch diameter. For wood, 4×4 posts work well. Cut to 6–8 feet, leaving 2 feet to anchor underground (if in soil).
Sand the top edges to avoid snagging wires. If using wood, apply a clear outdoor sealant or paint (I like matte black for a modern look).
Warning: Never use untreated wood for outdoor poles—it will warp, crack, and rot within a year. Trust me, I tried it once. Big mistake.
Step 3: Install the Poles (3 Methods)
How you secure the poles depends on your surface. Here are the three most common setups:
Option A: In-Ground (Grass or Soil)
- Dig a hole 18–24 inches deep, 6 inches wide.
- Place the pole in the hole. Use a level to make sure it’s straight.
- Pour quick-setting concrete mix into the hole. Follow package directions (usually just add water).
- Let cure for 24–48 hours before adding lights.
This is the most stable option and perfect for permanent installations. I used this for my backyard and haven’t had a single wobble in three years—even during storms.
Option B: Surface-Mounted (Concrete or Deck)
- Use a base plate with bolt holes.
- Mark and drill pilot holes into the concrete/deck using a masonry bit.
- Secure the base with concrete anchors or deck screws.
- Attach the pole to the base with bolts or a sleeve.
Great for renters or if you don’t want to dig. I use this on my concrete patio—easy to remove if I move.
Option C: Weighted Base (Deck or Patio)
- Use a planter base (like a large pot or weighted stand).
- Fill with sand, gravel, or concrete for extra weight.
- Insert pole into a central sleeve or bracket.
Ideal for decks or balconies. I added decorative rocks and a fake succulent on top—looks like a garden feature!
Step 4: Install Eye Hooks or Mounting Points
Now it’s time to prepare for the lights. You’ll need at least two mounting points per pole—one near the top (for the main span) and optionally one lower (for a secondary line or net pattern).
- Measure 6–8 inches down from the top of each pole.
- Drill a pilot hole (slightly smaller than the hook shank).
- Screw in the eye hook by hand, then tighten gently with pliers.
- Repeat on the opposite side if you want a crisscross or grid pattern.
For extra security, I like to use stainless steel lag eye bolts—they’re stronger than standard hooks and won’t rust.
Pro tip: If you’re using a crisscross pattern (like a “web” of lights), install hooks at multiple heights. Start at 7 ft, then add one at 5 ft for a layered look.
Step 5: Hang the String Lights
This is where the magic happens. But don’t rush—take your time to avoid tangles and sags.
- Unroll the lights completely. Plug them in to test—always test before hanging.
- Attach one end to an eye hook using a zip tie or carabiner clip.
- Walk to the other pole and gently pull the string taut. Don’t over-tighten—lights can stretch or break.
- Secure the far end. For a drooping “catenary” look (my favorite), leave a slight sag—about 6 inches in the middle.
- Use zip ties or wire clips every 18–24 inches to keep the line straight and prevent wind damage.
I prefer a gentle arc over a tight line. It looks more natural and reduces strain on the poles. Plus, it casts a softer, more inviting glow.
Step 6: Connect to Power (Safely!)
Power is the trickiest part—safety first. Never run cords across walkways or under rugs. Here’s how I do it:
- Use outdoor-rated extension cords with GFCI protection.
- Route cords along the pole base, securing with clips or conduit.
- Plug into a weatherproof outlet or use an outdoor power box.
- For longer runs, use a junction box to connect multiple light strings.
I added a timer switch to mine—lights turn on at sunset and off at 10 PM. Saves energy and means I never forget to turn them off.
Warning: Never use indoor extension cords outside. They’re not rated for moisture or UV exposure—this is a fire hazard. I learned this after a rainy night fried my first cord.
Step 7: Test, Adjust, and Enjoy
Now the moment of truth. Turn on the lights and step back.
- Check for sags, tangles, or dark spots.
- Adjust zip ties or hooks as needed.
- Walk under the lights—make sure they don’t hang too low (aim for 7 ft minimum clearance).
I like to invite a friend over for a “test night.” They’ll spot things I miss—like a flickering bulb or a cord that’s too visible.
Once it’s perfect? Pour a drink, turn on the lights, and enjoy your new outdoor oasis.
Pro Tips & Common Mistakes to Avoid
After building five different pole setups (and making plenty of mistakes), here are the lessons I wish I’d known from the start.
Pro Tip 1: Use the Right Light Type
Not all string lights are created equal. I love LED filament bulbs—they look like vintage Edison bulbs but use 80% less energy and last 10+ years. Avoid incandescent—they get hot, burn out fast, and are banned in many areas now.
Pro Tip 2: Plan for Wind
Even a light breeze can swing lights and strain poles. I learned this when my first setup swayed so much it pulled an eye hook loose. Now I:
- Use heavier-duty hooks (3/8 inch shank).
- Leave a 6-inch sag to absorb movement.
- Secure cords every 2 feet in windy areas.
Pro Tip 3: Make It Modular
Want to take it down for winter? Use quick-connect fittings or carabiners. I installed marine-grade stainless steel carabiners on each end—I can remove the lights in seconds and store them in a dry box.
Common Mistake #1: Overloading the Poles
Too many lights or too tight a span can bend or break poles. I once hung 150 feet of lights on two 6-foot poles—by morning, they were leaning like the Tower of Pisa. Now I limit each span to 20–30 feet max.
Common Mistake #2: Ignoring the Power Source
Running a 50-foot extension cord from your garage to the patio? That’s a tripping hazard and can cause voltage drop. Use multiple shorter cords with weatherproof connections, or install a dedicated outdoor outlet.
Common Mistake #3: Skipping the Level
Even a 5-degree tilt looks weird. Always use a level—both horizontally and vertically. I keep a small torpedo level in my tool kit for quick checks.
Bonus: Seasonal Upgrades
Your pole setup doesn’t have to be static. I swap out lights seasonally:
- Summer: Warm white or amber
- Fall: Orange and yellow for a harvest vibe
- Winter: Cool white or blue for a frosty glow
- Holidays: Color-changing RGB strings
It keeps the space fresh and fun. And with modular poles, changing lights is a 10-minute job.
FAQs About How to Make a Pole to String Patio Lights in 2026 Easy Guide
Let’s tackle the questions I get most often—straight from my backyard to yours.
Q: Can I use PVC pipe instead of metal or wood?
Technically, yes—but I wouldn’t recommend it. PVC is lightweight and can warp in heat or break in cold. I tried it once; a strong wind knocked one over and shattered it. Stick with metal or treated wood for durability.
Q: How tall should the poles be?
6 to 8 feet is ideal. Below 6 ft, people might hit their heads. Above 8 ft, it’s harder to install and can look awkward. I use 7 ft for a balanced look—tall enough to be out of the way, short enough to reach for adjustments.
Q: Can I install this on a rooftop or balcony?
Absolutely—just use a weighted base (like a planter or sandbag). Make sure the base is wide enough to prevent tipping. I did this on my 4th-floor balcony with a 120-pound concrete planter—no issues in three years.
Q: What if I don’t have an outdoor outlet?
You have a few options:
- Use a weatherproof extension cord from a window or door (secure the cord with clips).
- Install a solar-powered string light system (no wiring needed).
- Hire an electrician to add an outdoor outlet (worth the investment if you use the space often).
I went with solar for my side yard—no cords, no hassle.
Q: How do I keep birds from nesting in the lights?
Birds love warm, sheltered spots. To deter them:
- Use motion-activated lights (they scare birds away).
- Install fake owls or reflective tape nearby.
- Turn lights off during nesting season (spring/summer).
I also check weekly during bird season. So far, no nests—just a few confused sparrows.
Q: Can I use this setup year-round?
Yes, but protect your lights. Use weatherproof, shatterproof bulbs and cover the plug connections with a silicone sealant or weatherproof cap. I leave mine up all year and haven’t had a single bulb die from rain or snow.
Q: What’s the cheapest way to do this?
Repurpose what you already have:
- Use old fence posts or metal conduit from a home project.
- Buy string lights on sale (after holidays).
- Make your own base with a large pot and rocks.
My first setup cost under $40—and it looked great!
Final Thoughts
Creating a pole to string patio lights setup isn’t just about lighting up your backyard—it’s about crafting a space that feels like an extension of your home. Whether you’re hosting friends, enjoying a quiet night, or just wanting to feel more connected to the outdoors, this project delivers.
This How to Make a Pole to String Patio Lights in 2026 Easy Guide is designed to be simple, safe, and stylish. You don’t need fancy tools or a contractor. All you need is a little time, some basic materials, and the willingness to try.
Start small. Build one pole. Hang one string. See how it feels. Then expand. Add dimmers, colors, or even a second level of lights. Make it yours.
And remember: the best outdoor spaces aren’t perfect—they’re lived-in, loved, and full of personality. So go ahead, string up those lights, and let your backyard shine.
Final tip: Take a photo of your setup when it’s done. Share it with friends. You’ll be amazed how many people ask, “How did you do that?” And when they do, you can say, “It’s easy—here’s how.”

