
Featured image for how to make your own patio string lights
Image source: s-media-cache-ak0.pinimg.com
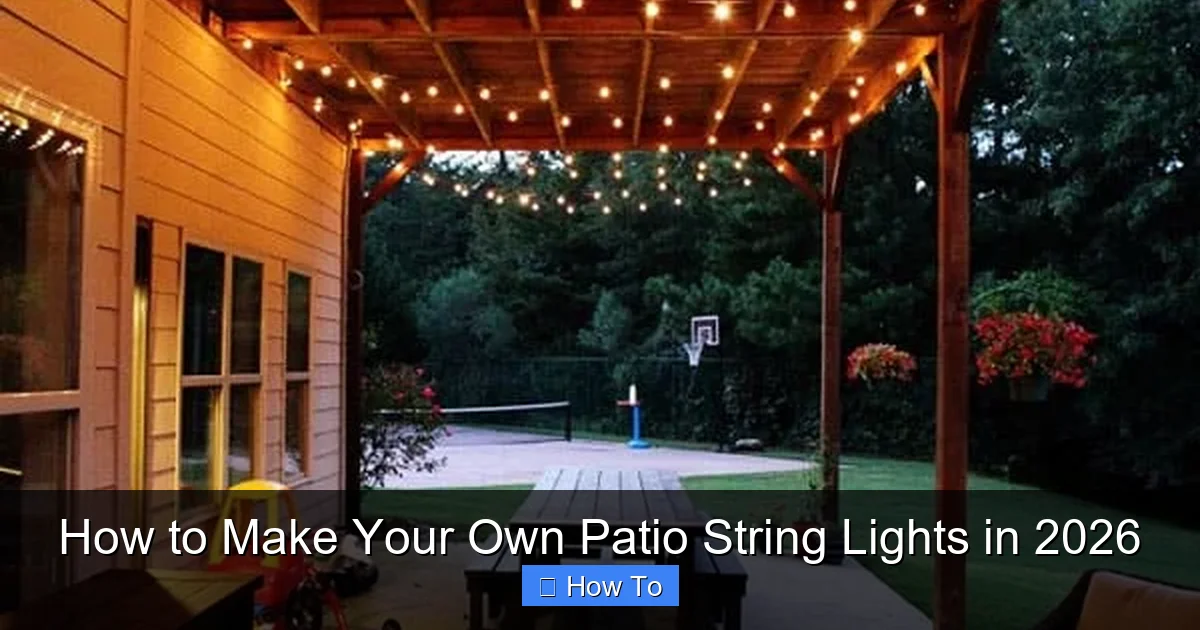
Transform your outdoor space in 2026 by crafting custom patio string lights with simple, affordable materials and a few hours of DIY effort. With weather-resistant bulbs, a flexible power source, and creative mounting techniques, you can design a unique ambiance that store-bought lights can’t match. Follow our expert steps to safely wire, space, and install your lights for a stunning, personalized glow all season long.
“`html
How to Make Your Own Patio String Lights in 2026
Key Takeaways
- Plan your layout: Measure your patio to determine light spacing and power needs.
- Choose weatherproof bulbs: Opt for LED or solar-powered lights for durability and efficiency.
- Use a dimmer switch: Adjust brightness to set the perfect mood effortlessly.
- Secure with clips: Install cable clips to prevent sagging and damage over time.
- Test before hanging: Ensure all bulbs work before final installation for hassle-free setup.
- Add timers or smart controls: Automate lighting schedules to save energy and enhance convenience.
Why This Matters / Understanding the Problem
Let’s be honest: nothing beats the cozy glow of string lights on a warm summer evening. Whether you’re hosting a backyard BBQ or enjoying a quiet night with a book, the right lighting sets the mood. But buying ready-made patio string lights? They’re often overpriced, limited in style, or just don’t fit your space.
That’s where how to make your own patio string lights in 2026 comes in. DIY isn’t just about saving money—it’s about creating something uniquely yours. You get to choose the bulbs, the spacing, the length, and even the mounting style. Plus, you’re not stuck with a one-size-fits-all solution that barely reaches from your pergola to the fence.
I learned this the hard way. A few summers ago, I spent $120 on a “premium” set from a big-box store. It died after two months. The bulbs burned out, the wire frayed, and the plug was barely weatherproof. That’s when I decided to take control. And honestly? Building my own was easier—and more satisfying—than I ever imagined.
This guide walks you through how to make your own patio string lights in 2026 with simple tools, clear steps, and real-life hacks. Whether you’re a first-time DIYer or a seasoned tinkerer, you’ll end up with lights that are safer, longer-lasting, and perfectly tailored to your outdoor space.
What You Need
Before you dive in, let’s talk gear. The beauty of this project is that you don’t need a workshop or fancy tools. Most items are available at hardware stores or online. Here’s your starter kit for how to make your own patio string lights in 2026:
Visual guide about how to make your own patio string lights
Image source: onekindesign.com
- Weatherproof LED string light cord (with sockets spaced 12–18 inches apart; look for SPT-1 or SPT-2 rating)
- LED bulbs (choose warm white, vintage-style Edison, or color-changing for ambiance)
- Extension cord or outdoor-rated power source (with GFCI protection)
- Weatherproof wire connectors (butt splices or twist-on caps)
- Waterproof heat-shrink tubing (for extra protection on connections)
- Stainless steel or vinyl-coated cable clips (to secure the lights without damaging surfaces)
- Measuring tape (to plan your layout)
- Drill and drill bits (for mounting clips or anchors)
- Wire stripper and cutter
- Zip ties (for temporary testing or tight spaces)
- Optional: dimmer switch or smart plug (for mood control)
Pro tip: Always check the maximum wattage or amperage your string light cord can handle. Most are rated for 10–15 amps. Overloading can cause overheating—even with LEDs.
Bonus: If you’re going the extra mile, consider a weatherproof junction box for connecting multiple runs or adding a timer. It’s not required, but it’s a game-changer for long-term durability.
Step-by-Step Guide to How to Make Your Own Patio String Lights in 2026
Step 1: Plan Your Layout (The Secret to a Flawless Install)
Don’t just start hammering clips into the wall. Start with a plan. Walk around your patio and visualize where the lights will go. Are you draping them across a pergola? Wrapping them around tree branches? Running them along a fence?
Measure the distance. Add 10–15% extra to your total length—just in case. For example, if your pergola is 20 feet long, plan for a 22–23 foot string. This gives you slack for curves, corners, and plug-in clearance.
Sketch it out on paper or use a free app like SketchUp Free or even a napkin. Mark where you’ll place each clip, where you’ll plug in, and where you might need extensions or splices.
Warning: Avoid running lights across high-traffic walkways. You don’t want guests tripping over cords. If you must cross a path, use a low-profile conduit or bury the cord under mulch (only if rated for direct burial).
This step is crucial for how to make your own patio string lights in 2026—because a good plan prevents frustration later.
Step 2: Choose the Right String Light Cord
Not all cords are created equal. For outdoor use, you need a weatherproof cord rated for wet locations. Look for these labels:
- UL Listed (safety certified)
- SPT-1 or SPT-2 (standard for outdoor strings; SPT-2 is thicker and more durable)
- IP65 or higher (dust and water resistant)
I recommend commercial-grade LED string lights with replaceable bulbs. These cost a bit more (around $20–$40 for 25–50 feet), but they last years. Avoid the cheap $10 sets from discount stores—they often use thin wire and non-replaceable LEDs.
Pro move: Buy a cord with end-to-end sockets (not just one plug and socket). This lets you connect multiple runs without extra extension cords. Just make sure each run stays under the amperage limit.
For how to make your own patio string lights in 2026, quality cord = fewer headaches down the road.
Step 3: Install Mounting Clips (Without Damaging Your Home)
This is where most DIYers go wrong. They use nails, staples, or duct tape—which can damage siding, rot wood, or create fire hazards.
Instead, use stainless steel or vinyl-coated cable clips. These grip the wire without crushing it and won’t rust. For wood surfaces, pre-drill small holes and screw the clips in. For stucco or brick, use plastic anchors or adhesive-backed clips (like 3M Command Outdoor Light Clips).
Space clips every 12–18 inches. This keeps the string taut and prevents sagging. If you’re wrapping around trees, use tree-friendly straps (not zip ties that dig into bark).
For pergolas or gazebos, run the lights along the rafters or beams. Use clips to secure the cord to the underside—out of sight but fully visible from below.
Personal insight: I once used regular zip ties on my cedar pergola. After a year, they left stains and the wood started cracking. Learned my lesson: always use UV-resistant, non-abrasive fasteners.
This step ensures your how to make your own patio string lights in 2026 project looks professional and lasts.
Step 4: String the Lights (Test Before You Commit)
Now the fun part: hanging them. Start at the power source. Plug in the first string and test it. Make sure all bulbs light up and the cord isn’t hot to the touch.
Then, run the string along your planned path, clipping it in place as you go. Don’t pull too tight—leave a slight sag. This prevents tension on the sockets and gives you flexibility if you need to adjust later.
If you’re connecting multiple strings, use weatherproof wire connectors (butt splices with heat-shrink tubing). Here’s how:
- Strip ½ inch of insulation from each wire end.
- Twist the corresponding wires together (black to black, white to white, green to green if grounded).
- Slide on a heat-shrink tube, then use a heat gun or hair dryer to seal it.
- Wrap the connection with electrical tape for extra protection.
Never use regular twist-on wire nuts outdoors—they can loosen in heat and let in moisture.
Pro tip: Test each section as you go. If a bulb burns out or a splice fails, it’s easier to fix before the whole string is clipped in.
This step is key to a safe, reliable setup for how to make your own patio string lights in 2026.
Step 5: Secure the Power Source (Safety First)
Your plug is the weakest link. If it’s exposed to rain, it can short out—or worse, cause a fire.
Always plug into a ground fault circuit interrupter (GFCI) outlet. These cut power if they detect a leak, which is critical for outdoor circuits. If your outdoor outlet isn’t GFCI, install one (or use a GFCI extension cord).
Elevate the plug off the ground. Use a plastic storage bin turned upside down, a weatherproof outlet cover, or a dedicated outdoor power box. I keep mine under a small bench with a vented lid—keeps it dry and accessible.
For longer runs, consider a low-voltage transformer with a timer. It converts 120V to 12V, which is safer and more energy-efficient. Plus, you can set it to turn on at sunset.
Warning: Never daisy-chain more than three strings unless the manufacturer allows it. Check the packaging or manual. Overloading is a common cause of failure.
This step ensures your how to make your own patio string lights in 2026 are as safe as they are beautiful.
Step 6: Add Finishing Touches (The Magic Touch)
Now for the fun stuff. Want a boho vibe? Tuck in some faux greenery or hang paper lanterns. Love modern style? Use sleek black clips and minimalist bulbs.
Try a dimmer switch for ambiance. Many LED strings are dimmable—just make sure your dimmer is compatible. I use a Lutron outdoor dimmer, and it’s amazing for setting the mood.
For smart control, plug the string into a Wi-Fi smart plug. Use your phone to turn them on, set schedules, or sync with music. I love coming home to lights that turn on as I walk into the yard.
And don’t forget maintenance. Every spring, wipe the bulbs with a dry cloth and check for loose clips or frayed wires.
These small touches make your how to make your own patio string lights in 2026 truly yours.
Pro Tips & Common Mistakes to Avoid
After building dozens of patio light setups (for myself and friends), I’ve learned a few hard truths. Here’s what to keep in mind:
- Don’t skip the GFCI. It’s not optional. I once ignored it during a storm. The plug sparked and tripped the breaker. GFCI would’ve prevented it.
- Use LED bulbs only. Incandescent bulbs get hot, use more power, and burn out faster. LEDs last 25,000+ hours and stay cool.
- Avoid over-sagging. Too much droop looks sloppy and can stress the wire. A gentle curve is fine—just not a “U” shape.
- Label your splices. Use colored tape or tags to mark where connections are. Saves time if you need to troubleshoot.
- Store properly off-season. Coil the strings loosely and keep them in a dry, dark place. Sunlight degrades plastic over time.
- Don’t use indoor-rated lights outside. Even if they “look” waterproof, they’re not built for UV, rain, or temperature swings.
Real talk: I once tried to save $10 by using indoor string lights on my porch. Within a month, the plastic cracked and the bulbs flickered. Lesson: invest in outdoor-rated gear from the start.
These tips will save you time, money, and frustration as you learn how to make your own patio string lights in 2026.
FAQs About How to Make Your Own Patio String Lights in 2026
Q: Can I use solar-powered string lights instead?
Yes, but with caveats. Solar lights work great in sunny areas, but they’re dimmer and less reliable on cloudy days. I use them for accent lighting, but for full ambiance, I stick with plug-in strings. Plus, solar strings often have non-replaceable batteries—so when they die, the whole set goes.
Q: How do I hide the power cord?
Great question. I use a few tricks: tuck the cord behind a planter, run it through a gutter, or bury it under mulch (if it’s rated for direct burial). You can also paint the cord to match your fence or wall. Just don’t cover it completely—it needs airflow.
Q: What if my patio has no nearby outlet?
No outlet? No problem. Use a long, outdoor-rated extension cord (14-gauge or thicker) or install a new outlet. I ran a 50-foot cord from my garage to the back patio—no issues. For permanent setups, hire an electrician to add an outdoor outlet. Worth every penny.
Q: Can I connect multiple strings end to end?
Yes, but check the amperage. Most strings can handle 2–3 connected. Look for the “max connected strings” label. If it says “2,” don’t add a third. I once ignored this—the cord melted at the plug. Not fun.
Q: Are smart plugs safe for outdoor lights?
Absolutely—if they’re rated for outdoor use. Look for “weather-resistant” or “outdoor” in the product description. I use a Kasa outdoor smart plug, and it’s survived two winters and countless storms.
Q: How do I fix a burnt-out bulb?
Easy. Most outdoor strings have replaceable bulbs. Just unscrew the dead one and pop in a new one. Keep a few extras on hand. If the whole string flickers, the issue might be a loose socket or bad splice—check connections first.
Q: Will the lights attract bugs?
LEDs attract fewer bugs than incandescent bulbs. But they’re not bug-proof. I use yellow “bug” LEDs or add citronella candles nearby. Works like a charm.
Final Thoughts
Making your own patio string lights isn’t just a DIY project—it’s a way to create magic in your outdoor space. You’re not just hanging lights; you’re building memories. Every time you turn them on, you’ll remember the time you took control, solved the problem, and made something beautiful.
And the best part? This method works for any style, any space, and any budget. Whether you’re lighting a tiny balcony or a sprawling backyard, how to make your own patio string lights in 2026 gives you the power to customize, upgrade, and enjoy.
Start small. Try one string this weekend. Test it, tweak it, and see how it feels. Then expand. Add a second run, a dimmer, or a smart plug. Before you know it, your patio will be the envy of the neighborhood—and you’ll know exactly how it happened.
So grab your tools, sketch your plan, and get started. The glow is worth it.
“`

