Featured image for patio string light hanging kit
Image source: cdn.christmaslightsetc.com
Transform your outdoor space instantly with a reliable patio string light hanging kit—designed for secure, hassle-free installation and long-lasting ambiance. These kits include weather-resistant hardware, adjustable tension cables, and easy-to-use hooks, ensuring your lights stay perfectly placed through every season. Say goodbye to sagging wires and hello to a professionally lit patio with minimal effort.
Key Takeaways
- Choose durable materials: Opt for weather-resistant kits to ensure longevity.
- Plan your layout first: Measure space to avoid gaps or overcrowding.
- Use adjustable hooks: They simplify installation and tension adjustments.
- Prioritize safety: Keep lights away from water and flammable materials.
- Add dimmers: Control brightness for versatile ambiance settings.
- Secure cables properly: Prevent sagging with zip ties or clips.
📑 Table of Contents
Why Your Patio Needs a String Light Hanging Kit
Remember the last time you sat outside as the sun dipped below the horizon, and the only thing missing was that cozy, inviting glow? Maybe you tried draping a string of lights over a tree branch or nailing them to the fence, only to find them sagging or tangled the next morning. We’ve all been there—and it’s frustrating. That’s where a patio string light hanging kit comes in. These kits are game-changers for creating a warm, inviting outdoor space without the hassle of DIY guesswork.
Whether you’re hosting a summer barbecue, enjoying a quiet evening with a book, or setting the mood for a romantic dinner, the right lighting transforms your patio into an extension of your home. A dedicated hanging kit ensures your lights stay secure, look professional, and last longer. No more frayed wires, drooping strands, or last-minute trips to the hardware store. In this guide, I’ll walk you through everything you need to know about these kits—from choosing the right one to installing it with confidence—so you can focus on what really matters: enjoying your outdoor oasis.
What Is a Patio String Light Hanging Kit?
Defining the Basics
A patio string light hanging kit is a collection of hardware and accessories designed to help you install and maintain string lights safely and effectively. Think of it as your all-in-one solution for outdoor lighting. Unlike makeshift setups (like tying lights to trees or using duct tape), these kits are engineered to handle weather, weight, and time. They typically include:
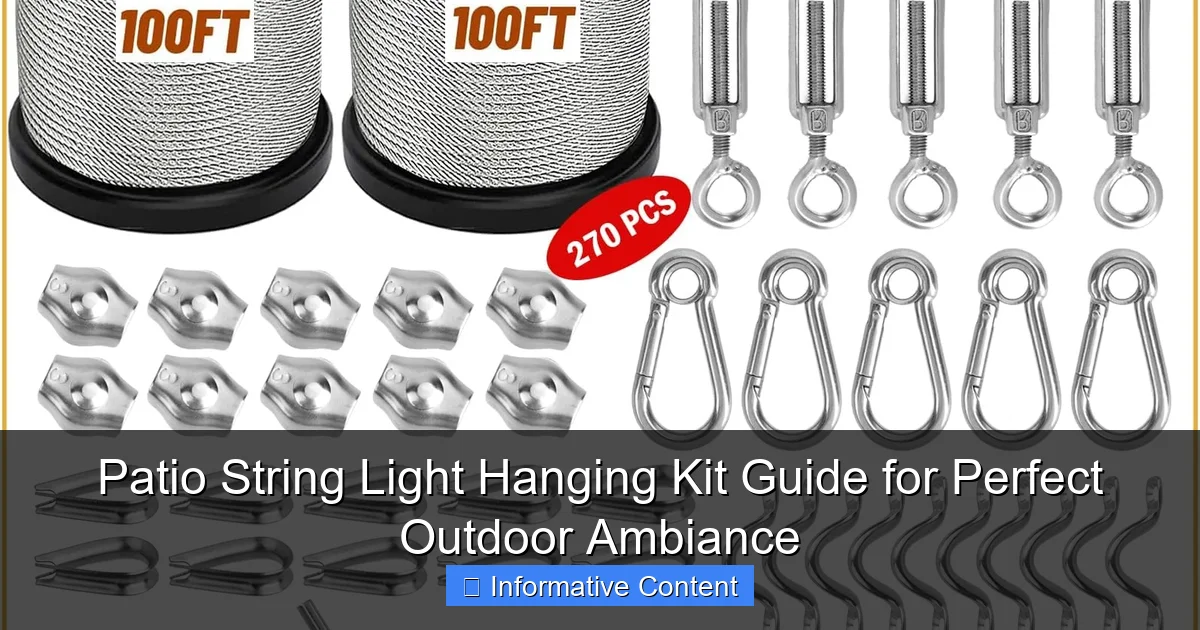
Visual guide about patio string light hanging kit
Image source: m.media-amazon.com
- Anchor points (screw eyes, hooks, or brackets)
- Cable or wire (to support the lights)
- Tensioners or turnbuckles (to keep the line taut)
- Mounting hardware (screws, anchors, or adhesive strips)
- Clips or fasteners (to attach the lights to the cable)
Some kits even come with decorative elements, like vintage-style pulleys or copper hooks, to add a touch of charm. The goal? To create a stable, long-lasting framework that keeps your lights in place—no matter the season.
Why a Kit Beats DIY Hacks
Sure, you could grab some nails and twine from the garage. But here’s the problem: nails can rust, twine can fray, and trees can grow. A dedicated kit solves these issues. For example:
- Durability: Marine-grade stainless steel hooks resist corrosion, even in rainy climates.
- Flexibility: Adjustable turnbuckles let you fine-tune tension as cables stretch over time.
- Versatility: Many kits work with various surfaces (wood, stucco, brick, or vinyl siding).
One of my friends tried hanging lights with zip ties. Within a month, the ties had snapped in the sun, and the lights were dangling dangerously low. A proper kit would’ve saved him the headache (and the safety risk).
Types of Patio String Light Hanging Kits
1. Cable-Based Kits
The most popular type, cable-based kits use a steel or nylon wire as the backbone for your lights. The cable runs between two anchor points (e.g., a house wall and a pergola), and the lights clip onto it. This design keeps the lights evenly spaced and prevents sagging. Best for: Large patios, pergolas, or spaces with multiple anchor points.
Pros:
- High weight capacity (great for heavy-duty lights)
- Minimal sagging over long distances
- Professional, clean look
Cons:
- Requires drilling into surfaces for anchor points
- More complex installation than clip-on kits
Tip: Use a patio string light hanging kit with a turnbuckle for easy tension adjustments. I learned this after my first cable sagged after a rainy week—the turnbuckle fixed it in seconds.
2. Clip-On or Track Kits
These kits use adhesive-backed clips, magnetic strips, or pre-installed tracks to hold lights. They’re ideal for renters or anyone who wants a no-drill solution. Best for: Small patios, balconies, or temporary setups.
Pros:
- No permanent damage to surfaces
- Quick to install (under 30 minutes)
- Lightweight and portable
Cons:
- Lower weight capacity (avoid heavy glass bulbs)
- Adhesive may fail in extreme heat/cold
Real-world example: My neighbor uses a clip-on kit on her vinyl siding. The clips held strong for two years—until a hailstorm loosened a few. A quick reapplication of outdoor-grade adhesive fixed it.
3. Pergola or Gazebo Kits
Designed specifically for overhead structures, these kits include rafter hooks, beam clamps, or zip ties. They let you drape lights across beams or create a canopy effect. Best for: Covered patios, gazebos, or pergolas.
Pros:
- No need for additional anchor points
- Creates a “floating” light effect
- Easy to remove for seasonal changes
Cons:
- Not suitable for open-air patios
- May require custom sizing for odd-shaped structures
4. Tension Rod Kits
These kits use spring-loaded rods to stretch cables between two walls or posts. No drilling required—just adjust the rod length. Best for: Narrow patios, between trees, or renters.
Pros:
- Instant setup
- No tools needed
- Adjustable for different widths
Cons:
- Less stable in high winds
- Limited to shorter spans (under 15 feet)
How to Choose the Right Kit for Your Patio
Step 1: Assess Your Space
Before buying, take measurements:
- Distance between anchor points: Use a tape measure to find the longest span. Add 10% for slack (e.g., 20 feet = 22 feet of cable).
- Surface type: Wood, stucco, and vinyl require different anchors. A stucco wall needs masonry screws, while vinyl siding needs low-profile hooks.
- Weight of your lights: Check the packaging. A 25-foot strand of LED Edison bulbs weighs ~2 lbs, while heavy-duty glass bulbs can weigh 5+ lbs.
Pro tip: Sketch a rough layout. Note where you’ll place anchor points, and whether you want a zigzag, crisscross, or straight-line pattern.
Step 2: Prioritize Weather Resistance
Your patio string light hanging kit must survive sun, rain, and wind. Look for:
- Stainless steel or galvanized hardware: Resists rust.
- UV-resistant cable: Prevents fraying from sun exposure.
- Waterproof connectors: If your kit includes splices, ensure they’re sealed.
I once used a kit with aluminum hooks. After one summer, they corroded and broke. Lesson learned: invest in stainless steel.
Step 3: Match Your Aesthetic
Kits aren’t just functional—they’re part of your decor. Consider:
- Color: Black or silver cables blend with most patios; copper adds warmth.
- Design: Vintage-style pulleys or minimalist clips.
- Bulb compatibility: Some kits work only with S14 or E26 bulbs.
Example: For a boho-chic patio, I paired a black cable kit with colorful globe lights. The contrast looked stunning.
Step 4: Check for Extra Features
Some kits go the extra mile:
- Adjustable tensioners: Let you tighten cables as they stretch.
- Decorative covers: Hide hardware for a cleaner look.
- Smart compatibility: Kits with Wi-Fi hubs for app-controlled lights.
Caution: Don’t pay for features you won’t use. A basic kit works fine if you’re on a budget.
Installation: A Step-by-Step Guide
Tools You’ll Need
- Measuring tape
- Drill (for permanent anchor points)
- Level (to keep cables straight)
- Wrench (for turnbuckles)
- Outdoor-rated extension cord (if lights aren’t solar)
Note: For clip-on kits, you might only need a ladder and a helper.
Step 1: Install Anchor Points
For cable-based kits:
- Mark anchor points at equal height (use a level).
- Drill pilot holes, then insert screws or anchors.
- Attach screw eyes or hooks. Ensure they’re secure—wiggle them to test.
Tip: On stucco, use a masonry bit and silicone sealant to prevent water damage.
Step 2: Run the Cable
- Unroll the cable between anchor points.
- Attach one end to a hook with a carabiner or clamp.
- Pull the cable taut, then secure the other end with a turnbuckle.
Warning: Don’t overtighten. Cables should be firm but not strained. A 20-foot cable needs ~50 lbs of tension.
Step 3: Attach the Lights
- Clip or loop the lights onto the cable. Use the kit’s fasteners.
- Space bulbs evenly (check the kit’s instructions).
- For zigzag patterns, use additional clips at corners.
Pro move: Leave 6 inches of slack at each end for adjustments.
Step 4: Test and Adjust
- Plug in the lights. Check for dark spots or sagging.
- Use the turnbuckle to fine-tune tension.
- Trim excess cable with wire cutters.
Real-world fix: My first installation had a sag in the middle. A half-turn on the turnbuckle fixed it instantly.
Maintenance and Troubleshooting
Seasonal Care
To extend your kit’s lifespan:
- Spring: Inspect for rust, frayed cables, or loose hooks. Tighten turnbuckles.
- Summer: Clean bulbs with a damp cloth. Avoid harsh chemicals.
- Fall: Trim nearby branches to prevent wind damage.
- Winter: In freezing climates, remove lights or use weatherproof covers.
Tip: Store cables in a cool, dry place to prevent kinking.
Common Issues and Fixes
| Issue | Likely Cause | Solution |
|---|---|---|
| Sagging lights | Loose cable or stretched wire | Tighten turnbuckle or replace cable |
| Rust on hooks | Low-quality hardware | Replace with stainless steel; apply rust-resistant spray |
| Adhesive clips failing | Surface dirt or extreme temps | Clean surface; use outdoor-grade adhesive |
| Uneven lighting | Bulbs too far apart | Re-space bulbs or add a second strand |
Personal story: Last year, a storm blew down my lights. I found the turnbuckle had loosened. Now I check it monthly.
Creating Your Perfect Ambiance
A patio string light hanging kit is more than hardware—it’s the foundation for unforgettable moments. Imagine: laughter under a canopy of warm white lights, the soft glow of Edison bulbs on a rainy evening, or the sparkle of fairy lights during a holiday party. With the right kit, these moments are effortless.
Don’t let a sagging strand or rusty hook ruin your vibe. Invest in quality, follow the steps in this guide, and take the time to maintain your setup. Your patio will become the place everyone wants to gather—rain or shine. And when someone asks, “How did you get your lights to look so professional?” you can smile and say, “It’s all in the kit.”
Now, grab your tools, pick a clear evening, and start hanging. The perfect ambiance is just a few turns of a turnbuckle away.
Frequently Asked Questions
What is a patio string light hanging kit, and why do I need one?
A patio string light hanging kit includes all the hardware—hooks, wires, zip ties, and mounts—needed to securely install string lights without damaging surfaces. It simplifies setup and ensures professional-looking results for your outdoor ambiance.
Can I install a string light hanging kit on any patio surface?
Most kits work on wood, stucco, vinyl, or metal surfaces, thanks to versatile mounting hardware like adhesive clips, screws, or tension wires. Always check the kit’s compatibility with your specific patio material before purchasing.
How do I choose the right patio string light hanging kit for my space?
Measure your patio area to determine the required cable length and ensure the kit supports your light weight (e.g., LED vs. incandescent). Opt for weather-resistant materials like stainless steel or UV-resistant plastic for durability.
Are patio string light hanging kits weatherproof?
Quality kits feature waterproof or weather-resistant components, such as rubberized hooks and galvanized steel cables, to withstand rain and sun. Confirm the kit’s IP rating for outdoor use before buying.
Can I reuse my string light hanging kit if I move or redesign my patio?
Yes, most kits are reusable if installed with removable hardware (e.g., adhesive hooks or twist ties). For permanent mounts like screws, you can patch holes and reinstall the kit in your new layout.
How do I avoid sagging lights when using a hanging kit?
Use the kit’s tension cable or support wires to create a taut line, spacing anchors 2-3 feet apart for heavy bulbs. For longer runs, add a central support hook to prevent drooping.

