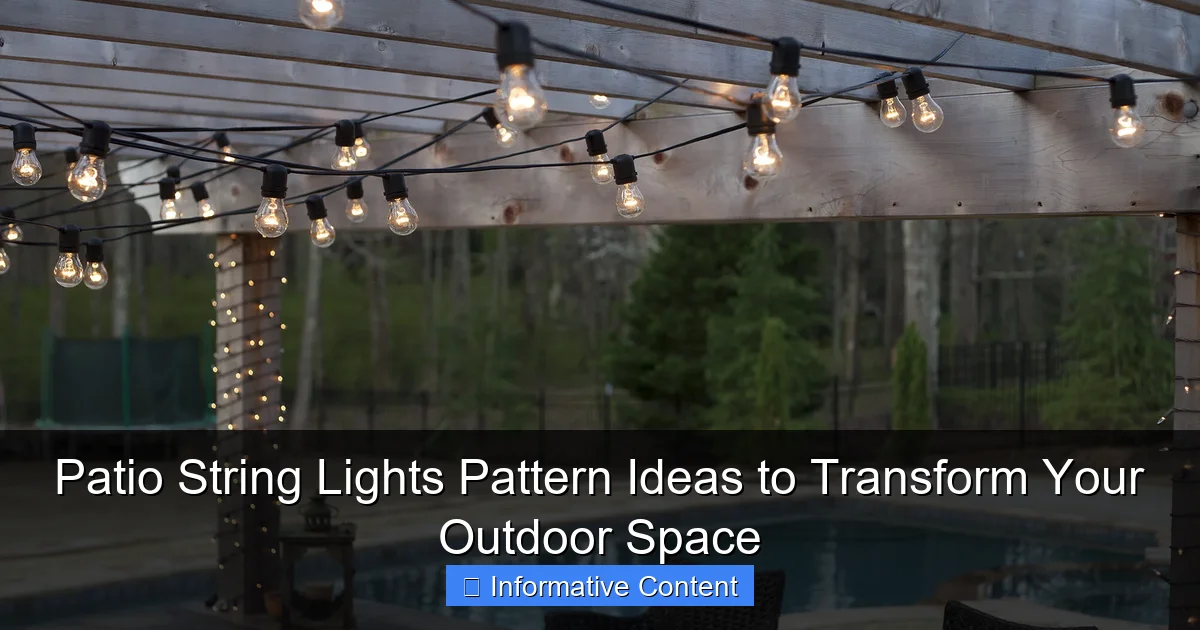
Featured image for patio string lights pattern
Image source: img.yardenvy.com
Transform your patio into a captivating retreat with strategic string light patterns that enhance ambiance and style. From classic zigzags and elegant canopies to geometric grids and cascading curtains, the right layout can define spaces, highlight architectural features, and set the mood for any occasion. Choosing the perfect pattern is the key to unlocking your outdoor area’s full potential—effortlessly blending function and flair.
Key Takeaways
- Plan your layout: Sketch light placement before hanging to ensure balanced coverage.
- Mix patterns creatively: Combine zigzag and crisscross designs for dynamic visual interest.
- Highlight focal points: Frame seating areas or fire pits to enhance ambiance.
- Use dimmers: Adjust brightness to set the perfect mood for any occasion.
- Choose weatherproof lights: Ensure durability with outdoor-rated, waterproof string lights.
- Layer lighting: Pair string lights with lanterns or candles for added depth.
📑 Table of Contents
- Why Patio String Lights Are a Game-Changer for Outdoor Ambiance
- Understanding the Basics: Choosing the Right String Lights for Your Space
- Top 6 Patio String Lights Pattern Ideas (With Real-World Examples)
- How to Hang Your Lights Safely and Securely
- Creative Ways to Enhance Your Light Patterns
- Common Mistakes to Avoid (And How to Fix Them)
- Final Thoughts: Light Up Your Life (Literally)
Why Patio String Lights Are a Game-Changer for Outdoor Ambiance
There’s something magical about stepping into a backyard at night and being greeted by a warm, inviting glow. Whether it’s a quiet evening with a book, a family barbecue, or a late-night chat with friends, the right lighting can completely transform your outdoor space. And when it comes to creating that cozy, enchanting atmosphere, patio string lights pattern choices play a surprisingly big role.
I remember the first time I strung up lights in my own backyard. I just draped them across the fence—nothing fancy. But the moment the sun set and those tiny bulbs flickered to life, it felt like I’d unlocked a secret level of relaxation. That simple addition made my patio feel like a destination, not just an afterthought. Since then, I’ve experimented with dozens of patio string lights pattern ideas, from zigzags to canopies, and I’ve learned that the way you hang them matters just as much as the lights themselves. The right pattern doesn’t just light up a space—it shapes it, frames it, and makes it feel intentional.
Understanding the Basics: Choosing the Right String Lights for Your Space
Types of Patio String Lights
Before diving into patio string lights pattern ideas, it helps to know what kind of lights you’re working with. Not all string lights are created equal, and your choice will influence the look, feel, and even the durability of your setup.
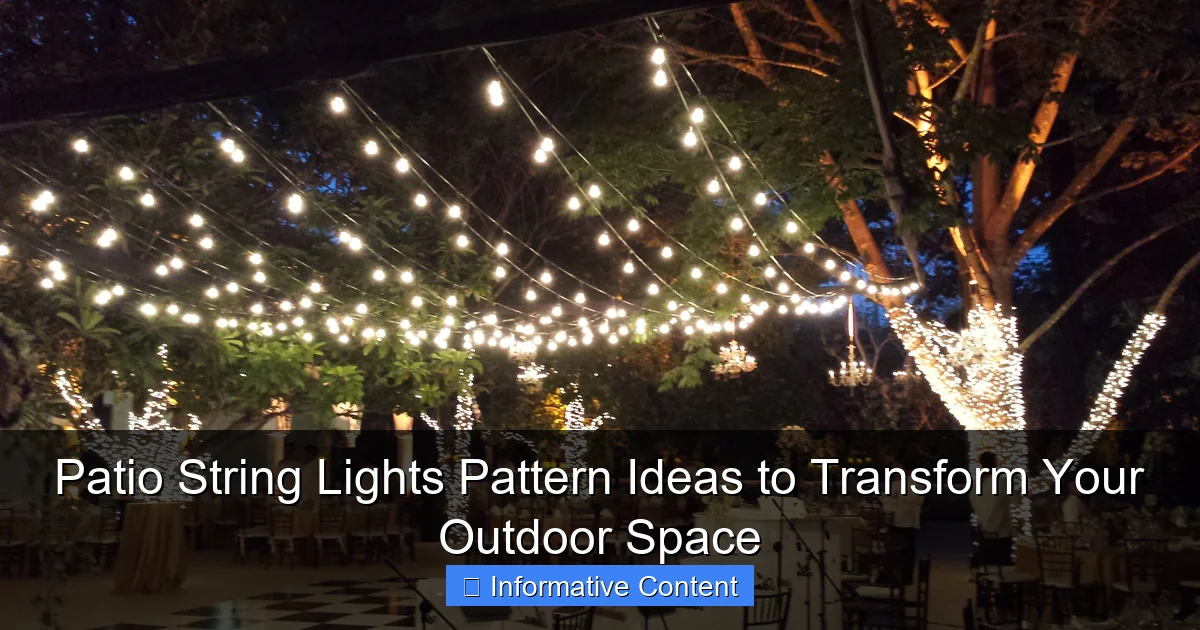
Visual guide about patio string lights pattern
Image source: img.yardenvy.com
- LED Edison Bulbs: These are my go-to for a vintage, romantic vibe. The exposed filaments give off a warm, golden glow—perfect for creating a café-like ambiance. They’re energy-efficient and last longer than incandescent bulbs, but they can be pricier upfront.
- Mini Globe Lights: Small, round bulbs that offer a softer, more diffused light. Great for wrapping around trees, railings, or creating a starry-night effect overhead. They’re budget-friendly and easy to install.
- Solar-Powered Lights: Ideal if you’re in a sunny area and want to skip the extension cords. They charge during the day and turn on automatically at dusk. Just keep in mind they may not shine as brightly or as long as plug-in models.
- Smart RGB Lights: Want to change colors with your mood? These let you control hue, brightness, and even patterns via an app. Perfect for themed parties or seasonal decor, but they require a power source and Wi-Fi.
- Twinkling or Flashing Lights: These add movement and sparkle, but use them sparingly. Too many twinkles can feel chaotic, especially in a small space.
Factors That Influence Your Pattern Choice
Your patio string lights pattern should complement your space, not overwhelm it. Here are a few things to consider:
- Size of the Area: A tiny balcony calls for a subtle pattern—maybe a single zigzag or a wrapped column. A sprawling backyard can handle a full canopy or grid.
- Ceiling Height: If you’re hanging lights overhead, make sure there’s enough clearance. You don’t want guests ducking every time they stand up.
- Existing Structures: Trees, pergolas, railings, and eaves are natural anchor points. Use them! But if you don’t have them, you can install poles, hooks, or tension wires.
- Power Source: Are you near an outlet? If not, solar lights or battery-powered options may be your best bet. Just remember: the longer the run, the more power you’ll need.
- Weather Resistance: Look for lights rated for outdoor use (IP44 or higher). If you live in a rainy or snowy climate, durability is key.
One mistake I made early on was buying lights that were too short. I tried to stretch a 20-foot strand across a 30-foot span, and the tension pulled the bulbs out of the sockets. Lesson learned: always measure your space and buy lights with a little extra length—or connect multiple strands with a safe, UL-listed extension.
Top 6 Patio String Lights Pattern Ideas (With Real-World Examples)
The Classic Canopy: A Sky of Light
This is the gold standard for outdoor entertaining. Picture a grid of lights strung overhead, like a glowing ceiling. It’s simple, elegant, and makes any patio feel like a destination.
How to do it: Use a pergola, two posts, or even trees as anchor points. Run parallel strands across the space, spaced 12–18 inches apart. For a tighter canopy, crisscross them into a grid. I’ve done this in a friend’s backyard using four 25-foot LED Edison strands, connected end-to-end with a waterproof connector. We used zip ties to secure them to the pergola beams, and the result? A warm, golden ceiling that made their outdoor dining table feel like a private bistro.
Pro tip: Add a slight sag (about 6–8 inches) between anchor points. It creates a softer, more organic look—and prevents tension from snapping bulbs.
The Zigzag (or Chevron) Pattern: Dynamic and Modern
If you want something with a bit more movement, try a zigzag pattern. It’s especially effective on fences, railings, or along the edge of a deck.
How to do it: Start at one end of your fence, run the lights diagonally up to the top corner of the next section, then diagonally back down. Repeat across the entire span. I used this on a cedar fence in my own backyard with mini globe lights. The alternating angles made the fence feel taller and more interesting—like a piece of art.
Best for: Small to medium spaces. Avoid this on very long runs (over 30 feet), as the angles can make the lights look cluttered.
The Wrapped Column or Tree: Vertical Interest
Don’t just hang lights horizontally—use them to highlight vertical features. A wrapped tree or column draws the eye upward and adds depth.
How to do it: Wrap the lights tightly around a tree trunk, post, or pillar, starting at the base and working up. Use spiral wraps for a more dynamic look, or straight vertical lines for a clean, modern feel. I’ve seen this done beautifully on a backyard gazebo with four support columns. Each column was wrapped with warm white LED lights, creating a glowing “frame” for the structure.
Caution: Avoid wrapping too tightly on live trees—it can damage the bark. Use a loose spiral and check the tree periodically.
The Starry Night Effect: Floating Glow
Want to mimic the look of stars? This pattern uses random, scattered strands to create a soft, natural glow overhead.
How to do it: Instead of a grid, run lights in irregular lines—some short, some long, some crossing at odd angles. Use clips or hooks to attach them to eaves, trees, or poles. I tried this in a small courtyard with limited structure. I used 10 short strands (8–12 feet each), connected them with extension cords, and attached them to gutter hooks. The result? A dreamy, floating canopy that felt like a secret garden.
Pro tip: Use dimmable lights or add a dimmer switch. Too many bright points can look chaotic—soft, low lighting feels more magical.
The Grid Pattern: Crisp and Structured
For a clean, modern look—especially with a pergola or covered patio—a grid pattern delivers precision and symmetry.
How to do it: Run horizontal strands every 12–18 inches, then cross them with vertical strands at the same interval. Secure with hooks or cable ties. I’ve used this in a backyard with a 10×10 ft pergola. We ran 12 parallel strands, then added 8 perpendicular ones. The grid created a geometric ceiling that felt modern and intentional.
Bonus: This pattern works great with smart lights. You can program each row to fade in sequence for a “wave” effect.
The Curtain or Drape Effect: Soft and Romantic
For a softer, more intimate feel, try hanging lights like a curtain—vertically, with gentle sags.
How to do it: Attach a horizontal support wire (like a steel cable) across your space. Then, run individual strands down from it, spaced 6–12 inches apart. Let them drape slightly for a flowing look. I saw this done at a wedding reception—white mini lights hung from a pergola, cascading down like a glowing waterfall. It was breathtaking.
Best for: Narrow spaces or entryways. Avoid in high-traffic areas—guests might walk into the strands.
How to Hang Your Lights Safely and Securely
Choosing the Right Hardware
You don’t need fancy tools, but you do need the right hardware. Here’s what I’ve found works best:
- Hooks: Use outdoor-rated screw-in or adhesive hooks. I prefer stainless steel or plastic-coated hooks—they resist rust and won’t damage wood.
- Zip Ties: Great for temporary setups or wrapping lights around beams. Use UV-resistant ties for long-term use.
- Tension Wires: For long runs, a steel cable (like a 1/8” galvanized wire) gives you a sturdy base. Anchor it with turnbuckles for easy tension adjustment.
- Clips and Hangers: Gutter clips, S-hooks, and light clips make it easy to attach and remove lights without drilling.
One time, I used regular zip ties on a metal pergola. After a summer of sun, they cracked and the lights fell. Now I always use UV-stabilized ties—worth the extra $5.
Electrical Safety Tips
Safety first! Here’s what to keep in mind:
- Use outdoor-rated extension cords. Indoor cords aren’t weatherproof and can overheat.
- Don’t overload circuits. Check the wattage of your lights and the rating of your outlet. If you’re unsure, use a circuit checker.
- Use a GFCI outlet or adapter. This protects against electrical shock in wet conditions.
- Keep connections dry. Use waterproof caps or enclosures where cords connect.
- Turn off lights when not in use. Especially during storms or high winds.
I once had a friend who ran 15 strands on a single 15-amp circuit. The breaker tripped during a party—not a good look. Now I always calculate total wattage: divide the circuit’s amp rating (usually 15 or 20) by 120 volts to get max watts, then keep your lights under 80% of that.
Seasonal vs. Permanent Installation
Are you going all-in, or just dressing up for summer? Your approach will differ.
- Permanent setup: Use durable hardware (steel cables, permanent hooks) and weatherproof lights. Ideal if you entertain year-round.
- Seasonal setup: Use removable clips, zip ties, or adhesive hooks. Easier to take down, but may need reinstalling each year.
I keep my canopy lights up year-round (with LED Edisons and a weatherproof connector), but I take down the drape lights after summer—they’re more delicate and I don’t want to risk winter damage.
Creative Ways to Enhance Your Light Patterns
Layering with Other Light Sources
String lights are just one piece of the puzzle. Add layers for depth:
- Path lights: Line walkways with solar stake lights. They guide guests and add a soft glow at ground level.
- Tabletop lanterns: Place on tables or benches for task lighting. I love vintage-style lanterns with flickering LEDs.
- Uplighting: Point lights upward at trees or walls to create a dramatic backdrop.
- Fire pits or candles: The flicker of fire adds movement and warmth. Just keep them a safe distance from lights.
In my own space, I combine a canopy with path lights and a fire pit. It creates a layered effect—like moving through different “rooms” of light.
Using Color and Dimming for Mood
Warm white (2700K–3000K) is classic, but don’t be afraid to experiment:
- White: Clean, modern, bright.
- Warm white: Cozy, inviting, romantic.
- Amber or gold: Vintage, nostalgic.
- RGB (color-changing): Great for parties or seasonal decor.
And dimming? A game-changer. I use a smart dimmer switch so I can adjust brightness from 10% (for late-night chats) to 100% (for grilling).
Adding Decorative Elements
Enhance your patio string lights pattern with simple decor:
- Fairy light jars: Hang mason jars with battery-powered mini lights.
- Paper lanterns: Place over bulbs for a soft, diffused glow.
- Garlands or greenery: Weave eucalyptus or ivy between strands for a natural touch.
- Wind chimes: Add sound and movement—especially nice with a gentle breeze.
I once hung paper lanterns over my zigzag pattern for a dinner party. The soft glow made the space feel like a lantern festival—guests couldn’t stop taking photos.
Common Mistakes to Avoid (And How to Fix Them)
Overcrowding the Space
More lights aren’t always better. I’ve seen patios with so many strands that the glow was blinding. The key is balance.
Solution: Stick to one main pattern and add accents. If you have a canopy, skip the wrapped columns. If you’re doing a zigzag, keep the rest of the space simple.
Ignoring the View
Your lights should enhance the view, not block it. I once hung a dense grid that blocked the sight of the garden from the patio. Big mistake.
Solution: Design your patio string lights pattern with sightlines in mind. Use thinner strands or space them wider in key areas.
Forgetting About Maintenance
Outdoor lights take a beating. Rain, wind, sun—they all take a toll.
Solution: Inspect your setup each spring. Replace broken bulbs, tighten loose connections, and clean dust or debris. I keep a spare bulb kit and extra zip ties in my garage—it saves me from last-minute runs to the store.
Using the Wrong Bulb Size
Large Edison bulbs look great, but they cast strong shadows. Mini lights are subtle but can get lost.
Solution: Match bulb size to your space. Large bulbs for open areas, mini for intimate zones. I use a mix: Edison bulbs overhead, mini globes along the fence.
| Pattern Type | Best For | Installation Difficulty | Estimated Cost (20-ft run) | Lighting Effect |
|---|---|---|---|---|
| Canopy | Open patios, pergolas | Medium | $40–$80 | Even, ambient |
| Zigzag | Fences, railings | Easy | $25–$50 | Dynamic, modern |
| Wrapped Column | Trees, posts | Easy | $20–$40 | Vertical focus |
| Starry Night | Small courtyards | Medium | $30–$60 | Soft, scattered |
| Grid | Pergolas, covered patios | Hard | $50–$100 | Crisp, structured |
| Curtain/Drape | Narrow spaces, entries | Medium | $35–$70 | Romantic, flowing |
Final Thoughts: Light Up Your Life (Literally)
Your patio isn’t just a place to park a grill—it’s an extension of your home, a sanctuary for relaxation, and a stage for memories. And with the right patio string lights pattern, you can turn it into a space that feels magical, intentional, and uniquely yours.
I’ve learned that it’s not about perfection. It’s about creating a feeling. Maybe it’s the warmth of Edison bulbs over a dining table. Maybe it’s the playful zigzag along a fence that makes your kids laugh. Maybe it’s the quiet glow of a starry night pattern as you sip coffee at dawn.
Start small. Try one pattern this weekend. String up a zigzag on your fence. Wrap a tree. Hang a single strand over your table. See how it feels. Then build from there. And remember: lighting isn’t just functional—it’s emotional. It sets the tone for every moment, from lazy afternoons to late-night confessions.
So go ahead. Play with patterns. Experiment with placement. Let your space shine. Because when the sun goes down and your patio string lights pattern comes to life, you’re not just illuminating a yard—you’re creating a feeling. And that’s worth every bulb.
Frequently Asked Questions
What are the most popular patio string lights pattern ideas?
Popular patio string lights pattern ideas include zigzag canopies, crisscross grids, and cascading “starry sky” designs. These patterns maximize coverage while creating a cozy, inviting ambiance for outdoor entertaining. For a boho vibe, try wrapping lights around pergola beams or railings in a spiral pattern.
How do I choose the right string light pattern for my patio size?
For small patios, use a simple grid or linear pattern to avoid overcrowding, while large spaces can handle dramatic zigzags or overlapping crisscross designs. Always measure your space first and select a patio string lights pattern that complements your layout without overwhelming it.
Can I use patio string lights in a tree for a unique pattern?
Absolutely! Wrap lights vertically around tree trunks or drape them outward in a radial pattern to mimic fireflies. For multi-tree setups, connect the lights between branches to create a cohesive canopy effect.
What’s the easiest patio string lights pattern for a beginner to install?
A horizontal “railway” pattern (running lights parallel along a fence or railing) is the easiest for beginners. Just secure the lights at even intervals with hooks or zip ties—no complex measurements or tools required.
How do I create a crisscross string light pattern without sagging?
Use sturdy anchor points like eye hooks or poles, spacing them 4–6 feet apart. For longer spans, add a center support (like a pole or wire) to prevent sagging, especially with heavier bulb styles.
Are there solar-powered options for intricate patio string lights patterns?
Yes! Solar-powered string lights are ideal for complex patio string lights patterns since they eliminate outlet limitations. Opt for high-capacity solar batteries to ensure consistent brightness, even in shaded areas.

