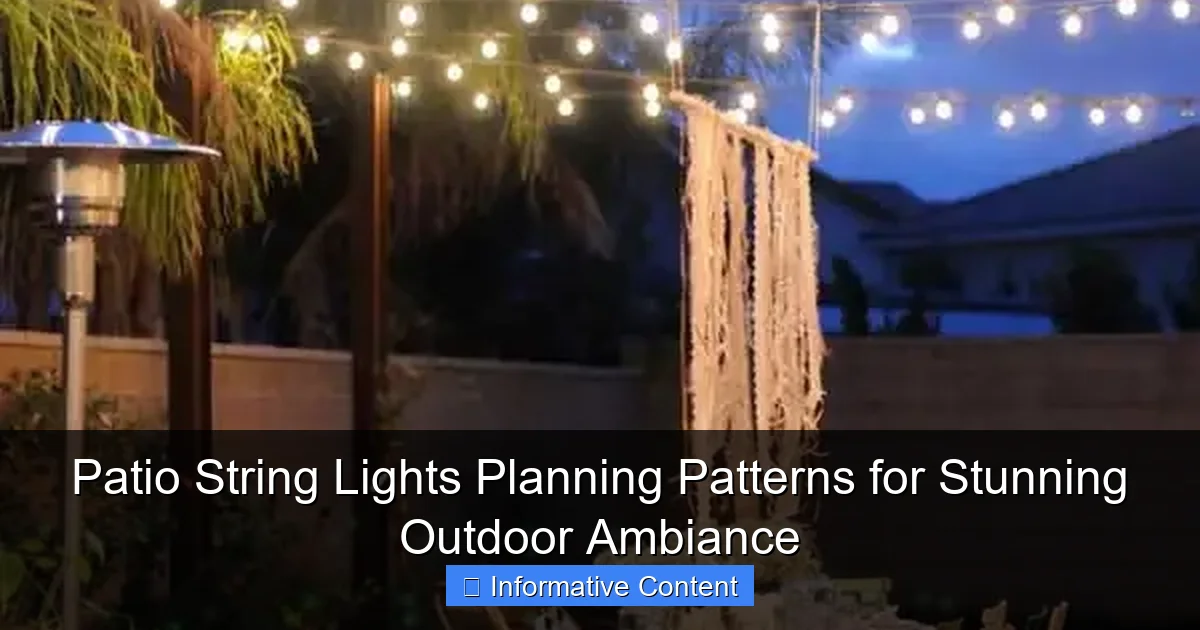
Featured image for patio string lights planning patterns
Image source: woohome.com
Strategic patio string lights planning patterns transform ordinary outdoor spaces into captivating retreats by balancing spacing, height, and layout for maximum visual impact. Whether using grid, zigzag, or canopy patterns, aligning your design with the area’s function and architecture ensures a seamless, inviting ambiance. Master the art of layering and symmetry to elevate your outdoor lighting game.
Key Takeaways
- Plan spacing first: Ensure even 2-3 ft gaps between bulbs for balanced illumination.
- Choose weatherproof lights: Use UL-rated or IP65+ lights for year-round durability.
- Layer light patterns: Combine zigzag, grid, and canopy styles for depth and dimension.
- Anchor securely: Install hooks, poles, or cables rated for outdoor weight and wind.
- Mix bulb types: Pair Edison and globe bulbs for visual interest and ambiance.
- Use smart controls: Automate brightness and schedules with dimmers or smart plugs.
📑 Table of Contents
- Why Patio String Lights Matter: Setting the Scene for Outdoor Magic
- Understanding Your Patio Layout: The Foundation of Great Lighting
- Popular Patio String Lights Planning Patterns (With Examples)
- Choosing the Right Lights: Type, Color, and Brightness
- Installation Tips: Safety, Tools, and Avoiding Common Mistakes
- Advanced Tips: Smart Controls, Seasonal Adjustments, and Creative Twists
- Reference Table: Quick Guide to Patio String Lights Planning
- Final Thoughts: Your Patio, Your Glow
Why Patio String Lights Matter: Setting the Scene for Outdoor Magic
There’s something almost magical about stepping into a backyard at dusk. The air is warm, the day’s stress melts away, and if you’re lucky, soft, twinkling lights drape overhead like stars brought down to earth. That’s the power of patio string lights planning patterns—they transform ordinary outdoor spaces into enchanting retreats. Whether it’s a quiet evening with a book, a dinner party under the stars, or a family gathering on a summer night, the right lighting can elevate the mood instantly.
I remember the first time I strung lights across my patio. I just grabbed a random set from a box, looped them haphazardly, and called it a day. The result? A lopsided, uneven glow that looked more like a forgotten holiday display than a cozy oasis. It wasn’t until I sat down and actually planned the layout—measuring, sketching, testing—that the real transformation happened. Suddenly, my patio felt intentional, inviting, and truly mine. That’s when I realized: patio string lights planning patterns aren’t just about hanging lights. They’re about creating an experience.
In this guide, we’ll walk through everything you need to know to design stunning, functional, and safe outdoor lighting. From choosing the right layout for your space to avoiding common mistakes, we’ll cover practical tips, real-world examples, and even a handy reference table to keep your planning on track. No fluff, no sales pitches—just honest, actionable advice to help you craft an outdoor ambiance you’ll love.
Understanding Your Patio Layout: The Foundation of Great Lighting
Before you even think about plugging in a strand, take a step back and really look at your patio. Every space is unique, and the best patio string lights planning patterns start with understanding your environment. This isn’t just about size—it’s about shape, structure, usage, and even how you move through the space.
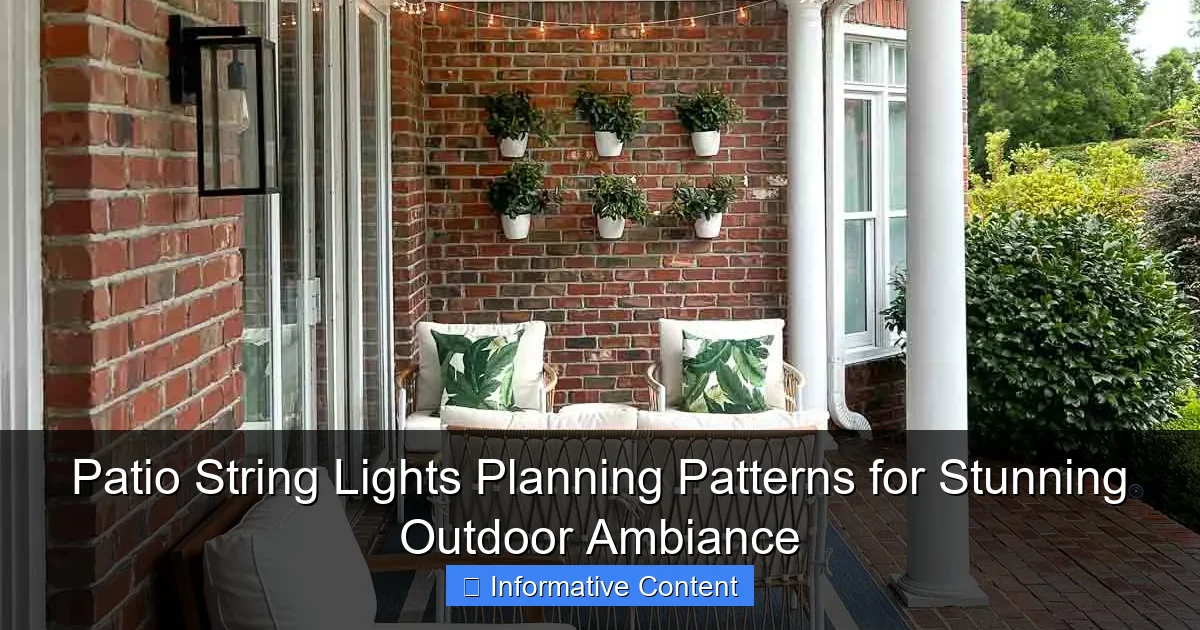
Visual guide about patio string lights planning patterns
Image source: drivenbydecor.com
Assess Your Space Dimensions and Shape
Grab a tape measure and note the length, width, and any irregular angles. Is your patio a perfect rectangle? L-shaped? Circular? Each shape calls for a different approach. For example:
- Rectangular patios work well with parallel or grid patterns.
- L-shaped or U-shaped patios benefit from segmented lighting zones or a continuous “racetrack” pattern that follows the perimeter.
- Small or irregular spaces may need a focal point pattern (like a canopy or starburst) to avoid clutter.
Pro tip: Sketch your patio on graph paper or use a free design app (like SketchUp or Canva) to visualize light placement. This helps you spot potential issues before you start drilling or hanging.
Identify Key Zones and Usage Areas
How do you use your patio? Is it primarily for dining? Relaxing? Entertaining? Different zones need different lighting strategies. For instance:
- Dining area: Focus lights directly above the table for ambiance and visibility.
- Seating nook: Use softer, warmer lighting with lower intensity to encourage conversation.
- Pathways or steps: Add subtle ground-level or low-hanging lights for safety.
One mistake I see often? Overlighting. People hang lights everywhere, which can wash out the space and feel chaotic. Instead, think like a designer: create layers. Use your patio string lights planning patterns to define zones, not just blanket the area.
Check for Power Sources and Obstacles
Nothing kills the vibe faster than realizing your lights don’t reach an outlet. Map out:
- Where your outdoor outlets are (and how many you have).
- Any obstacles (trees, railings, pergolas, chimneys) that could affect hanging.
- Whether you’ll need extension cords, timers, or smart plugs (more on that later).
For example, if your only outlet is on the back wall, but you want lights over the center of the patio, you’ll need a long, weather-rated extension cord or a solar-powered option. Planning this early saves frustration later.
Popular Patio String Lights Planning Patterns (With Examples)
Now that you’ve mapped your space, it’s time to choose a pattern. The right patio string lights planning patterns depend on your patio’s layout, your style, and how you want the space to feel. Here are the most popular designs—and how to make them work for you.
1. Parallel Lines (The Classic Grid)
This is the go-to pattern for rectangular patios and pergolas. You run multiple strands of lights parallel to each other, evenly spaced (usually 1–3 feet apart), from one end to the other. Think of it like a ceiling of stars.
- Best for: Long, open patios, dining areas, pergolas.
- Pro tip: Use a level to ensure lines are straight. Uneven lines look sloppy, even if the lights are bright.
- Example: A 12×16 ft patio with 5 parallel strands spaced 2 ft apart creates a balanced, airy glow.
One friend used this pattern over her outdoor dining table. She added a sheer canopy between the lights to soften the glare—genius!
2. Canopy or “Cloud” Pattern
Instead of straight lines, you crisscross lights diagonally or in a grid to create a “floating ceiling” effect. This is perfect for covering large areas without a pergola.
- Best for: Open patios, large decks, spaces with high ceilings.
- Pro tip: Use zip ties or clips to secure intersections. Too many loose wires = a tangled mess.
- Example: In my backyard, I used this over a 10×10 ft area. I anchored the lights to corner posts and a central hook on the roof eave. The result? A cozy, intimate glow that felt like a secret hideaway.
Warning: This pattern uses more lights, so plan your budget accordingly. But the payoff is worth it.
3. Perimeter or “Racetrack” Pattern
Run lights along the edges of your patio—around the railings, along the house, or under the eaves. This defines the space and adds a subtle glow without overpowering.
- Best for: L-shaped patios, small spaces, modern designs.
- Pro tip: Use LED rope lights or smaller bulbs for a clean look. Avoid bulky bulbs that look like Christmas leftovers.
- Example: A client with a narrow balcony used this to highlight the railing. The lights made the space feel twice as wide.
4. Starburst or “Sunray” Pattern
All lights radiate from a central point (like a tree, post, or hook). This creates a dramatic focal point and works well in circular or central seating areas.
- Best for: Fire pits, conversation areas, small patios.
- Pro tip: Use a sturdy anchor (e.g., a heavy-duty hook or tree branch) to support the weight. Test the tension before hanging.
- Example: A couple with a fire pit in the center of their patio used this pattern. The lights drew the eye to the fire, making it the star of the space.
5. Layered or “Zoned” Pattern
Combine multiple patterns for different areas. For example: parallel lines over the dining table, perimeter lights around the lounge area, and a starburst over the fire pit.
- Best for: Large patios with multiple zones.
- Pro tip: Use different color temperatures (warm white for dining, soft yellow for lounging) to distinguish zones.
- Example: A friend’s 20×20 ft patio has a dining zone (grid), a lounge (perimeter), and a hot tub (canopy). Each area feels distinct but cohesive.
Choosing the Right Lights: Type, Color, and Brightness
Pattern is just one piece of the puzzle. The type of lights you choose will shape the mood, durability, and ease of installation. Here’s how to pick the right ones for your patio string lights planning patterns.
Bulb Type: Incandescent vs. LED
- Incandescent: Warm, cozy glow. Lower upfront cost. But they burn out faster, use more energy, and get hot (a fire hazard if near dry foliage).
- LED: Energy-efficient, cooler, longer-lasting (25,000+ hours). Available in warm white, cool white, and color-changing. Slightly higher cost, but savings add up over time.
My take: Go with LED. I once used incandescent lights for a summer party. By the end, three bulbs had burned out, and the heat was making the string sag. Never again.
Color Temperature: Warm, Cool, or Colorful?
- Warm white (2700K–3000K): Most popular. Creates a cozy, inviting feel. Perfect for dining and lounging.
- Cool white (4000K+): Modern, crisp. Better for task lighting (e.g., grilling) but can feel clinical.
- Color-changing: Fun for parties, but overkill for everyday use. Stick to one color for ambiance.
One rule: avoid mixing temperatures. It creates visual clutter. If you want variety, use warm white as a base and add colored fairy lights for accents.
Brightness and Spacing
- Brightness: Measured in lumens. 10–30 lumens per bulb is usually enough for ambiance. For task areas (e.g., cooking), go higher.
- Spacing: Bulbs 6–12 inches apart are standard. Closer spacing = brighter, more even glow. Wider spacing = twinkly, star-like effect.
Example: For a dining area, I use bulbs 6 inches apart. For a lounge, 12 inches works better—it’s less intense, more relaxing.
Durability and Weather Resistance
Look for:
- IP44 or higher rating: Resists rain, snow, and dust.
- UL or ETL certification: Ensures safety standards.
- UV-resistant wire: Prevents yellowing and cracking in sunlight.
Pro tip: Check the warranty. A good set should last 3–5 years outdoors.
Installation Tips: Safety, Tools, and Avoiding Common Mistakes
Even the best patio string lights planning patterns fail if installed poorly. Here’s how to do it right—safely and efficiently.
Essential Tools and Materials
- Measuring tape: For spacing and alignment.
- Drill and anchors: For securing hooks or eye screws.
- Zip ties, clips, or hooks: To attach lights without damaging wires.
- Level: Keeps lines straight.
- Weatherproof extension cords: Use outdoor-rated cords with GFCI protection.
Skip the staples or nails—they can pierce the wire and cause shorts.
Step-by-Step Installation
- Mark anchor points: Use chalk or tape to mark where hooks will go.
- Install hardware: Drill pilot holes, then insert anchors and screws. For trees, use adjustable straps (not nails).
- Test the lights: Plug them in before hanging to check for dead bulbs.
- Hang the lights: Start at the power source and work outward. Use clips or zip ties every 1–2 feet to prevent sagging.
- Secure the ends: Loop excess cord and tie it to a hook or railing.
One trick: hang the lights in daylight. It’s easier to see alignment and spot issues.
Common Mistakes to Avoid
- Overloading circuits: Check your outlet’s amperage. Most outdoor outlets handle 15 amps. A string of LED lights uses ~0.1 amps per 100 bulbs—but incandescent uses more.
- Ignoring tension: Lights sag over time. Use turnbuckles or extra hooks to keep them taut.
- Forgetting maintenance: Clean bulbs annually. Dust and grime dim the glow.
- Skipping timers or smart controls: Use a timer or smart plug to automate lights. Saves energy and adds convenience.
Example: A neighbor once hung lights without a timer. She’d forget to turn them off, draining her energy bill. After adding a timer, her usage dropped 40%.
Advanced Tips: Smart Controls, Seasonal Adjustments, and Creative Twists
Ready to take your patio string lights planning patterns to the next level? These pro tips add function, flair, and flexibility.
Smart Lighting for Effortless Control
- Smart plugs: Control lights via app or voice (e.g., “Hey Google, turn on patio lights”).
- Timers: Set lights to turn on at sunset and off at bedtime.
- Motion sensors: Lights turn on when someone walks by—great for safety.
Bonus: Some smart lights sync with music or change color based on weather. Perfect for parties!
Seasonal Adjustments
- Summer: Use brighter lights for late-night gatherings.
- Winter: Add warm white or amber lights for cozy nights by the fire.
- Holidays: Swap in colored lights or add festive accents (e.g., lanterns).
Pro tip: Use quick-connect hooks so you can easily swap light sets seasonally.
Creative Twists to Personalize Your Space
- Mix light types: Combine string lights with fairy lights or lanterns for depth.
- Add reflectors: Hang mirrors or metallic accents to bounce light.
- Use plants: Weave lights through trees, shrubs, or trellises for a natural glow.
- DIY shades: Make paper or fabric shades to soften the light.
Example: A reader wrapped lights around her grapevine-covered pergola. The result? A fairy-tale glow that felt like a secret garden.
Reference Table: Quick Guide to Patio String Lights Planning
| Pattern | Best For | Bulb Spacing | Power Needs | Pro Tip |
|---|---|---|---|---|
| Parallel Lines | Rectangular patios, pergolas | 1–3 ft between strands | Medium (3–5 strands) | Use a level for straight lines |
| Canopy | Large open spaces | 6–12 in between bulbs | High (multiple crossings) | Secure intersections with zip ties |
| Perimeter | Small or L-shaped patios | 12–18 in along edges | Low (1–2 strands) | Use rope lights for a clean look |
| Starburst | Fire pits, central zones | 10–15 ft from center | Medium (6–10 strands) | Anchor to a sturdy central point |
| Layered | Multi-zone patios | Varies by zone | High (3+ zones) | Use different color temps for zones |
Final Thoughts: Your Patio, Your Glow
Creating stunning outdoor ambiance with patio string lights planning patterns isn’t about perfection—it’s about intention. It’s about asking, “How do I want to feel in this space?” and letting that guide your choices. Whether you’re drawn to the crisp lines of a grid pattern, the cozy glow of a canopy, or the drama of a starburst, your patio should reflect you.
Remember: the best lighting is the kind that disappears into the experience. You shouldn’t notice the wires or the bulbs—you should just feel the magic. So take your time. Sketch, measure, test. Don’t rush the process. And if a strand sags or a bulb burns out? That’s okay. Patio lighting is meant to evolve, just like the seasons.
Now, step outside at dusk, plug in your lights, and take it all in. That soft glow, the gentle twinkle, the way the shadows dance—that’s the reward. Your patio isn’t just a space. It’s a sanctuary. And with the right patio string lights planning patterns, it’s yours to enjoy, night after night.
Frequently Asked Questions
What are the best patio string lights planning patterns for a cozy ambiance?
For a cozy vibe, consider draping lights in a zigzag pattern across your patio or wrapping them around pergola beams. These patio string lights planning patterns create intimate zones while maximizing coverage without overwhelming the space.
How do I choose the right spacing for string lights in my outdoor area?
Space bulbs 6–12 inches apart for even illumination, adjusting based on brightness and coverage needs. For larger patios, combine multiple runs of lights using grid or canopy patterns to avoid dark spots.
Can I use patio string lights planning patterns on a budget?
Absolutely! Use simple DIY techniques like crisscrossing lights between trees or railings, or focus on high-impact areas like dining tables. Affordable LED string lights can achieve stunning results with creative patio string lights planning patterns.
What’s the easiest way to hang string lights without drilling holes?
Use removable adhesive hooks, zip ties on railings, or tension rods between walls. These methods work well for renters and allow you to experiment with patterns like swags or clusters.
How do I create a professional-looking string light canopy?
Anchor lights to poles, trees, or eaves in a grid or diamond pattern, ensuring wires are taut and evenly spaced. Overlap layers for depth and use dimmable lights to fine-tune the ambiance.
Are there weather-resistant options for long-term outdoor string lights?
Yes, look for UL-rated “outdoor” or “weatherproof” string lights with sealed sockets and UV-resistant wiring. Proper installation with drip loops (to prevent water pooling) ensures durability in all conditions.

