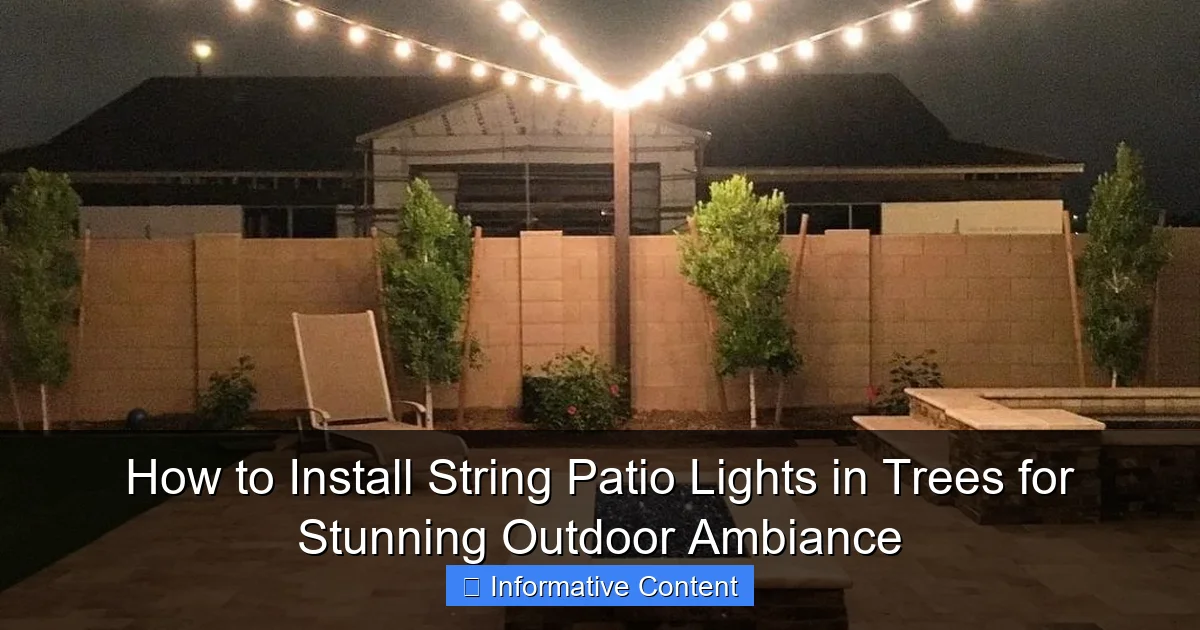
Featured image for putting string patio lights in trees
Image source: hellobombshell.com
Transform your outdoor space by securely installing string patio lights in trees to create a magical, inviting ambiance. Use durable, outdoor-rated lights and anchor them with weather-resistant hooks or zip ties, ensuring a safe, professional look that withstands the elements. With thoughtful placement and spacing, tree-mounted string lights elevate nighttime gatherings and highlight your landscape’s natural beauty.
Key Takeaways
- Plan your layout first: Sketch light placement to avoid over- or under-lighting key areas.
- Use outdoor-rated lights: Ensure durability with weatherproof, UL-listed string lights.
- Secure lights properly: Use insulated clips or hooks, never nails or staples.
- Keep cords hidden: Route wires along branches and trunks for a clean look.
- Test before finalizing: Check connections and brightness before completing installation.
- Maintain accessibility: Position plugs near outlets and avoid tight knots for easy upkeep.
📑 Table of Contents
- Why String Patio Lights in Trees Transform Your Backyard
- Choosing the Right String Patio Lights for Your Trees
- Planning Your Layout for Maximum Impact
- Step-by-Step Installation Guide
- Pro Tips for a Safe and Long-Lasting Display
- Creative Ideas and Troubleshooting Common Issues
- Conclusion: Enjoy Your Glowing Backyard Oasis
Why String Patio Lights in Trees Transform Your Backyard
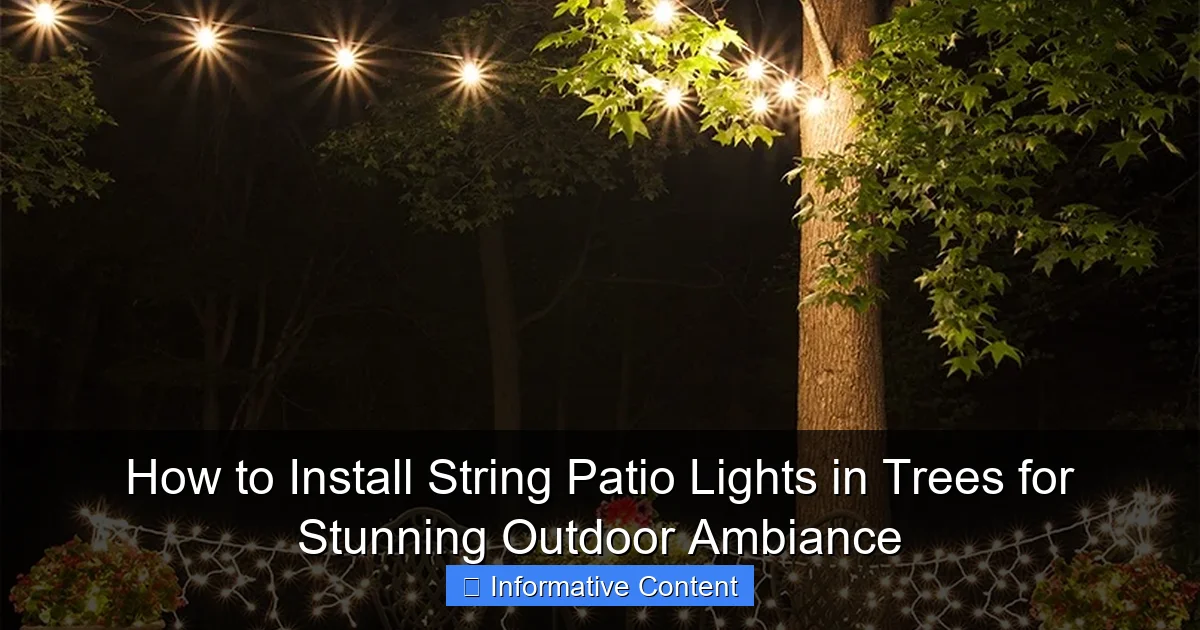
There’s something magical about stepping into a backyard at night, lit by the soft glow of string patio lights draped through the trees. It’s not just about illumination—it’s about atmosphere. The gentle shimmer of lights weaving through branches can turn a simple outdoor space into a cozy retreat, a romantic hideaway, or the perfect spot for a summer barbecue. I remember the first time I strung lights in my own backyard. I was skeptical—would it look cheesy? Would the lights survive a storm? But after a few hours of careful planning and a little trial and error, the result was nothing short of enchanting. My friends couldn’t stop raving about how the space felt “like a fairytale.”
String patio lights in trees aren’t just a trend; they’re a timeless way to extend your living space outdoors. Whether you’re hosting a dinner party, enjoying a quiet evening with a book, or just watching the stars, these lights add warmth and charm. But here’s the thing: installing them isn’t as simple as tossing a strand into a tree and calling it a day. There’s an art to it—balancing aesthetics, safety, and practicality. In this guide, I’ll walk you through everything you need to know to create a stunning, safe, and long-lasting display. From choosing the right lights to troubleshooting common pitfalls, we’ll cover it all. So grab a cup of coffee (or a glass of wine), and let’s get started!
Choosing the Right String Patio Lights for Your Trees
The first step in creating your dream outdoor ambiance is selecting the right lights. With so many options on the market, it’s easy to feel overwhelmed. But don’t worry—I’ve done the legwork for you. Here’s what to consider:
Visual guide about putting string patio lights in trees
Image source: cdn.christmaslightsetc.com
Types of String Lights
Not all string patio lights are created equal. Here are the most common types you’ll encounter:
- Incandescent bulbs: These give off a warm, nostalgic glow but consume more energy and burn out faster than newer options. Great for short-term displays, but not ideal for long-term use.
- LED bulbs: Energy-efficient, durable, and available in a range of colors (including warm white, cool white, and multicolor). They’re pricier upfront but last years longer and use up to 80% less energy.
- Solar-powered lights: Perfect for off-grid setups. They charge during the day and turn on automatically at dusk. However, they may not be bright enough for large trees or cloudy days.
- Edison-style bulbs: These vintage-inspired lights have exposed filaments and a warm, golden glow. They’re a popular choice for rustic or boho aesthetics but can be fragile.
Brightness and Spacing
Think about how much light you need. For a soft, ambient glow (perfect for dinner parties), choose lights with bulbs spaced 6–8 inches apart. If you want brighter coverage (like for a game area), go for 4-inch spacing. A good rule of thumb: fewer bulbs create a more elegant effect, while more bulbs add drama.
Length and Connectivity
Measure the distance between your trees before buying. Most string patio lights come in 25–50-foot strands, but you can often connect multiple strands end-to-end. Just check the manufacturer’s guidelines—some LED sets can handle up to 40 connected strands, while others max out at 5. Pro tip: Buy 10% extra length to account for curves and overlaps.
Durability and Weather Resistance
Your lights will face rain, wind, and UV exposure, so look for:
- IP65 or higher waterproof rating: Ensures the lights can handle heavy rain and splashes.
- UV-resistant wires: Prevents cracking and fading over time.
- Thick, insulated cords: Reduces tripping hazards and protects against fraying.
Planning Your Layout for Maximum Impact
Once you’ve got your lights, it’s time to plan where they’ll go. A well-thought-out layout makes all the difference between a chaotic mess and a cohesive design. Here’s how to approach it:
Assess Your Tree Structure
Not all trees are created equal for lighting. Look for:
- Strong, horizontal branches: These provide the best anchor points.
- Clear sightlines: Avoid trees with dense foliage that might block the light.
- Height: Taller trees (15+ feet) create a more dramatic effect, but shorter trees work too—just use more strands.
Example: In my backyard, I have two oak trees about 20 feet apart. I used their lowest branches (around 8 feet high) to create a canopy effect. The result? A cozy, intimate space perfect for small gatherings.
Design Patterns
Here are a few classic layouts to inspire you:
- Canopy style: String lights horizontally between trees, creating a “roof” of light. Ideal for dining areas or fire pits.
- Web style: Crisscross lights diagonally between multiple trees for a starry-night effect.
- Vertical drops: Hang lights straight down from branches for a whimsical, cascading look.
- Layered style: Combine horizontal and vertical strands for depth.
Power Source Considerations
Where will your lights plug in? Options include:
- Outdoor outlets: The easiest solution. Use a heavy-duty extension cord if needed, but keep it off the ground to avoid tripping.
- Outdoor-rated power strips: Great for connecting multiple strands.
- Solar-powered: No outlet? No problem. Just ensure the solar panel gets 6+ hours of direct sunlight daily.
Pro tip: Sketch your layout on paper first. Mark tree locations, light paths, and power sources. This saves time and helps avoid “oops” moments mid-installation.
Step-by-Step Installation Guide
Now comes the fun part—hanging your lights! With the right tools and a little patience, you’ll have a stunning display in no time. Here’s my foolproof process:
Tools You’ll Need
- String patio lights (measured and tested!)
- Measuring tape
- Extension ladder (if needed)
- Outdoor-rated zip ties, S-hooks, or specialized light clips
- Heavy-duty extension cords (if using electric lights)
- Work gloves (to protect your hands from branches)
- Helper (optional, but recommended for tall trees)
Step 1: Test Your Lights
Before hanging anything, plug in your lights and check for dead bulbs or frayed wires. There’s nothing worse than finishing the install only to find half the strand is dark. If you spot issues, replace the bulb or swap the strand now.
Step 2: Mark Anchor Points
Use a piece of chalk or masking tape to mark where you’ll attach the lights on each tree. For canopy-style layouts, aim for branches at least 6–8 feet high (high enough to walk under, low enough to see the glow).
Step 3: Secure the First Strand
Start with the end closest to your power source. Here’s how to attach it:
- For zip ties: Loop the tie around the branch and through the light’s hanging loop. Pull tight, but don’t over-tighten (it can damage the wire).
- For S-hooks: Hook one end to the branch, the other to the light’s loop. These are easier to adjust later.
- For light clips: Snap the clip onto the branch, then slide the light strand into the groove. These are the most secure but can leave marks on bark.
Step 4: Hang the Lights
Work methodically:
- Unroll the strand as you go (don’t unroll the whole thing at once—it’ll tangle).
- Attach the lights every 3–4 feet to prevent sagging.
- For curves, use more anchor points to maintain tension.
- Keep the cord taut but not stretched. A little slack is okay, but too much creates tripping hazards.
Step 5: Connect Additional Strands
If using multiple strands:
- Connect them end-to-end, following the manufacturer’s guidelines.
- Use waterproof connectors or electrical tape to seal the joints.
- Hide the connections under branches or foliage for a seamless look.
Step 6: Secure the Power Source
For electric lights:
- Run the extension cord along the ground, tucking it under mulch or using cord covers to prevent tripping.
- Plug it into a GFCI outlet (ground fault circuit interrupter) for safety.
For solar lights:
- Place the solar panel in direct sunlight, angled toward the sun.
- Secure it to a tree, fence, or stake with zip ties.
Pro Tips for a Safe and Long-Lasting Display
Your lights should look amazing, but they also need to last. Here’s how to avoid common pitfalls and keep your display looking fresh for years:
Weatherproofing Your Setup
Mother Nature can be tough on outdoor lights. Protect them with:
- Waterproof connectors: Use silicone sealant or electrical tape on all connections.
- Elevated power sources: Keep outlets and extension cords off wet grass or soil.
- Wind-resistant anchoring: Use multiple zip ties or S-hooks on exposed branches to prevent swaying.
Example: After a windstorm last year, I lost two strands because the zip ties snapped. Now I use two ties per anchor point and haven’t had an issue since.
Minimizing Tree Damage
Trees are living things—don’t harm them for the sake of ambiance. Avoid:
- Nails or screws: These can damage bark and invite pests. Use zip ties or clips instead.
- Over-tightening: Tighten just enough to hold the lights, not strangle the branch.
- Blocking sunlight: Don’t cover more than 20% of the canopy. Trees need light to thrive!
Seasonal Maintenance
Even the best lights need TLC. Here’s my seasonal checklist:
- Spring: Inspect for frayed wires, loose connections, or damaged bulbs. Replace as needed.
- Summer: Wipe down bulbs with a damp cloth to remove dust and pollen.
- Fall: Trim back overgrown branches that might snag the lights.
- Winter: If you live in a snowy climate, consider taking the lights down or using weatherproof covers.
Energy Efficiency Hacks
Want to save energy without sacrificing ambiance? Try:
- Timers or smart plugs: Set your lights to turn on at dusk and off at midnight.
- Motion sensors: Great for security-focused setups.
- Dimmer switches: Lower the brightness for a softer glow during quiet evenings.
Creative Ideas and Troubleshooting Common Issues
Now that your lights are up, let’s take them to the next level! Here are some creative ways to personalize your display and solve common problems:
Unique Design Ideas
- Themed colors: Use red and white lights for a picnic vibe, or blue and white for a coastal feel.
- Fairy light clusters: Wrap small LED strands around branches for a “firefly” effect.
- Hanging lanterns: Mix string lights with paper or metal lanterns for texture.
- Color-changing LEDs: Set them to cycle through hues for a dynamic display.
Dealing with Common Problems
| Issue | Solution |
|---|---|
| Lights won’t turn on | Check the outlet, test the strand indoors, replace dead bulbs, or inspect for frayed wires. |
| Sagging strands | Add more anchor points or use a support wire (like fishing line) under the lights. |
| Flickering lights | Tighten loose connections or replace the strand if the wiring is damaged. |
| Birds nesting in lights | Turn off lights during nesting season or install bird-safe deterrents (like reflective tape). |
| Faded or yellowed bulbs | Replace the strand—UV exposure can degrade plastic over time. |
Lighting for Special Occasions
Got a birthday, anniversary, or holiday coming up? Customize your lights:
- Holiday colors: Red/green for Christmas, orange/purple for Halloween.
- Event-specific hues: Pink for a baby shower, gold for New Year’s.
- DIY patterns: Use clips to shape lights into hearts, stars, or initials.
Conclusion: Enjoy Your Glowing Backyard Oasis
There you have it—a complete guide to installing string patio lights in trees for that perfect outdoor ambiance. From choosing the right lights to troubleshooting hiccups, you’re now equipped to create a space that feels like an extension of your home. I’ll never forget the first night I turned on my lights. The warm glow filtering through the leaves, the way the shadows danced on the grass—it was pure magic. And the best part? I did it myself, with a little patience and a lot of planning.
Remember, this isn’t about perfection. It’s about creating a space where you and your loved ones can relax, laugh, and make memories. Whether you go for a minimalist canopy or a bold web-style design, the key is to have fun with it. Don’t stress over a loose strand or a slightly crooked hook. What matters is the feeling your lights create—the way they turn your backyard into a place you never want to leave. So grab those lights, call a friend (or go solo!), and start stringing. Your glowing oasis awaits.
Frequently Asked Questions
How do I install string patio lights in trees without damaging them?
Use soft, non-abrasive materials like zip ties, garden wire, or specialized tree-friendly clips to secure the lights. Avoid nails or staples, as they can harm the tree’s bark and invite pests or disease.
What type of string patio lights work best for outdoor trees?
Opt for weatherproof, LED string lights with a UL or IP65 rating to withstand rain, wind, and UV exposure. Solar-powered options are great for energy efficiency and easy installation without outlets.
How high should I hang string lights in trees for the best effect?
Hang lights at varying heights (8–15 feet) to create depth and dimension, focusing on main branches and the tree’s natural shape. Use a ladder or pole for hard-to-reach spots, and step back to check spacing as you go.
Can I leave string patio lights in trees year-round?
While durable lights can stay up, it’s best to remove them during extreme weather (e.g., heavy snow or storms) to prolong their life. Check connections and bulbs annually, and trim any overgrown branches that could damage the strands.
How do I power string lights in trees if there’s no nearby outlet?
Use extension cords rated for outdoor use, running them discreetly along the ground or through trees. Alternatively, choose solar-powered or battery-operated string patio lights for a cord-free solution.
What’s the easiest way to avoid tangled string lights in trees?
Plan your route before hanging, starting from the trunk and working outward in a spiral or zigzag pattern. Use light clips or hooks to keep strands taut and separate, preventing knots and sagging.

