Featured image for putting up string leds lights on patio
Image source: i5.walmartimages.com
Transform your patio into a captivating retreat by strategically installing string LED lights to enhance ambiance and extend outdoor enjoyment. Mount lights securely along railings, pergolas, or eaves using weather-resistant clips or hooks, ensuring even spacing and a balanced glow. With minimal effort, you’ll create a stunning, inviting atmosphere perfect for entertaining or relaxing under the stars.
Key Takeaways
- Plan your layout: Sketch light placement before installation to avoid gaps or overhangs.
- Use durable hardware: Choose weather-resistant hooks, screws, or clips for long-lasting support.
- Test lights first: Ensure all bulbs and connections work before mounting.
- Secure connections: Protect outdoor plugs and junctions with waterproof covers or enclosures.
- Space evenly: Maintain consistent distance between bulbs for balanced, professional look.
- Angle for ambiance: Drape lights slightly for soft, diffused illumination over seating areas.
📑 Table of Contents
- Why String LED Lights Transform Your Patio
- Choosing the Right String LED Lights for Your Patio
- Planning Your Layout: The Key to a Balanced Look
- Tools and Supplies You’ll Need (Don’t Skip These!)
- Step-by-Step Installation Guide (With Real-World Tips)
- Styling Tips for Maximum Ambiance (Beyond the Basics)
- Final Thoughts: Enjoy Your Magical Patio
Why String LED Lights Transform Your Patio
Imagine this: It’s a warm summer evening, you’re lounging on your patio with a glass of wine, and the soft glow of string LED lights dances above you. The atmosphere feels magical—cozy, inviting, and just a little bit romantic. That’s the power of string LED lights. They’re not just for Christmas trees or holiday decor. When used right, they can turn your outdoor space into a dreamy retreat. Whether you’re hosting a backyard barbecue, enjoying a quiet night with your family, or just want to add a touch of whimsy to your evenings, string lights are the secret ingredient.
But here’s the thing: putting up string LED lights on your patio isn’t as simple as just hanging them randomly. It takes a little planning, the right tools, and a few clever tricks to get that *perfect* ambiance. I learned this the hard way after my first attempt ended in tangled wires and a dimly lit corner. After a few trial-and-error projects, I’ve gathered all the best tips and techniques to help you avoid my mistakes. In this guide, I’ll walk you through everything you need to know—from choosing the right lights to installing them safely and stylishly.
Choosing the Right String LED Lights for Your Patio
Before you even think about hanging your lights, you need to pick the right type. Not all string LED lights are created equal, and choosing the wrong ones can lead to frustration (or worse, a fire hazard). Let’s break down what you need to consider.
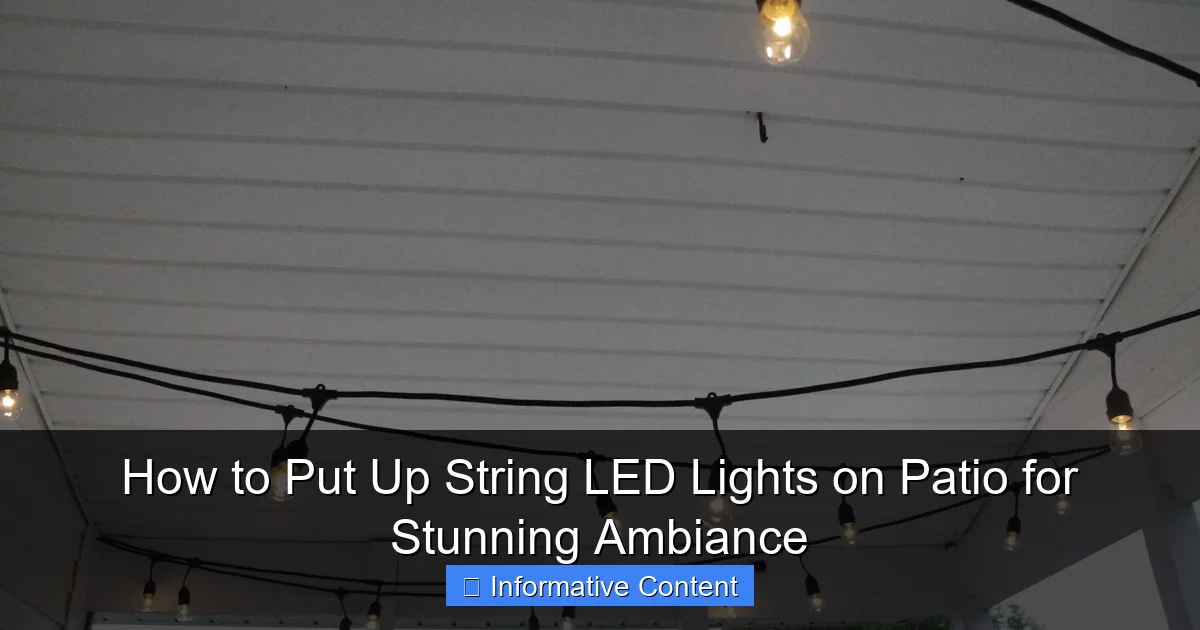
Visual guide about putting up string leds lights on patio
Image source: charlestoncrafted.com
Types of String LED Lights
There are a few main types of string lights, and each has its own strengths and weaknesses:
- Incandescent vs. LED: While incandescent lights give off a warm, nostalgic glow, they use way more energy and burn out faster. LED lights, on the other hand, are energy-efficient, last longer, and produce less heat. For patios, LED string lights are almost always the better choice.
- Bulb Shape: You’ll find globe, Edison, mini, and fairy lights. Globe and Edison bulbs create a bolder, more vintage look, while mini and fairy lights are delicate and perfect for a soft, twinkling effect.
- Color Temperature: This is a big one! Warm white (2700K-3000K) gives off that cozy, inviting glow—ideal for patios. Cool white (4000K+) feels more modern and clinical, while multicolor lights are fun for parties but can feel tacky if overused.
- Indoor vs. Outdoor: Always, *always* choose outdoor-rated string lights. They’re designed to handle rain, wind, and temperature changes. Indoor lights might look pretty, but they’ll short-circuit the first time it rains.
Key Features to Look For
Here’s what else you should keep in mind when shopping:
- Weather Resistance: Look for an IP44 or higher rating. This means the lights are protected against splashes and dust. IP65 is even better for harsh weather.
- Length and Spacing: Measure your patio space first. If your patio is 20 feet long, you’ll need lights that are at least that long (plus extra for slack). Also, check the spacing between bulbs. 6-12 inches apart is ideal for even lighting.
- Connectable vs. Non-Connectable: Some lights can be plugged into each other (great for long patios), while others are standalone. If you’re covering a large area, connectable lights save you from needing multiple outlets.
- Smart Features: Want to control your lights with an app or voice assistant? Some LED strings come with smart features like dimming, color-changing, or scheduling. Just make sure they’re compatible with your home system (e.g., Google Home, Alexa).
For example, I recently installed 100-foot warm white LED string lights with globe bulbs on my own patio. They’re outdoor-rated, connectable, and have a dimmer switch. The result? A soft, golden glow that makes my backyard feel like a cozy bistro. But if you’re going for a boho vibe, fairy lights with copper wire might be a better fit.
Planning Your Layout: The Key to a Balanced Look
Now that you’ve picked your lights, it’s time to plan where they’ll go. This step is crucial—skip it, and you might end up with uneven lighting or lights that sag in the middle. Here’s how to get it right.
Step 1: Map Out Your Space
Start by sketching a rough layout of your patio. Note where the power source is (you’ll need an outdoor outlet or extension cord). Then, think about the focal points you want to highlight. Do you want lights:
- Over your dining area?
- Along the railing or fence?
- Draped from trees or pergolas?
- Wrapping around pillars?
For example, on my patio, I focused on two zones: the dining table and the lounge area. I ran lights along the pergola over the table and draped fairy lights around the lounge’s corner posts. This created two distinct “rooms” without making the space feel crowded.
Step 2: Choose Your Hanging Method
How you hang the lights affects both the look and durability. Here are the most common methods:
- Overhead (Canopy Style): Hang lights in a grid or crisscross pattern between posts or trees. This works best for large patios and gives a “floating” effect.
- Linear (Straight Lines): Run lights along railings, fences, or eaves. Simple, elegant, and perfect for smaller spaces.
- Draped (Cascading): Let lights hang down in gentle curves from a higher point (like a pergola or roof). Great for adding depth.
- Wrapped (Spiral): Wrap lights around pillars, posts, or trees. Adds a playful touch.
Pro tip: If you’re using overhead lights, leave a slight sag between anchor points. This prevents the wires from pulling tight and breaking in high winds.
Step 3: Calculate Length and Power Needs
Here’s where math comes in (don’t worry—it’s easy). Measure the total distance you’re covering. Then, add 10-15% extra for slack and curves. If your lights are connectable, check the manufacturer’s limit—most allow 3-4 strings max before overloading the circuit.
Also, make sure your power source can handle the load. For example, a 100-foot string of LED lights typically draws about 10-20 watts. If you’re connecting multiple strings, use a weatherproof outlet cover and a ground fault circuit interrupter (GFCI) outlet to prevent electrical hazards.
Tools and Supplies You’ll Need (Don’t Skip These!)
You don’t need a full toolbox, but having the right gear makes the job easier and safer. Here’s my tried-and-true list:
Essential Tools
- Measuring tape: For measuring your patio and light lengths.
- Drill and screws/anchors: If you’re attaching lights to wood, stucco, or concrete, you’ll need the right hardware. For wood, use eye screws; for stucco, toggle bolts; for concrete, masonry anchors.
- Staple gun (optional): For securing wires along eaves or railings. Use low-voltage cable staples to avoid damaging the insulation.
- Extension ladder: For reaching high points. Make sure it’s stable and on level ground.
- Zip ties: For bundling excess wire or securing lights to railings.
- Weatherproof sealant: To seal any drilled holes and prevent water damage.
Smart Alternatives to Nails
Not comfortable drilling into your patio? No problem. Try these damage-free options:
- Adhesive hooks: Use outdoor-rated adhesive hooks (like 3M Command Outdoor). They’re strong enough to hold lights but remove cleanly.
- Magnetic hooks: If your patio has metal railings or posts, magnetic hooks are a game-changer.
- Clips and clamps: Specialty clips (like gutter clips or fence clips) let you attach lights without nails.
- Fishing line or wire: For a nearly invisible look, run fishing line between anchor points and hang lights from it.
For example, I used adhesive hooks on my stucco patio walls and magnetic hooks on the metal pergola. No drilling, no damage, and the lights stayed put all summer.
Step-by-Step Installation Guide (With Real-World Tips)
Alright, let’s get to the fun part—hanging the lights! Follow these steps for a smooth, professional-looking installation.
Step 1: Test Your Lights First
Before you start hanging, plug in the lights to make sure they work. There’s nothing worse than finishing the job and realizing one string is dead. If you’re connecting multiple strings, test them one at a time to avoid overloads.
Step 2: Mark Your Anchor Points
Using your layout sketch, mark where each anchor point will go. For overhead lights, space them 3-5 feet apart. For linear lights, place anchors every 6-12 inches. Use a pencil or removable marker—don’t drill yet!
Step 3: Install the Anchors
Now, drill your holes and install the anchors. If you’re using adhesive hooks, clean the surface first with rubbing alcohol for better adhesion. For screws, drill a pilot hole to prevent wood from splitting.
Pro tip: Use a level to make sure your anchor points are aligned. Crooked lights look sloppy and can sag unevenly.
Step 4: Hang the Lights
Start at the power source and work outward. Hook the first light to the anchor, then gently drape the rest along the layout. Avoid pulling too tight—leave a slight sag (about 6-12 inches) between anchor points. For draped lights, let them hang down in soft curves.
If you’re using zip ties or clips, secure the wire every 1-2 feet to prevent sagging. Don’t staple directly over the wire—use the built-in loops or clips on the lights instead.
Step 5: Connect and Power Up
Once all the lights are hung, connect them (if using connectable strings). Plug into the outlet and test again. If everything’s working, use zip ties to bundle excess wire and keep it tidy. For a polished look, tuck the wires behind railings or into crevices.
Step 6: Weatherproof and Secure
Seal any drilled holes with weatherproof sealant. If you’re in a windy area, add extra zip ties or clips to prevent the lights from swaying too much. For overhead lights, consider adding a center support (like a pole or tree branch) to prevent sagging in the middle.
Real-world example: On my patio, I ran lights from the pergola to the back fence. I used eye screws on the pergola, adhesive hooks on the stucco wall, and gutter clips on the fence. The result? A seamless, professional look that survived a summer storm without a single bulb going out.
Styling Tips for Maximum Ambiance (Beyond the Basics)
Now that your lights are up, it’s time to take the ambiance to the next level. Here are some creative ways to make your patio feel truly special.
Layer Your Lighting
Don’t rely on string lights alone. Combine them with:
- Path lights: Line walkways with solar-powered stakes.
- Uplights: Place LED spotlights under trees or plants to create shadows.
- Fairy lights in jars: Scatter mason jars with fairy lights on tables or steps.
Play with Colors and Effects
Even warm white lights can feel dynamic with the right tricks:
- Dimming: Use a dimmer switch to adjust the brightness for different moods.
- Twinkling or flashing: Some LEDs have a “twinkle” setting for a starry-night effect.
- Color-changing: For parties, switch to multicolor or RGB lights (but keep them subtle).
Create Zones
Use lights to define different areas:
- Dining zone: Hang lights directly over the table for a cozy, intimate feel.
- Lounge zone: Drape lights around the edges for a relaxed vibe.
- Fire pit zone: Wrap lights around nearby posts to highlight the gathering spot.
Seasonal Touches
Keep your patio fresh year-round:
- Spring: Add floral garlands between the lights.
- Summer: Hang paper lanterns or string citronella candles.
- Fall: Drape lights through pumpkins or autumn leaves.
- Winter: Add white or blue lights for a frosty glow.
Data Table: Recommended String LED Lights for Patios
| Brand/Model | Type | Length | Weather Rating | Key Features | Best For |
|---|---|---|---|---|---|
| Brightown Outdoor LED | Globe bulbs | 48 ft | IP44 | Connectable, dimmable, warm white | Large patios, dining areas |
| Minetom Fairy Lights | Fairy lights | 50 ft | IP65 | Waterproof, battery-powered, copper wire | Boho patios, railings |
| Twinkle Star Edison | Edison bulbs | 25 ft | IP44 | Vintage look, connectable, 8 modes | Modern patios, pergolas |
| GE Color Effects | RGB LEDs | 24 ft | IP65 | Color-changing, app control, weatherproof | Parties, smart homes |
| Koopower Solar String | Mini LEDs | 33 ft | IP65 | Solar-powered, auto on/off, warm white | Eco-friendly patios, no outlet needed |
Final Thoughts: Enjoy Your Magical Patio
Putting up string LED lights on your patio is one of those projects that’s equal parts practical and magical. It’s not just about lighting up the space—it’s about creating a mood, a feeling, a place where memories are made. Whether you’re sipping coffee at sunrise or laughing with friends under the stars, the right lights can make your patio feel like an extension of your home.
Remember, the key is to plan your layout, choose quality lights, and install them thoughtfully. Don’t rush it. Take your time to measure, test, and adjust. And don’t be afraid to experiment—sometimes the best looks come from happy accidents. I once accidentally draped lights in a zigzag pattern, and now it’s my favorite part of the patio!
So grab your lights, your tools, and a glass of your favorite drink. Turn on those LEDs, sit back, and let the magic happen. Your patio is about to become the most enchanting spot in your home. Happy lighting!
Frequently Asked Questions
How do I hang string LED lights on a patio without drilling holes?
Use removable adhesive hooks, tension rods, or clip-on mounts to secure the lights without damaging surfaces. This method works well for renters or temporary setups and keeps your patio damage-free.
What’s the best way to plan the layout for patio string LED lights?
Measure your patio dimensions and sketch a design, spacing lights 2–3 feet apart for even illumination. Consider zigzag, grid, or canopy patterns to maximize ambiance and coverage.
Can I leave string LED lights on my patio year-round?
Only if the lights are rated for outdoor use and weatherproof (look for an IP65+ rating). For seasonal use, store them indoors during harsh weather to prolong their lifespan.
How do I power string LED lights on a large patio?
Use outdoor-rated extension cords and power strips, or install a weatherproof outlet nearby. For longer runs, opt for low-voltage LED lights with a transformer to avoid voltage drop.
What tools do I need to put up string LED lights on a patio?
Basic tools include hooks, zip ties, a ladder, a measuring tape, and a staple gun (if drilling isn’t an option). For permanent installations, use eye screws and turnbuckles for tension.
How do I prevent string LED lights from sagging on my patio?
Install support hooks or poles at intervals to maintain tension, or use a guide wire between anchor points. For long spans, tighten lights gradually and check sag after installation.

