Featured image for how do you hang indoor string lights
Image source: jessicawellinginteriors.com
Hanging indoor string lights is easy and transformative—start by planning your layout and choosing the right hanging method, such as adhesive hooks, nails, or tension rods, depending on your wall type and desired look. Always measure and test lights before installation to ensure even spacing and a safe, stunning glow that enhances any room’s ambiance.
Key Takeaways
- Plan your layout first: Sketch light placement to avoid over- or under-lighting.
- Use removable hooks: Damage-free options work best for most indoor surfaces.
- Measure twice, hang once: Confirm spacing before installing hardware for even coverage.
- Secure cords safely: Tuck wires along edges to prevent tripping hazards.
- Test lights early: Check functionality before finalizing installation to save time.
- Layer with care: Combine string lights with other decor for balanced ambiance.
- Follow manufacturer guidelines: Adhere to weight limits and indoor-use recommendations.
📑 Table of Contents
Choosing the Right Indoor String Lights
Types of Indoor String Lights
When it comes to enhancing your indoor space, the first step is selecting the right type of indoor string lights. There’s a wide variety to choose from, each offering different benefits and aesthetic appeals. LED string lights are energy-efficient, long-lasting, and come in various colors and brightness levels, making them ideal for both ambient and decorative lighting. Incandescent string lights, while less energy-efficient, emit a warm, classic glow that many find nostalgic and cozy.
For a more rustic or vintage feel, Edison bulb string lights are a popular choice. These lights feature exposed filaments that give off a soft, golden light. Fairy lights, often battery-operated, are perfect for delicate, twinkling effects and are great for adding a touch of magic to any room. Lastly, smart string lights offer the convenience of app control, allowing you to change colors, set timers, and even sync with music—ideal for tech-savvy users.
Considerations for Choosing Lights
Before purchasing, consider the size and length of the lights. Measure the area you plan to decorate to ensure you have enough length without excess. The bulb spacing is also crucial; closer spacing creates a denser light effect, while wider spacing offers a more subtle glow.
Think about the power source. Battery-operated lights offer flexibility in placement but require frequent battery changes. Plug-in lights are more permanent and reliable but need access to an outlet. For rooms with limited outlets, consider using extension cords or power strips, but always ensure they’re rated for indoor use and not overloaded.
- Room Aesthetic: Match the lights to your room’s decor. Warm white lights complement wooden furniture and earthy tones, while cool white or colored lights suit modern, minimalist spaces.
- Durability: Check the IP rating for indoor use. While most indoor lights don’t need high waterproof ratings, a higher IP rating can indicate better durability.
- Special Features: Some lights offer dimming, twinkling, or remote control features. Decide which functionalities are essential for your needs.
Planning Your Indoor String Light Layout
Measuring and Mapping Your Space
Proper planning is key to achieving the perfect lighting effect. Start by measuring the length of the area you want to decorate. Use a tape measure to get accurate dimensions, and consider the height at which you’ll hang the lights. For example, if you’re draping lights across a wall, measure the distance from the ceiling to where you want the lowest point of the lights to hang.
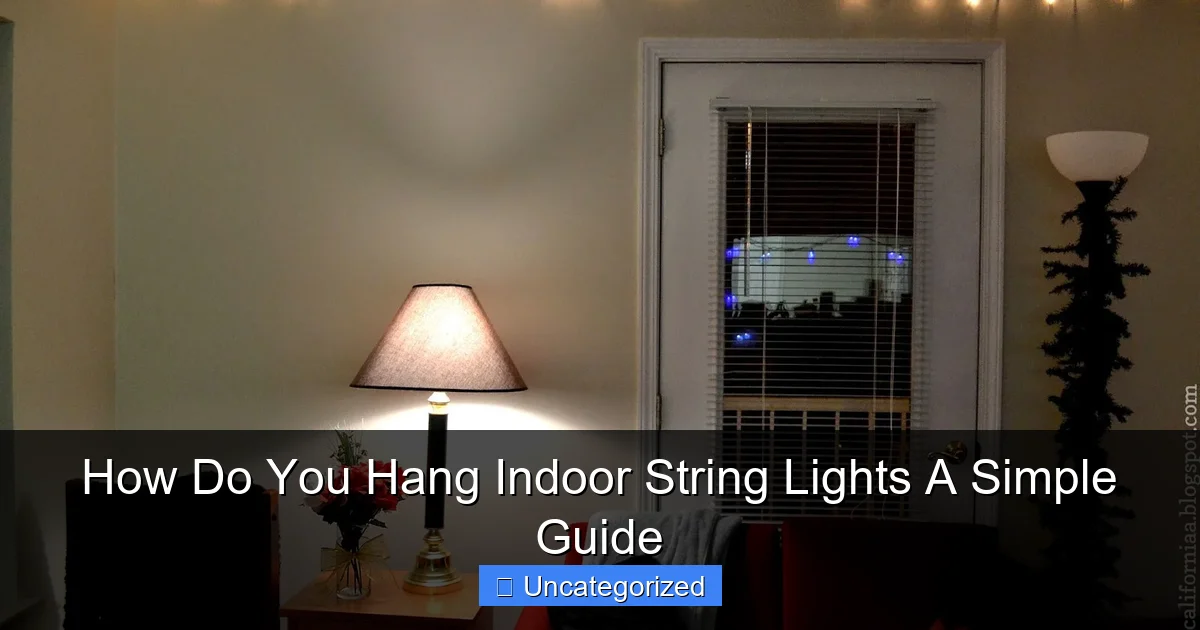
Visual guide about how do you hang indoor string lights
Image source: easydecor101.com
Sketch a rough layout on paper or use digital tools like floor planning apps. This helps visualize the placement and ensures you purchase the right amount of lights. For instance, if you’re wrapping lights around a bookshelf, measure the perimeter and height of the shelf to calculate the total length needed.
Deciding on Light Patterns and Designs
The pattern in which you hang the lights can dramatically change the room’s ambiance. Straight lines create a clean, modern look, ideal for headboards, mantels, or along the top of walls. Swags or drapes offer a more romantic, whimsical effect, perfect for bedrooms or cozy corners.
For a dynamic effect, consider zigzag patterns or geometric shapes like diamonds or stars. These patterns work well on larger walls or as a focal point in a living room. If you’re decorating a small space, clustered lights in a corner or around a mirror can create an intimate, inviting feel.
- Layering: Combine different light patterns for a more complex look. For example, hang a straight line of lights along the ceiling and add swags below for depth.
- Focal Points: Use lights to highlight specific areas, such as a gallery wall, a piece of artwork, or a plant display.
- Ceiling Decor: For a dramatic effect, consider hanging lights from the ceiling to create a canopy or starry night effect in a bedroom.
Tools and Materials for Hanging String Lights
Essential Hanging Tools
Having the right tools makes hanging string lights much easier and safer. Measuring tape is essential for accurate measurements. Pencil or marker helps mark spots on walls or furniture where you’ll place hooks or clips.
Adhesive hooks and clips are perfect for temporary installations or delicate surfaces like painted walls or wallpaper. They come in various sizes and strengths, so choose ones that can support the weight of your lights. For more permanent installations, picture hooks or small nails are reliable options. Use a hammer or drill for secure placement.
For hard-to-reach areas or high ceilings, a step ladder or extension pole can be invaluable. Always ensure your ladder is stable and placed on a flat surface to avoid accidents.
Additional Materials for Secure Installation
Beyond basic hooks, consider command strips for a damage-free option. These adhesive strips can hold significant weight and are easily removable without leaving residue. Zip ties are great for securing lights to furniture, railings, or other structures, especially if you’re wrapping lights around objects.
Extension cords and power strips are necessary if your lights are far from an outlet. Choose cords with a low profile to keep them discreet. For a polished look, use cord covers or raceway channels to hide and organize cords along walls or baseboards.
- Level Tool: Ensures your lights hang straight, especially important for straight-line installations.
- Wire clips or staples: Useful for securing cords to walls or ceilings, but be cautious not to damage the wire insulation.
- Decorative elements: Consider using garlands, ribbons, or sheer fabric to complement your lights and enhance the overall decor.
Step-by-Step Guide to Hanging Indoor String Lights
Preparing the Installation Area
Before hanging your lights, prepare the area to ensure a smooth process. Clear the space of any furniture or decor that might obstruct your work. If you’re working on a wall, move any pictures, shelves, or mirrors out of the way temporarily.
Clean the surfaces where you’ll be placing hooks or adhesive strips. Dust, dirt, or grease can weaken adhesion, so wipe down walls, furniture, or other surfaces with a damp cloth and let them dry completely. For adhesive hooks, press them firmly in place for at least 30 seconds to ensure a strong bond.
If you’re using nails or screws, mark the spots with a pencil before driving them in. Use a level to ensure your marks are straight, especially for long stretches of lights. For high ceilings, consider using a ladder with a tool tray to keep your materials organized and within reach.
Hanging Techniques for Different Surfaces
Different surfaces require different hanging techniques. For painted walls, adhesive hooks or command strips are ideal to avoid damage. Choose hooks with a weight rating higher than your lights to ensure they hold securely.
On wooden surfaces like headboards or shelves, small nails or picture hooks work well. Drill pilot holes first to prevent splitting the wood. For metal surfaces like railings or frames, magnetic hooks can be a quick and secure option.
For ceilings, use adhesive ceiling hooks or small screws. Ensure the hooks are rated for ceiling use and can support the weight of your lights. If you’re hanging lights from a high ceiling, consider using a fishing line or thin wire to create a suspension system that holds the lights in place.
- Wall-to-wall installations: Start at one end and work your way across, securing each hook or clip as you go. This prevents the lights from sagging or drooping.
- Wrapping lights: When wrapping lights around furniture or columns, use zip ties or clips every few feet to keep the lights taut and secure.
- Draping lights: For swag patterns, hang the lights in a series of loops, securing each loop at the top and bottom points to create a flowing effect.
Connecting and Testing the Lights
Once your hooks or clips are in place, it’s time to hang the lights. Start by attaching one end of the string to the first hook, then gently guide the lights along your planned path, securing them at each hook or clip. Avoid pulling or stretching the lights too tightly, as this can damage the wiring.
After hanging, connect the lights to a power source and test them to ensure they’re working properly. Check for any flickering, dimming, or non-functional bulbs. If you notice issues, unplug the lights and inspect the wiring, connections, and bulbs.
For lights with multiple strands, use connectors to join them seamlessly. Ensure the connectors are secure and not exposed to moisture. If your lights are dimmable, test the dimming function to make sure it works as expected.
Creative Ideas for Styling Indoor String Lights
Room-Specific Decorating Ideas
Different rooms call for different lighting styles. In the bedroom, hang lights above the bed to create a cozy, romantic atmosphere. Drape them along the headboard, or create a canopy effect by suspending them from the ceiling. Use warm white or soft pink lights for a soothing ambiance.
In the living room, use lights to highlight architectural features like mantels, bookshelves, or artwork. Wrap lights around the legs of a coffee table or drape them along the top of a window frame. For a festive touch during holidays, incorporate colored lights or themed bulbs.
For the kitchen, hang lights under cabinets or along the backsplash to add task lighting. String lights around a breakfast nook or dining table can create an inviting space for meals. Use cool white lights for a clean, modern look.
Unique and Whimsical Light Displays
Get creative with your light displays to make a statement. Geometric shapes like triangles, hexagons, or stars can be created using wireframes or adhesive hooks. These designs work well on accent walls or as a focal point in a room.
Hanging light curtains are another unique idea. Attach multiple strands of lights to a horizontal rod or wire, spacing them evenly to create a shimmering curtain effect. This works beautifully behind a bed, in a window, or as a room divider.
For a bohemian vibe, wrap lights around potted plants, macrame wall hangings, or woven baskets. Combine different light colors and styles for a layered, eclectic look. Use battery-operated fairy lights in glass jars or vases for a magical, floating effect.
- Seasonal themes: Swap out bulbs or add themed decorations to match holidays or seasons. Use red and green lights for Christmas, orange and purple for Halloween, or pastel colors for Easter.
- Interactive displays: Use smart lights to create interactive displays that respond to sound, motion, or voice commands. Sync lights with music for a dynamic party atmosphere.
- DIY backdrops: Create a backdrop for photos or video calls using string lights. Hang them on a wall or frame them with a wooden or metal structure for a professional look.
Maintaining and Troubleshooting Indoor String Lights
Routine Maintenance Tips
To keep your indoor string lights looking their best, perform routine maintenance. Clean the bulbs and wiring periodically with a soft, dry cloth to remove dust and debris. Avoid using water or cleaning sprays, as these can damage the electrical components.
Check the condition of the wiring and connectors regularly. Look for frayed wires, loose connections, or damaged insulation. Replace any faulty strands immediately to prevent safety hazards. For lights with replaceable bulbs, keep spare bulbs on hand in case of burnouts.
If you’re using battery-operated lights, replace batteries as needed and store them properly when not in use. Remove batteries if the lights will be unused for an extended period to prevent corrosion.
Common Issues and Solutions
Even with proper care, issues can arise. Flickering lights often indicate a loose connection or a failing bulb. Check all connections and replace any bulbs that are dim or flickering. If the entire strand flickers, inspect the wiring for damage.
Non-functional lights can be caused by a blown fuse (in plug-in lights) or dead batteries (in battery-operated lights). Replace fuses or batteries as needed. For lights with multiple strands, ensure all connectors are secure and not corroded.
Overheating is a serious issue, especially with incandescent bulbs. If lights feel hot to the touch, turn them off immediately and unplug them. Switch to LED lights, which generate less heat and are safer for prolonged use.
- Storage tips: When not in use, store lights in a cool, dry place. Wrap them loosely around a cardboard tube or use a storage reel to prevent tangling.
- Safety first: Always turn off and unplug lights before performing maintenance. Use lights rated for indoor use only and avoid overloading circuits.
- Long-term care: For permanent installations, inspect lights annually and replace any worn or damaged components to ensure longevity.
Data Table: Indoor String Light Maintenance Checklist
| Task | Frequency | Tools/Materials Needed | Notes |
|---|---|---|---|
| Clean bulbs and wiring | Monthly | Soft, dry cloth | Use gentle pressure to avoid damaging bulbs. |
| Check wiring and connectors | Quarterly | Visual inspection, flashlight | Look for fraying, loose connections, or corrosion. |
| Replace batteries | As needed (every 1-3 months) | Replacement batteries | Use high-quality batteries for longer life. |
| Inspect for overheating | After 4-6 hours of use | Touch test (carefully) | Turn off immediately if lights feel hot. |
| Test functionality | Before each use | Power source, dimmer (if applicable) | Check for flickering, dimming, or non-functional bulbs. |
| Store lights properly | Seasonally or when not in use | Storage reel, cardboard tube | Wrap loosely to prevent tangling and damage. |
Hanging indoor string lights is a simple yet impactful way to transform your space. Whether you’re looking to create a cozy bedroom, a vibrant living room, or a whimsical corner, the right lights and techniques can make all the difference. By choosing the right type of lights, planning your layout, using the proper tools, and following a step-by-step approach, you can achieve a professional-looking installation that enhances your home’s ambiance.
Remember to get creative with your designs—experiment with patterns, colors, and placements to find what works best for your style. Don’t be afraid to mix and match different types of lights or incorporate unique elements like plants, fabric, or themed decorations. With a little effort and imagination, your indoor string lights can become a stunning focal point in any room.
Lastly, prioritize safety and maintenance to ensure your lights remain functional and beautiful for years to come. Regular cleaning, inspections, and proper storage will extend the life of your lights and prevent common issues. So go ahead, grab your lights, and start transforming your space today—your perfect indoor lighting setup is just a few hooks away!
Frequently Asked Questions
How do you hang indoor string lights without damaging walls?
Use damage-free solutions like removable adhesive hooks, tension rods, or command strips designed for lightweight decor. These methods securely hold string lights while leaving no residue or holes when removed.
What’s the best way to hang indoor string lights on ceilings?
Install small ceiling hooks or adhesive ceiling mounts at even intervals, then drape the lights in zigzags, swags, or straight lines. For a seamless look, plan your layout first using painter’s tape to test spacing.
Can I hang indoor string lights on curtains or windows?
Yes! Clip or tie lights directly to curtain rods, tension rods, or window frames using clear zip ties or removable clips. Avoid placing them near curtains to reduce fire risk from overheating.
How do you hang indoor string lights on shelves or furniture?
Loop lights around the edges of shelves, headboards, or picture ledges using adhesive clips or tiny nails for stability. Ensure cords are tucked neatly to maintain a clean, safe setup.
What tools do I need to hang indoor string lights securely?
Most setups require adhesive hooks, nails, screws, or clips—depending on your surface. Always check the lights’ weight and your wall type (drywall, wood, etc.) to choose the right hardware.
How can I hide the cords when hanging indoor string lights?
Route cords behind furniture, baseboards, or curtains to keep them out of sight. Use cord covers or clips to secure loose wires along walls for a polished, tangle-free look.

