Featured image for string lights criss crossing patio
Image source: cdn.igp.com
Transform your patio into a mesmerizing nighttime oasis with criss-crossing string lights that add depth, ambiance, and a touch of magic to any backyard. Strategic diagonal or grid-style installations maximize coverage, eliminate dark corners, and create an inviting glow perfect for entertaining or unwinding. Elevate your outdoor space with this simple yet stunning lighting technique.
Key Takeaways
- Plan your layout first: Sketch the criss-cross pattern to ensure even spacing and coverage.
- Use durable lights: Choose weatherproof string lights for long-lasting outdoor use.
- Anchor securely: Install hooks or poles at equal heights for a taut, professional look.
- Mix light types: Combine warm white and twinkling lights for layered ambiance.
- Time it right: Add a timer for automatic dusk-to-dawn illumination.
- Keep it balanced: Avoid overcrowding; maintain consistent spacing between strands.
📑 Table of Contents
- Why String Lights Criss Crossing Patio Are the Ultimate Backyard Upgrade
- How to Plan Your String Lights Criss Crossing Patio Layout
- Choosing the Best String Lights for a Criss-Crossing Setup
- Step-by-Step Guide to Hanging String Lights Criss Crossing Patio
- Creative String Lights Criss Crossing Patio Ideas
- Maintenance and Safety Tips for Long-Lasting Glow
- Data Table: String Lights Criss Crossing Patio – Quick Reference Guide
- Final Thoughts: Your Patio, Transformed
Why String Lights Criss Crossing Patio Are the Ultimate Backyard Upgrade
Remember that one summer evening when you hosted your first backyard barbecue? The laughter, the smell of grilled burgers, and the warm glow of string lights criss crossing patio—suddenly, your backyard felt like a cozy outdoor lounge. That’s the magic of well-placed string lights. They don’t just illuminate your space; they transform it into an inviting, Instagram-worthy retreat. Whether you’re hosting a dinner party or enjoying a quiet night with a book, string lights criss crossing patio create a warm, magical ambiance that makes every moment feel special.
But let’s be real: not all string light setups are created equal. Some look like a tangled mess of wires, while others fade into the background, barely noticeable. The secret to a truly stunning glow? Criss-crossing your string lights. This technique—where lights are hung in a zigzag or web-like pattern across your patio—adds depth, dimension, and drama. It’s not just about hanging lights; it’s about creating a moment. In this post, we’ll explore how to master this look, from planning your layout to choosing the right bulbs, and even how to keep them looking great season after season.
How to Plan Your String Lights Criss Crossing Patio Layout
Before you start drilling holes or untangling cords, take a step back and think about your patio’s layout. Planning is the difference between a professional-looking glow and a DIY disaster. Here’s how to get it right.
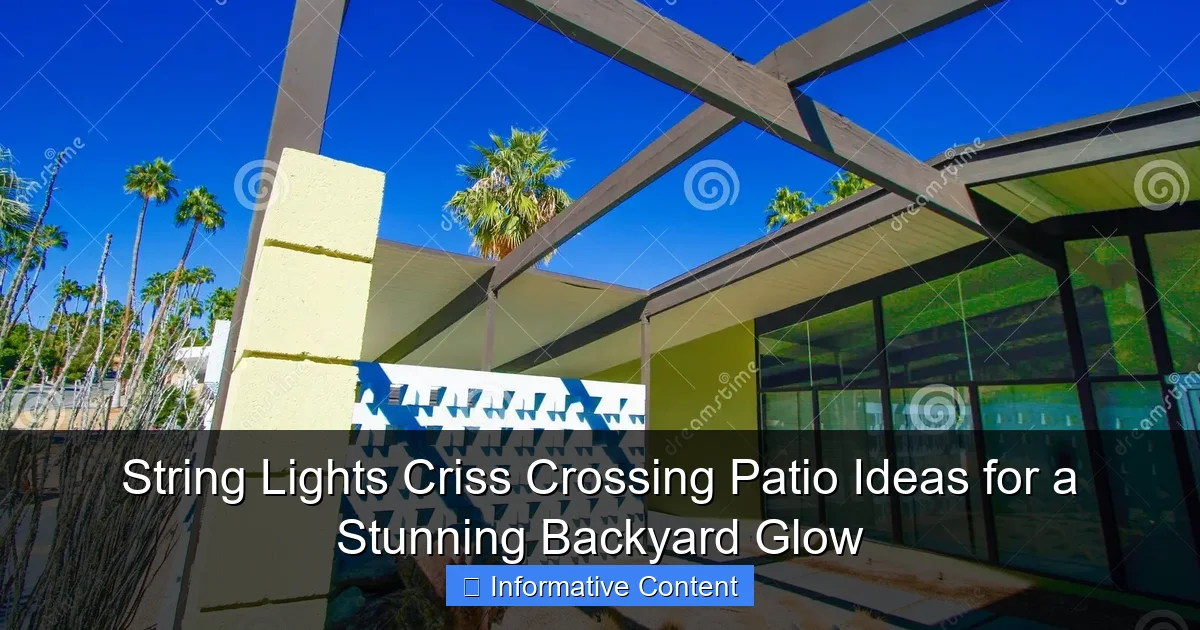
Visual guide about string lights criss crossing patio
Image source: thumbs.dreamstime.com
Assess Your Patio’s Structure and Dimensions
Start by measuring your patio. How wide is it? How long? Are there natural anchor points like trees, pergolas, or house walls? For example, if your patio is 12 feet wide and 16 feet long, you’ll need enough string lights to cover that space without sagging or looking sparse.
- Pro tip: Use painter’s tape to mark where you’ll hang the lights. This lets you visualize the criss-cross pattern before committing.
- Example: On a 12×16 ft patio, you might run 3-4 horizontal lines from one side to the other, then criss-cross diagonally between them.
- Watch out: Avoid hanging lights too close to walkways—you don’t want guests tripping over cords.
Choose the Right Anchor Points
Anchor points are where your lights will attach. The best ones are sturdy and evenly spaced. Here’s what to consider:
- Trees: Great for natural charm, but make sure they’re healthy and won’t lose branches in storms.
- Pergolas or Gazebos: Ideal if you have one—just run lights along the beams or criss-cross between corners.
- House Walls: Use outdoor-rated hooks or eye screws. Avoid nails—they can damage siding.
- Posts: If your patio has no natural anchors, install 4×4 wooden posts or metal poles at the corners. Paint them to match your patio for a seamless look.
Real talk: I once tried using flimsy hooks on my vinyl siding, and after a windy night, half the lights came crashing down. Learn from my mistake—use heavy-duty anchors!
Sketch a Simple Layout (Yes, Really)
Grab a notepad or use a free design app like SketchUp Free to sketch your criss-cross pattern. Think of it like a grid:
- Run horizontal lines (parallel to the house) every 2-3 feet.
- Then, criss-cross diagonally between them, creating a web or diamond pattern.
- For a more dramatic look, overlap multiple layers of criss-crossing.
Example: On my 10×12 ft patio, I ran 4 horizontal lines and 3 diagonal ones. The result? A cozy, starry-sky effect that guests still talk about.
Choosing the Best String Lights for a Criss-Crossing Setup
Not all string lights are created equal. Some are built for durability, others for style, and a few for both. Here’s how to pick the perfect set for your criss-crossing patio.
Bulb Type: LED vs. Incandescent vs. Edison
The bulb you choose affects everything—from ambiance to energy bills. Here’s the breakdown:
- LED Lights: My top pick. They’re energy-efficient (use 80% less power than incandescent), last 25,000+ hours, and come in warm white (2700K) or cool white (4000K). Bonus: Many are dimmable and weatherproof.
- Incandescent Lights: Warm, classic glow—but they’re hot, fragile, and burn out fast. Only use them for short-term events.
- Edison Bulbs: Vintage charm with exposed filaments. Perfect for a rustic or boho vibe, but they’re pricey and less energy-efficient than LEDs.
Real-world tip: I use warm white LEDs for year-round use and save Edison bulbs for parties. It’s the best of both worlds!
Length, Spacing, and Brightness
How many feet of lights do you need? How far apart should the bulbs be? Here’s what matters:
- Length: Measure your total criss-crossing distance. For a 12×16 ft patio, you’ll need at least 40-50 feet of lights. Buy 10-15% extra for slack.
- Spacing: Closer bulbs (every 3-6 inches) create a dense, twinkling effect. Wider spacing (12-24 inches) gives a subtle, starry look. For criss-crossing, I recommend 6-12 inch spacing.
- Brightness: Lumens tell you how bright the lights are. For patios, 100-300 lumens per bulb is plenty. Too bright, and it feels like a parking lot; too dim, and it’s hard to see.
Pro tip: Buy string lights with removable bulbs. If one burns out, you can replace it—no need to toss the whole strand.
Weatherproofing and Durability
If you’re using lights year-round, they need to survive rain, wind, and snow. Look for:
- IP Rating: IP65 or higher means the lights are dust-tight and water-resistant. Perfect for patios.
- UV-Resistant Wires: Prevents yellowing or cracking from sun exposure.
- Stainless Steel or Plastic Hooks: Rust-proof anchors keep your lights secure.
My mistake: I once bought cheap “outdoor” lights with no IP rating. After one summer, the wires cracked and the bulbs flickered. Invest in quality—it pays off.
Step-by-Step Guide to Hanging String Lights Criss Crossing Patio
Now for the fun part: hanging your lights! This step-by-step guide ensures a clean, professional look—no tangled messes.
Step 1: Gather Your Tools
You’ll need:
- String lights (with extra bulbs)
- Outdoor-rated hooks, eye screws, or zip ties
- Drill and screwdriver (if using screws)
- Measuring tape
- Ladder (if reaching high points)
- Timer or smart plug (optional, but highly recommended)
Step 2: Install Anchor Points
Follow your sketch to place hooks or screws. Here’s how:
- For wood: Drill pilot holes, then screw in hooks.
- For vinyl/metal: Use adhesive hooks rated for outdoor use.
- For trees: Wrap zip ties around branches (avoid damaging bark).
Pro tip: Space anchors every 2-3 feet to prevent sagging.
Step 3: String the Horizontal Lines
Start with the horizontal (parallel) lines. Attach the first end to an anchor, run the lights across, and secure the other end. Use zip ties or clips to keep the cord taut.
- Key tip: Don’t stretch the cord too tight—it can damage the wires.
- For extra support: Run a thin, clear fishing line along the lights to reduce strain.
Step 4: Criss-Cross Diagonally
Now for the magic. Attach the first diagonal line from one corner to the opposite. Then, weave the next line in the opposite direction, creating an X or diamond pattern.
- Spacing: Keep diagonal lines 2-3 feet apart for a balanced look.
- Overlap: For a layered effect, run diagonals in both directions (like a net).
- Secure: Use zip ties at each intersection to prevent shifting.
Real talk: My first criss-cross attempt looked like a spiderweb after a storm. Take your time—adjust the tension as you go.
Step 5: Test and Adjust
Plug in the lights and step back. Look for:
- Uneven sagging? Tighten the cords.
- Bulbs too far apart? Add extra strands.
- Glare in your eyes? Angle the bulbs downward.
Final touch: Add a timer or smart plug to turn lights on at dusk automatically. No more forgetting to switch them on!
Creative String Lights Criss Crossing Patio Ideas
Ready to take your criss-crossing setup to the next level? Here are 5 creative ideas to inspire you.
1. The Starry Sky Effect
For a dreamy, nighttime glow, use warm white LEDs with close spacing (6 inches). Criss-cross tightly in a diamond pattern, then add a few extra strands for a “starburst” effect.
- Perfect for: Romantic dinners or stargazing nights.
- Pro tip: Add a few twinkling fairy lights for extra magic.
2. Boho Chic with Edison Bulbs
Use Edison-style bulbs and criss-cross loosely (12-18 inch spacing). Drape the lights over a pergola or between trees for a laid-back, boho vibe.
- Pair with: Wicker furniture, patterned rugs, and potted plants.
- Watch out: Edison bulbs are fragile—avoid high-traffic areas.
3. Minimalist Grid
For a modern look, use cool white LEDs in a simple grid pattern. Run 2-3 horizontal lines, then criss-cross with 2 diagonal lines—no overlap.
- Best for: Contemporary patios with clean lines.
- Bonus: This style is low-maintenance and easy to take down.
4. Party-Ready Layered Glow
Layer multiple strands: one horizontal, one diagonal, and a third in a zigzag. Use color-changing LEDs for a fun, dynamic effect.
- Ideal for: BBQs, birthdays, or holiday gatherings.
- Pro tip: Sync the lights to music with a smart controller.
5. Nature-Inspired Web
For a woodland feel, criss-cross lights between trees, then drape them over branches. Use amber or warm white LEDs to mimic fireflies.
- Pair with: String lights in mason jars or hanging lanterns.
- Caution: Avoid overloading trees—check weight limits.
Maintenance and Safety Tips for Long-Lasting Glow
Great lighting isn’t a one-and-done project. To keep your criss-crossing patio lights looking amazing, follow these maintenance and safety tips.
Seasonal Care
- Spring: Inspect for damage (cracked wires, loose bulbs). Replace any worn parts.
- Summer: Clean bulbs with a damp cloth to remove dust and bugs.
- Fall: Trim overhanging branches that could snag lights.
- Winter: If you live in a snowy climate, take lights down or use heavy-duty, weatherproof strands.
My rule: I do a full inspection every spring and replace 1-2 bulbs annually.
Safety First
- Use outdoor-rated lights: Indoor lights can overheat and cause fires.
- Check for frayed wires: Replace damaged cords immediately.
- Don’t overload circuits: Use a power strip with surge protection.
- Keep away from water: Never hang lights over pools or fountains.
Real scare: A friend once used indoor lights on his patio. After a rainstorm, the cord shorted and sparked. Safety isn’t optional—it’s essential.
Storage Hacks
- Wrap lights around a piece of cardboard or a reel to prevent tangling.
- Store in a dry, temperature-controlled space (not the garage).
- Label strands with their length and bulb type for easy setup next year.
Data Table: String Lights Criss Crossing Patio – Quick Reference Guide
| Factor | Best Choice | Why It Matters |
|---|---|---|
| Bulb Type | Warm White LEDs (2700K) | Energy-efficient, long-lasting, cozy glow |
| Length | 40-50 ft for a 12×16 ft patio | Enough for criss-crossing without sagging |
| Spacing | 6-12 inches | Balanced density—not too sparse, not too bright |
| IP Rating | IP65 or higher | Weatherproof for year-round use |
| Anchor Points | Stainless steel hooks or zip ties | Rust-proof and secure |
| Smart Features | Timer or app-controlled | Automate on/off times, save energy |
Final Thoughts: Your Patio, Transformed
There’s something undeniably magical about string lights criss crossing patio. They’re not just lights—they’re storytellers. They turn ordinary evenings into memories, and simple patios into destinations. Whether you’re going for a cozy boho nook or a sleek, modern glow, the criss-cross technique adds depth and drama that flat, horizontal lines just can’t match.
But here’s the best part: this isn’t a one-size-fits-all project. Your patio is unique, and your lights should be too. Play around with patterns, experiment with bulb types, and don’t be afraid to tweak your setup until it feels just right. And remember—great lighting is about more than aesthetics. It’s about creating a space where you want to linger, where friends gather, and where the world outside fades away.
So grab your tools, sketch that layout, and start stringing. Your dream patio glow is closer than you think. And when those lights finally twinkle to life? You’ll know it was worth every minute.
Frequently Asked Questions
How do I install string lights criss crossing patio without damaging my roof or walls?
Use removable adhesive hooks, gutter clips, or freestanding poles to suspend the lights without nails or screws. This method keeps your surfaces intact while creating a secure, even criss-cross pattern.
What’s the best spacing for string lights criss crossing patio to achieve balanced lighting?
Space anchor points 6–8 feet apart for optimal coverage and a professional look. Adjust based on bulb density—closer for ambient glow, wider for subtle accents.
Can I use indoor string lights for a criss-cross patio setup?
No—always choose outdoor-rated string lights with weatherproof certifications (like IP65). They’re designed to withstand UV rays, rain, and temperature changes.
How do I power string lights in the center of a large criss-cross patio design?
Use an outdoor-rated extension cord hidden under rugs or conduit, or install a weatherproof outlet nearby. For larger spaces, consider solar-powered lights with long battery life.
What type of string lights work best for a criss-cross pattern?
LED Edison bulbs or globe lights with flexible, tangle-resistant cords are ideal. Their warm glow and durable construction enhance ambiance while simplifying installation.
How can I make my criss-cross patio lights look professional and avoid sagging?
Pre-stretch the lights taut between anchor points and use tensioners or turnbuckles for support. For long spans, add a center pole to prevent drooping.

