
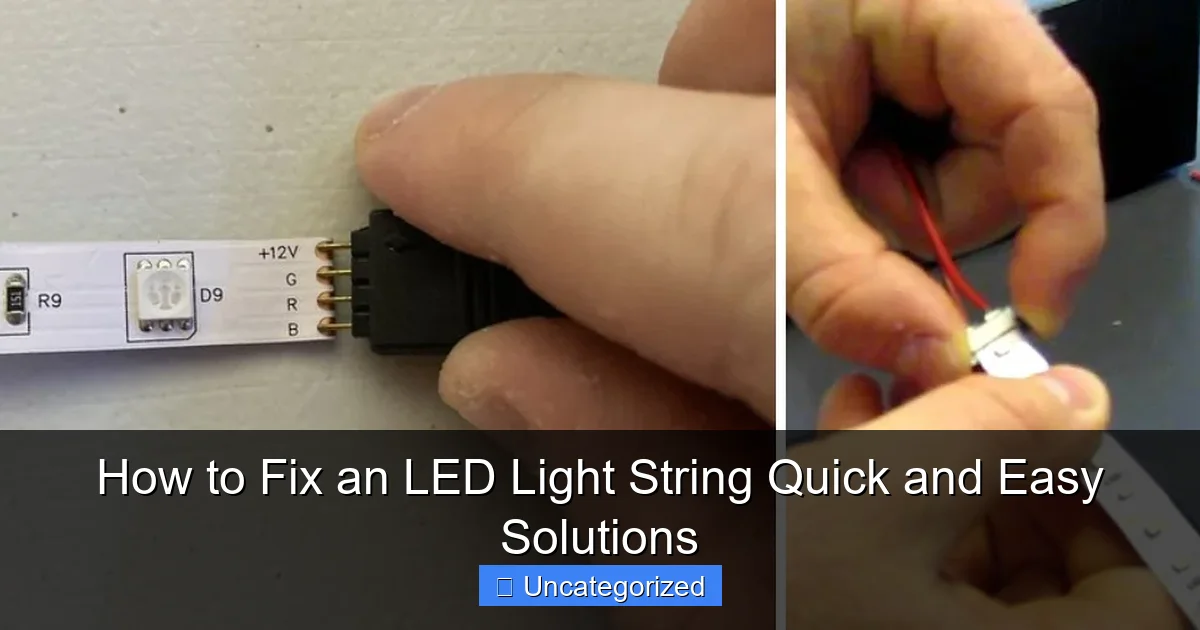
Featured image for how to fix an led light string
Image source: i.ytimg.com
Most LED light string issues stem from loose connections or burnt-out bulbs—start by inspecting and reseating each bulb. For non-responsive strands, test the power source and replace fuses or batteries before attempting wire repairs. With simple tools and a few minutes, you can often revive your lights without replacing the entire set.
How to Fix an LED Light String Quick and Easy Solutions
Key Takeaways
- Inspect bulbs first: Check for loose or burnt-out bulbs before assuming complex issues.
- Test the fuse: Replace faulty fuses in the plug to restore power quickly.
- Check connections: Secure loose wires or connectors to fix intermittent lighting.
- Use a multimeter: Diagnose voltage issues to pinpoint dead sections accurately.
- Replace damaged wires: Solder or tape frayed wires to prevent short circuits.
- Clean bulb sockets: Remove corrosion with vinegar for better electrical contact.
Why This Matters / Understanding the Problem
Nothing ruins the cozy glow of holiday lights or your favorite room decor faster than a flickering or completely dead LED light string. Whether it’s a string of Christmas lights, fairy lights, or outdoor path lights, a single bad bulb or loose wire can turn your festive setup into a frustrating puzzle.
Unlike traditional incandescent bulbs, LED strings are more energy-efficient and longer-lasting—but they’re also more sensitive to electrical inconsistencies. The good news? Most LED light string issues are fixable without replacing the entire set. That’s where how to fix an LED light string quick and easy solutions comes in handy.
Instead of tossing out a $15–$30 light set, you can often solve the problem in under 15 minutes with basic tools. This guide walks you through diagnosing and repairing common LED string problems—from flickering to total blackouts—so you can save money, reduce waste, and keep your lights shining bright.
Whether you’re troubleshooting a string that won’t turn on, has dead sections, or blinks erratically, these quick and easy solutions are designed for real people, not electricians. No soldering iron required (in most cases!).
Did you know? Over 60% of LED light string failures are due to loose connections or damaged wires—not faulty LEDs. Fixing them is easier than you think.
What You Need
Before diving into how to fix an LED light string quick and easy solutions, gather these simple tools and materials. You probably already have most of them at home.
Visual guide about how to fix an led light string
Image source: brightlighthub.com
- Multimeter (digital or analog) – Essential for testing voltage, continuity, and bulb functionality. A $15–$20 model works fine. Look for one with a continuity beep.
- Small flathead and Phillips screwdrivers – For opening bulb sockets or control boxes.
- Needle-nose pliers – Handy for gripping tiny wires or pulling out bulbs.
- Wire strippers – Only needed if you’re splicing or repairing broken wires.
- Replacement LED bulbs (same type and wattage) – Keep a few spares from an old set or buy a pack online. Match color, voltage, and base type.
- Electrical tape or heat shrink tubing – For insulating exposed wires after repairs.
- Scissors – For cutting tape or trimming damaged insulation.
- Rubbing alcohol and cotton swab – To clean corroded contacts in bulb sockets.
- Small flashlight – Helps you see inside dark sockets or tangled wires.
- Work gloves (optional) – Protect your hands from sharp wire ends.
Bonus: Keep a labeled storage bag for spare bulbs and tools. That way, when next year’s string fails, you’re ready with your quick and easy solutions toolkit.
Step-by-Step Guide to How to Fix an LED Light String Quick and Easy Solutions
LED light strings fail in predictable ways. By following this step-by-step process, you’ll diagnose the root cause and apply the right fix—without guessing or wasting time.
Step 1: Unplug and Inspect the Entire String
Start by unplugging the lights from any power source. Safety first! Even low-voltage LED strings can carry a small charge, especially if they have a battery pack or transformer.
Now, lay the string flat on a clean surface. Run your hands along the wire from end to end. Look for:
- Frayed or cracked insulation
- Kinks, twists, or sharp bends (common near plugs or connectors)
- Discolored or melted plastic near bulbs or sockets
- Loose or dangling bulbs
If you find visible damage—like a chewed wire or a melted socket—mark that spot. This is likely your culprit.
Pro insight: Pets, kids, or storage in attics/basements often cause physical damage. A single nick in the wire can short the whole circuit.
Step 2: Check the Power Source and Plug
Plug the string into a working outlet. If it still doesn’t light, test the outlet with another device (like a phone charger) to rule out a dead outlet.
Next, inspect the plug and power adapter (if your string has one). Look for:
- Corrosion or rust on metal prongs
- Frayed wires near the plug
- Overheating (warm or hot to the touch)
If the adapter is hot or smells like burnt plastic, stop using it. Replace it with a compatible one—matching voltage and polarity. Never use a higher-voltage adapter; it can fry your LEDs.
Use your multimeter to test the plug’s voltage. Set it to DC voltage (for battery-powered) or AC (for plug-in). Insert probes into the plug’s metal slots. You should see the rated voltage (e.g., 3V, 12V, 120V).
No voltage? The plug or transformer is dead. Time to replace it or bypass it (see Step 5).
Step 3: Test for Continuity in the Wire
Now, test the wire for breaks or shorts using your multimeter’s continuity function (usually marked with a sound wave or diode symbol).
Unplug the string. Set the multimeter to continuity mode. Touch one probe to the metal tip of the plug’s positive terminal. Touch the other probe to the first bulb’s positive contact (usually the center metal tab in the socket).
If the multimeter beeps, the wire is intact. Move the second probe to the next bulb, then the next—checking continuity all the way to the end.
No beep? You’ve found a break. Trace back until the beep returns. That’s where the wire is damaged.
Repeat the test on the negative side (the outer ring of the plug and socket).
Warning: Don’t skip this step. A broken wire often looks fine on the outside but has a snapped internal conductor.
Step 4: Examine and Test Individual Bulbs
LED strings are usually wired in series (all bulbs share one circuit) or parallel (each bulb has its own path). Most consumer sets are series-wired, meaning one dead bulb can kill the whole string.
Start by checking the bulbs visually. Look for:
- Blackened or cracked lenses
- Bulbs that are loose or wobbly in the socket
- Corrosion (white or green powder) on bulb contacts
Clean corroded contacts with a cotton swab dipped in rubbing alcohol. Let it dry completely before reinserting the bulb.
Now, use your multimeter to test each bulb. Set it to diode test mode (if available) or continuity. Touch one probe to the bulb’s base and the other to the metal tip. A working LED will light up dimly or show a voltage drop (1.8–3.3V, depending on color).
No response? The bulb is dead. Replace it with an identical one. Match the base type (E12, E10, wedge, etc.) and voltage.
Note: Some strings use “shunt” LEDs—if one dies, current bypasses it, keeping the rest on. But many older or cheaper sets don’t have this feature. A single dead bulb can shut down the whole strand.
Step 5: Repair or Bypass a Damaged Wire
If you found a break in the wire during Step 3, it’s time to fix it. Here are two quick and easy solutions:
Option A: Splice and Solder (Most Reliable)
- Cut out the damaged section with scissors or wire cutters.
- Strip 1/2 inch of insulation from both ends using wire strippers.
- Twist the matching wires together (positive to positive, negative to negative).
- Solder the connections for a permanent, low-resistance joint.
- Cover each splice with electrical tape or a heat shrink tube. Slide the tube on before soldering!
Option B: Crimp Connectors (No Soldering)
- Use insulated butt connectors (available at hardware stores).
- Insert each wire end into opposite sides of the connector.
- Crimp with pliers for a secure hold.
- Wrap the joint in electrical tape for extra protection.
For minor nicks (not full breaks), wrap the area tightly with electrical tape. This is a temporary fix but often lasts for one season.
Real-life example: Sarah from Ohio fixed her patio lights with just a crimp connector and tape. She saved $20 and kept her favorite string for another summer.
Step 6: Fix a Malfunctioning Controller or Battery Pack
Many LED strings have a controller box (for blinking, fading, etc.) or a battery pack. If the lights don’t respond to the remote or switch, the issue might be here.
Open the controller or battery pack (usually held by small screws). Look for:
- Corroded battery terminals (especially in alkaline battery packs)
- Loose internal wires
- Burnt or discolored circuit board traces
Clean corrosion with vinegar or isopropyl alcohol. Re-solder any loose wires. If the circuit board is damaged, replacement is usually easier than repair.
For battery packs, replace old batteries and check the voltage with your multimeter. A weak battery may show low voltage but still “work”—causing flickering or dim lights.
If the controller is dead, bypass it:
- Cut the wires just before the controller.
- Connect the power source directly to the light string (positive to positive, negative to negative).
- Use a switch or plug to control power manually.
This turns your fancy programmable lights into simple on/off lights—but they’ll still work!
Step 7: Reassemble and Test the String
Once you’ve made repairs, reassemble everything:
- Reinsert bulbs into sockets (don’t force them—they only fit one way).
- Tuck wires back into control boxes or battery packs.
- Secure with screws or clips.
- Plug in the string or install fresh batteries.
Turn it on. If the lights work, great! If not, double-check your connections and retest with the multimeter.
For flickering or dim lights, check for:
- Loose bulb contacts
- Low battery voltage
- Overloaded circuit (too many strings on one adapter)
Unplug other devices and test the string alone. Sometimes, a weak power source can’t handle multiple loads.
Pro Tips & Common Mistakes to Avoid
Even with the right tools, small errors can ruin your repair. Here are insider tips to make your how to fix an LED light string quick and easy solutions process smoother.
Pro Tip #1: Label your bulbs. Use a marker to number bulbs 1, 2, 3… as you test them. This helps you track which one failed and where in the sequence.
Pro Tip #2: Use a “known good” bulb. Test a spare bulb in each socket to see if the socket itself is faulty. A bad socket (not a bad bulb) is a common culprit.
Pro Tip #3: Store lights properly. Wrap them loosely around a cardboard tube or storage reel. Avoid tangles, which stress wires and sockets.
Pro Tip #4: Check the fuse (if your plug has one). Some LED strings have a tiny fuse inside the plug. Unscrew the plug cap and look for a small glass tube. If the wire inside is broken, replace it with an identical fuse (usually 0.5–2A).
Pro Tip #5: Test in stages. If you’re fixing a long string (50+ bulbs), test every 10 bulbs. This narrows down the problem area fast.
Now, the mistakes to avoid:
- Using the wrong replacement bulbs. LEDs come in different voltages (3V, 12V, 120V) and base types. A mismatched bulb won’t work—or could damage the string.
- Over-tightening sockets. Forcing a bulb can crack the socket or break internal wires.
- Ignoring water damage. Outdoor strings exposed to rain or snow may have internal corrosion. Let them dry completely before testing.
- Skipping the continuity test. A wire that looks fine might have a hidden break. Always test.
- Using duct tape instead of electrical tape. Duct tape isn’t insulating and can melt or catch fire. Use only electrical tape or heat shrink for repairs.
Remember: patience wins. Rushing leads to mistakes. Take your time with each step—especially when soldering or splicing.
FAQs About How to Fix an LED Light String Quick and Easy Solutions
Here are the most common questions people ask when trying to fix an LED light string quick and easy solutions—answered by real repair experience.
Q1: Why do only some bulbs work on my string?
This usually means a break in the wire or a dead bulb in a series-wired string. Use your multimeter to test continuity from the last working bulb to the first dead one. The break is somewhere in between. Also, check if the string is designed with “shunt” technology—some modern LEDs keep working even if one bulb fails.
Q2: Can I fix an LED string with a broken plug?
Yes! Cut off the old plug, strip the wires, and attach a new one. Match the wire colors (usually black to black, white to white, or red to red). Use a polarized plug if the original was polarized (one prong wider than the other). Secure with electrical tape or a strain relief clamp.
Q3: My LED string flickers. What’s wrong?
Flickering can be caused by:
- Loose bulb in the socket
- Low battery voltage
- Damaged wire with intermittent connection
- Faulty controller or transformer
Test each possibility. Tighten bulbs, replace batteries, and use your multimeter to check for voltage drops when flickering occurs.
Q4: Are LED light strings repairable if they’re waterproof?
Yes—but it’s trickier. Waterproof strings have sealed sockets and silicone-coated wires. You’ll need to carefully cut open the seal to access the bulb or wire. Use silicone sealant or waterproof tape when reassembling. For minor repairs, you can sometimes slide a new bulb into the socket without fully opening it.
Q5: Can I use regular incandescent bulbs in an LED string?
No. LED strings are designed for low voltage and specific current. Incandescent bulbs draw more power, which can overheat the string or blow the fuse. Always use LED bulbs designed for the string (check the packaging).
Q6: How do I know if my string is series or parallel wired?
Easy test: Remove one bulb. If the whole string goes out, it’s series-wired. If the other bulbs stay on, it’s parallel-wired. Most consumer strings are series, which is why one dead bulb kills the set.
Q7: Is it worth fixing a cheap LED string?
Depends. If the repair takes under 10 minutes and costs less than $5 (e.g., one replacement bulb or a bit of tape), yes. If you need to solder, buy a multimeter, or replace the plug, consider whether a new string might be more cost-effective. But for sentimental or specialty lights (like custom-colored or shaped LEDs), fixing is often worth it.
Final Thoughts
Learning how to fix an LED light string quick and easy solutions isn’t just about saving a few bucks—it’s about reclaiming control over your home’s ambiance and reducing waste. Most LED string failures are simple: a loose bulb, a frayed wire, or a dead battery. With the right tools and a little patience, you can bring them back to life.
This guide gives you a clear, step-by-step path: inspect, test, repair, and test again. You don’t need to be an electrician. Just follow the process, use your multimeter wisely, and don’t skip the continuity check.
Next time your lights go dark, don’t toss them. Grab your toolkit, take a deep breath, and start diagnosing. You’ll be surprised how often a 5-minute fix saves your favorite string.
And remember: keep spare bulbs, a multimeter, and electrical tape handy. That way, when the next holiday or special occasion rolls around, you’re ready to shine—literally.
Now go fix those lights and enjoy the glow of your handiwork!

