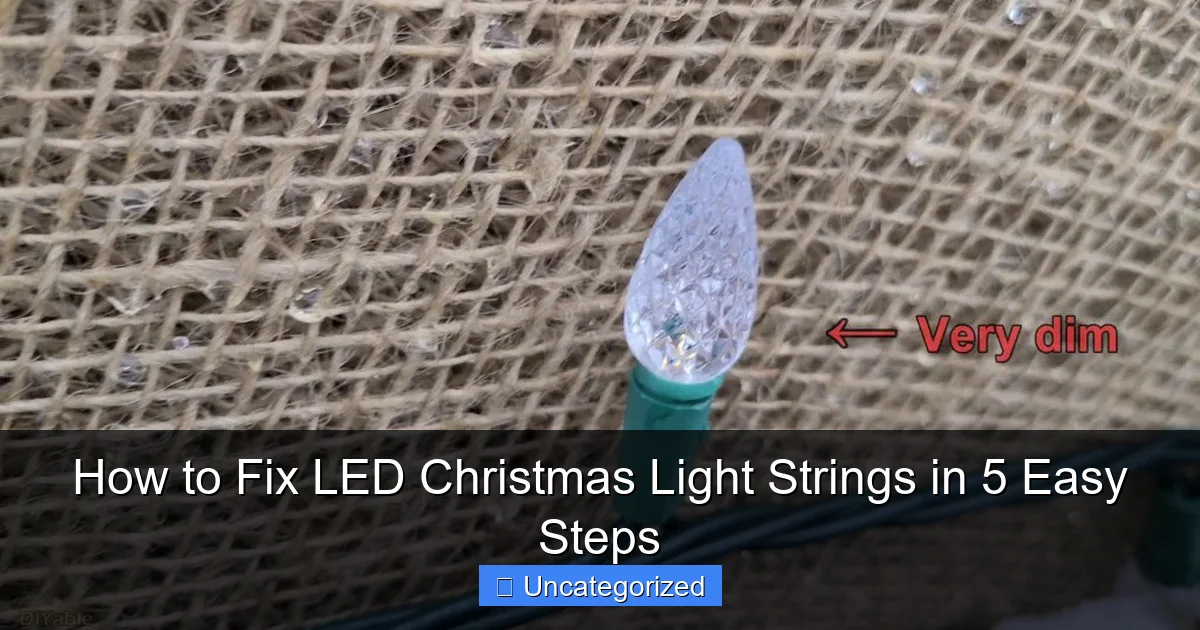
Featured image for how to fix led christmas light strings
Image source: diyable.com
Revive your LED Christmas light strings in minutes by following five simple, step-by-step troubleshooting techniques that address the most common issues—loose bulbs, faulty fuses, and damaged wires. No special tools or expertise needed—just a few minutes of your time to test connections, replace parts, and restore your festive glow safely and efficiently.
How to Fix LED Christmas Light Strings in 5 Easy Steps
Key Takeaways
- Inspect bulbs first: Check for loose or burnt-out bulbs causing the issue.
- Test the fuse: Replace blown fuses in the plug for quick restoration.
- Use a voltage detector: Identify dead sections without disassembling the string.
- Secure connections: Tighten loose bulb bases to ensure consistent power flow.
- Store properly: Prevent future damage by wrapping lights loosely and dry.
Why This Matters / Understanding the Problem
You’ve spent hours decorating your home for the holidays—only to discover that half your LED Christmas light strings are dark. It’s frustrating, especially when you’re trying to create that perfect festive glow. But here’s the good news: you don’t need to toss them out or call an electrician. Learning how to fix LED Christmas light strings in 5 easy steps can save you time, money, and a lot of holiday stress.
Unlike old incandescent lights, LED strings are more energy-efficient and long-lasting, but they’re not indestructible. A single dead bulb, a loose wire, or a faulty plug can knock out an entire section. The key is knowing where to look and what to do. This guide walks you through a simple, proven process to get your lights shining again—without any technical know-how.
Whether you’re troubleshooting a single strand or a whole outdoor display, fixing LED Christmas lights is easier than you think. With the right approach, you can avoid the hassle of buying new sets every year. Let’s dive into the most common causes and how you can solve them fast.
By the end of this guide, you’ll know exactly how to fix LED Christmas light strings in 5 easy steps, using tools you probably already have at home. No magic, no guesswork—just clear, practical solutions.
What You Need
Before you start, gather these simple tools and materials. Most of them are household items or affordable purchases from your local hardware store.
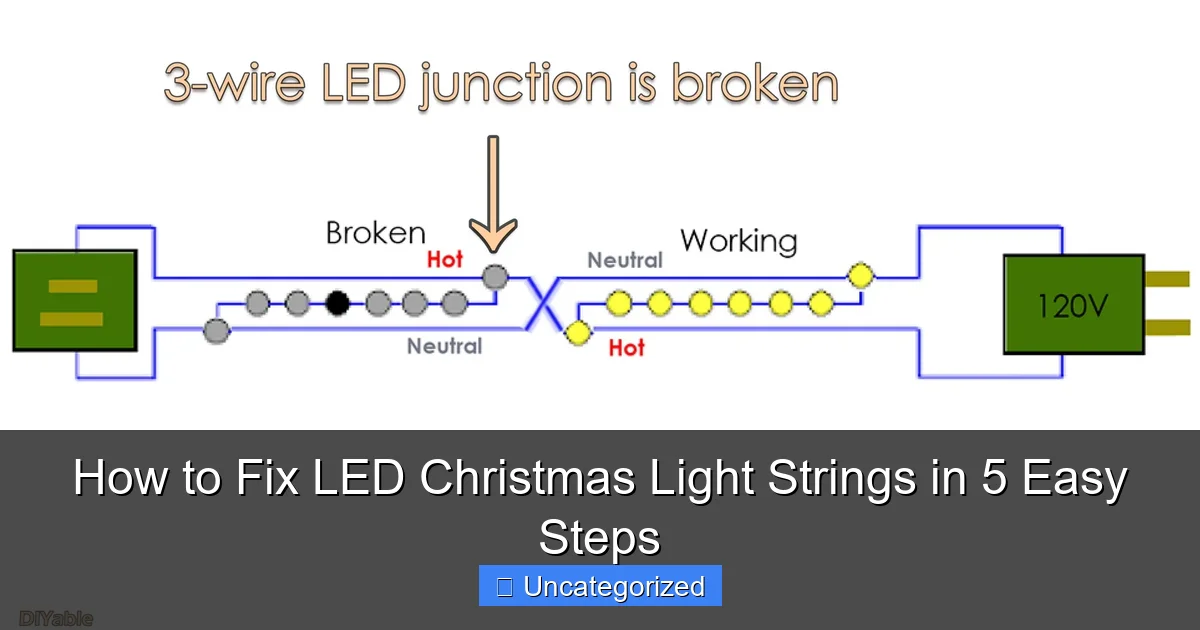
Visual guide about how to fix led christmas light strings
Image source: diyable.com
- Replacement LED bulbs (check the wattage and size to match your string)
- Small flathead screwdriver (for prying open sockets or testing contacts)
- Needle-nose pliers (for gently gripping and removing bulbs or wires)
- Multimeter (optional but helpful for testing voltage and continuity)
- Electrical tape (for insulating exposed wires)
- Replacement fuses (usually 3-amp or 5-amp; check your plug)
- Flashlight (to see inside dark sockets or under eaves)
- Work gloves (to protect your hands from sharp edges or broken plastic)
- Small container (to hold screws, bulbs, or fuses so you don’t lose them)
You don’t need all of these to start—many fixes only require a screwdriver and a spare bulb. But having the full kit on hand makes the process smoother, especially if you’re dealing with multiple strings. Think of it as your holiday repair toolkit.
Bonus: Keep a light string repair journal (yes, really!) to track which bulbs you replaced or which strings you fixed. This helps next year when you pull them out of storage.
Step-by-Step Guide to How to Fix LED Christmas Light Strings in 5 Easy Steps
Step 1: Unplug and Inspect the Entire String
First things first: unplug the lights. Safety always comes first, especially with electricity. Even low-voltage LED strings can give a shock if damaged or wet.
Now, lay the string out on a flat surface—like a table or the floor. Look for any obvious signs of damage: frayed wires, melted plastic, cracked sockets, or bulbs that are loose or missing.
Pay special attention to the plug, the first few bulbs, and any areas where the wire bends sharply (like near a tree branch or gutter). These are common trouble spots.
Pro Tip: If you’re working outdoors, bring the string inside or use a dry, covered area. Water and electricity don’t mix—even with LED lights.
While you’re inspecting, check the fuse in the plug. Many LED strings have a small compartment with a tiny fuse inside. Use a screwdriver to open it and see if the fuse is blown (look for a broken wire inside the glass).
If the fuse is blown, replace it with an identical one (usually labeled on the old fuse or in the manual). Never use a higher amp fuse—it can damage the string or create a fire hazard.
This step alone fixes about 10–15% of LED light issues. So don’t skip it!
Step 2: Test for Power and Use the “Bulb Swap” Trick
Now, plug the string back in and see if any part lights up. If the whole string is dead, it could be a power issue. If only one section is dark, the problem is likely a bulb or socket.
Here’s a simple trick: swap bulbs between working and non-working sections. Remove a bulb from a lit section and plug it into the dark section. If the dark section lights up, you’ve found the culprit—the original bulb was dead.
If the swapped bulb doesn’t light up in the dark section, the issue might be the socket, wiring, or a break in the circuit.
LED strings are often wired in series or parallel. In a series string, one bad bulb can kill the whole chain. In parallel, only one section goes out. Knowing your wiring helps you narrow down the problem.
Warning: Never force a bulb in or out. Use a twisting motion (usually clockwise to remove, counterclockwise to install). Forcing it can break the socket or damage the contacts.
If you have a multimeter, set it to continuity mode and test each bulb. Touch the probes to the metal contacts inside the socket. If the meter beeps, the circuit is closed—meaning the bulb should work. No beep? The bulb or socket is faulty.
This step is crucial in how to fix LED Christmas light strings in 5 easy steps because it helps you isolate the exact problem—without replacing every bulb blindly.
Step 3: Check for Loose or Corroded Sockets
Even if a bulb looks fine, the socket might be the real issue. Over time, plastic sockets can warp, crack, or collect moisture and dirt—especially if stored in a damp garage or attic.
Use your flashlight to look inside each socket. Check for:
- Blackened or greenish contacts (signs of corrosion)
- Cracked or melted plastic
- Loose or bent metal tabs (they should grip the bulb firmly)
If you see corrosion, gently clean the contacts with a cotton swab dipped in rubbing alcohol. Let it dry completely before testing again.
For bent or loose tabs, use needle-nose pliers to carefully straighten them. The metal should press firmly against the bulb’s base when inserted.
If a socket is cracked or damaged, you have two options:
- Replace the bulb—sometimes a new bulb with fresh contacts can bridge a slightly damaged socket.
- Replace the socket—cut the old socket off (with about 1 inch of wire), strip the wires, and splice in a new socket using wire nuts or solder. Cover with electrical tape.
Pro Tip: Buy a pack of universal LED replacement sockets (available online or at hardware stores). They’re cheap and work with most standard C7/C9 or mini-light strings.
This step is often overlooked, but it’s one of the most common causes of LED light failure. A clean, tight socket can make all the difference.
Step 4: Look for Broken Wires or Splices
Sometimes, the problem isn’t the bulbs—it’s the wire. LED strings can develop breaks from:
- Being pinched in a window or door
- Chewed by pets or rodents
- Repeated bending over the years
Run your fingers along the wire, feeling for soft spots, kinks, or areas where the insulation is cracked. If you find a damaged section, don’t panic.
For small breaks (less than 1 inch), you can:
- Cut out the damaged section with wire cutters.
- Strip about 1/2 inch of insulation from each end.
- Twist the exposed wires together (match colors: black to black, white to white, or red to red).
- Secure with a wire nut and wrap with electrical tape.
For larger breaks or multiple cuts, consider replacing the entire string. But for a single break, this fix works great.
If you’re using a multimeter, set it to continuity mode and test the wire from end to end. No continuity? There’s a break somewhere.
Warning: Never splice wires while the string is plugged in. Always unplug first. And never leave exposed wires—always cover with tape or a wire nut.
This step is essential in how to fix LED Christmas light strings in 5 easy steps because wire damage is often invisible but deadly to the circuit.
Step 5: Test the Controller and Timer (If Applicable)
Many LED strings come with a controller box or timer that manages flashing patterns, brightness, or on/off schedules. If the lights aren’t turning on at all, the controller might be the issue—not the lights.
First, check the batteries (if it uses them). Replace with fresh ones and test again.
Next, look for a reset button or mode switch. Some controllers have a “reset” function—press it for 5 seconds to restart the system.
If the controller has a display, check for error codes or blank screens. A dead display often means dead batteries or a faulty unit.
Still not working? Bypass the controller temporarily. Unplug it and connect the light string directly to the power source. If the lights turn on, the controller is the problem.
You can:
- Replace the controller (most are plug-and-play)
- Bypass it permanently (cut it off and wire the string directly to the plug)
- Use a smart plug instead (control with your phone or voice assistant)
Bonus: If your string has a remote control, replace the remote batteries and test again. A dead remote can make it seem like the lights are broken.
Pro Tip: Label your strings with the type of controller or timer they use. This makes next year’s setup much easier.
This final step ensures you’re not blaming the lights when the real issue is the control system. It’s a common mistake—and one that’s easily avoided.
Pro Tips & Common Mistakes to Avoid
Fixing LED Christmas lights isn’t rocket science, but a few smart habits can save you time and trouble.
Use the Right Replacement Bulbs
Not all LED bulbs are the same. Check the size, voltage, and base type (e.g., C7, C9, mini, or wedge). A mismatched bulb won’t fit or won’t work properly.
Look for the label on your string or take a bulb to the store for matching. Online, search using the model number from the plug or box.
Don’t Overload the Circuit
Most LED strings can be connected end-to-end, but there’s a limit. Check the packaging—usually 2–5 strings max. Overloading can blow fuses or damage the controller.
Use a power strip with overload protection if you’re running multiple strings from one outlet.
Store Lights Properly
After the holidays, wrap lights around a cardboard rectangle or use a dedicated reel. Avoid tangling or crushing the wires.
Store in a cool, dry place. Moisture is the #1 enemy of LED strings—it causes corrosion and short circuits.
Test Before Hanging
Always test your lights before climbing ladders or stringing them up. Fixing a bulb on the roof is way harder than doing it on the ground.
Common Mistakes to Avoid
- Forcing bulbs in or out—this cracks sockets and bends contacts.
- Using wet hands or working in rain—even low voltage can be dangerous.
- Ignoring the fuse—a blown fuse is often the simplest fix.
- Throwing out the whole string for one dead bulb—LEDs are designed to be repairable.
- Using tape as a permanent splice—tape wears out. Use wire nuts or solder for long-term fixes.
Pro Tip: Keep a “repair kit” with spare bulbs, fuses, sockets, and wire nuts. It’s a holiday lifesaver.
Remember: how to fix LED Christmas light strings in 5 easy steps isn’t just about the repair—it’s about preventing problems in the first place.
FAQs About How to Fix LED Christmas Light Strings in 5 Easy Steps
Q: Can I use regular incandescent bulbs in my LED string?
No. LED and incandescent bulbs use different voltages and circuits. Using the wrong type can damage the string or cause it to overheat. Always use LED-specific replacements.
Q: Why do LED lights stay lit even when unplugged?
This is called “ghost lighting.” It happens when residual current flows through the string. It’s usually harmless, but if the lights stay on for more than a few minutes, it could indicate a wiring fault. Unplug and inspect the string.
Q: How long do LED Christmas lights last?
High-quality LED strings can last 50,000+ hours—that’s over 5 years of nightly use. But poor storage, moisture, or physical damage can shorten that. Proper care is key.
Q: Can I cut my LED string to shorten it?
Only if it’s labeled “cuttable” or “end-to-end.” Most LED strings have a specific cut point (marked with a line or symbol). Cutting elsewhere can ruin the entire string. Never cut between bulbs unless instructed.
Q: What if the whole string is dead, even after replacing the fuse and bulbs?
Check the wiring for breaks, test the plug with a multimeter, and inspect the controller. If all else fails, the internal circuit board might be damaged. At that point, replacing the string is often cheaper than repairing it.
Q: Are there smart tools to help diagnose LED light issues?
Yes! Tools like the Light Keeper Pro use a “pulse” method to find and fix shorts in LED strings. It’s not magic, but it can save time on long strings. Great for large displays.
Q: Can I fix outdoor LED lights the same way as indoor ones?
Yes, but outdoor lights are more prone to moisture damage. Pay extra attention to sockets and splices. Use waterproof wire nuts and silicone sealant on outdoor repairs. And always unplug before working.
Final Thoughts
There’s nothing more satisfying than watching your LED Christmas lights flicker back to life after a simple fix. You don’t need to be an electrician or spend a fortune. With just a few tools and a little patience, you can master how to fix LED Christmas light strings in 5 easy steps—and keep your holiday display shining bright for years to come.
Start by inspecting, testing, and replacing only what’s broken. Use the right bulbs, store them properly, and always prioritize safety. And remember: a small repair today can prevent a big headache tomorrow.
So next time a string goes dark, don’t toss it. Grab your screwdriver, follow these steps, and bring the magic back. Your home—and your wallet—will thank you.
Now go enjoy your glowing, twinkling, perfectly working Christmas lights. The holidays just got a whole lot brighter.

