Featured image for how to hang outdoor string lights on pergola
Image source: thecreativityexchange.com
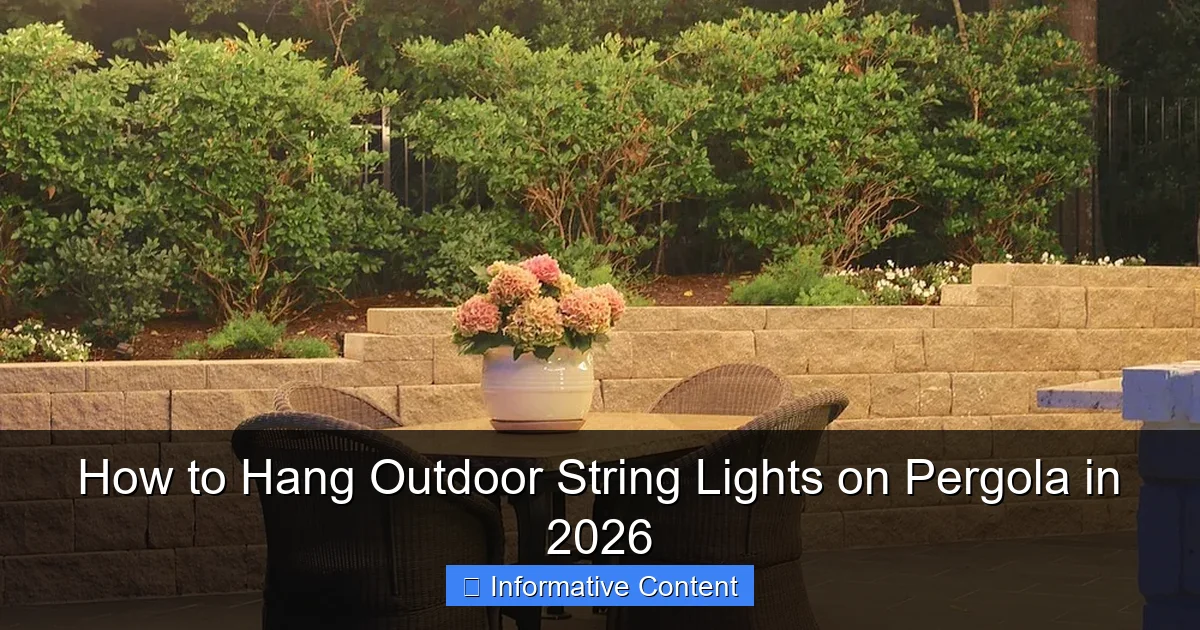
Transform your pergola into a magical nighttime retreat by securely mounting outdoor string lights using weather-resistant hardware and a strategic layout that maximizes coverage and ambiance. Plan your design, use durable hooks or zip ties, and ensure proper spacing to create a safe, professional-looking installation that withstands the elements in 2026 and beyond.
Key Takeaways
- Plan your layout first: Sketch light placement to avoid uneven spacing or gaps.
- Use weatherproof lights: Choose UL-listed, IP65-rated strings for durability in all conditions.
- Anchor securely: Install eye hooks or zip ties every 12–18 inches for stable support.
- Hide cords smartly: Run wires under beams or use raceways for a clean, polished look.
- Test before finalizing: Power up lights early to fix flickering or dim spots.
- Opt for dimmers: Add ambiance with adjustable brightness for different moods and events.
📑 Table of Contents
- How to Hang Outdoor String Lights on Pergola in 2026: A Practical Guide
- 1. Choosing the Right String Lights for Your Pergola
- 2. Planning Your Lighting Layout
- 3. Gathering Tools and Materials
- 4. Step-by-Step Installation Guide
- 5. Maintenance and Longevity Tips
- 6. Creative Ideas to Elevate Your Pergola Lighting
- Final Thoughts: Light Up Your Pergola with Confidence
How to Hang Outdoor String Lights on Pergola in 2026: A Practical Guide
Imagine this: it’s a warm summer evening, the sun has just dipped below the horizon, and your backyard pergola glows with a soft, inviting light. The hum of conversation, the clink of glasses, and the gentle sway of string lights overhead create the perfect ambiance. That’s the magic of well-placed outdoor string lights on a pergola. But getting that dreamy look isn’t always as simple as it seems. If you’ve ever tried hanging lights only to end up with tangled wires, drooping strands, or lights that barely last a season, you’re not alone.
In 2026, outdoor lighting trends are all about blending functionality with style. Whether you’re creating a cozy nook for family dinners, hosting weekend parties, or just enjoying a quiet night under the stars, the right lighting setup can transform your pergola into an outdoor sanctuary. But how do you hang outdoor string lights on a pergola without making it look messy, unsafe, or overly complicated? That’s what we’re diving into today. From choosing the right lights to installation tips and maintenance hacks, this guide will walk you through every step—like a friend sharing hard-won wisdom after a few (okay, more than a few) trial-and-error moments.
1. Choosing the Right String Lights for Your Pergola
Before you start hammering or drilling, the foundation of a great lighting setup is choosing the right string lights. Not all lights are created equal, and picking the wrong type can lead to frustration, poor performance, or even safety hazards. Let’s break down what to look for.

Visual guide about how to hang outdoor string lights on pergola
Image source: cdn.mos.cms.futurecdn.net
Types of Outdoor String Lights
- LED String Lights: Energy-efficient, long-lasting (up to 50,000 hours), and cool to the touch. They come in warm white, cool white, color-changing, and even vintage Edison styles. Great for year-round use.
- Incandescent String Lights: Give off a warm, traditional glow but use more energy and burn out faster. Best for occasional use or vintage aesthetics.
- Solar-Powered String Lights: Eco-friendly and easy to install (no wiring needed), but performance depends on sunlight. Ideal for shaded pergolas with partial sun.
- Smart String Lights: Can be controlled via app or voice assistant (Alexa, Google Assistant). Offer color, brightness, and scheduling options. A bit pricier, but perfect for tech lovers.
Pro Tip: If you live in a rainy or snowy climate, make sure the lights are rated for wet or damp locations. Look for an IP44 or IP65 rating on the packaging. I once bought “outdoor” lights that shorted out after one storm—lesson learned!
Bulb Style and Spacing
- Bulb Shape: Globe bulbs give a modern, even glow. Vintage Edison bulbs add charm and a retro vibe. Mini lights are great for subtle, twinkling effects.
- Spacing: Standard spacing is 6–12 inches between bulbs. Closer spacing (6–8 inches) creates a denser, more luxurious look. Wider spacing (12+ inches) is more casual and budget-friendly.
- Length: Measure your pergola’s perimeter and add 10–15% extra for overlap or curves. For example, a 10-foot pergola needs about 11–12 feet of lights. Don’t forget to account for how you’ll run the power cord.
Power Source and Connectivity
Most outdoor string lights need an outlet. Consider:
- Extension cords: Use outdoor-rated, heavy-duty cords (at least 16-gauge). Avoid daisy-chaining too many together—it can cause voltage drop and flickering.
- Outdoor-rated power strips: Useful if you’re powering multiple strands or adding other decor (fans, speakers).
- Weatherproof outlet covers: Protect the connection point from rain and debris.
Real-World Example: My friend Sarah installed solar lights on her pergola, but since it’s under a tree, the panels only got 3 hours of sun a day. The lights barely lasted two hours. We swapped them for LED with a weatherproof extension cord, and now they shine all night.
2. Planning Your Lighting Layout
Now that you’ve picked your lights, it’s time to plan where and how they’ll go. A good layout makes all the difference between a professional look and a haphazard mess.
Sketch Your Pergola Design
Grab a piece of paper or use a free design app (like SketchUp Free or Canva) to sketch your pergola. Note:
- Beam locations and spacing
- Columns/posts
- Ceiling height
- Nearby power sources
- Furniture placement (you don’t want lights in your face when you’re sitting!)
Choose a Hanging Pattern
Here are the most popular (and effective) patterns for pergolas:
- Linear (Straight Lines): Run lights parallel to the beams. Simple, clean, and easy to install. Best for modern or minimalist styles.
- X-Pattern (Criss-Cross): Create an “X” between beams for a dynamic, starry-sky effect. Adds visual interest and better light coverage.
- Grid Pattern: Use horizontal and vertical lines to form a grid. Great for larger pergolas and even light distribution.
- Swag Pattern: Let lights drape in gentle arcs between posts. Adds romance and softness—perfect for evening ambiance.
- Zigzag Pattern: Alternate lights up and down for a playful, festive look. Works well for parties or seasonal decor.
Pro Tip: For X- or grid patterns, use light clips or zip ties every 12–18 inches to prevent sagging. I once skipped this step and ended up with droopy lights that looked like sad spaghetti.
Calculate Light Coverage
To avoid dark spots:
- Space strands 12–18 inches apart for linear layouts.
- For X-patterns, aim for 15–20 inches between crossing lines.
- Use a light meter app (like Light Meter for iPhone or Light Meter – Free for Android) to check brightness at eye level (about 5 feet high).
Power and Cord Management
Plan how the power cord will reach the outlet:
- Hide cords behind beams or use cord clips to run them along the pergola’s edge.
- Use a power cord cover (like a raceway or conduit) if the cord runs along the ground.
- For a clean look, drill a small hole in a beam to feed the cord through (only if it’s safe and code-compliant).
3. Gathering Tools and Materials
You don’t need a full workshop, but having the right tools makes the job faster and safer. Here’s your checklist:
Essential Tools
- Measuring tape: For layout and spacing.
- Ladder (2-step or 4-step): Make sure it’s stable. I use a Little Giant ladder—it’s lightweight and adjusts to uneven ground.
- Drill and drill bits: For wood or metal beams (if using screws or eye hooks).
- Hammer: For nail-in hooks or staples.
- Wire cutters/strippers: For trimming zip ties or cords.
- Pliers: For tightening hooks or adjusting clips.
- Level: To keep lines straight (especially for linear or grid patterns).
Installation Hardware
- Outdoor-rated light clips: Plastic or metal clips that snap onto beams. No drilling needed! Brands like Command Outdoor or Gardner Bender work well.
- Eye hooks or cup hooks: For swag or X-patterns. Choose stainless steel or galvanized to resist rust.
- Zip ties (UV-resistant): For securing lights to beams or posts. Cut the ends with wire cutters for a clean look.
- Staples (for wood beams): Use outdoor-rated staples with a staple gun. Avoid regular staples—they rust fast.
- Adhesive hooks: For temporary setups or renters. Test weight capacity first!
Safety Gear
- Work gloves: Protect your hands from splinters and sharp edges.
- Safety glasses: Especially when drilling or hammering.
- Non-slip shoes: Ladder safety first!
Pro Tip: Buy a light tester (under $10 at hardware stores). It plugs into the end of the string light and checks for broken bulbs or wiring issues. I’ve saved hours of troubleshooting with this little tool.
4. Step-by-Step Installation Guide
Now the fun part—putting it all together! Follow these steps for a clean, secure, and long-lasting setup.
Step 1: Test Your Lights
Plug in the string lights before hanging. Check for:
- Flickering or dim bulbs
- Broken sockets
- Damaged cords
Replace any faulty lights. It’s much easier to fix them on the ground than 8 feet in the air.
Step 2: Mark Your Layout
Using your sketch, mark where each light strand will go:
- For linear patterns, use a chalk line or painter’s tape to mark straight lines.
- For X-patterns, mark the center point of each beam and draw diagonal lines with chalk.
- Use a measuring tape to space hooks or clips evenly (every 12–18 inches).
Step 3: Install Hooks, Clips, or Staples
Choose your method based on your pergola material:
- Wood beams: Use outdoor clips, zip ties, or staples. For hooks, pre-drill holes to prevent splitting.
- Metal beams: Use magnetic clips or adhesive hooks (if the surface is smooth). Avoid staples—they can damage the metal.
- PVC or composite beams: Use UV-resistant zip ties or outdoor adhesive clips. Avoid drilling—it can crack the material.
Pro Tip: For swag patterns, install hooks at different heights to create gentle curves. I like a 6-inch drop between posts for a natural drape.
Step 4: Hang the Lights
- Start at the power end (the end with the plug).
- Attach the first bulb or socket to the hook/clip.
- Work your way down the line, securing every 12–18 inches.
- For X-patterns, run one strand diagonally, then cross it with another.
- For grid patterns, hang horizontal lines first, then vertical.
Real-World Example: I installed a grid pattern on my pergola using outdoor clips. It took 2 hours, but the even light distribution is worth it. No more dark corners!
Step 5: Secure the Power Cord
- Run the cord along the beam edge using clips or zip ties.
- Keep it taut to avoid tripping hazards.
- Use a weatherproof outlet cover at the connection point.
- If the cord runs on the ground, use a cord cover or bury it in a shallow trench (with conduit).
Step 6: Test and Adjust
Turn on the lights at dusk. Look for:
- Sagging strands (add more clips)
- Uneven brightness (check for voltage drop)
- Glare (adjust bulb angles or spacing)
5. Maintenance and Longevity Tips
Good news: once your lights are up, they’re low-maintenance. But a little care goes a long way.
Seasonal Care
- Winter: If you live in a snowy area, consider removing lights or using weatherproof covers. Heavy snow can snap bulbs or damage cords.
- Spring/Fall: Clean lights with a damp cloth. Check for rust, frayed wires, or loose hooks.
- Summer: Trim overhanging branches to prevent damage during storms.
Cleaning and Storage
- Unplug lights before cleaning.
- Wipe bulbs with a soft, dry cloth. For stubborn grime, use mild soap and water.
- Store lights in a cool, dry place. Wrap them loosely around a cardboard tube or reel to prevent tangling.
Troubleshooting Common Issues
| Problem | Cause | Solution |
|---|---|---|
| Flickering lights | Loose bulb, voltage drop, or damaged cord | Check all bulbs; replace damaged cord; avoid daisy-chaining more than 2–3 strands |
| Sagging strands | Insufficient support | Add more clips or hooks every 12 inches |
| Short circuit | Water in sockets or damaged insulation | Replace affected bulbs; use silicone sealant on sockets in wet areas |
| Dim lights | Low voltage or too many strands | Use a heavier-gauge extension cord; limit to 2–3 strands per circuit |
Upgrade Options for 2026
- Smart Controls: Use an app to schedule lights, change colors, or sync with music.
- Motion Sensors: Lights turn on when someone enters the pergola—great for security.
- Timer Outlets: Automatically turn lights on at dusk and off at midnight.
6. Creative Ideas to Elevate Your Pergola Lighting
Ready to take your setup from “nice” to “wow”? Here are some creative twists:
Layer Your Lights
Combine string lights with:
- Fairy lights in mason jars: Place on tables or hang from hooks.
- LED candles: Add to centerpieces for a flickering glow.
- Under-beam lighting: Use LED tape lights to highlight the pergola’s structure.
Add Color and Movement
- Use color-changing smart bulbs for parties or holidays.
- Hang wind chimes with LED elements for sound and light.
- Try twinkling or flashing modes for a festive vibe (but use sparingly—too much motion can be dizzying).
Incorporate Nature
- Weave lights through vining plants like jasmine or clematis.
- Hang lights from hanging baskets for a garden-party feel.
- Use lanterns with string lights for a bohemian look.
Pro Tip: For a romantic dinner setup, I use a swag pattern with warm white LEDs and add a few flickering candles. It’s cozy without being too bright.
Final Thoughts: Light Up Your Pergola with Confidence
Hanging outdoor string lights on a pergola isn’t just about function—it’s about creating a feeling. Whether you’re after a soft, romantic glow or a lively party atmosphere, the right setup can make your outdoor space feel like an extension of your home. And in 2026, with so many smart, weather-resistant, and energy-efficient options, there’s no reason not to go all in.
Remember: take your time with planning, use the right tools, and don’t be afraid to experiment. I’ve redone my pergola lighting three times—each version better than the last. The key is to start small, test as you go, and adjust based on what feels right. And if something doesn’t work? No worries. Even the best DIYers have “learning moments.”
So grab your lights, gather your tools, and get ready to transform your pergola into a magical evening retreat. With this guide, you’re not just hanging lights—you’re building memories, one glowing strand at a time.
Frequently Asked Questions
How do I hang outdoor string lights on a pergola without drilling holes?
Use removable hooks, adhesive clips, or zip ties to secure the lights without damaging the pergola. These options are easy to install and remove, making them ideal for renters or temporary setups.
What’s the best way to hang outdoor string lights on a pergola for a professional look?
Plan a symmetrical layout using guide wires or hooks spaced evenly across the pergola beams. Drape the lights in a zigzag or crisscross pattern for visual appeal while ensuring even spacing and tension.
How can I hang outdoor string lights on a pergola with uneven beams?
Use adjustable hooks or tension rods to accommodate varying beam heights and widths. Flexible mounting options like these help maintain a consistent light display even on irregular structures.
Do I need special hardware to hang string lights on a pergola in 2026?
For durability, use weather-resistant hooks, eye screws, or stainless steel wire rated for outdoor use. These materials withstand wind, rain, and UV exposure, ensuring your lights stay secure year-round.
How high should outdoor string lights be hung on a pergola?
Aim for 7–8 feet above the ground to ensure clearance while maintaining ambiance. Adjust slightly based on pergola height and whether the lights will be near seating or dining areas.
Can I hang outdoor string lights on a pergola without a power source nearby?
Yes—use solar-powered or battery-operated string lights to avoid long extension cords. These options are energy-efficient and perfect for pergolas far from electrical outlets.

