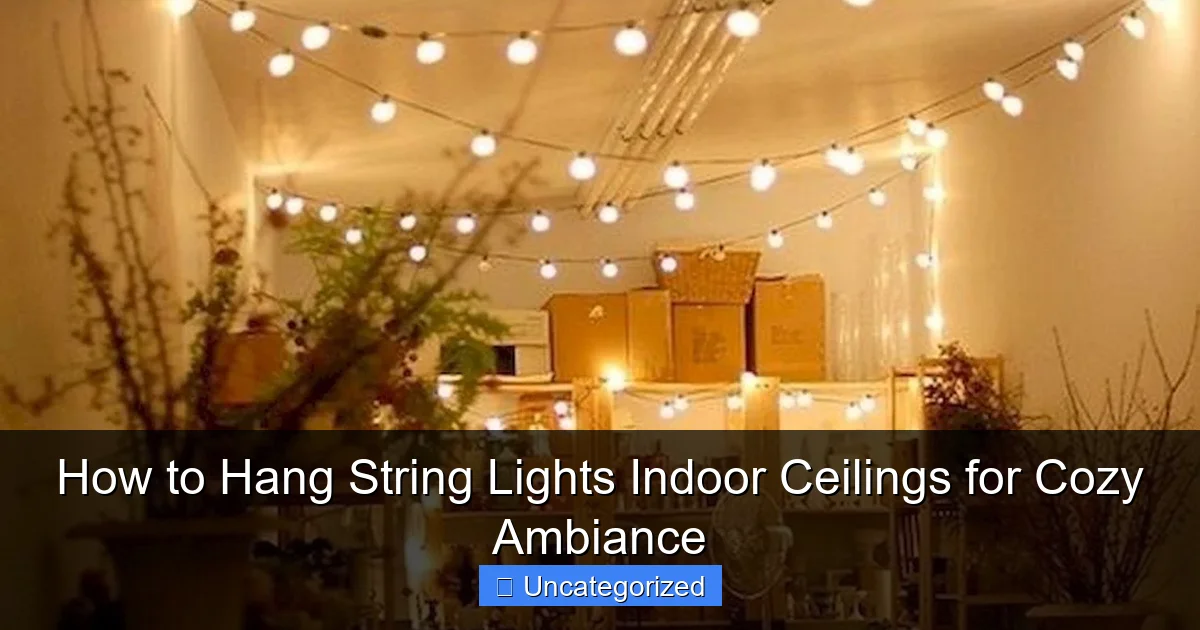
Featured image for how to hang string lights indoor ceilings
Image source: i.pinimg.com
Transform your indoor space with string lights by securely mounting them along ceiling beams, molding, or adhesive hooks for a safe, seamless glow. Choose a layout—draped, zigzag, or grid—to enhance ambiance while ensuring cords are tucked neatly and bulbs are evenly spaced. Always check ceiling material and use appropriate hardware to avoid damage and maintain a cozy, professional look.
Key Takeaways
- Plan your layout: Sketch the design before hanging for balanced spacing and coverage.
- Use removable hooks: Protect ceilings with damage-free adhesive or screw-in hooks.
- Secure with tension: Keep lights taut to avoid sagging and uneven light distribution.
- Hide cords neatly: Conceal wires along edges or with cord covers for a clean look.
- Test lights first: Ensure all bulbs work before installation to save time and effort.
- Layer for depth: Combine string lights with other lighting for a richer ambiance.
📑 Table of Contents
- How to Hang String Lights Indoor Ceilings for Cozy Ambiance
- Choosing the Right String Lights for Your Space
- Planning Your Installation: Design and Layout
- Tools and Materials for Safe Installation
- Step-by-Step Installation Guide
- Creative Ideas and Maintenance Tips
- Data Table: String Light Comparison
- Conclusion
How to Hang String Lights Indoor Ceilings for Cozy Ambiance
There’s something undeniably magical about the warm, soft glow of string lights transforming an ordinary room into a cozy, inviting haven. Whether you’re aiming to create a romantic atmosphere for a dinner date, add a whimsical touch to your child’s bedroom, or simply elevate your living space with a touch of hygge, indoor string lights are a versatile and affordable solution. Unlike harsh overhead lighting, these delicate strands of light can be draped, looped, or arranged to cast a gentle, diffused glow that instantly makes a space feel more welcoming and intimate.
But while the end result is undeniably beautiful, the process of hanging string lights on indoor ceilings can sometimes feel daunting. From choosing the right type of lights to ensuring they’re safely and securely installed without damaging your walls or ceiling, there are several factors to consider. This comprehensive guide will walk you through every step of the process, from planning and preparation to installation and maintenance. With practical tips, creative ideas, and expert advice, you’ll be able to create a stunning, ambient lighting display that enhances the mood and character of any room in your home. Whether you’re a DIY novice or a seasoned pro, you’ll find everything you need to know about how to hang string lights indoor ceilings right here.
Choosing the Right String Lights for Your Space
Before you start hammering nails or drilling holes, it’s essential to select the right type of string lights for your indoor ceiling project. The market offers a wide range of options, each with unique features that can impact the ambiance, durability, and ease of installation. Making the right choice from the start will save you time, effort, and potential frustration down the line.
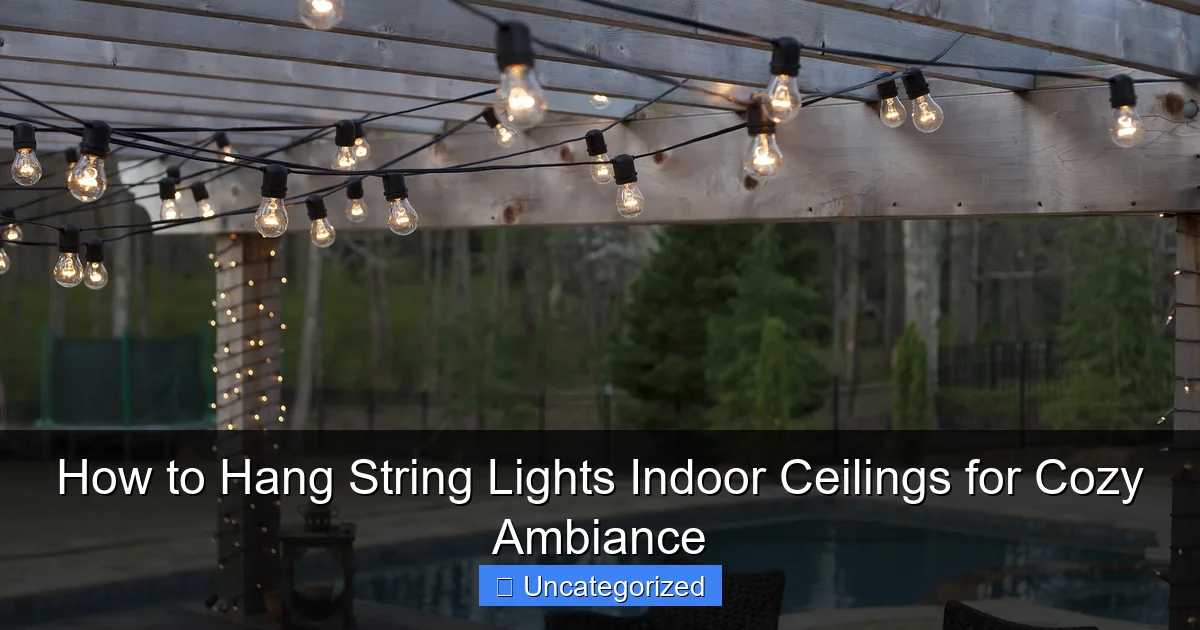
Visual guide about how to hang string lights indoor ceilings
Image source: img.yardenvy.com
Types of String Lights
When shopping for indoor string lights, you’ll typically encounter three main types:
- Incandescent String Lights: These are the classic, warm-glowing bulbs that many people associate with holiday decorations. They emit a soft, golden light that’s perfect for cozy spaces. However, they tend to use more energy and generate more heat than other options, so they’re best for short-term use or rooms with good ventilation.
- LED String Lights: The most popular choice today, LED lights are energy-efficient, long-lasting, and available in a variety of colors and styles. They emit very little heat, making them safe for extended use. You can find warm white LEDs for a traditional feel or cool white and colored options for a modern or playful look. Many LED sets are also dimmable and come with remote controls for added convenience.
- Edison-Style String Lights: Featuring exposed, vintage-style bulbs, these lights add a rustic or industrial charm to any space. They’re excellent for lofts, dining areas, or rooms with exposed brick or wood. Keep in mind that the bulbs are more fragile and may require extra care during installation.
Pro Tip: For most indoor ceiling applications, warm white LED string lights are the ideal choice. They offer the perfect balance of energy efficiency, safety, and ambiance. Look for sets with a high lumens-per-watt ratio (e.g., 80+ lumens/watt) and a color temperature around 2700K for a soft, inviting glow.
Key Features to Consider
Beyond the type of bulb, several other features can impact your decision:
- Length and Spacing: Measure your ceiling area to determine how many feet of lights you’ll need. Consider whether you want a dense, full coverage (e.g., 6-inch bulb spacing) or a more sparse, twinkling effect (e.g., 12-inch spacing). For a standard 12×12 foot room, a 25-foot string with 100 bulbs (6-inch spacing) is often sufficient for a subtle glow.
- Connectability: If you need longer runs, check if the lights are connectable (i.e., you can plug multiple strings into one outlet). This is especially important for large rooms or when draping lights across multiple surfaces. Look for sets rated for at least 5-8 connected strings.
- Power Source: Most indoor string lights plug into standard wall outlets, but you can also find battery-operated or USB-powered options. Battery lights offer more flexibility for hard-to-reach areas but require periodic battery changes. USB lights can be powered by a computer or power bank, making them great for temporary setups.
- Weatherproof Rating: While you’re installing indoors, look for lights with at least an IP44 rating. This ensures they’re protected against splashes and dust, which is important for longevity and safety.
- Smart Features: Some modern string lights come with app control, voice assistant compatibility (e.g., Alexa, Google Home), or color-changing capabilities. These can be fun for themed events but may be overkill for everyday use.
Example: For a bedroom with a vaulted ceiling, you might choose 30 feet of warm white LED lights with 8-inch spacing, dimmable function, and a remote control. This setup allows you to create a soft, adjustable glow that enhances the cozy atmosphere without overwhelming the space.
Planning Your Installation: Design and Layout
With your string lights selected, it’s time to plan how you’ll arrange them on your ceiling. A well-thought-out design ensures even light distribution, avoids unsightly gaps, and makes the most of your chosen space. This step is crucial for achieving the desired ambiance and avoiding last-minute adjustments.
Measuring and Marking
Start by measuring the ceiling area where you plan to hang the lights. Use a tape measure to determine the length, width, and any architectural features (e.g., beams, vents, ceiling fans) that might affect your layout. Sketch a simple diagram of the space, noting:
- The location of power outlets (since most string lights require access to a socket)
- Ceiling height and any slopes or vaulted areas
- Furniture placement, as you’ll want to avoid draping lights over items that could obstruct the view or create safety hazards
- Desired light coverage (e.g., full ceiling, accent around the perimeter, or a specific pattern)
Pro Tip: For a room with a standard flat ceiling, aim for lights to be installed 12-18 inches from the walls to create a soft, diffused glow that doesn’t cast harsh shadows. If your ceiling is sloped, measure the highest and lowest points to ensure even spacing.
Popular Layout Ideas
Here are some creative ways to arrange your string lights, depending on your room and desired effect:
- Perimeter Drape: Run lights along the edges of the ceiling, following the walls. This is a classic choice for bedrooms and dining rooms, creating a warm, cocooning effect. Use adhesive hooks or clips every 12-16 inches to secure the lights.
- Grid or Crisscross: Create a geometric pattern by running lights in a grid (horizontal and vertical lines) or crisscrossing them diagonally. This works well in large rooms or for a modern, artistic touch. Use a chalk line or laser level to ensure straight lines.
- Canopy or Tent Style: For a romantic or whimsical look, hang lights from the ceiling to the floor or bedposts, creating a “tent” effect. This is popular in children’s rooms or for special occasions. Use ceiling hooks and tension rods to create the structure.
- Swag or Loop: Drape lights in gentle curves or loops across the ceiling, mimicking the look of a chandelier. This adds visual interest and is great for rooms with low ceilings. Use adhesive hooks to create the desired shape.
- Accent Lighting: Focus lights on a specific area, such as above a bed, dining table, or reading nook. This creates a focal point and is perfect for highlighting artwork or architectural details.
Example: In a living room with a 9-foot flat ceiling, you might opt for a perimeter drape with lights placed 15 inches from the walls. Use 30 feet of lights with 8-inch spacing, secured with clear adhesive hooks every 14 inches. This creates a soft, ambient glow that enhances the room without being too bright.
Testing Before Installing
Before you start hanging the lights, plug them in and lay them out on the floor to test their brightness, color, and overall effect. This allows you to:
- Check for any burnt-out bulbs or faulty connections
- Adjust the length or spacing if needed
- Ensure the lights don’t create glare or harsh shadows when viewed from different angles
- Confirm that the power cord can reach the outlet without being stretched or tripped over
If you’re using a dimmable set, test the brightness levels to find the ideal setting for your space. For example, a bedroom might benefit from a 30-50% brightness level for evening relaxation, while a dining room could use 70-80% for meals.
Tools and Materials for Safe Installation
Now that you’ve planned your layout, it’s time to gather the tools and materials you’ll need for a safe, secure installation. The right equipment ensures that your lights stay in place, your ceiling remains undamaged, and you avoid any safety hazards.
Essential Tools
Here’s a checklist of tools you’ll likely need:
- Measuring Tape: For precise placement and spacing.
- Level or Laser Level: To ensure straight lines, especially for grid or crisscross layouts.
- Chalk Line or Pencil: For marking guide lines on the ceiling.
- Stepladder or Scaffolding: For reaching high ceilings safely. A sturdy 6-foot ladder is usually sufficient for standard rooms.
- Drill and Drill Bits: If you’re using screws or anchors (e.g., for drywall, plaster, or wood ceilings).
- Hammer: For installing nails or small hooks.
- Screwdriver: For tightening screws or adjusting hardware.
- Stud Finder (Optional): If you’re installing heavy lights or want to anchor into ceiling joists for extra security.
Pro Tip: If you have a vaulted or cathedral ceiling, consider renting a small lift or scaffolding for safety. Always have someone spot you when using a ladder, and never stand on the top two rungs.
Installation Hardware
The type of hardware you’ll need depends on your ceiling material and the weight of your lights. Here are the most common options:
- Adhesive Hooks/Clips: Ideal for lightweight LED lights on smooth ceilings (e.g., drywall, plaster). Choose clear, removable hooks to avoid damage. Brands like 3M Command offer strong, damage-free options. Use at least one hook every 12-16 inches.
- Small Nails or Screws: For heavier lights or rough surfaces (e.g., wood, brick). Use 1-inch finishing nails or #4 screws. For drywall, use drywall anchors to prevent pulling out.
- Ceiling Hooks (Screw-in or Adhesive): Great for creating a canopy or swag design. Screw-in hooks provide more security for long-term installations.
- Tension Rods or Curtain Rods: For creating a “tent” effect or supporting draped lights. These are easy to install and remove without damaging the ceiling.
- Wire or Cable Clips: For securing excess wire or creating clean, organized runs. These prevent tripping hazards and keep the lights looking neat.
<
Example: For a 25-foot string of lightweight LED lights on a drywall ceiling, you might use 18 clear adhesive hooks (one every 14 inches) and a few wire clips to manage the power cord. For a 50-foot set of Edison-style lights (which are heavier), use a combination of adhesive hooks and small screws with drywall anchors every 12 inches.
Safety Considerations
Safety should always be your top priority when installing string lights. Follow these guidelines:
- Never overload circuits: Check the total wattage of your lights and ensure it doesn’t exceed the circuit’s capacity (usually 15-20 amps). As a rule, don’t connect more than 3-4 standard string lights to one outlet.
- Avoid heat sources: Keep lights away from vents, radiators, or other heat sources, as some bulbs (especially incandescent) can generate heat.
- Inspect for damage: Before installing, check the cord, plug, and bulbs for fraying, cracks, or loose connections. Discard any damaged lights.
- Use GFCI outlets: If your room has a GFCI (Ground Fault Circuit Interrupter) outlet, use it. This is especially important for rooms with water sources (e.g., bathrooms).
- Secure cords: Keep power cords off the floor or tuck them into baseboards to prevent tripping. Use cord covers if necessary.
Pro Tip: For a permanent or semi-permanent installation, consider hiring an electrician to install additional outlets or a dedicated lighting circuit. This is especially useful for large rooms or if you plan to use lights frequently.
Step-by-Step Installation Guide
With your plan, tools, and materials ready, it’s time to hang your string lights. Follow these step-by-step instructions for a smooth, professional-looking installation.
Step 1: Prepare the Ceiling
Clean the ceiling area where you’ll be installing the lights. Remove dust, cobwebs, or grease with a damp cloth. If using adhesive hooks, wipe the area with rubbing alcohol to ensure a strong bond. Let the ceiling dry completely before proceeding.
Step 2: Mark Your Guide Lines
Using your diagram, mark the starting and ending points for your lights. For a perimeter drape, use a chalk line or pencil to mark a line 12-18 inches from the wall. For a grid layout, mark both horizontal and vertical lines. Use a level or laser level to ensure straight lines. For a swag or loop design, mark the points where you’ll place hooks to create the desired curve.
Step 3: Install the Hardware
Follow the manufacturer’s instructions for your chosen hardware:
- Adhesive Hooks: Remove the backing and press firmly onto the ceiling for 30 seconds. Wait 24 hours before hanging lights for maximum adhesion.
- Nails/Screws: Drill pilot holes (if needed), then gently tap nails or drive screws into the ceiling. For drywall, insert anchors first, then screw in the hook.
- Ceiling Hooks: Screw or press into place, ensuring they’re secure and level.
Pro Tip: For a grid layout, start by installing the corner hooks, then use a string or chalk line to guide the placement of the remaining hooks. This ensures even spacing.
Step 4: Hang the Lights
Unroll the lights and start at one end, attaching them to the first hook. Work your way around the room, gently draping the lights over each hook. Avoid pulling or stretching the cord, as this can damage the wiring. For a crisscross design, alternate directions with each line. For a swag, create gentle curves between hooks.
If you’re connecting multiple strings, plug them in as you go, ensuring the connections are secure and not dangling. Use wire clips to manage excess cord and keep it tidy.
Step 5: Adjust and Test
Once all lights are installed, step back and assess the overall effect. Make any adjustments to spacing, height, or drape. Plug in the lights and test them to ensure all bulbs are working. If using a dimmable set, adjust the brightness to your liking. Check for any glare, shadows, or uneven coverage.
Step 6: Secure and Finalize
After testing, secure any loose ends. Use wire clips to tuck excess cord into baseboards or along the wall. For a clean look, you can also paint the cord to match the wall color (use fabric-safe paint). Double-check that all hooks are secure and the lights are evenly spaced.
Example: For a bedroom with a perimeter drape, you might start at the corner near the outlet, hang the lights around the room, and end at the opposite corner. Use a remote control to dim the lights to 40% brightness, creating a cozy, relaxing ambiance.
Creative Ideas and Maintenance Tips
Now that your string lights are installed, it’s time to get creative and ensure they stay beautiful for years to come. Here are some ideas and tips to maximize your lights’ potential.
Creative Styling Ideas
Take your string lights beyond basic installation with these creative touches:
- Add Greenery: Weave in ivy, eucalyptus, or faux flowers for a natural, boho look. Use floral wire to secure the plants to the lights.
- Hang Photos or Art: Use small clips to attach Polaroids, postcards, or lightweight artwork to the lights. This creates a personalized gallery effect.
- Use with Curtains: Hang lights behind sheer curtains for a dreamy, ethereal glow. This works especially well in bedrooms or living rooms.
- Create a Starry Sky: For a magical touch, hang lights in a random, scattered pattern on the ceiling. Use different lengths to mimic stars.
- Combine with Other Decor: Pair lights with paper lanterns, fairy lights, or candles for a layered, ambient effect.
Maintenance and Care
To keep your lights looking their best:
- Regular Dusting: Use a microfiber cloth or duster to remove dust and cobwebs every few weeks.
- Check for Damage: Inspect the cord and bulbs annually for fraying, cracks, or loose connections. Replace any damaged parts.
- Store Properly: When not in use, coil the lights loosely and store them in a dry, cool place. Avoid kinks or tangles.
- Replace Bulbs: If a bulb burns out, replace it promptly to maintain even lighting. Keep spare bulbs on hand.
- Seasonal Adjustments: For seasonal decor, you can easily swap out light colors or add themed accents (e.g., snowflakes for winter, hearts for Valentine’s Day).
Example: In a living room, you might hang lights in a crisscross pattern and add small clips with family photos. During the holidays, swap the warm white lights for colored ones and add mini ornaments for a festive touch.
Data Table: String Light Comparison
| Feature | Incandescent | LED | Edison-Style |
|---|---|---|---|
| Energy Efficiency | Low (60-75W per 25 ft) | High (4-10W per 25 ft) | Medium (15-25W per 25 ft) |
| Lifespan | 1,000-2,000 hours | 25,000-50,000 hours | 1,000-3,000 hours |
| Heat Output | High | Very Low | Medium |
| Color Options | Warm white only | Warm white, cool white, multicolor | Warm white, amber |
| Best For | Short-term, nostalgic use | Long-term, everyday use | Industrial, vintage spaces |
| Average Cost (25 ft) | $10-$20 | $15-$30 | $20-$40 |
Conclusion
Hanging string lights on indoor ceilings is more than just a decor choice—it’s an art form that can transform the mood, functionality, and character of your space. By carefully selecting the right type of lights, planning your layout, and using the proper tools and techniques, you can create a stunning, ambient display that enhances any room. Whether you prefer the warm glow of incandescent lights, the energy efficiency of LEDs, or the vintage charm of Edison-style bulbs, there’s a perfect option for your needs.
Remember, the key to success lies in preparation and attention to detail. Take the time to measure, mark, and test before you start installing. Choose hardware that suits your ceiling material and the weight of your lights, and always prioritize safety by avoiding circuit overloads and securing cords. With a little creativity, you can go beyond basic installation and add personal touches like greenery, photos, or seasonal decor to make your lights truly unique.
Most importantly, enjoy the process. String lights aren’t just about functionality—they’re about creating moments of joy, comfort, and connection. Whether you’re relaxing in a softly lit bedroom, hosting a dinner party under a canopy of lights, or simply enjoying a quiet evening at home, the warm, inviting glow of your carefully hung string lights will remind you of the magic in the everyday. So grab your tools, follow this guide, and start creating the cozy ambiance you’ve always dreamed of. Your perfect indoor lighting setup is just a few hooks away.
Frequently Asked Questions
How do you hang string lights on indoor ceilings without drilling holes?
Use removable adhesive hooks, tension rods, or ceiling-mounted tracks designed for renters. These options securely hold string lights while leaving minimal to no damage when removed. Always check weight limits to ensure safety.
What’s the best way to hang string lights on high or vaulted ceilings?
For high ceilings, use a staple gun (for temporary setups) or install screw-in hooks with a ladder or extension pole. For vaulted ceilings, drape lights along beams or use adhesive clips to follow the ceiling’s slope for even coverage.
How can I hang string lights indoor ceilings for a professional look?
Plan your layout first, spacing hooks or clips evenly (6–12 inches apart). Use clear or white cords for subtlety, and secure lights tautly to avoid sagging. Consider zigzag or grid patterns for visual interest.
Are there battery-powered string lights for ceilings without nearby outlets?
Yes! Battery-powered string lights with remote controls are ideal for areas without outlets. Opt for LED versions for longer battery life and place the battery pack discreetly using adhesive strips or small hooks.
How do I hide the cords when hanging string lights on indoor ceilings?
Run cords along crown molding, behind furniture, or through cord covers painted to match the ceiling. For a seamless look, use twist ties or clear clips to guide wires neatly along the ceiling’s edge or beams.
Can I use command hooks to hang string lights on indoor ceilings?
Absolutely! Command hooks (like 3M strips) are renter-friendly and hold lightweight string lights securely. Choose hooks rated for your lights’ weight and clean the surface thoroughly before applying for best adhesion.

