
Featured image for how to hang up led string lights with photo clips
Image source: images-na.ssl-images-amazon.com
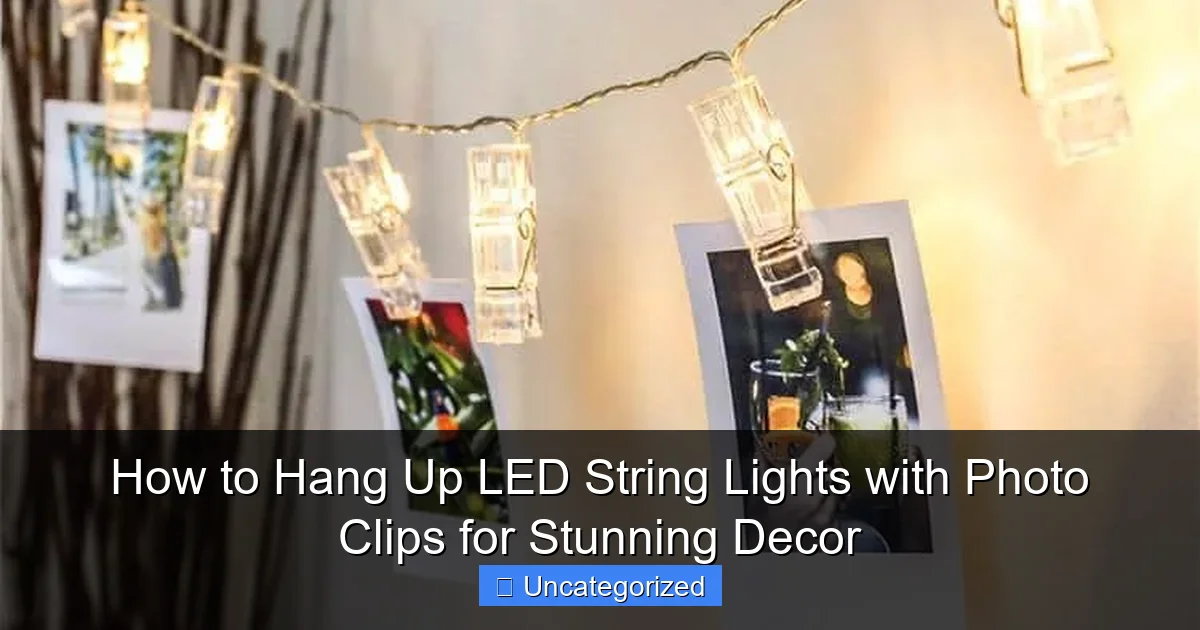
Transform any space instantly by hanging LED string lights with photo clips for a personalized, eye-catching display. Simply drape the lights along walls, windows, or ceilings and use the attached clips to showcase photos, notes, or small decor—no tools or nails required. This effortless setup blends ambiance and sentiment, making it perfect for parties, dorms, or cozy home accents.
How to Hang Up LED String Lights with Photo Clips for Stunning Decor
Key Takeaways
- Plan your layout first: Sketch the design to avoid mistakes and ensure balanced spacing.
- Use adhesive hooks: Secure clips without nails for easy, damage-free installation.
- Space clips evenly: Maintain 6–8 inches between clips for a polished, professional look.
- Test lights before hanging: Ensure all bulbs work to avoid rehanging after placement.
- Mix photos and lights: Alternate clips and bulbs for a dynamic, layered display.
- Secure loose wires: Use zip ties or clips to hide cords and prevent tangling.
Why This Matters / Understanding the Problem
Transforming a plain wall, bedroom, or outdoor patio into a cozy, magical space doesn’t require expensive renovations or professional help. One of the easiest and most affordable ways to add warmth and personality is by learning how to hang up LED string lights with photo clips for stunning decor. Whether you’re creating a photo gallery wall, setting the mood for a party, or just brightening up a dull corner, this DIY project brings instant charm.
But here’s the catch: many people struggle with tangled wires, crooked clips, or lights that fall down after a few days. Some end up with a cluttered mess instead of the elegant look they imagined. The good news? With the right method and a little planning, you can achieve a clean, professional-looking display that stays up and shines bright.
This guide walks you through every step—from choosing the right materials to avoiding common pitfalls—so your LED string lights with photo clips become a centerpiece of beauty and function. Whether you’re decorating for a wedding, a dorm room, or your living room, this method works for any space and any style.
What You Need
Before you start, gather these essential tools and materials. Having everything ready saves time and prevents frustration mid-project. Here’s your checklist:
Visual guide about how to hang up led string lights with photo clips
Image source: printbebo.in
- LED string lights with photo clips – Choose battery-operated or plug-in based on your power needs. Look for clips that are sturdy and spaced evenly (about 6–10 inches apart).
- Measuring tape or ruler – For precise placement and symmetry.
- Level – A small bubble level or a free app on your phone works great to keep lines straight.
- Removable adhesive hooks – Use 3M Command Strips, picture-hanging putty, or small adhesive clips. Avoid nails if you’re renting or want no damage.
- Scissors or wire cutters (optional) – Only if you need to trim excess wire or adjust spacing.
- Photos or printed memories – Print your favorite moments at home or use an online service. Size them to fit the clips (usually 3×3 or 4×4 inches).
- Pencil (optional) – For light marking on walls (can be erased easily).
- Extension cord (if using plug-in lights) – Helps reach outlets without tripping hazards.
- Step ladder (for high walls) – Safety first!
Pro Tip: Test your lights before hanging them. Plug them in or turn on the battery to make sure all bulbs work and the clips are functional. Nothing’s worse than hanging a string only to find a section is dead.
Step-by-Step Guide to How to Hang Up LED String Lights with Photo Clips for Stunning Decor
Now that you’re prepped, let’s dive into the process. This method works on drywall, wood, concrete, and even outdoor surfaces (with weatherproof lights). Follow these steps to create a stunning display that lasts.
Step 1: Plan Your Layout
Start by deciding where you want your lights. Common spots include above a bed, along a wall, across a ceiling, or around a window. Visualize the final look: do you want a straight line, a zigzag, a heart shape, or a grid?
Use painter’s tape to mark key points on the wall—like where each hook will go—before attaching anything permanently. This “dry run” helps you adjust spacing and avoid mistakes. For a straight line, use your level to ensure it’s perfectly horizontal. For curves or shapes, sketch a light pencil outline first.
Measure the length of your LED string lights. If it’s 10 feet, plan your layout to fit within that range. Leave a little slack near the power source (battery box or plug) to avoid strain.
Pro Tip: For a balanced look, space adhesive hooks every 12–16 inches. This gives enough support without overcrowding. If your clips are already on the lights, match the hook spacing to the clip spacing.
Step 2: Install the Hanging Points
Now, attach your adhesive hooks or clips to the wall. If using 3M Command Strips, follow the instructions: clean the wall with rubbing alcohol, press firmly for 30 seconds, and wait an hour before hanging weight.
For a straight line, start at one end. Place the first hook 2–3 inches from the edge of your layout. Use your level to draw a light pencil line across the wall, then align each hook along that line. This keeps everything straight and professional-looking.
If you’re creating a shape (like a heart or arch), use a template. Print a large shape, cut it out, and tape it to the wall. Then, place hooks along the outline. Remove the paper once hooks are in place.
For outdoor use, choose weather-resistant hooks and ensure the lights are rated for outdoor use. Avoid areas with direct rain unless the string is fully waterproof.
Warning: Don’t overload adhesive hooks. Most can hold 1–2 pounds. If your lights are heavy (long strands, metal clips), use multiple hooks or upgrade to small nails or screws for extra support.
Step 3: Hang the LED String Lights
With hooks in place, it’s time to hang the lights. Start at the end closest to the power source (outlet or battery box). This reduces wire tension and keeps the plug accessible.
Hang the first clip on the first hook. Gently pull the string taut but don’t stretch it. Continue hanging each clip on its hook, working toward the far end. Keep the wire straight and avoid kinks or tangles.
If your string has extra wire (like a long “tail” near the plug), tuck it behind the first few hooks or use a small zip tie to secure it neatly. This prevents tripping and keeps the look clean.
For battery-powered strings, position the battery box where it’s easy to access (e.g., near a table or shelf). Hide it behind a photo or small decoration if needed.
Pro Tip: If the lights sag between clips, add a small hook or clear push pin in the middle. Just make sure it doesn’t damage the wire. A little support goes a long way!
Step 4: Add Photos to the Clips
Now for the fun part—adding your memories! Open each photo clip gently and slide in a printed photo. Use high-quality prints (glossy or matte) for the best look. Avoid thick cardstock—it can bend the clip or make it hard to close.
Rotate photos for visual interest. Try mixing vertical and horizontal prints, or arrange them by theme (travel, family, pets). You can also leave a few clips empty for a minimalist look.
For a dynamic display, add small mementos: concert tickets, pressed flowers, or handwritten notes. Just make sure they fit and don’t weigh down the clips.
Step back and check the spacing. Are the photos evenly spaced? Are they all facing the same direction? Adjust as needed.
Pro Tip: Use a photo app to print mini versions of your favorite images. Many offer 2×2 or 3×3 inch prints perfect for string light clips. Or, cut regular photos to size with scissors.
Step 5: Power Up and Test
Turn on your lights and admire your work! Check each bulb to ensure they’re all glowing. If a section is dark, gently wiggle the wire near the battery or plug—sometimes loose connections cause flickering.
Adjust the photos if needed. Some might tilt or fall slightly. Tighten the clips or add a tiny dot of non-permanent glue (like museum putty) to hold them in place.
For plug-in lights, use an extension cord if the outlet is far away. Tape the cord to the wall or baseboard to prevent tripping. For battery lights, replace batteries every few months or when the lights dim.
Warning: Never leave lights on unattended for long periods, especially near flammable materials like curtains. Use timers or smart plugs to automate on/off times and save energy.
Step 6: Maintain and Refresh
Your display isn’t “set it and forget it.” Dust can dull the lights and photos. Wipe the bulbs with a dry microfiber cloth every few weeks. Use a soft brush to clean photo clips.
Rotate photos seasonally—swap summer beach pics for fall leaves, or holiday memories during December. This keeps your decor fresh and meaningful.
If a bulb burns out, check if the string is replaceable. Some LED strings have individual bulbs you can swap. Others need the whole string replaced. Keep a spare on hand.
Pro Tips & Common Mistakes to Avoid
Even small mistakes can ruin the look of your LED string lights with photo clips. Here’s how to avoid the biggest ones—and a few insider tricks for a pro-level finish.
Pro Tip 1: Use a Template for Shapes
Want a heart, star, or word (like “LOVE”)? Print a large template, cut it out, and tape it to the wall. Place hooks along the outline, then remove the paper. This ensures perfect symmetry.
Pro Tip 2: Mix Light Types for Depth
Combine warm white and cool white lights for a layered effect. Or use colored lights for a themed party. Just make sure the colors complement each other.
Pro Tip 3: Hide the Battery Box
For battery-powered strings, hide the box in a decorative container (like a small basket or photo frame). Or, place it behind a photo in the middle of the string.
Pro Tip 4: Use Outdoor Lights for Patios
For decks, balconies, or gazebos, choose weatherproof LED strings. Look for “IP65” or “outdoor-rated” labels. Hang them under eaves or pergolas for extra protection.
Common Mistake 1: Overcrowding
Too many photos or lights in a small space looks cluttered. Stick to 10–15 clips per 8-foot wall. Leave breathing room between photos.
Common Mistake 2: Ignoring Power Needs
Battery lights last 12–48 hours per set. For all-night events, use rechargeable batteries or plug-in strings. Test battery life before a big event!
Common Mistake 3: Using Weak Adhesives
Cheap adhesive hooks fail under weight. Invest in 3M Command Strips or similar brands. For heavy strings, use small nails with clear heads.
Common Mistake 4: Skipping the Level
Even a 1-inch tilt looks crooked. Always use a level—especially for straight lines. A free app (like “Bubble Level”) works in a pinch.
Common Mistake 5: Forgetting Maintenance
Dust, loose clips, and dead bulbs ruin the effect. Check your display monthly. Replace batteries, clean bulbs, and tighten clips.
FAQs About How to Hang Up LED String Lights with Photo Clips for Stunning Decor
You’ve got questions—we’ve got answers. Here are the most common queries about this popular decor method.
Can I hang LED string lights with photo clips on textured walls?
Yes, but it’s trickier. Textured walls (like popcorn ceilings or stucco) make it hard for adhesive hooks to stick. Use hooks with longer adhesive strips or small nails. For a no-damage option, try tension rods or freestanding displays.
How do I prevent photos from falling out of the clips?
Use thinner paper (like photo paper, not cardstock). If photos still slip, add a tiny dot of non-permanent glue (like museum putty) to the back. Avoid glue on the front or it’ll stain the print.
Are battery-powered or plug-in lights better?
It depends. Battery-powered lights are portable and great for rooms without outlets. But batteries die quickly and need replacing. Plug-in lights are brighter and last longer, but require an outlet and extension cord.
Can I use these lights outdoors?
Only if they’re rated for outdoor use. Look for “weatherproof” or “IP65” labels. Hang them under cover (like a porch or awning) to protect from rain. Never submerge the battery box or plug.
How do I clean the lights and clips?
Wipe bulbs with a dry microfiber cloth. For clips, use a soft brush or cotton swab to remove dust. Never use water or cleaning sprays—they can damage the electronics.
What if my wall is concrete or brick?
Use heavy-duty adhesive hooks (rated for rough surfaces) or small screws with wall anchors. For a no-drill option, try magnetic clips (if the surface is metal) or freestanding frames.
How many photos should I hang?
It’s up to you! A 10-foot string usually holds 10–15 clips. Start small—5–7 photos—and add more if you like. Remember: less is often more.
Final Thoughts
Learning how to hang up LED string lights with photo clips for stunning decor is one of the most rewarding DIY projects you can do. It’s affordable, customizable, and instantly transforms any space into a cozy, personal haven.
From planning your layout to maintaining the lights, every step matters. Use quality materials, test your lights first, and don’t rush the process. The result? A beautiful display that tells your story and shines with warmth.
Ready to get started? Grab your lights, print some photos, and turn your wall into a gallery of memories. Whether it’s for a bedroom, party, or outdoor patio, this decor idea never goes out of style. And the best part? You can change it anytime—just swap the photos and keep the magic alive.
Your space, your memories, your light. Now go make it shine.

