Featured image for how to install string lights indoors
Image source: thediyplaybook.com
Transform any indoor space into a cozy retreat by strategically installing string lights along walls, ceilings, or furniture for soft, inviting illumination. Use adhesive hooks, clips, or discreet nails to secure lights without damaging surfaces, and opt for battery-powered or low-voltage options for safe, flexible placement. With simple tools and creative placement, you can achieve a warm, ambient glow in minutes—no electrical expertise required.
Key Takeaways
- Plan your layout: Sketch light placement before installing for balanced coverage.
- Use adhesive hooks: Secure lights without damaging walls or ceilings.
- Measure cord length: Ensure enough reach between outlets and light strands.
- Layer for depth: Combine overhead and accent lighting for cozy ambiance.
- Test before finalizing: Check brightness and placement prior to permanent installation.
- Choose warm LEDs: Opt for 2700K-3000K bulbs for inviting, soft light.
- Hide cords neatly: Use cord covers or tuck behind furniture for clean look.
📑 Table of Contents
- How to Install String Lights Indoors for a Cozy Ambiance
- Choosing the Right String Lights for Your Space
- Planning Your Installation: Layout and Design
- Tools and Materials for a Secure, Damage-Free Install
- Step-by-Step Installation Guide
- Creative Ideas and Styling Tips
- Maintenance, Safety, and Longevity
How to Install String Lights Indoors for a Cozy Ambiance
There’s something undeniably magical about the soft, warm glow of string lights. Whether it’s the gentle shimmer in a bedroom, the inviting warmth in a living room, or the whimsical sparkle in a home office, string lights have the power to transform any indoor space into a sanctuary of comfort and style. In recent years, they’ve evolved from mere holiday decorations to year-round design essentials, embraced by interior decorators and DIY enthusiasts alike. The key to their popularity? Their ability to create a cozy ambiance—a feeling of intimacy, relaxation, and personal expression—without requiring a major renovation or a hefty budget.
But while the end result is enchanting, the process of installing string lights indoors can seem daunting if you’re unsure where to begin. From choosing the right type of lights to navigating tricky surfaces and power sources, there are several factors to consider. The good news is that with the right tools, techniques, and a bit of creativity, anyone can install string lights to elevate their home’s atmosphere. Whether you’re aiming for a minimalist Scandinavian look, a bohemian haven, or a modern industrial vibe, string lights are versatile enough to complement any aesthetic. This guide will walk you through every step—planning, selecting, installing, and maintaining—your indoor string lights to achieve a beautifully lit, cozy space that feels like home.
Choosing the Right String Lights for Your Space
Types of Indoor String Lights
Before you start hammering hooks into walls, it’s essential to understand the different types of string lights available. Not all lights are created equal, and your choice will affect both the ambiance and the ease of installation.
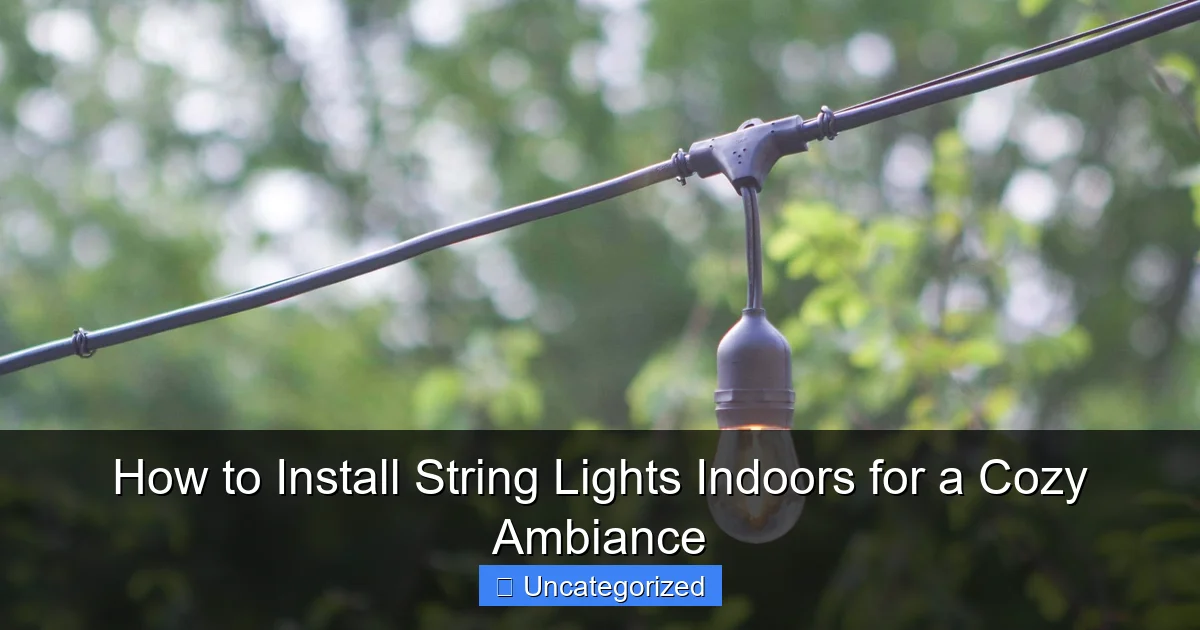
Visual guide about how to install string lights indoors
Image source: thediyplaybook.com
- LED String Lights: Energy-efficient, long-lasting, and cool to the touch, LED lights are ideal for indoor use. They come in various colors, including warm white (2700K–3000K), cool white (4000K+), and multicolor. Many are dimmable and compatible with smart home systems.
- Incandescent String Lights: These offer a classic, warm glow but consume more energy and generate heat, making them less ideal for prolonged indoor use or near fabrics.
- Fairy Lights: Delicate and often battery-powered, fairy lights feature tiny bulbs on thin wires. Perfect for draping over shelves, bed frames, or mirrors.
- Edison Bulb String Lights: With vintage-style exposed filaments, these add industrial or rustic charm. Best for open spaces like dining areas or lofts.
- Smart String Lights: Wi-Fi or Bluetooth-enabled, these allow you to control brightness, color, and even set schedules via an app. Great for tech-savvy users.
Tip: For most indoor applications, warm white LED string lights are the go-to choice—they mimic candlelight, are safe, and enhance coziness.
Length, Spacing, and Bulb Count
The size of your space dictates how many lights you need. Measure the area you want to cover—whether it’s a wall, ceiling perimeter, headboard, or bookshelf. A general rule: allow 1.5 to 2 feet of string light per square foot of space for even coverage.
- Short runs (under 10 feet): Use 10–25 bulbs for subtle accent lighting.
- Medium runs (10–20 feet): 30–60 bulbs for balanced illumination.
- Long runs (20+ feet): 70+ bulbs or multiple strands for full coverage.
Spacing between bulbs matters too. Tight spacing (2–3 inches) creates a dense, glowing effect, while wider spacing (6+ inches) gives a more scattered, twinkling look. For bedrooms and reading nooks, tighter spacing is often preferred for soft, even light.
Power Source and Connectivity
Consider how your lights will be powered:
- Plug-in (AC-powered): Most common. Ensure you have nearby outlets or use extension cords. Ideal for permanent installations.
- Battery-powered: Portable and outlet-free. Great for temporary setups, small spaces, or rentals. Check battery life (typically 20–60 hours).
- USB-powered: Can be plugged into a power bank or wall adapter. Useful for desks or near electronics.
Pro Tip: Use a timer outlet with plug-in lights to automate on/off cycles, saving energy and enhancing convenience.
Planning Your Installation: Layout and Design
Mapping Your Lighting Zones
Before hanging a single light, sketch a rough layout of where you want the lights to go. Think in terms of lighting zones—areas where light serves a specific purpose:
- Task lighting: Over a desk, reading nook, or kitchen island.
- Accent lighting: Highlighting artwork, shelves, or architectural features.
- General ambiance: Draped along walls, ceilings, or around windows.
For example, in a bedroom, you might install lights along the headboard for a dreamy canopy effect, with additional strands framing the mirror for a soft glow during nighttime routines. In a living room, consider outlining the ceiling perimeter to create a floating ceiling effect.
Choosing the Right Placement
The placement of your lights dramatically affects the mood. Here are popular and effective indoor placements:
- Along the ceiling perimeter: Use adhesive clips or hooks to run lights around the room’s edges. This creates an indirect, ambient glow.
- Draped over a bed frame or headboard: For a romantic, hotel-like feel. Secure with removable hooks or zip ties.
- On a gallery wall: Weave lights through picture frames or around a large mirror for a gallery-inspired look.
- Behind a bookshelf or floating shelves: Adds depth and highlights decor items.
- Along a staircase or railing: Enhances safety and visual appeal.
- Inside glass jars or lanterns: For a rustic, DIY touch on a coffee table or mantle.
Example: A small studio apartment can use ceiling-perimeter lights combined with a draped canopy over the bed to create distinct zones without physical dividers.
Measuring and Testing Before Installation
Always test your lights and layout before permanent installation. Plug them in, lay them along your planned path, and assess:
- Is the brightness appropriate? (Too bright can be jarring; too dim may not be visible.)
- Do shadows or dark spots exist?
- Are cords visible or awkward to conceal?
- Is the power source accessible without tripping hazards?
Use painter’s tape or masking tape to temporarily mark hook or clip locations. This allows you to adjust the design without damaging walls.
Tools and Materials for a Secure, Damage-Free Install
Essential Tools and Fasteners
Using the right hardware ensures your lights stay in place and your walls remain intact. Here’s what you’ll need:
- Adhesive hooks and clips: Removable, damage-free options like 3M Command Strips or adhesive LED light clips. Ideal for renters or painted walls.
- Small nails or push pins: For permanent installations on drywall or wood. Use fine-gauge nails to minimize damage.
- Cup hooks or eye screws: Screwed into wood trim, ceiling beams, or door frames. Great for heavier lights or long-term setups.
- Zip ties and cord clips: For securing wires and hiding cords along baseboards or furniture.
- Measuring tape and level: Ensures straight, even placement.
- Extension cords or power strips: With built-in surge protection if using multiple strands.
Tip: For textured walls, use adhesive putty (like Blu-Tack) instead of standard clips—it grips better without peeling paint.
Surface-Specific Installation Tips
Different surfaces require different approaches:
- Drywall: Use adhesive hooks rated for 1–2 lbs. For heavier lights, anchor with drywall anchors or toggle bolts.
- Wood (trim, beams, furniture): Screw in cup hooks or use wood screws with adhesive backing. Pre-drill holes to avoid splitting.
- Tile or glass: Use suction cup clips (for glass) or adhesive hooks designed for smooth surfaces.
- Concrete or brick: Use masonry screws or adhesive hooks rated for rough surfaces. Avoid nails—they can chip the material.
- Curtains or fabric: Use small clips or tuck the wire into the curtain rod or valance.
Pro Tip: For a clean look, paint adhesive hooks the same color as your wall to make them nearly invisible.
Concealing Cords and Wires
Visible cords can ruin an otherwise elegant setup. Here’s how to hide them:
- Use cord clips or raceways: Stick them along baseboards or moldings to guide cords discreetly.
- Tuck behind furniture: Run cords behind a bed, sofa, or bookshelf.
- Use a cord cover: Paintable plastic covers blend with walls and protect cords.
- Route through wall cavities (advanced): For permanent installations, hire an electrician to run cords behind walls.
For battery packs, place them in a decorative box, behind a picture frame, or under a cushion.
Step-by-Step Installation Guide
Step 1: Prepare Your Space and Lights
Clear the area where you’ll be working. Unroll and untangle your string lights. Plug them in to confirm they work. If using multiple strands, test them together to ensure compatibility (especially with smart or dimmable lights).
Step 2: Mark Hook or Clip Locations
Using your layout plan, measure and mark where each hook or clip will go. Use a pencil or removable tape. For ceiling perimeter lighting, space clips every 12–18 inches. For headboard draping, place clips at the corners and every 6 inches along the top.
Step 3: Install Fasteners
Follow the manufacturer’s instructions for adhesive hooks—clean the surface with rubbing alcohol, wait for it to dry, then press firmly for 30 seconds. For screws, drill pilot holes and tighten securely. Avoid over-tightening, which can damage drywall or wood.
Step 4: Hang the Lights
Start at the power source and work outward. Drape the lights over the hooks or clips, allowing a slight sag for a natural, flowing look. For a straight line (e.g., along a shelf), pull the wire taut. Use zip ties or clips to secure excess wire behind the lights.
Tip: For a “floating” effect, use clear fishing line to suspend lights from the ceiling—ideal for large rooms or open-concept spaces.
Step 5: Manage Cords and Power
Route cords along baseboards or behind furniture. Use cord clips every 12–18 inches to prevent sagging. Plug into a surge protector or timer. For battery-powered lights, hide the pack in a drawer or decorative container.
Step 6: Adjust and Finalize
Step back and assess the lighting. Adjust bulb spacing, add or remove strands, and tweak the angle of draping. Turn off other lights to evaluate the ambiance. Make final adjustments to cord placement for a clean finish.
Creative Ideas and Styling Tips
Theme-Based Lighting Designs
Tailor your string lights to match your room’s theme:
- Bohemian: Drape lights over a macramé wall hanging or around a rattan mirror. Use colored bulbs or mix with paper lanterns.
- Minimalist: Install a single straight line of warm white LEDs along a floating shelf or ceiling edge. Keep cords hidden.
- Rustic Farmhouse: Use Edison bulbs with black or brown wire. Hang from exposed beams or a wooden ladder.
- Modern Glam: Pair crystal or geometric pendant lights with string lights for layered lighting.
- Kid’s Room: Create a “starry sky” on the ceiling with glow-in-the-dark stars or a moon cutout.
Seasonal and Themed Swaps
Change your lighting seasonally for variety:
- Fall/Winter: Add orange or red bulbs, or wrap lights around a faux garland.
- Spring/Summer: Use pastel bulbs or pair with greenery like ivy or eucalyptus.
- Holidays: Swap in themed bulbs (e.g., snowflakes, hearts) or use colored strands for parties.
Layering with Other Lighting
String lights work best as part of a layered lighting scheme:
- Combine with floor lamps for task lighting.
- Use table lamps to fill in dark corners.
- Add wall sconces for vertical illumination.
- Pair with dimmers to adjust brightness throughout the day.
Example: In a living room, use string lights for ambient glow, a floor lamp for reading, and a coffee table lamp for accent lighting.
Maintenance, Safety, and Longevity
Regular Cleaning and Inspection
Keep your lights looking their best:
- Wipe bulbs gently with a dry or slightly damp cloth.
- Check for loose connections, frayed wires, or flickering bulbs.
- Replace burned-out bulbs promptly—especially in incandescent strands, as one dead bulb can dim the entire strand.
For battery-powered lights, replace batteries annually or when brightness decreases.
Safety Precautions
Prioritize safety to prevent hazards:
- Never use outdoor-rated lights indoors if they’re not UL-listed for indoor use.
- Don’t overload power strips—stick to the manufacturer’s recommended number of connected strands.
- Keep lights away from water sources (bathrooms, kitchens) unless rated for damp locations.
- Use timers to prevent lights from running 24/7.
- For children’s rooms, ensure cords are out of reach and bulbs are cool to the touch (LEDs only).
Storing Lights When Not in Use
If you plan to remove lights seasonally:
- Coil them loosely around a cardboard circle or a dedicated reel.
- Store in a dry, temperature-controlled area to prevent wire damage.
- Label boxes by room or theme for easy retrieval.
| Light Type | Best For | Average Lifespan | Energy Use | Installation Difficulty |
|---|---|---|---|---|
| LED String Lights | All rooms, year-round | 25,000–50,000 hours | Low | Easy |
| Incandescent | Holiday decor, temporary | 1,000–3,000 hours | High | Easy |
| Fairy Lights | Bedrooms, shelves, crafts | 10,000–20,000 hours | Very Low | Very Easy |
| Edison Bulbs | Dining rooms, lofts | 5,000–15,000 hours | Medium | Medium |
| Smart Lights | Tech-integrated spaces | 25,000+ hours | Low | Medium (app setup) |
Installing string lights indoors is more than just a design choice—it’s an investment in your home’s atmosphere and your personal well-being. The soft, diffused glow has been shown to reduce stress, enhance relaxation, and even improve sleep quality by mimicking natural sunset light. With the right planning, tools, and creativity, you can achieve a professional-looking setup that feels custom-tailored to your space. From choosing the perfect type of lights to mastering cord concealment and seasonal swaps, every step contributes to a cozy ambiance that invites you to unwind, recharge, and enjoy your home to the fullest. So gather your supplies, turn on some calming music, and let the glow begin—your cozy sanctuary awaits.
Frequently Asked Questions
How do I install string lights indoors without damaging walls?
Use removable adhesive hooks, command strips, or tension rods to hang string lights indoors without nails or screws. These methods provide strong support while keeping walls intact and are ideal for renters or temporary setups.
What’s the best way to hide string light cords indoors?
Route cords along baseboards, behind furniture, or use cord covers to keep them out of sight. For a polished look, tuck excess wire into wall crevices or use decorative clips to guide the path.
How to install string lights indoors on ceilings or high areas?
Use adhesive ceiling hooks or removable ceiling clips designed for lightweight decor. For vaulted ceilings, consider using a ladder and fishing line with hooks to secure the lights at your desired height.
Can I use command hooks for installing string lights indoors?
Yes, command hooks are a popular choice for installing string lights indoors—they’re sturdy, removable, and won’t leave residue. Just ensure the hook weight rating matches your lights and test adhesion on the surface first.
How do I plan the layout for string lights indoors?
Measure the space and sketch a layout, noting power source locations and high-impact zones like above a bed or along a bookshelf. Drape lights loosely in a zigzag or wave pattern for a natural, cozy ambiance.
Are battery-powered string lights safe for indoor installation?
Yes, battery-powered string lights are safe for indoor installation and eliminate cord clutter. Just check battery compartment seals regularly and opt for LED bulbs to reduce heat and energy consumption.

