Featured image for how to make outdoor string lighting poles
Image source: themprojects.com
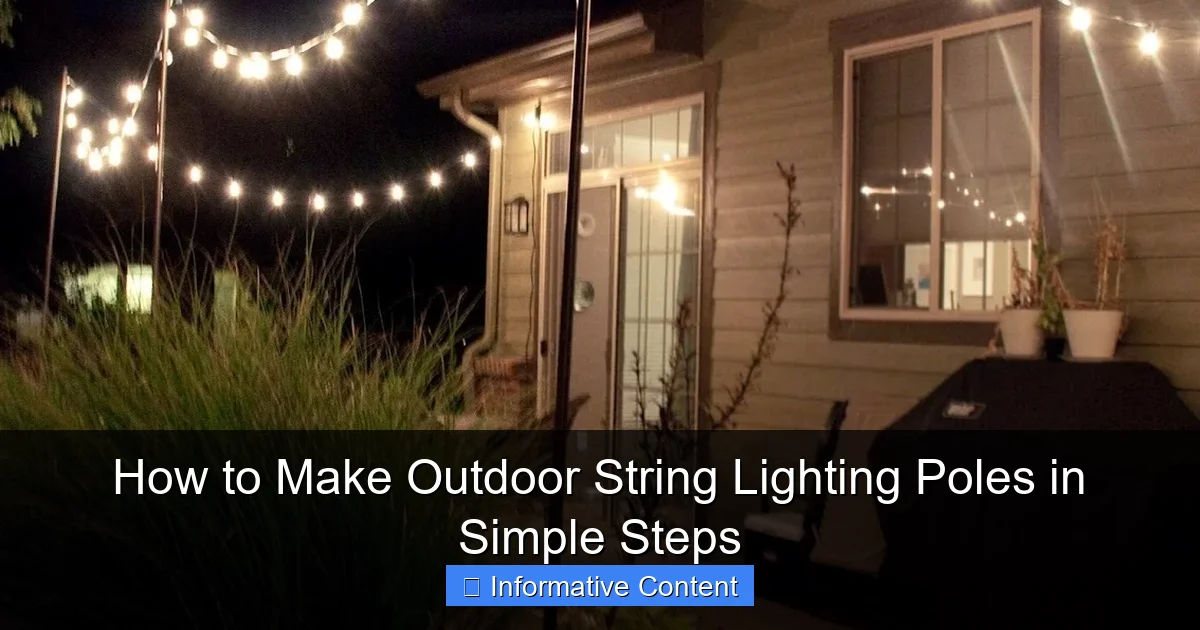
Transform your backyard with DIY outdoor string lighting poles using basic tools and materials like metal conduits, wooden posts, or PVC pipes. This simple, step-by-step guide walks you through measuring, securing, and mounting poles to create a stunning, professional-looking ambiance—perfect for patios, gardens, or walkways. Elevate your outdoor space affordably and safely in just a few hours.
Key Takeaways
- Choose durable materials: Use weather-resistant metal or treated wood for long-lasting poles.
- Plan pole placement: Space poles 8–10 feet apart for balanced string light distribution.
- Secure deep installation: Dig holes 24″ deep and use concrete for stability.
- Add mounting hooks: Install eye bolts or hooks 12″ below the top for easy hanging.
- Test lights first: Ensure bulbs work before final pole installation to avoid rework.
- Protect wiring: Run cords through PVC conduit or use outdoor-rated extension cables.
- Maintain height clearance: Keep lights 7+ feet high for safe pedestrian passage.
📑 Table of Contents
- How to Make Outdoor String Lighting Poles in Simple Steps
- Why Build Your Own Outdoor String Lighting Poles?
- Choosing the Right Materials for Your Lighting Poles
- Step-by-Step Guide: Building and Installing Your Poles
- Securing and Protecting Your String Lights
- Advanced Tips and Creative Ideas
- Maintenance and Longevity: Keeping Your Poles in Top Shape
How to Make Outdoor String Lighting Poles in Simple Steps
Imagine this: it’s a warm summer evening, the sun is setting, and your backyard is softly glowing with the warm flicker of string lights. You’re sipping lemonade, laughing with friends, and feeling that cozy, magical vibe only outdoor lighting can create. Now, picture doing it all with lighting poles you built yourself—custom, sturdy, and perfectly placed to highlight your favorite outdoor spaces.
That’s the dream, right? The good news? It’s not just for contractors or DIY pros. With a few basic tools, some simple materials, and a dash of creativity, you can build your own outdoor string lighting poles in just a weekend. No need to dig deep trenches for electrical wires or pay for expensive professional installations. Whether you’re lighting up a patio, garden path, or poolside hangout, homemade poles give you total control over height, placement, and ambiance. And honestly, there’s something deeply satisfying about stepping back and saying, “I built that.”
In this guide, I’ll walk you through how to make outdoor string lighting poles step by step—no jargon, no overcomplication, just practical, real-world advice from someone who’s done it (and made a few mistakes along the way). We’ll cover everything from choosing the right materials and planning your layout to securing the poles and adding those finishing touches that make your setup shine. By the end, you’ll have a system that’s not only functional but uniquely yours.
Why Build Your Own Outdoor String Lighting Poles?
Before we dive into the how, let’s talk about the why. Why go through the effort of building your own poles instead of buying ready-made kits or using existing structures?
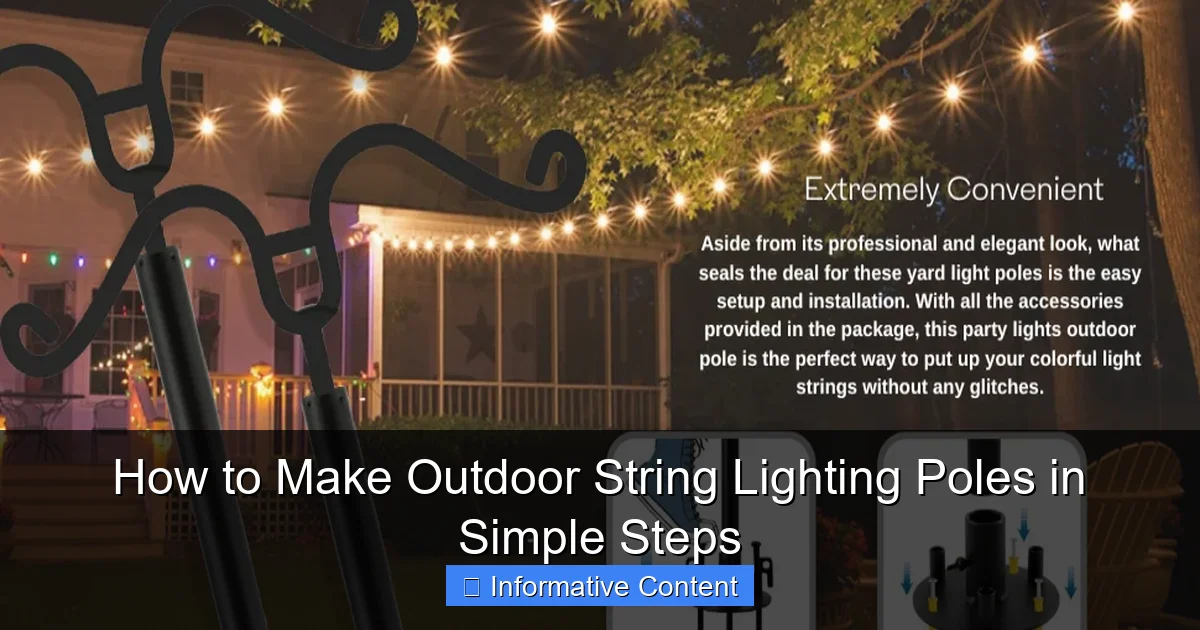
Visual guide about how to make outdoor string lighting poles
Image source: m.media-amazon.com
Cost-Effective and Customizable
Store-bought lighting poles can be pricey—especially if you need more than a couple. And let’s be honest, they’re often flimsy, too short, or not quite the right style. When you build your own, you control the budget. A basic pole setup can cost under $50 per pole using wood or PVC. Plus, you can tailor the height, thickness, and finish to match your outdoor aesthetic. Want rustic cedar poles for a cottage garden? Done. Sleek black metal for a modern patio? Easy.
One friend of mine, Sarah, wanted to light her backyard fire pit area. The store options were either too short (lights would dangle in people’s faces) or too industrial-looking. She built two 7-foot cedar poles, stained them to match her deck, and spaced them perfectly to create a cozy canopy. Total cost? $75 for both. She saved hundreds and got exactly what she wanted.
Greater Flexibility in Placement
Existing structures—like trees, fences, or walls—are great for string lights, but they’re not always where you need them. Maybe your favorite tree is too far from the seating area. Or your fence is too low. With DIY poles, you can place lights exactly where you want them. Want to highlight a garden path? Install poles along the edges. Need to define a dining zone? Space them around your table. The freedom is yours.
Durability and Longevity
Many commercial lighting poles are made from thin metal or plastic that can warp, rust, or snap in wind or snow. When you build your own, you can use heavy-duty materials like pressure-treated wood, galvanized steel, or thick PVC. Properly sealed and secured, these poles can last 10+ years. I built my first set 8 years ago using 4×4 treated lumber. They’ve survived two hurricanes, a few snowstorms, and countless backyard barbecues—still going strong.
Creative Expression
Your outdoor space is an extension of your home. Why not make it reflect your personality? You can paint poles to match your house, add decorative caps, or even integrate solar lights into the pole design. One reader, Mark, turned his poles into “lantern towers” by attaching vintage-style cages at the top. It added charm and extra light—all without running new electrical lines.
Choosing the Right Materials for Your Lighting Poles
Now that you’re sold on DIY, let’s talk materials. This is where many people get stuck—there are so many options! But don’t worry. The key is matching your choice to your climate, budget, and style.
Wood: Classic, Warm, and Affordable
Wood is the go-to for most DIYers, and for good reason. It’s easy to work with, looks great, and can be stained or painted to match any decor.
- Pressure-Treated Lumber (4×4 or 6×6): Ideal for outdoor use. Treated to resist rot, insects, and moisture. Best for permanent installations. Expect to pay $15–$30 per 8-foot 4×4.
- Cedar or Redwood: Naturally resistant to decay and insects. More expensive (around $30–$50 per 8-foot 4×4) but beautiful and long-lasting. Great for a premium look.
- Tip: Always use exterior-grade wood. Avoid pine or spruce—they’ll rot quickly when buried in soil or exposed to rain.
Pro Tip: If using pressure-treated wood, let it “weather” for a few weeks before staining. The chemicals can interfere with paint adhesion if you seal it too soon.
Metal: Strong and Modern
Metal poles offer unmatched strength and a sleek, industrial look. They’re perfect for windy areas or modern homes.
- Galvanized Steel Pipe (1.5″ to 2″ diameter): Rust-resistant and very sturdy. Can be painted or left as-is. Costs $20–$40 per 8-foot section.
- Aluminum Pipe: Lightweight and corrosion-resistant. Great for coastal areas. Slightly more expensive but easier to handle.
- Tip: Metal conducts heat and cold. If you live in extreme climates, consider adding a wooden or plastic cap to reduce temperature transfer to the string lights.
PVC: Lightweight and Weatherproof
PVC is a budget-friendly, low-maintenance option—especially for temporary or seasonal setups.
- Schedule 40 PVC Pipe (2″ to 3″ diameter): Won’t rot, rust, or warp. Easy to cut and glue. Costs $10–$20 per 10-foot section.
- Downside: Can become brittle in prolonged UV exposure unless painted or covered. Also, it’s not as rigid as wood or metal in high winds.
- Tip: Paint PVC with exterior-grade spray paint to add UV protection and customize the look.
Hybrid Options
Want the best of both worlds? Combine materials. For example:
- Use a metal pipe as the core for strength, then slide a wooden sleeve over it for aesthetics.
- Build a wooden pole but add a metal anchor sleeve at the base for extra stability.
One of my favorite setups uses 2″ galvanized pipe buried in concrete, with a 4×4 cedar post slipped over the top. The pipe provides strength; the cedar gives a warm, natural look.
Step-by-Step Guide: Building and Installing Your Poles
Now for the fun part—actually building and installing your poles. Follow these steps for a safe, sturdy, and professional-looking result.
Step 1: Plan Your Layout
Grab a measuring tape, stakes, and string. Mark where you want each pole. Consider:
- Height: 7–9 feet is ideal for most areas. Tall enough to clear heads, short enough to hang lights easily.
- Spacing: 10–15 feet between poles works well for standard string lights. Closer for heavier bulbs or wider areas.
- Anchor Points: Avoid placing poles on soft, wet soil. Use existing concrete pads, decks, or well-drained ground.
Pro Tip: Sketch your layout on paper first. Include distances, pole heights, and where you’ll run the lights. This saves time and materials.
Step 2: Prepare the Materials
Cut your poles to length (usually 8–10 feet total, with 18–24 inches buried). Sand wood to remove splinters. Wipe metal or PVC to remove dust. If using wood, apply a water-repellent sealant to the bottom 2 feet—this helps prevent rot where it meets the ground.
Step 3: Dig the Holes
Use a post hole digger or shovel to dig holes 18–24 inches deep and 6–8 inches wide. The depth depends on your soil:
- Clay or soft soil: Go deeper (24″) for stability.
- Firm, well-drained soil: 18″ is fine.
Pro Tip: Add 2–3 inches of gravel at the bottom of each hole for drainage. This prevents water from pooling around the pole base.
Step 4: Set the Poles
Place the pole in the hole. Use a level to ensure it’s perfectly vertical. Have a helper hold it steady while you backfill with concrete (for permanent installations) or compacted soil (for removable poles).
- For concrete: Mix quick-setting concrete according to package instructions. Pour into the hole, leaving 2–3 inches at the top for soil or mulch. Let cure for 24–48 hours before attaching lights.
- For soil: Backfill in layers, tamping each layer firmly. Water lightly to help settle the soil.
Pro Tip: For added stability, use a “dead man” anchor: bury a horizontal piece of wood or rebar at the bottom of the hole, then attach the pole to it with screws or wire. This resists uplift from wind.
Step 5: Add Lighting Hardware
Once the poles are secure, install hooks, eye bolts, or cable clamps at the top (and optionally, halfway up for multi-tier lighting). Use stainless steel or galvanized hardware to prevent rust.
- For wood: Pre-drill holes to prevent splitting. Use 3″ eye screws or lag bolts.
- For metal: Weld or screw on brackets, or use pipe clamps.
- For PVC: Use PVC glue to attach caps with pre-drilled holes, or use metal brackets.
Pro Tip: Install a small hook or loop on the side of the pole to hang your ladder or tools during installation—it’s a lifesaver!
Securing and Protecting Your String Lights
You’ve got the poles up—great! Now let’s make sure your lights stay put, look good, and last for years.
Choosing the Right String Lights
Not all string lights are created equal. For outdoor use, look for:
- Weatherproof rating (IP44 or higher): Protects against rain and dust.
- Bulb type: LED bulbs last longer, use less power, and are cooler than incandescent.
- Bulb spacing: 6–12 inches is ideal for ambient lighting.
- Plug type: Use outdoor-rated plugs and extension cords. Consider a GFCI outlet for safety.
Pro Tip: Buy a few extra bulbs and sockets. They’ll come in handy if one burns out.
Hanging the Lights
Start at one end and work your way across. Use:
- Zip ties or cable clips: For a clean, low-profile look. Attach to hooks or eye bolts.
- Wire or aircraft cable: For a “floating” effect. Run a thin cable between poles, then hang lights from it with S-hooks.
- Twine or rope (decorative only): Use for temporary setups. Not recommended for long-term use—it degrades in UV light.
Pro Tip: Leave a little slack in the lights—about 10–20% extra length. This prevents tension on the sockets during wind or temperature changes.
Protecting Against the Elements
Outdoor lights face sun, rain, wind, and temperature swings. Protect them with:
- UV-resistant covers: Some bulbs come with them; you can also buy aftermarket sleeves.
- Sealed connections: Use waterproof wire nuts or silicone tape on splices.
- Timers or smart plugs: Turn lights off automatically to reduce wear.
Pro Tip: In winter, remove lights or use a protective cover. Ice and snow can damage sockets and wires.
Advanced Tips and Creative Ideas
Once you’ve mastered the basics, take your lighting to the next level with these pro tips and creative twists.
Multi-Level Lighting
Don’t just hang lights at the top. Add a second row at 4–5 feet high for layered lighting. This works great for:
- Defining seating areas
- Highlighting plants or water features
- Creating a “tent” effect over a dining table
Use different bulb styles—warm white for the top, colored or twinkling for the lower level.
Integrated Solar Lights
Add solar-powered spotlights to the poles themselves. Mount small solar panels on top, or use pole-mounted solar lanterns. This adds accent lighting and reduces the need for extension cords.
Seasonal Adaptability
Design your system to be modular. Use quick-release hooks or magnetic clamps so you can:
- Swap out light colors for holidays (white for summer, red/green for winter)
- Add garlands, banners, or wind chimes
- Take down lights for winter storage
Pro Tip: Label each pole and light strand with a weatherproof tag. Makes setup and troubleshooting much easier.
Wind-Resistant Designs
In windy areas, use:
- Thicker poles (6×6 wood or 2.5″ metal)
- Guy wires (tension cables from pole top to ground anchors)
- Flexible mounting—allow lights to sway slightly instead of pulling tight
Maintenance and Longevity: Keeping Your Poles in Top Shape
A well-built pole system can last a decade or more—but only with regular care.
Annual Inspection
Every spring, check for:
- Cracks or rot in wood
- Rust on metal (touch up with rust-inhibiting paint)
- Shifting or leaning poles (re-level if needed)
- Damaged wiring or loose connections
Cleaning and Sealing
- Wood: Clean with mild soap and water. Reapply water-repellent sealant every 2–3 years.
- Metal: Wipe with a damp cloth. Use a metal polish if it dulls.
- PVC: Wash with soapy water. Repaint every 3–5 years to prevent UV damage.
Light Care
- Replace burned-out bulbs promptly—they can overload the circuit.
- Store lights in a dry, cool place when not in use.
- Use a surge protector to guard against lightning or power spikes.
| Material | Cost per 8′ Pole | Lifespan | Best For | Maintenance |
|---|---|---|---|---|
| Pressure-Treated Wood | $15–$30 | 10–15 years | Backyards, patios, gardens | Re-seal every 2–3 years |
| Cedar | $30–$50 | 15–20 years | Premium, natural look | Light cleaning; re-stain every 3–5 years |
| Galvanized Steel | $20–$40 | 20+ years | Wind-prone areas, modern style | Rust check; repaint as needed |
| PVC | $10–$20 | 5–8 years | Temporary or seasonal use | Repaint every 3–5 years |
Building your own outdoor string lighting poles isn’t just about saving money or adding light—it’s about creating a space that feels truly yours. It’s about the pride in saying, “I made this,” and the joy of seeing your friends’ faces light up (literally) when they step into your backyard oasis.
From choosing the right materials to planning your layout, securing the lights, and maintaining your setup, every step is an opportunity to learn, customize, and enjoy. You don’t need to be a master craftsman. You just need a little patience, a few tools, and the willingness to try.
So grab your shovel, pick your favorite wood or metal, and get started. In a weekend, you’ll have a lighting system that’s sturdy, stylish, and uniquely tailored to your outdoor life. And every time you flip that switch, you’ll remember the effort—and the reward.
Happy building, and even happier lighting!
Frequently Asked Questions
What materials do I need to make outdoor string lighting poles?
You’ll need wooden or metal poles (4-6 feet tall), concrete for stability, outdoor-rated string lights, hooks or eye bolts, and basic tools like a drill and level. Choose weather-resistant materials to ensure durability. This setup works well for DIY outdoor string lighting poles.
How do I secure the poles to prevent tipping?
Dig a 12-18 inch hole, set the pole in concrete, and let it cure for 24-48 hours. For added stability, bury the pole deeper or use a ground anchor. This is a key step when learning how to make outdoor string lighting poles.
Can I use existing structures instead of poles?
Yes! Attach string lights to trees, fences, or pergolas using hooks or zip ties. Just ensure the structure is sturdy and can support the lights’ weight. This is a no-dig alternative to traditional outdoor string lighting poles.
How far apart should I space the poles?
Space poles 6-8 feet apart for even lighting and minimal sagging. Adjust based on your string light length and pole height. Proper spacing ensures your outdoor string lighting poles look balanced.
How do I hide the wires for a cleaner look?
Run wires through PVC conduit or use wire clips to attach them to the pole’s backside. Paint the conduit to match the pole for a seamless finish. This keeps your outdoor string lighting poles tidy.
Are there solar-powered options for these poles?
Absolutely! Solar string lights eliminate the need for wiring. Install a solar panel on top of the pole or nearby for charging. Solar-powered outdoor string lighting poles are eco-friendly and easy to maintain.

