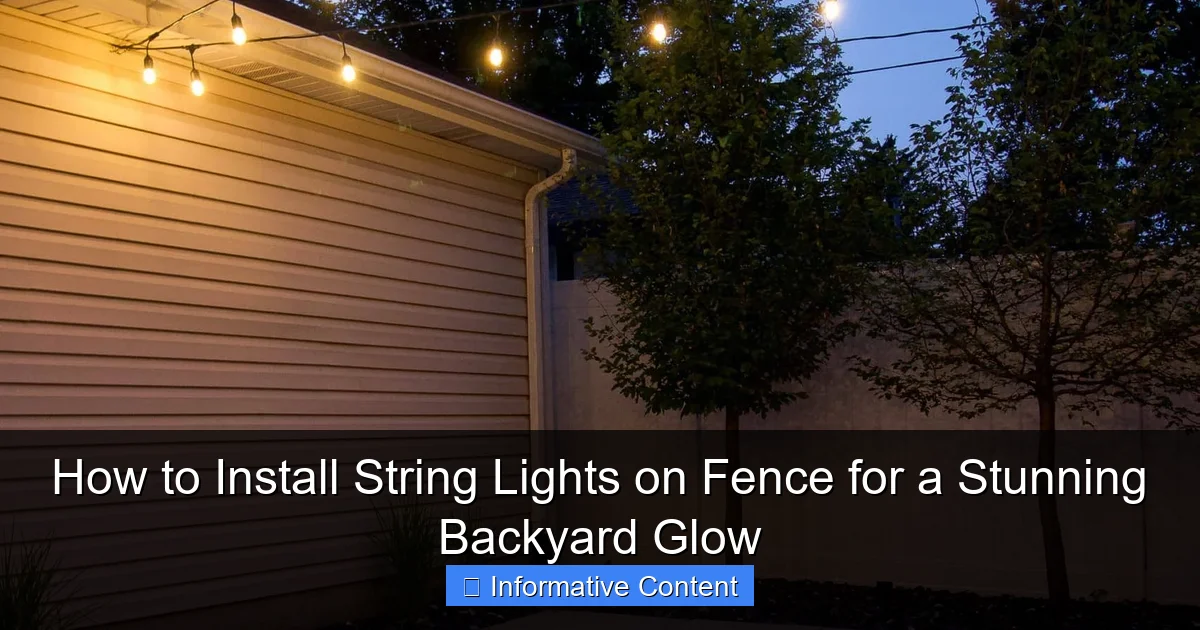
Featured image for install string lights on fence
Image source: thediyplaybook.com
Transform your backyard into a magical retreat by installing string lights on your fence—effortlessly and safely. With simple tools, weather-resistant lights, and secure mounting clips, you can achieve a professional-looking glow that enhances ambiance and extends outdoor enjoyment into the night.
Key Takeaways
- Plan your layout: Sketch light placement before installing to ensure even spacing and coverage.
- Choose durable lights: Opt for weatherproof, outdoor-rated string lights for long-term use.
- Secure with clips: Use fence clips or zip ties for damage-free, stable attachment.
- Hide the power source: Route cords discreetly and use extension cables if needed.
- Test before finalizing: Check brightness and connections before completing the full install.
- Space evenly: Maintain 6–12 inches between bulbs for a balanced, professional glow.
📑 Table of Contents
How to Install String Lights on Fence for a Stunning Backyard Glow
There’s something magical about the soft, twinkling glow of string lights. Whether you’re hosting a backyard barbecue, enjoying a quiet evening under the stars, or just want to make your outdoor space feel cozier, string lights can transform your fence into a warm, inviting centerpiece. I remember the first time I strung lights along my backyard fence—it was like flipping a switch on my outdoor ambiance. Suddenly, the space felt larger, more intimate, and perfect for entertaining. But getting that perfect glow isn’t always as simple as hanging a few lights and calling it a day.
Installing string lights on a fence requires a little planning, the right tools, and some clever tricks to ensure they look great and last for seasons to come. From choosing the right type of lights to avoiding sagging and tangled wires, there are several factors to consider. In this guide, I’ll walk you through every step—from planning and prep to installation and maintenance—so you can create a backyard glow that’s not just beautiful, but also practical and safe. Whether you’re a DIY newbie or a seasoned home improver, this guide will help you avoid common pitfalls and achieve a professional-looking result.
1. Planning Your String Light Installation
Assess Your Fence Type and Condition
Before you buy a single light, take a close look at your fence. Is it made of wood, vinyl, aluminum, or chain link? Each material has unique characteristics that affect how you’ll attach the lights. For example:
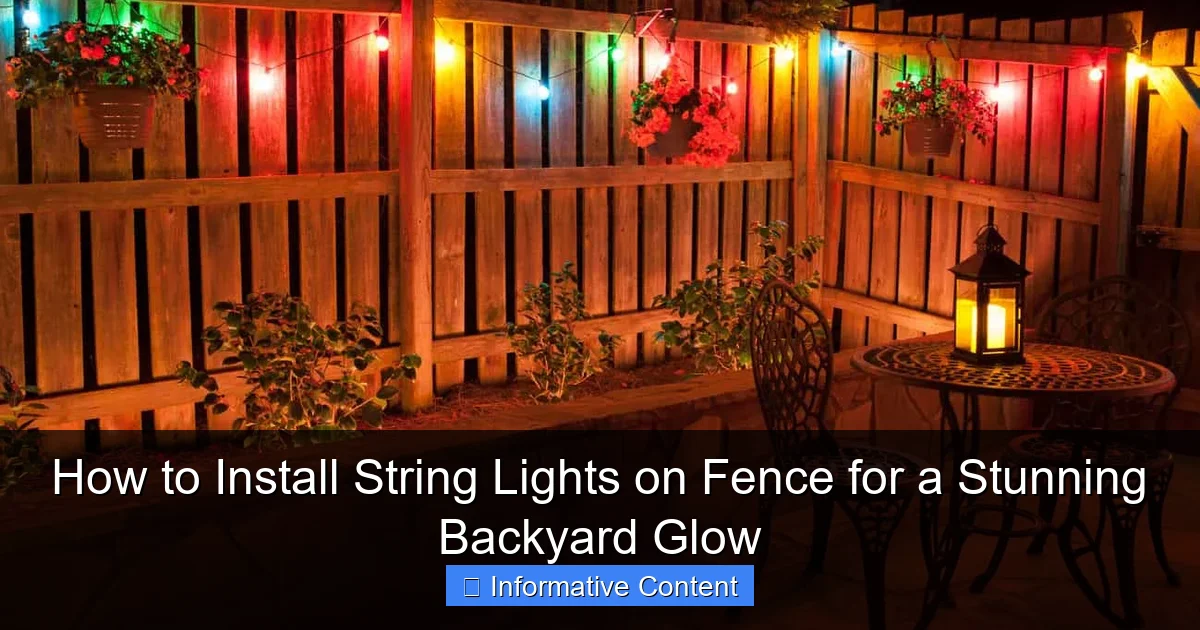
Visual guide about install string lights on fence
Image source: cdn.trendir.com
- Wooden fences are ideal because they allow you to use screws, nails, or hooks without damaging the structure. Just make sure the wood is sturdy and not rotting.
- Vinyl or PVC fences are lightweight and less forgiving. Avoid driving nails or screws too deep, as they can crack the material. Adhesive clips or zip ties work better here.
- Metal or aluminum fences are durable but can conduct electricity. Use insulated clips or hooks, and never let exposed wires touch the metal.
- Chain-link fences are surprisingly easy to work with. You can weave lights through the links or use zip ties for secure attachment.
Also, check for any weak spots, loose boards, or rust. You don’t want your lights pulling down a section of the fence after a few weeks.
Measure Your Space and Determine Light Coverage
Grab a measuring tape and measure the total length of your fence where you plan to install the lights. This helps you estimate how many string lights you’ll need. Most outdoor string lights come in 24- to 48-foot lengths, but you can always connect multiple strands—just don’t exceed the manufacturer’s recommended limit (usually 2-3 strands in series).
Consider the spacing between bulbs. For a soft, even glow, look for lights with bulbs spaced 4–6 inches apart. If you want a denser, bistro-style look, opt for 2–3 inch spacing. Also, think about the height—most people install lights 5–6 feet off the ground, but you can go higher for a dramatic effect or lower for intimate lighting.
Choose the Right Type of String Lights
Not all string lights are created equal. Here are the most common types and when to use them:
- LED string lights: Energy-efficient, long-lasting, and cool to the touch. Ideal for year-round use. Look for dimmable or warm white options for a cozy feel.
- Incandescent string lights: Classic warm glow, but less efficient and shorter lifespan. Best for seasonal use.
- Solar-powered lights: Eco-friendly and wire-free, but may not be as bright or reliable in cloudy climates. Great for areas without easy access to outlets.
- Plug-in lights: Bright, consistent, and customizable. Best for permanent or semi-permanent installations with nearby outdoor outlets.
For fence installations, I recommend LED plug-in lights with a 48-foot strand and 6-inch spacing. They’re bright enough to illuminate your yard but not so bright they feel like a stadium. Plus, they’re safe for year-round use.
2. Gather Your Tools and Materials
Essential Tools for a Smooth Installation
You don’t need a full workshop to install string lights, but having the right tools makes the job easier and safer. Here’s what I always keep on hand:
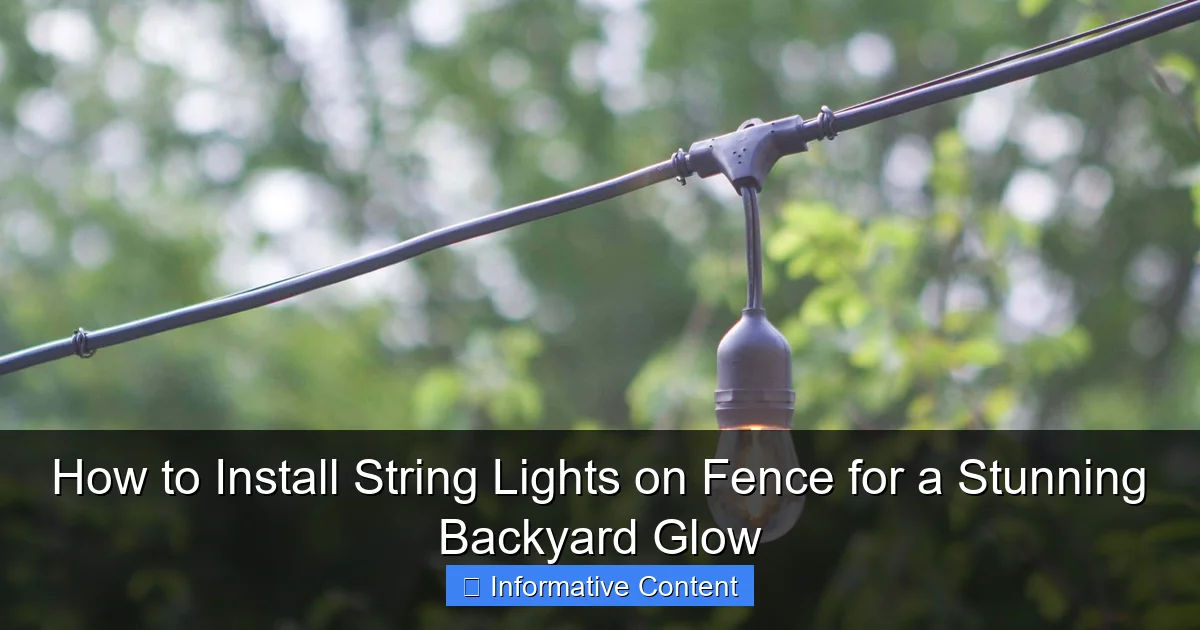
Visual guide about install string lights on fence
Image source: thediyplaybook.com
- Measuring tape: For precise spacing and layout.
- Drill and drill bits: For wood or vinyl fences (use a small pilot hole first).
- Hammer: For nails or small hooks on wood.
- Zip ties or cable clips: For vinyl, metal, or chain-link fences.
- Outdoor-rated adhesive clips: Great for temporary or renter-friendly installations.
- Extension cords: Use outdoor-rated, grounded cords with built-in GFCI protection.
- Wire cutters: For trimming zip ties or adjusting cord length.
- Step ladder or scaffolding: For reaching higher sections safely.
Recommended Materials and Accessories
Beyond the lights and tools, consider these extras for a polished finish:
- Weatherproof light clips: Designed specifically for string lights, these prevent damage and sagging.
- Outdoor outlet covers: Protect your power source from rain and debris.
- Timer or smart plug: Automate your lights to turn on at dusk and off at bedtime—no more forgetting to unplug them.
- Fuse-protected power strips: If you’re connecting multiple strands, use a surge protector to prevent overloads.
- Decorative cord covers: Hide unsightly wires along the ground or fence base for a cleaner look.
Pro tip: Buy one extra strand of lights and a few extra clips. You’ll likely need them for corners, gate areas, or unexpected gaps.
3. Step-by-Step Installation Process
Step 1: Map Out Your Layout
Before you start hanging, sketch a rough plan. Decide where the lights will start and end, where you’ll place the power source, and how you’ll handle corners or gates. I like to use chalk or masking tape to mark key points—like where each clip will go or where a strand will turn a corner.
For a clean, professional look, keep the lights straight and parallel to the fence. Avoid zigzagging or random patterns unless you’re going for a whimsical, bohemian vibe.
Step 2: Install Mounting Hardware
This step varies by fence type, but here are the most common methods:
- Wooden fences: Use small cup hooks or eye screws. Drill a pilot hole first, then twist in the hook. Space them every 2–3 feet for even support.
- Vinyl/PVC fences: Use adhesive clips or low-profile zip ties. Apply clips every 2 feet. For extra hold, use outdoor-rated double-sided tape under the clip.
- Metal/chain-link fences: Use insulated clips or zip ties. Weave lights through the links for a built-in look, or attach clips to the top rail.
For corners or gates, use a 90-degree clip or a small hook to redirect the lights smoothly. Avoid sharp bends, as they can damage the cord.
Step 3: Hang the String Lights
Start at the power source. Plug in the first strand and run it along the fence, attaching it to each clip or hook. Don’t stretch the cord—let it hang loosely for a natural drape. If you’re connecting multiple strands, use an outdoor-rated extension cord or a multi-outlet power strip.
For long runs, use zip ties to secure the cord between clips. This prevents sagging and keeps the lights level. If you’re using solar lights, make sure the solar panel is positioned to receive at least 6 hours of direct sunlight daily.
Step 4: Manage Cords and Power Sources
Visible cords can ruin the ambiance. Here’s how to hide them:
- Along the fence: Run cords behind the lights or use cord clips to tuck them under the top rail.
- Along the ground: Use decorative cord covers or bury them shallowly (at least 2 inches deep) with mulch or gravel.
- Near the outlet: Use an outlet cover with a built-in cord channel or install a small wooden box to hide the plug.
Always use a GFCI outlet or a GFCI-protected extension cord. This protects against shocks and short circuits, especially in wet weather.
4. Creative Design Ideas and Layouts
Classic Straight-Line Installation
The most common approach is running lights straight along the top rail of the fence. It’s simple, elegant, and works for most backyard styles. Use even spacing and keep the lights taut (but not stretched) for a clean look.
For a twist, try double rows—one near the top and one 12–18 inches below. This adds depth and brightness without overwhelming the space.
Weaving or Crisscross Patterns
If you have a chain-link or open-style fence, consider weaving the lights through the links. This creates a mesh-like effect and adds texture. For wood fences, use a zigzag pattern by angling the lights between hooks. It’s playful and perfect for festive occasions.
Layered or Multi-Zone Lighting
Divide your yard into zones—like a dining area, lounge space, and pathway—and install lights in each. Use different colors or bulb styles for contrast. For example:
- Warm white for dining and conversation areas.
- Soft yellow for pathways or garden edges.
- Color-changing for parties or holidays.
This approach makes your yard feel like an extension of your home.
Hanging Lights Above the Fence
For a dramatic effect, install lights above the fence using poles, trees, or a pergola. Use guide wires to suspend the lights in a gentle arc. This creates a canopy effect and works well for large backyards.
5. Troubleshooting and Maintenance Tips
Preventing Sagging and Tension Issues
Sagging lights look sloppy and can damage the cord. To avoid this:
- Use enough clips (every 2–3 feet).
- Don’t overstretch the cord.
- Use zip ties to support long runs.
- For heavy bulbs, add extra support at midpoints.
If you notice sagging after installation, add a few more clips or use a tension wire (like a thin steel cable) behind the lights to pull them taut.
Weatherproofing and Safety
Outdoor lights are exposed to rain, wind, and UV rays. To keep them looking good and functioning safely:
- Use weather-resistant lights with an IP44 or higher rating.
- Inspect connections and seals annually.
- Store lights indoors during extreme weather (like hurricanes or blizzards).
- Never use indoor-rated lights outdoors.
For added protection, apply a clear sealant to any exposed wire connections or splices.
Seasonal Maintenance Checklist
Here’s a quick table to keep your lights in top shape year-round:
| Season | Task | Frequency |
|---|---|---|
| Spring | Inspect for damage, clean bulbs, test all strands | Once |
| Summer | Check for loose clips, tighten zip ties, clear debris | Monthly |
| Fall | Remove leaves, inspect for water damage, store if needed | Bi-weekly |
| Winter | Cover or store lights, protect outlet from snow | As needed |
Pro tip: Take photos of your installation each season. This helps you track wear and plan upgrades.
6. Final Touches and Long-Term Enjoyment
Enhancing the Ambiance
Once your lights are installed, add complementary elements to elevate the vibe:
- Outdoor rugs under seating areas.
- Potted plants with LED spotlights.
- String light “curtains” between fence posts for privacy.
- Fire pit or lanterns for additional warmth and light.
Remember, lighting is just one part of the experience. Combine it with music, comfortable seating, and maybe a drink station for the ultimate backyard oasis.
When to Upgrade or Replace
Even the best string lights don’t last forever. Look for these signs it’s time to replace them:
- Flickering or dim bulbs.
- Frayed or cracked cords.
- Corroded sockets or connectors.
- Faded or discolored bulbs.
LED lights typically last 20,000–50,000 hours, so you may only need to replace them every 5–10 years. Incandescent lights last 1,000–2,000 hours—perfect for seasonal use.
Share Your Glow
Once your installation is complete, take a step back and admire your work. Snap a few photos at dusk to capture the glow. Share them with friends or post them online—you’ve earned it! And don’t forget to enjoy the space. Light a candle, pour a drink, and savor the magic of your transformed backyard.
Installing string lights on a fence is more than a DIY project—it’s a way to create memories, extend your living space, and add joy to everyday life. With the right planning, tools, and a little creativity, you can achieve a stunning backyard glow that lasts for years. So grab your lights, gather your tools, and get ready to shine.
Frequently Asked Questions
How do I install string lights on a fence without damaging it?
Use removable adhesive hooks, zip ties, or specialized fence clips to secure string lights without nails or screws. These methods protect your fence while providing a sturdy hold for long-term use.
What’s the best way to hang string lights on a wooden fence?
For wooden fences, use cup hooks or screw-in eye bolts spaced evenly along the top rail. Attach the string lights to these anchors for a clean, evenly spaced look that highlights your fence line.
Can I install string lights on a vinyl fence without drilling holes?
Yes! Opt for no-damage solutions like heavy-duty zip ties, adhesive-backed hooks, or tension rods designed for vinyl fences. These keep your fence intact while ensuring the lights stay secure.
How do I power string lights on a fence if there’s no nearby outlet?
Use solar-powered string lights or a weatherproof extension cord routed safely from a nearby outlet. For longer runs, consider a low-voltage transformer to extend power without overloading circuits.
How far apart should I space hooks when installing string lights on a fence?
Space hooks or anchors 12–18 inches apart for optimal support, depending on the lights’ weight. This prevents sagging and ensures even illumination across your fence line.
Are string lights on a fence safe for year-round use?
Yes, if you use outdoor-rated, weather-resistant lights and secure them properly. Check for frayed wires or damage periodically, and opt for LED lights for energy efficiency and durability.

