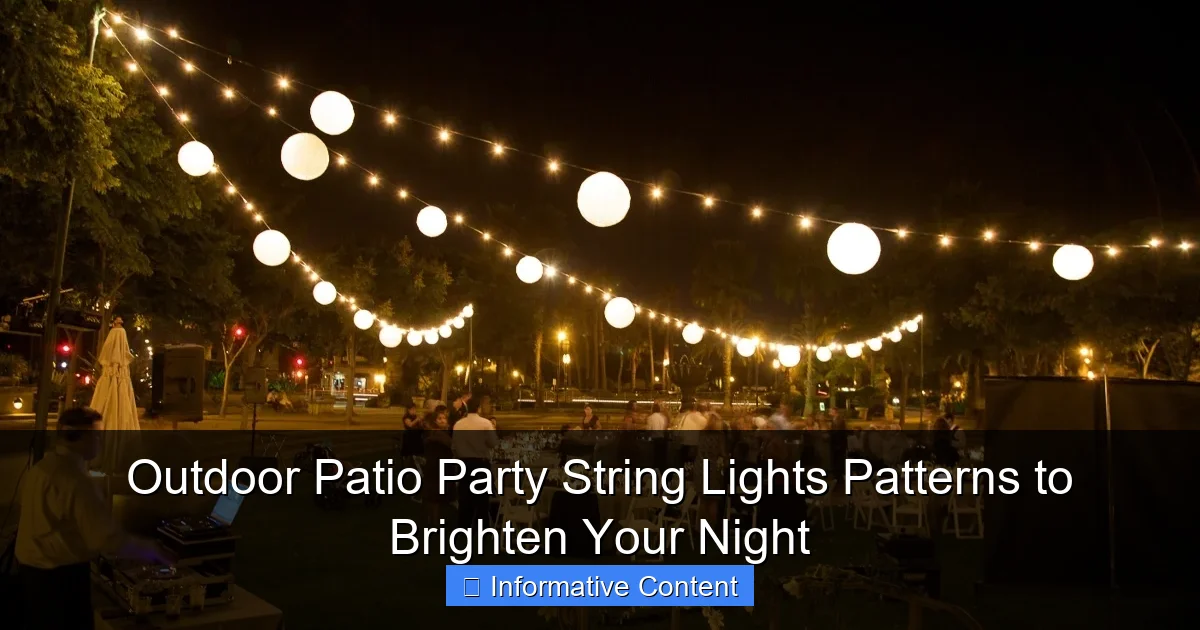
Featured image for outdoor patio party string lights pateerns
Image source: themprojects.com
Transform your outdoor patio into a dazzling nighttime oasis with creative string light patterns that combine ambiance and style for unforgettable gatherings. From classic zigzags to geometric shapes and cascading canopies, these easy-to-install lighting designs elevate any party atmosphere while maximizing visual impact.
Key Takeaways
- Mix light patterns for dynamic, eye-catching patio displays.
- Use warm white LEDs to create inviting, cozy atmospheres.
- Hang lights at varying heights to add depth and dimension.
- Choose weatherproof designs for year-round outdoor durability.
- Sync lights with music to elevate party energy instantly.
- Layer lights with decor for a seamless, festive look.
📑 Table of Contents
- The Magic of String Lights: Setting the Scene
- Why Pattern Matters: More Than Just Pretty Lights
- Top 5 Outdoor Patio String Light Patterns (With Real Examples)
- Planning Your Layout: A Step-by-Step Guide
- Creative Twists: Elevating Your Pattern Game
- Maintenance & Longevity: Keeping the Glow Alive
- Final Thoughts: Light Up Your Life (Literally)
The Magic of String Lights: Setting the Scene
Imagine this: the sun dips below the horizon, painting the sky in soft hues of orange and pink. You’re gathered around your outdoor patio with friends and family, the air warm with laughter and good vibes. But something’s missing—until you flick a switch, and suddenly, your space transforms into a glowing haven, lit by delicate strands of string lights. That’s the power of outdoor patio party string lights patterns—they don’t just illuminate, they create mood, spark conversation, and make memories feel a little more magical.
Whether you’re hosting a birthday bash, a casual BBQ, or a quiet evening with wine under the stars, the right lighting can make all the difference. String lights aren’t just functional; they’re a design tool. With so many patterns, placements, and styles available, you can tailor your outdoor lighting to match any vibe—from cozy and intimate to festive and energetic. But with great variety comes great confusion: where do you start? How do you avoid a chaotic mess of wires? And how do you pick a pattern that actually enhances your space instead of overwhelming it?
That’s exactly what we’re diving into today. From classic zigzags to modern geometric grids, we’ll explore the most popular and effective outdoor patio party string lights patterns that will not only brighten your night but elevate your entire outdoor experience. No fluff, no sales pitches—just real, practical advice from someone who’s spent countless evenings tinkering with lights, testing setups, and learning what works (and what doesn’t).
Why Pattern Matters: More Than Just Pretty Lights
The Psychology of Light and Design
Let’s get real for a second: lighting isn’t just about visibility. It shapes how people feel in a space. Harsh, bright lights can make a patio feel like a parking lot, while soft, diffused glows invite relaxation and connection. The pattern of your string lights plays a huge role in this. A symmetrical grid can feel modern and orderly, while a cascading waterfall design feels romantic and dreamy.
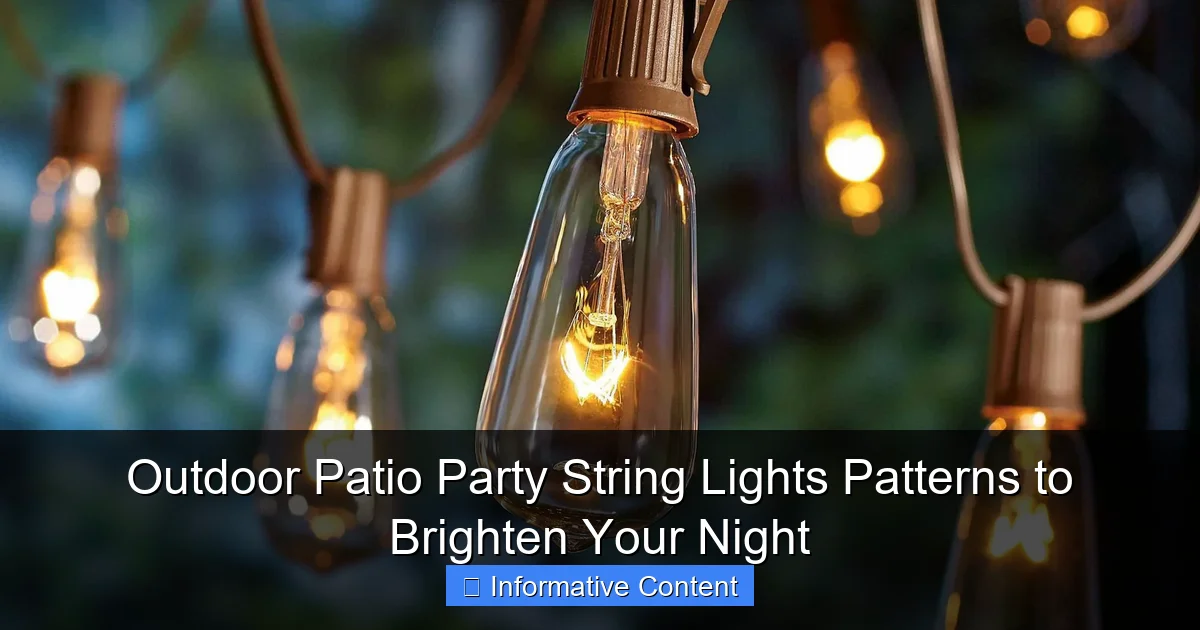
Visual guide about outdoor patio party string lights pateerns
Image source: warisanlighting.com
Think about your last memorable outdoor party. Chances are, the lighting had a rhythm—maybe lights were clustered over seating areas, or draped along railings to guide movement. That’s intentional design. When you plan your outdoor patio party string lights patterns, you’re not just hanging lights; you’re choreographing the flow of energy and attention in your space.
Function Meets Aesthetics
Sure, you want your patio to look amazing, but it also needs to work. A poorly planned pattern can leave dark corners, glare in people’s eyes, or create tripping hazards. The best patterns balance beauty with practicality. For example:
- Zigzag patterns over a dining table ensure even light distribution for meals and games.
- Canopy-style draping from pergolas or trees creates a ceiling of stars, reducing the “open sky” feeling.
- Linear runs along fences or railings define boundaries and improve safety.
I learned this the hard way during a friend’s garden party. We hung lights randomly—some too low, some too bright—and ended up with a space that felt disjointed. People kept bumping into low-hanging strands, and the brightest lights were right in the eyes of the host during dinner. After a quick rework—using a simple zigzag over the table and soft loops along the fence—the vibe changed instantly. It wasn’t just brighter; it felt *together*.
Choosing the Right Light Type for Your Pattern
Not all string lights are created equal. Before picking a pattern, consider the type of lights:
- LED bulbs: Energy-efficient, cool to the touch, and come in warm white (2700K–3000K) for a cozy feel or cool white (4000K+) for a crisp, modern look.
- Edison-style bulbs: Great for vintage or rustic themes, but emit more heat—best for open, airy spaces.
- Fairy lights (micro LEDs): Delicate and perfect for draping or wrapping, but not ideal for primary task lighting.
- Solar-powered: Eco-friendly and easy to install, but may dim over time and aren’t as bright as plug-in models.
For most outdoor patio party string lights patterns, I recommend warm white LEDs. They’re bright enough to see, soft enough to feel inviting, and work well with nearly every design. Plus, they last for years—no more replacing bulbs every season.
Top 5 Outdoor Patio String Light Patterns (With Real Examples)
1. The Classic Zigzag (or “X” Pattern)
This is the go-to for a reason. It’s simple, effective, and works on nearly any patio—flat roof, pergola, or open yard. The zigzag pattern involves stringing lights diagonally across your space, forming an “X” or series of “V” shapes.
How to do it:
– Anchor lights to opposite corners of your patio (e.g., house wall and a tree, or two pergola posts).
– Run the first strand diagonally from corner A to corner B.
– Return with the second strand, forming a “V” shape.
– Repeat across the space, spacing strands 2–3 feet apart.
Pro tip: Use zip ties or outdoor-rated hooks to secure strands. Avoid staples—they damage wires and can be a fire hazard.
Why it works:
– Even light distribution.
– Creates visual interest without clutter.
– Easy to scale up or down based on patio size.
Real example: My friend Sarah used this pattern for her 40th birthday party. She had a 12×16 ft patio with a pergola. She hung 5 zigzag strands using 25-foot warm white LED lights. The result? A warm, inviting space where people naturally gathered under the “light canopy.” No dark spots, no glare—just perfect ambiance.
2. The Canopy or “Starlight” Drape
Want to feel like you’re dining under the stars? This pattern mimics a night sky by draping lights from a central point (like a pergola beam or tree) down to the ground or lower anchors.
How to do it:
– Attach the start of the lights to the highest point.
– Let strands cascade down to ground anchors, fence posts, or furniture.
– Vary the lengths (1–3 ft drops) for a natural, starry effect.
– Use clear or warm white bulbs for a soft glow.
Pro tip: Add a dimmer switch. This lets you adjust brightness based on the event—bright for games, dim for late-night chats.
Why it works:
– Creates intimacy.
– Hides unsightly wires (they blend into the drape).
– Works in small spaces where overhead lights aren’t possible.
Real example: For a wedding rehearsal dinner, I draped lights from a pergola to the ground around a circular seating area. The effect was magical—guests said it felt like a secret garden. Just be mindful of tripping hazards; use low-profile anchors or tuck wires under rugs.
3. The Grid or “Ceiling” Pattern
For a modern, structured look, the grid pattern is unbeatable. It mimics a coffered ceiling, creating a defined, cozy space even in open yards.
How to do it:
– Install horizontal and vertical strands to form a grid.
– Use pergola beams, trees, or temporary poles as anchors.
– Space lines 3–4 feet apart for optimal coverage.
– Use straight runs—no sagging.
Pro tip: Use black or brown wire lights to blend into dark structures (like wood pergolas). White wires stand out against dark surfaces.
Why it works:
– Provides consistent, shadow-free light.
– Defines the party zone clearly.
– Great for large gatherings where you need visibility.
Real example: A client with a 20×20 ft patio used a 5×5 grid for their holiday party. They used 50-foot LED strands with 24-inch spacing. The result? A bright, festive space that felt like an outdoor living room. The only downside? It required more planning (measuring, leveling) and hardware (hooks, poles).
4. The “Waterfall” or Vertical Drape
Perfect for railings, fences, or balconies. This pattern involves hanging lights vertically from a high point to the ground, creating a curtain-like effect.
How to do it:
– Attach the top end to a railing, eaves, or pergola.
– Let strands hang straight down, spaced 6–12 inches apart.
– Use clips or hooks to secure the bottom (optional).
Pro tip: Use longer strands (50+ ft) to cover tall spaces. Cut shorter strands to size if needed.
Why it works:
– Adds height and drama.
– Great for privacy (lights obscure views from below).
– Works in tight spaces (e.g., apartment balconies).
Real example: On my own balcony, I hung a waterfall pattern from the railing to the ground. It transformed the space—now I use it for everything from coffee mornings to cocktail nights. Just watch for wind; secure strands with clips to prevent flapping.
5. The “Cluster” or “Orb” Pattern
For a playful, whimsical vibe, cluster lights into balls or orbs and hang them at different heights. This works best with fairy lights or small LED strands.
How to do it:
– Wrap lights around wire frames (like tomato cages) to form orbs.
– Hang orbs from trees, pergolas, or shepherd’s hooks.
– Vary heights (3–6 ft off the ground) for depth.
Pro tip: Use battery-powered or solar lights for easy placement. No need to run extension cords.
Why it works:
– Adds a “floating” effect.
– Great for kids’ parties or themed events.
– Low cost—you can make orbs with $10 of supplies.
Real example: For a baby shower, I made 10 orbs using tomato cages and warm white fairy lights. Guests loved the “fairy garden” vibe. Just be sure to use weatherproof lights—rain can ruin delicate wires.
Planning Your Layout: A Step-by-Step Guide
Step 1: Measure Your Space
Grab a tape measure and sketch your patio. Note:
- Length and width.
- Anchor points (trees, walls, pergolas).
- Obstacles (furniture, plants).
Pro tip: Use painter’s tape to mark light paths on the ground. This helps visualize the pattern before you commit.
Step 2: Choose Your Pattern (Based on Size & Use)
Not all patterns work for all spaces. Here’s a quick guide:
| Pattern | Best For | Minimum Space | Light Type |
|---|---|---|---|
| Zigzag | Dining, general use | 10×10 ft | LED or Edison |
| Canopy Drape | Intimate gatherings | 8×8 ft | Fairy or LED |
| Grid | Large parties, visibility | 15×15 ft | LED (straight runs) |
| Waterfall | Railings, balconies | 6 ft height | LED or solar |
| Cluster/Orb | Themed events, kids | Any | Fairy or battery |
Step 3: Buy the Right Hardware
Don’t skip this! The wrong hardware leads to sagging, damage, or safety issues. Essentials:
- Outdoor-rated hooks or clips (not nails).
- Zip ties (use UV-resistant ones).
- Extension cords (rated for outdoor use).
- Dimmer switch (for adjustable brightness).
Pro tip: Buy 10–20% more lights than you think you need. You’ll always find a spot for them!
Step 4: Install with Safety in Mind
Always:
- Turn off power before connecting cords.
- Use GFCI outlets to prevent shocks.
- Secure all strands to prevent tripping.
- Check bulbs before hanging (replace any that are out).
Never:
- Use indoor lights outdoors.
- Overload circuits (stick to 80% capacity).
- Hang lights near flammable materials (e.g., dry leaves).
Creative Twists: Elevating Your Pattern Game
Mix Patterns for Layered Lighting
Why choose one? Combine patterns for depth. For example:
- Use a grid overhead for general light.
- Add waterfall strands on railings for drama.
- Place orbs on tables for a pop of whimsy.
Real example: For a fall harvest party, I used a grid over the patio, waterfall lights on the fence, and orbs on the dining table. The result? A layered, inviting space that felt both festive and functional.
Use Color and Shape for Theme Nights
Swap out bulbs or add colored sleeves to match the occasion:
- Red and green for holidays.
- Blue and white for a coastal vibe.
- Purple and pink for a boho wedding.
Pro tip: Use color-changing LEDs for versatility. One strand, many looks!
Integrate with Nature
Don’t fight the landscape—work with it:
- Wrap lights around tree trunks (use non-damaging clips).
- Hang strands from branches (avoid heavy lights).
- Use solar lights along garden paths for a guiding glow.
Maintenance & Longevity: Keeping the Glow Alive
Storage Tips
To extend the life of your lights:
- Coil strands loosely (no tight knots).
- Store in a cool, dry place (avoid attics or garages with temperature swings).
- Use original packaging or reels to prevent tangles.
Pro tip: Label strands by length and type. Saves time next year!
Troubleshooting Common Issues
- Flickering lights: Check connections and replace bulbs.
- Sagging strands: Add extra anchors or use tension wires.
- Weather damage: Inspect for frayed wires after storms.
When to Upgrade
Even the best lights wear out. Consider replacing if:
- More than 20% of bulbs are out.
- Wires are brittle or cracked.
- Colors have faded (especially with colored LEDs).
Final Thoughts: Light Up Your Life (Literally)
At the end of the day, outdoor patio party string lights patterns aren’t just about aesthetics—they’re about creating moments. A well-lit patio isn’t just a place to gather; it’s a stage for laughter, connection, and joy. Whether you go for a simple zigzag or a dramatic canopy drape, the right pattern can transform an ordinary night into something unforgettable.
Remember, there’s no “perfect” setup. The best pattern is the one that feels right for *your* space and *your* people. Don’t be afraid to experiment, mix styles, or even start small and build over time. And if something doesn’t work? No worries. Lights are easy to tweak, and every mistake is a lesson in what makes your patio shine.
So grab those strands, plan your pattern, and let the glow begin. Your next unforgettable night is just a flick of the switch away.
Frequently Asked Questions
What are the most popular outdoor patio party string lights patterns?
The most popular patterns include classic warm white globe lights, vintage Edison bulbs, cascading waterfall designs, and geometric shapes like stars or moons. For a festive touch, consider color-changing LEDs or twinkling fairy lights to match your party theme. These outdoor patio party string lights patterns create a magical ambiance for any gathering.
How do I choose the right string light pattern for my patio?
Consider your patio’s style and the mood you want to create—warm whites for cozy elegance, colorful LEDs for lively parties, or themed shapes for holidays. Measure your space first to ensure the lights fit perfectly, and opt for weatherproof options for long-term use.
Can I use outdoor patio party string lights patterns year-round?
Yes! Choose durable, weather-resistant lights with UV-protected cords and shatterproof bulbs for year-round use. Solar-powered or low-voltage options are energy-efficient and safe for all seasons, making them ideal for permanent installations.
Are there smart string lights with customizable patterns?
Absolutely! Many modern outdoor patio party string lights patterns feature app-controlled color, brightness, and animation settings (like twinkling or fading). Brands like Philips Hue or Twinkly offer dynamic options perfect for themed parties or holidays.
How do I hang string lights without damaging my patio?
Use removable adhesive hooks, tension rods, or freestanding poles for renter-friendly setups. For permanent fixtures, opt for gutter clips or drill-free mounting brackets to protect your patio’s structure.
What’s the best spacing between lights for a balanced look?
For even coverage, space bulbs 6–8 inches apart on straight runs and 4–6 inches apart for denser patterns like canopies or swags. Adjust based on your desired brightness—closer for intimate glows, farther for subtle accents.

