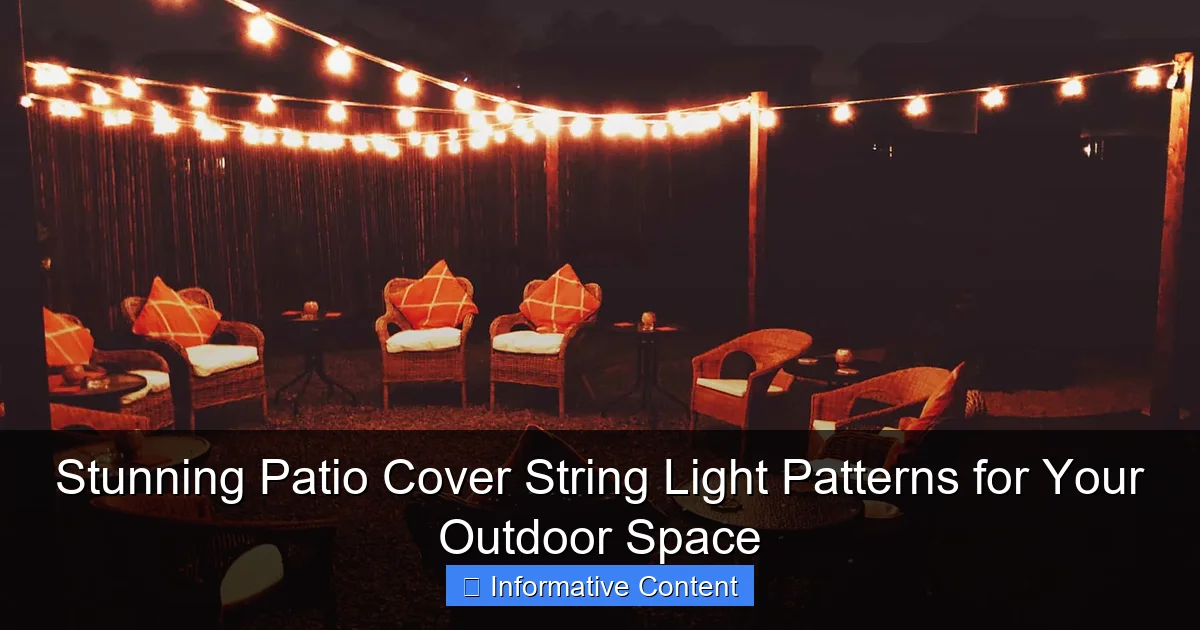
Featured image for patio cover string light patterns
Image source: backyard.exmark.com
Transform your outdoor space with stunning patio cover string light patterns that elevate ambiance and style. From geometric grids to cascading canopies, these versatile lighting designs create a magical atmosphere perfect for entertaining or relaxing. Discover how simple installations can make a dramatic impact.
Key Takeaways
- Choose weatherproof lights: Ensure durability with outdoor-rated string lights for long-lasting patio beauty.
- Plan your layout first: Sketch patterns to optimize spacing and avoid mid-project adjustments.
- Layer lighting styles: Combine string lights with spotlights or lanterns for depth and ambiance.
- Use dimmers or smart bulbs: Adjust brightness to match moods or occasions effortlessly.
- Try geometric patterns: Zigzags or grids add visual interest beyond basic horizontal lines.
- Anchor securely: Use hooks or clips to prevent sagging and maintain clean, professional lines.
📑 Table of Contents
- Stunning Patio Cover String Light Patterns for Your Outdoor Space
- Why the Right Pattern Matters: Beyond Just Hanging Lights
- Popular Patio Cover String Light Patterns (With Examples)
- Choosing the Right String Lights: Bulb Type, Spacing, and Power
- Installation Tips: How to Hang Lights Without the Headache
- Maintenance and Longevity: Keeping Your Lights Glowing
- Comparing Popular String Light Options (Data Table)
- Final Thoughts: Light Up Your Life
Stunning Patio Cover String Light Patterns for Your Outdoor Space
There’s something magical about stepping onto your patio after sunset and being greeted by a warm, inviting glow. String lights draped across your patio cover transform a simple outdoor area into a cozy, enchanting retreat. Whether you’re hosting a summer barbecue, enjoying a quiet evening with a book, or sharing laughs with loved ones under the stars, the right patio cover string light patterns can elevate the mood instantly.
I remember the first time I strung lights over my own patio. I had no idea what pattern to use—just a jumble of bulbs and extension cords. The result? A tangled mess that flickered more than it glowed. After some trial, error, and a few YouTube tutorials, I discovered how much the *pattern* matters. It’s not just about hanging lights; it’s about creating rhythm, balance, and ambiance. That’s what this guide is all about: helping you choose and install patio cover string light patterns that look stunning, function well, and suit your space and lifestyle.
Why the Right Pattern Matters: Beyond Just Hanging Lights
You might think, “Why not just drape the lights and call it a day?” And sure, that works—but a thoughtful pattern can make the difference between “meh” and “wow.” The way you arrange your string lights affects everything: brightness distribution, visual flow, and even how people move through your space.
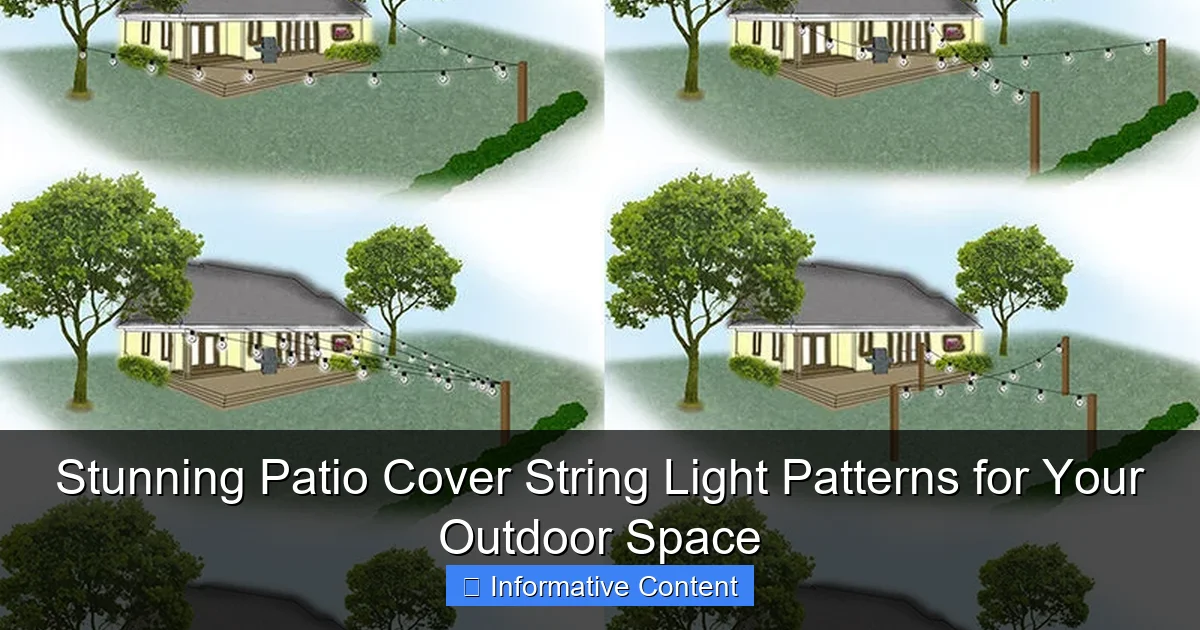
Visual guide about patio cover string light patterns
Image source: img.yardenvy.com
The Impact of Light Distribution
Imagine walking under a patio where the lights are clustered in one corner and sparse in another. It feels uneven, even chaotic. A well-planned pattern ensures even light distribution, eliminating dark spots and creating a cohesive glow. For example, a zigzag pattern across a pergola spreads light more evenly than a simple straight line, especially if your cover has multiple beams or posts.
Visual Rhythm and Flow
Patterns guide the eye. A crisscross pattern draws attention upward, making low ceilings feel taller. A grid pattern creates structure and symmetry, perfect for formal patios. On the other hand, a wave or swag pattern feels more relaxed and organic—ideal for a bohemian or rustic vibe.
Functionality Meets Aesthetics
Good patterns aren’t just pretty—they’re practical. For instance, if you have a dining area under your cover, you’ll want brighter, more focused lighting above the table. A concentric circle pattern centered over the table can highlight that zone while maintaining ambient light elsewhere. Similarly, if you’re using lights for safety (like near steps or railings), a border or outline pattern ensures visibility without overwhelming brightness.
Pro tip: Before hanging anything, sketch your patio cover on paper or use a digital design tool. Mark where you want lights to go, considering furniture placement, entry points, and focal areas (like a fire pit or grill). This “light map” will help you choose the right pattern from the start.
Popular Patio Cover String Light Patterns (With Examples)
Now that you understand why patterns matter, let’s explore some of the most popular—and effective—patio cover string light patterns. Each has its strengths, ideal use cases, and a few quirks to consider.
The Classic Crisscross (or X-Pattern)
This is the go-to for many homeowners, and for good reason. By running lights diagonally across the beams or rafters, you create a series of X shapes that add depth and dimension. It’s especially effective on pergolas with evenly spaced beams.
- Best for: Rectangular or square pergolas, modern or minimalist designs
- Pros: Even light spread, easy to install with clips or hooks, looks great from multiple angles
- Cons: Can look repetitive if overdone; may require more bulbs for larger spaces
Example: A friend of mine has a 12×16 ft pergola. She used two sets of 48-foot string lights, crisscrossing them at 45-degree angles. The result? A web of light that feels both structured and whimsical—perfect for her outdoor dining area.
The Grid (or Lattice) Pattern
Think of this as a checkerboard of light. Lights run horizontally and vertically across the cover, creating a grid. It’s ideal for covers with strong architectural lines or when you want a clean, geometric look.
- Best for: Covered patios with solid roofs, modern homes, spaces with symmetrical layouts
- Pros: High visibility, excellent for task lighting, easy to scale up or down
- Cons: Can feel too rigid for casual spaces; requires precise measurements
Tip: Use shorter string light sets (like 24-ft) for the grid to avoid excess cord. Connect them with waterproof connectors or use a central power source with multiple branches.
The Swag or Wave Pattern
For a softer, more romantic vibe, try a swag pattern. Lights are hung with gentle loops between anchor points, creating flowing curves. It’s like draping a necklace over your patio.
- Best for: Intimate seating areas, romantic dinners, bohemian or rustic themes
- Pros: Feels organic and inviting, hides imperfections in spacing, works with uneven surfaces
- Cons: Uses more bulbs per square foot; may require more frequent bulb changes
Example: I used this pattern on my own patio, swagging lights between the pergola posts and the house. The gentle dips create pockets of light that feel like little nooks. It’s perfect for curling up with a glass of wine.
The Border or Outline Pattern
Sometimes, less is more. This pattern frames the edges of your patio cover, highlighting its shape without filling every inch with light. It’s subtle but effective.
- Best for: Small patios, safety lighting (near steps or railings), modern or industrial styles
- Pros: Energy-efficient, easy to install, emphasizes architectural features
- Cons: Less ambient light; may need supplemental fixtures for full coverage
Pro tip: Combine a border pattern with a centerpiece light (like a pendant or chandelier) for layered lighting.
The Concentric Circles Pattern
Start with a circle in the center and add larger circles around it. This creates a “sunburst” effect, drawing attention to a focal point (like a dining table or fire pit).
- Best for: Circular or semi-circular patios, outdoor dining areas, fire pit zones
- Pros: Focused lighting, visually striking, easy to adjust for different table sizes
- Cons: Challenging on irregularly shaped covers; may need custom rigging
Example: A neighbor used this pattern over her round dining table. The lights form three concentric rings, with the innermost ring brighter than the outer ones. It feels like dining under a glowing halo.
Choosing the Right String Lights: Bulb Type, Spacing, and Power
The pattern is only half the equation. The *type* of string lights you use will determine how well your pattern works—and how long it lasts.
Bulb Type: LED vs. Incandescent
LED string lights are the clear winner for most outdoor setups. They’re energy-efficient (using up to 90% less power), last 10-20 times longer, and produce less heat. Modern LEDs come in warm white (2700K-3000K) for a cozy glow or cool white (4000K-5000K) for a crisp, modern look. Some even have color-changing options or smart controls.
Incandescent lights have a nostalgic charm and a softer glow, but they’re inefficient, fragile, and burn out faster. They’re best for temporary setups or if you’re going for a vintage aesthetic.
Tip: Look for outdoor-rated LED lights with an IP65 or higher waterproof rating. These can handle rain, snow, and UV exposure.
Bulb Spacing: Close vs. Wide
Bulb spacing affects both brightness and pattern visibility:
- Close spacing (2-3 inches): Creates a continuous glow, ideal for swag or wave patterns. Great for ambient lighting but can feel overwhelming in large spaces.
- Wide spacing (6-12 inches): Highlights the pattern’s structure, perfect for crisscross or grid designs. Saves bulbs but may leave dark spots.
Rule of thumb: For most patio covers, 6-inch spacing is a sweet spot. It balances coverage and visual impact.
Power and Connectivity
Consider how many lights you can run on one outlet. Most outdoor outlets support 10-15 amps, which is enough for 500-1000 LED bulbs (or 100-200 incandescent bulbs). Check the wattage of your string lights and use a power strip with surge protection if you’re connecting multiple sets.
For large patios, use a central power hub with multiple branches. This reduces voltage drop (which causes dimming) and makes troubleshooting easier.
Smart Lights and Controls
Want to change the mood with a tap? Smart string lights (like those with Wi-Fi or Bluetooth) let you adjust brightness, color, and even create custom patterns via an app. Some integrate with voice assistants (Alexa, Google Home) or sync with music.
Downside: Smart lights cost more and require a stable Wi-Fi signal. They’re worth it if you love tech, but overkill for simple setups.
Installation Tips: How to Hang Lights Without the Headache
Even the best pattern falls flat with poor installation. Here’s how to hang your lights like a pro—without spending hours (or cursing the universe).
Step 1: Plan Your Anchor Points
Identify where you’ll attach the lights: beams, posts, eaves, or even trees. Use outdoor-rated hooks, eye screws, or adhesive clips. Avoid nails or staples—they can damage wood and aren’t waterproof.
Pro tip: For a crisscross or grid pattern, pre-drill holes for eye screws to ensure even spacing.
Step 2: Test Before You Hang
Unroll your lights and plug them in to check for dead bulbs or frayed wires. Fix any issues *before* you start climbing ladders. Nothing’s worse than hanging a string only to find it doesn’t work.
Step 3: Start at the Power Source
Begin hanging lights near the outlet and work outward. This minimizes excess cord and reduces the risk of tripping. Use zip ties or cord clips to secure loose ends.
For swag patterns: Hang lights with 6-12 inches of slack between anchor points. Adjust the drape until it looks natural.
Step 4: Secure and Protect
Use weatherproof connectors where strings join. Wrap connections with electrical tape or use silicone-filled caps. For long-term installations, consider light tracks (like those used in commercial spaces) for a clean, professional look.
Step 5: Safety First
Never overload outlets or daisy-chain more than 2-3 light sets (unless they’re designed for it). Use a GFCI outlet (or adapter) to protect against electrical hazards. If your lights are within reach, ensure they’re rated for outdoor use and won’t get hot.
Common mistake: Hanging lights too tightly. This can strain connections and shorten bulb life. Allow a little slack—especially in swag patterns.
Maintenance and Longevity: Keeping Your Lights Glowing
Your patio cover string light patterns will only stay stunning with a little care. Here’s how to extend their life and keep them looking great.
Regular Cleaning
Dust, pollen, and bird droppings can dull the glow. Gently wipe bulbs with a damp cloth (unplug first!). For stubborn grime, use a mild soap solution. Avoid abrasive cleaners—they can scratch plastic bulbs.
Seasonal Storage
If you take lights down in winter, store them properly:
- Remove bulbs (if replaceable) to prevent breakage.
- Wrap cords around a reel or cardboard to avoid tangles.
- Store in a cool, dry place—not a damp garage or attic.
Pro tip: Take photos of your installed lights before removing them. It’s a lifesaver when rehanging next season.
Bulb Replacement
LEDs rarely burn out, but if one does, check if your string is replaceable-bulb or non-replaceable. For non-replaceable strings, you may need to replace the whole set. Keep spare bulbs on hand for older incandescent strings.
Weatherproofing
Even outdoor-rated lights need protection. Trim overhanging branches that could snag lights. If your area gets heavy snow, consider removable covers or take lights down temporarily. For coastal homes, choose corrosion-resistant materials (like stainless steel or plastic).
When to Upgrade
Most quality outdoor string lights last 5-10 years. If yours flicker, dim, or have multiple dead bulbs, it’s time for a refresh. Newer models have better weather resistance, energy efficiency, and smart features.
Comparing Popular String Light Options (Data Table)
Choosing the right lights can feel overwhelming. Here’s a quick comparison of popular types to help you decide:
| Type | Bulb Spacing | Lifespan (LED) | Waterproof Rating | Best Pattern | Price Range (per 24-ft set) |
|---|---|---|---|---|---|
| LED Globe | 6 inches | 25,000 hours | IP65 | Swag, Wave | $20-$40 |
| LED Edison | 4 inches | 20,000 hours | IP65 | Crisscross, Grid | $25-$50 |
| LED Fairy | 2 inches | 30,000 hours | IP67 | Swag, Concentric | $15-$35 |
| Smart LED | 6 inches | 25,000 hours | IP65 | All patterns | $50-$100 |
| Incandescent | 3 inches | 1,000 hours | IP44 | Border, Swag | $10-$20 |
Note: Prices vary by brand and retailer. Always check reviews for durability and weather resistance.
Final Thoughts: Light Up Your Life
Your patio isn’t just an outdoor space—it’s an extension of your home, a place to unwind, connect, and create memories. The right patio cover string light patterns can turn it into a personal oasis, no matter the season.
Remember, it’s not about perfection. My first attempt at a swag pattern was lopsided, and I once accidentally hung a grid pattern at a 30-degree tilt (it still looked great!). The key is to start small, experiment, and find what *feels* right for you. Whether you choose a bold crisscross, a romantic swag, or a minimalist border, let your lights reflect your style and needs.
And don’t forget the little things: test your lights first, plan your anchor points, and protect your connections. A little extra care now means years of glowing evenings ahead. So grab your ladder, pick a pattern, and light up your life—one bulb at a time.
Frequently Asked Questions
What are the most popular patio cover string light patterns for outdoor spaces?
Popular patio cover string light patterns include crisscross (diamond or grid), zigzag, cascading waterfall, and canopy-style draping. These designs enhance ambiance while providing functional illumination for patios, pergolas, and gazebos.
How do I choose the right string light pattern for my patio cover?
Consider your patio’s layout, desired brightness, and aesthetic goals. For example, a grid pattern offers even light distribution, while a draped or waterfall pattern creates a romantic, bistro-style vibe.
Can I install patio cover string lights without drilling holes?
Yes! Use adhesive hooks, zip ties, or magnetic clips to secure lights to beams, gutters, or railings. These options are ideal for renters or those avoiding permanent modifications to their outdoor space.
What type of string lights work best for outdoor patio covers?
Opt for weather-resistant, commercial-grade LED string lights with shatterproof bulbs. These are durable, energy-efficient, and available in warm white or color temperatures to match your patio cover string light patterns.
How do I create a crisscross string light pattern on my patio cover?
Start by installing anchor points (hooks or eye screws) on opposite sides of your patio cover. Weave the lights in a grid or diamond pattern, maintaining consistent spacing (6–12 inches apart) for a balanced look.
Are solar-powered string lights suitable for patio cover installations?
Solar-powered lights work well for shaded patio covers if the solar panel receives 6–8 hours of direct sunlight daily. They’re eco-friendly and eliminate the need for outlets, making them ideal for intricate light patterns.

