
Featured image for how to fix led light string
Image source: i.ytimg.com
Most LED light string issues stem from loose connections or dead bulbs—start by checking these first. A simple visual inspection, tightening sockets, and replacing faulty bulbs or fuses can resolve 90% of problems in under 10 minutes, saving time and money without needing specialized tools.
“`html
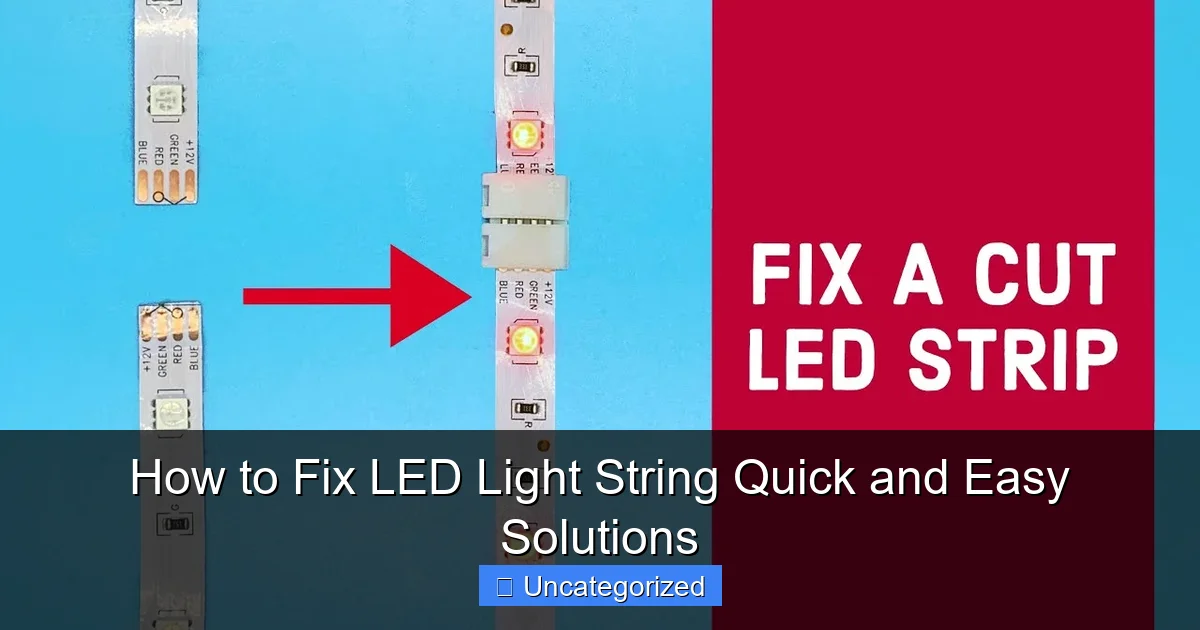
How to Fix LED Light String Quick and Easy Solutions
Key Takeaways
- Check the power source first: Ensure the outlet and connections are working properly.
- Inspect for damaged bulbs: Replace any cracked or burnt-out LEDs immediately.
- Test with a multimeter: Identify faulty sections by checking voltage along the string.
- Secure loose connections: Tighten or tape any exposed or frayed wires safely.
- Use manufacturer replacements: Match bulb type and voltage for reliable repairs.
- Store properly post-use: Prevent tangles and damage by wrapping lights carefully.
Why This Matters / Understanding the Problem
You’re halfway through decorating your patio for a summer party when suddenly—your LED light string flickers and dies. Or maybe one section stays dark while the rest shines bright. It’s frustrating, especially when you just want to enjoy a cozy evening.
Unlike old incandescent bulbs, LED strings are more efficient and longer-lasting, but they’re not immune to failure. The good news? Most issues can be fixed without replacing the entire set. With the right approach, you can learn how to fix LED light string quick and easy solutions and save time, money, and frustration.
Whether your lights won’t turn on, are dim, or have dead zones, the root causes are often simple: loose connections, damaged wires, faulty bulbs, or power issues. This guide walks you through diagnosing and solving these problems—step by step—so you can get your lights glowing again fast.
Pro Tip: Always unplug the light string before starting any repair. Safety first—even low-voltage LEDs can carry a shock risk if the power source is still connected.
What You Need
Before diving in, gather these tools and materials. Most are likely already in your home or toolbox. Having the right gear makes the process smoother and reduces the chance of making things worse.
Visual guide about how to fix led light string
Image source: i.ytimg.com
- Multimeter (digital or analog) – to test voltage and continuity
- Small flathead and Phillips screwdrivers – for opening plugs and sockets
- Needle-nose pliers – for bending wires and gripping tiny parts
- Wire strippers – to remove insulation cleanly
- Replacement LED bulbs (same model or compatible) – always keep extras on hand
- Electrical tape or heat-shrink tubing – for insulating repairs
- Scissors – for cutting tape or wire
- Magnifying glass (optional) – helpful for inspecting tiny solder joints
- Rubbing alcohol and cotton swabs – for cleaning contacts
- Small container – to hold screws and small parts
You don’t need to be an electrician to fix LED light strings. With this kit and a bit of patience, you’ll be ready to tackle most common issues. And remember: knowing how to fix LED light string quick and easy solutions means less waste and more holiday cheer—year after year.
Step-by-Step Guide to How to Fix LED Light String Quick and Easy Solutions
Let’s walk through a clear, practical process to get your lights back in action. These steps apply to most standard LED light strings, whether for Christmas, weddings, or outdoor patios.
Step 1: Unplug and Inspect the Entire String
Before touching anything, unplug the lights from the outlet or power source. This is non-negotiable for safety.
Now, lay the string out straight on a clean, dry surface—like a table or garage floor. Look for obvious signs of damage: kinked wires, melted plastic, loose bulbs, or frayed insulation.
Check the plug, socket, and every bulb base. Pay special attention to the first few bulbs near the plug. Often, the issue starts there due to strain or water exposure.
Warning: If you see blackened wires, melted plastic, or a burning smell, stop and consider replacing the string. These are signs of serious electrical faults.
Step 2: Test the Power Source and Plug
Sometimes, the problem isn’t the lights—it’s the outlet or adapter.
Plug the string into a different outlet you know works (like one with a phone charger). If it turns on, the original outlet may be faulty or tripped.
Next, check the plug itself. Look for bent prongs, loose connections, or corrosion. If the plug has a fuse (common in outdoor strings), use your multimeter to test continuity across the fuse terminals.
Set your multimeter to the continuity (or ohms) setting. Touch one probe to each metal end of the fuse. If you hear a beep or see a reading near 0 ohms, the fuse is good. No beep? Replace it with one of the same rating (usually 3A or 5A).
This simple test can save you time—don’t skip it. Many people assume the string is broken when it’s just a blown plug fuse.
Pro Tip: Use a surge-protected outlet for outdoor LED strings. Power spikes can damage the internal driver or fuse.
Step 3: Check for Loose or Corroded Bulbs
LED bulbs screw or snap into sockets, and over time, they can become loose or corroded—especially outdoors.
Start at the end of the string (farthest from the plug) and work backward. Remove each bulb gently and inspect the socket and bulb base.
Look for:
- Greenish or white crust (corrosion)
- Loose bulb that wiggles in the socket
- Burnt or discolored metal contacts
Clean corrosion with a cotton swab dipped in rubbing alcohol. Let it dry completely before reinserting the bulb.
If a bulb is loose, gently bend the metal contacts in the socket inward with a small screwdriver or tweezers. This tightens the grip. Then reinsert the bulb and test.
Try this on the first 10 bulbs. If the string turns on, you’ve likely found the culprit. If not, move to the next step.
Common Mistake: Forcing a bulb into a socket can break the plastic or damage the internal wires. Always twist gently, not push hard.
Step 4: Test Individual Bulbs with a Multimeter
If the string still doesn’t light, it’s time to test each bulb. LEDs don’t always fail completely—they can go dim or flicker due to internal damage.
Set your multimeter to the diode test mode (usually marked with a diode symbol). This sends a small current through the bulb to check if it conducts electricity.
Remove a bulb and touch the multimeter probes to the two metal contacts on the base (one on each side). A working LED will show a reading between 2–3 volts and may even glow faintly.
No reading? The bulb is dead. Replace it with a known-good bulb of the same type. If the string lights up, you’ve found the faulty bulb.
Test every bulb in the dead section. Even one bad bulb can disrupt the entire circuit, especially in series-wired strings.
For strings with multiple circuits (e.g., 3-wire sets), test each circuit separately. Some strings have parallel sections, so one dead bulb won’t kill the whole strand—but a short in one can affect others.
Pro Tip: Mark working bulbs with a small dot of tape so you know which ones are good. This speeds up future troubleshooting.
Step 5: Inspect and Repair Damaged Wires
Wires can break from bending, animal chewing, or weather exposure. A single cut or nick can kill the entire string.
Run your fingers along the cord from plug to end. Feel for soft spots, kinks, or areas where the wire feels thin.
Use your multimeter in continuity mode to test the wires. Set it to beep when a circuit is complete.
Touch one probe to the plug’s prong and the other to the corresponding wire point at the other end (e.g., the metal ring on a socket). If no beep, there’s a break.
Cut out the damaged section with wire strippers. Strip about 1/2 inch of insulation from both ends. Twist the exposed wires together (same color to same color), then cover with heat-shrink tubing or wrap tightly with electrical tape.
For waterproofing, use marine-grade heat-shrink or silicone tape, especially if the string is used outdoors.
After repair, plug in and test. If the section lights, you’ve fixed it. If not, check your splice for loose connections or missed wires.
Warning: Never leave exposed wires. Even low-voltage LEDs can cause a short or fire if they touch metal or each other.
Step 6: Check for Short Circuits or Overloads
A short circuit happens when two wires touch where they shouldn’t—often due to damaged insulation.
Signs of a short: the string turns off immediately, the plug gets hot, or the fuse blows repeatedly.
Inspect the entire cord for melted spots, crushed areas, or wires touching each other. Pay close attention to bulb sockets—sometimes wires inside get pinched or frayed.
If you find a short, cut out the damaged section and repair as in Step 5. For internal shorts in sockets, you may need to replace the entire socket or the bulb base.
Also, check if you’ve daisy-chained too many strings. Most LED sets can only handle 2–3 in a row. Check the manufacturer’s label for “max connectable” or “end-to-end” limits.
Example: If your string says “Max 3 sets,” and you connected 5, the overload could have damaged the internal driver. Unplug extra sets and test one at a time.
Pro Tip: Use a timer or smart plug to prevent overuse. Leaving LED strings on 24/7 can shorten their lifespan, even though they’re efficient.
Step 7: Test the Internal Driver or Controller (For Smart/Flashing Sets)
Many modern LED strings have a small box near the plug—called a driver, controller, or power supply. This regulates voltage and handles effects like twinkle or fade.
If your string has this box and won’t turn on, the driver may be dead. Test the output with your multimeter.
Set the meter to DC voltage (usually 3V, 6V, or 12V). Touch the probes to the output wires (where the string connects to the driver). You should see a reading close to the rated voltage.
No reading? The driver is likely faulty. Replacement drivers are available online—match the voltage, wattage, and plug type.
For strings with remote controls or apps, reset the unit. Unplug for 10 seconds, then plug back in. Remove and reinsert batteries in the remote. Sometimes, the issue is just a glitch.
If the driver is sealed and not repairable, consider replacing the whole string. But for simple on/off strings without a driver, skip this step.
Common Mistake: Assuming a flashing string is broken when it’s just in a slow mode. Check the manual or cycle through modes with the controller.
Step 8: Reassemble and Final Test
Once you’ve fixed the issue, reassemble everything carefully.
Make sure all bulbs are seated firmly. Tuck wires neatly into sockets. Secure any loose tape or heat-shrink.
Plug in the string and test in a dry area. Let it run for 15–30 minutes to ensure it stays on and doesn’t overheat.
If it works, you’ve successfully learned how to fix LED light string quick and easy solutions. If not, go back through the steps—especially Steps 4 and 5.
For outdoor use, consider adding a drip loop—a U-shaped bend in the cord below the plug—to prevent water from running into the outlet.
Pro Tip: Store your repaired string loosely coiled, not tightly wound. This prevents wire fatigue and makes next year’s setup easier.
Pro Tips & Common Mistakes to Avoid
Fixing LED strings is simple, but a few habits can make or break your success.
- Label your strings with the date and type of repair. This helps track which ones are reliable.
- Use the right replacement bulbs. Not all LEDs are the same. Match the voltage, base type (E12, E17, etc.), and color temperature.
- Don’t ignore flickering. It’s not always a bulb issue—could be a loose connection or failing driver.
- Test one change at a time. If you replace 5 bulbs and the string works, you won’t know which one fixed it. Replace one, test, then move on.
- Keep a repair kit with extra bulbs, fuses, and tape. Store it with your holiday decorations.
Common Mistake: Using regular tape instead of electrical tape. Regular tape dries out, becomes sticky, and doesn’t insulate properly. Always use electrical or heat-shrink.
Another big one: assuming the whole string is dead because one section isn’t working. LED strings often have multiple circuits. A dead section doesn’t mean the whole thing is trash.
Also, avoid cutting wires unless necessary. Sometimes, a loose bulb or corroded socket is the real issue—not the wire.
And finally: don’t rush. Take your time. A 20-minute fix can save you $30 on a new set.
FAQs About How to Fix LED Light String Quick and Easy Solutions
Got questions? We’ve got answers—straight from real-world fixes.
1. Why do only some bulbs light up on my LED string?
This usually means a break in the circuit after the last working bulb. In series-wired strings, all bulbs must work for power to reach the end. Use your multimeter to test continuity from the last good bulb to the next. A break in the wire or a dead bulb will stop the flow.
Parallel-wired strings (common in newer sets) allow other bulbs to work even if one is out—but a short in one bulb can still cause issues.
2. Can I fix an LED light string with water damage?
Yes—but only if the damage is minor. Dry the entire string with a towel, then let it air-dry completely (24+ hours) before testing. Clean corroded sockets with alcohol. Replace any bulbs with water inside.
If the plug or driver is wet, do not plug it in. Replace it if possible. For severe water damage (e.g., submerged in rainwater), replacement may be safer.
3. Do I need special tools to fix LED lights?
Not really. A multimeter is the most helpful tool, and you can get a basic one for $10–15. Everything else (screwdrivers, pliers, tape) you likely own. A magnifying glass helps for tiny solder joints, but it’s optional.
The key is patience and attention to detail—not expensive gear.
4. Why do my LED lights flicker or pulse?
Flickering can be caused by:
- Loose bulbs or sockets
- Failing power adapter or driver
- Voltage fluctuations (common with solar or low-quality transformers)
- Damaged wires creating intermittent connections
Start by tightening all bulbs and checking the plug. If it continues, test the voltage output. Replace the driver if needed.
5. How long do LED light strings last?
Quality LED strings can last 10–25 years with proper care. But exposure to weather, poor storage, or electrical surges can shorten that. Regular inspection and quick repairs (like how to fix LED light string quick and easy solutions) can extend their life significantly.
Look for strings with a UL or ETL safety rating—they’re more durable and safer.
6. Can I cut and splice LED light strings?
Yes, but only if they’re designed for it. Some strings have cut lines or splice points. Never cut a string that isn’t labeled for splicing—it can damage the internal circuitry.
When splicing, use the same voltage and wire gauge. Seal the joint with waterproof tape or heat-shrink for outdoor use.
7. Are battery-powered LED strings easier to fix?
Generally, yes. They don’t have a plug or driver, so fewer points of failure. Common issues: dead batteries, corroded contacts, or loose bulbs. Clean the battery compartment and contacts regularly. Use fresh batteries—old ones can leak and damage the unit.
But they’re not immune to wire breaks or dead LEDs—the same troubleshooting steps apply.
Final Thoughts
LED light strings are a modern marvel—energy-efficient, long-lasting, and versatile. But when they stop working, it doesn’t mean it’s time to toss them.
By following this guide, you’ve learned how to fix LED light string quick and easy solutions with confidence. From testing bulbs to repairing wires, you now have the skills to revive your favorite decorations—without spending a fortune.
Remember: most problems are simple—loose bulbs, corroded sockets, or a blown fuse. With a multimeter and a little patience, you can diagnose and fix them in under an hour.
Keep your repair kit ready, store your strings properly, and inspect them each season. And when in doubt, start at the plug and work your way down the line.
So next time your lights go dark, don’t panic. Grab your tools, take a breath, and fix it yourself. You’ll save money, reduce waste, and enjoy the glow of your handiwork—literally.
Now go light up that patio, porch, or Christmas tree. You’ve got this.
“`

