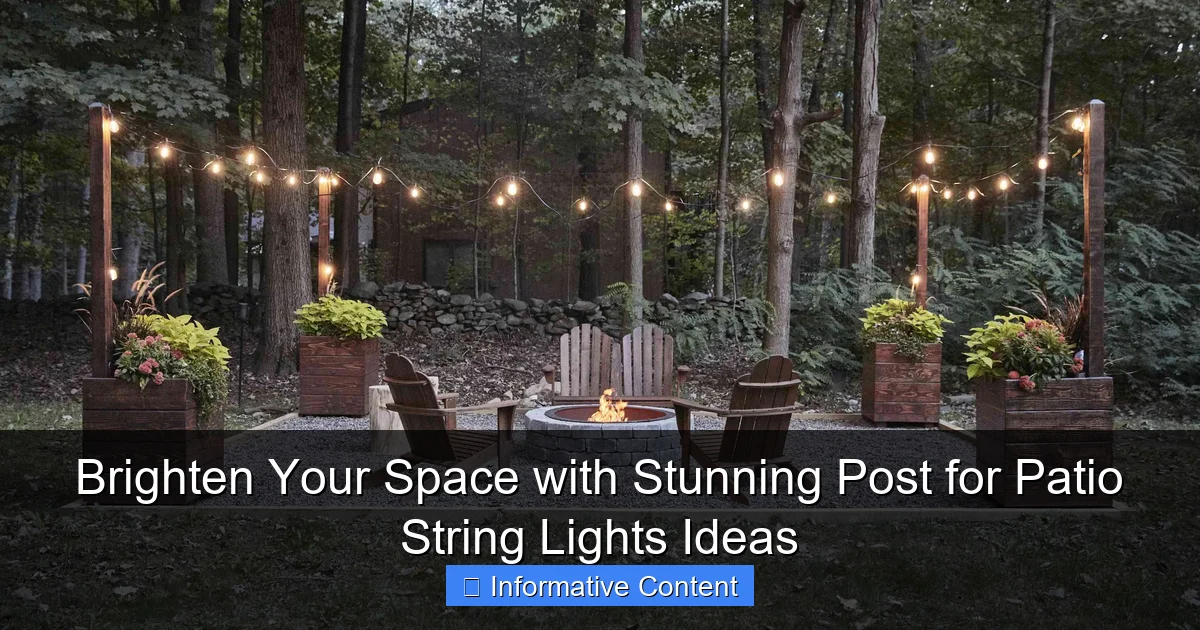
Featured image for post for patio string lights
Image source: thespruce.com
Transform your outdoor space with the perfect post for patio string lights—a simple upgrade that adds ambiance, style, and functionality to any backyard or deck. From sleek metal poles to rustic wooden posts, choosing the right support ensures stability, height, and seamless integration with your existing decor, letting your lights shine brighter and last longer.
Key Takeaways
- Choose weather-resistant posts: Ensure durability with materials like metal or treated wood.
- Plan spacing carefully: Maintain 8-10 feet between posts for optimal light distribution.
- Use adjustable mounts: Simplify installation and tension adjustments with versatile hardware.
- Mix heights creatively: Add visual interest by varying post elevations strategically.
- Anchor securely: Prevent sagging with deep-set concrete footings or weighted bases.
- Pair with dimmers: Control ambiance effortlessly using compatible dimmer switches.
📑 Table of Contents
- Why Post for Patio String Lights Transform Your Outdoor Space
- Choosing the Right Post for Patio String Lights: Materials, Height & Style
- Installation Tips: From Planning to Perfect Setup
- Creative Ways to Use Post for Patio String Lights
- Lighting Types and Accessories for Maximum Impact
- Maintenance and Longevity: Keeping Your Setup Shining
- Final Thoughts: Light Up Your Life, One Post at a Time
Why Post for Patio String Lights Transform Your Outdoor Space
There’s something magical about the glow of string lights on a warm evening. They don’t just light up your patio—they transform it into a cozy, inviting retreat. Whether you’re hosting a dinner party, enjoying a quiet night with a book, or sharing stories with loved ones, the right lighting sets the mood. And when it comes to elevating your outdoor ambiance, post for patio string lights are a game-changer. These sturdy, often decorative supports allow you to hang lights in ways that free-standing fixtures or flimsy poles simply can’t match.
Imagine walking into your backyard and being greeted by a canopy of twinkling lights, anchored securely to elegant posts that blend with your garden or deck. It’s not just about brightness—it’s about creating a space that feels like an extension of your home. I remember the first time I installed string lights on dedicated posts instead of draping them across trees and fences. The difference was night and day. The lights stayed in place, the spacing was even, and the whole area looked more polished. Suddenly, my patio wasn’t just a slab of concrete—it was a destination.
Choosing the Right Post for Patio String Lights: Materials, Height & Style
When it comes to selecting the perfect post for patio string lights, it’s not just about picking something that holds up the wires. You’re choosing a design element that impacts both function and aesthetics. The right post should support your lights securely, complement your outdoor decor, and withstand the elements. Let’s break down the key factors to consider.
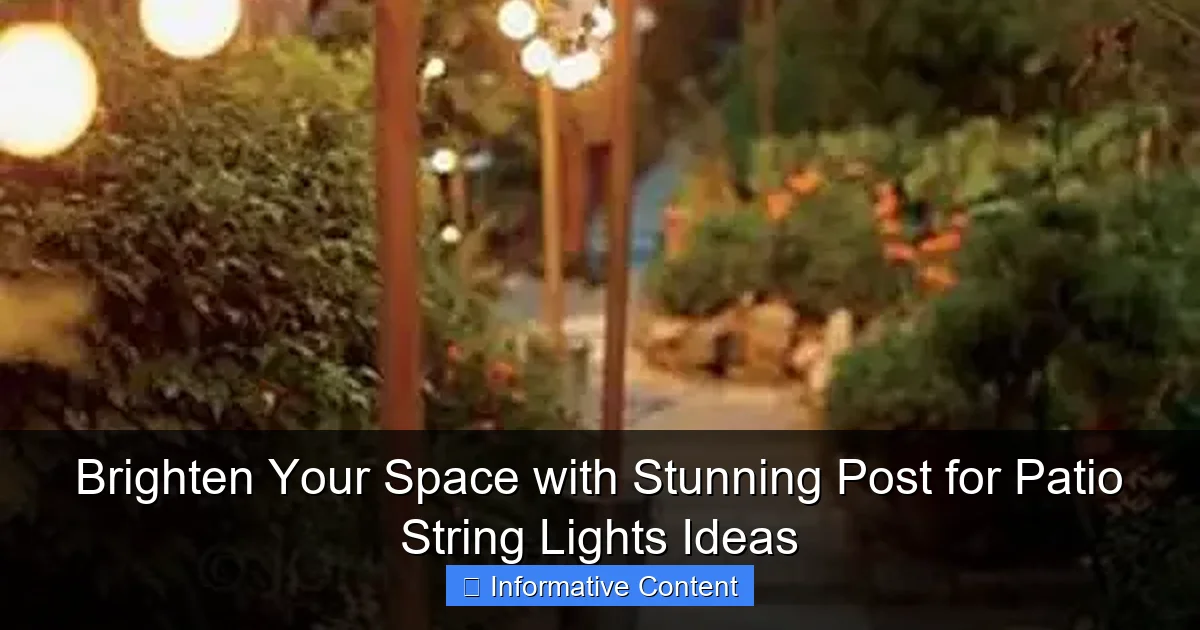
Visual guide about post for patio string lights
Image source: woohome.com
Material Matters: Durability vs. Aesthetics
Not all posts are created equal. The material you choose will affect longevity, maintenance, and how well it fits your style.
- Wood: Classic and warm, wooden posts—like cedar, redwood, or pressure-treated pine—blend beautifully with gardens and natural settings. They’re easy to customize with paint or stain, but require regular sealing to prevent rot and warping, especially in humid or rainy climates. Great for rustic, farmhouse, or cottage-style patios.
- Metal (Steel, Aluminum, Wrought Iron): These are the workhorses of outdoor lighting. Galvanized steel and aluminum resist rust and are lightweight (especially aluminum). Wrought iron is heavier and more ornate, perfect for traditional or Mediterranean designs. Powder-coated metal adds extra protection and comes in a range of colors.
- Composite or PVC: Low-maintenance and weather-resistant, these mimic wood but don’t rot, crack, or need sealing. Ideal for coastal areas or if you hate upkeep. They’re less eco-friendly but last longer with minimal effort.
- Concrete or Stone: For a permanent, high-end look, consider precast concrete or natural stone columns. These are ideal for built-in patios or decks where you want a seamless, architectural feel. They’re expensive and hard to install, but they’ll last decades.
Height and Spacing: Getting the Glow Just Right
The height of your post affects how the light spreads and how people interact with the space. Too low, and the lights get in the way; too high, and the glow feels distant.
- Standard Height: Aim for 7 to 8 feet (2.1–2.4 meters) above ground. This keeps the lights above head height but close enough to feel intimate. If you’re using multiple posts, maintain consistent height for a clean look.
- Spacing: For a canopy effect, place posts 8–12 feet apart. Closer spacing (6–8 feet) works for smaller patios or if you want a denser light pattern. Wider spacing (12+ feet) is better for large areas but may require stronger tension or support cables.
- Tip: Use a laser level or measuring tape to mark post locations before installing. Uneven spacing can make even the best lights look messy.
Style & Design: Matching Your Outdoor Vibe
Your posts should feel like part of your patio’s personality, not an afterthought.
- Minimalist: Sleek black metal posts with clean lines work well with modern or urban patios. Pair with geometric string lights for a contemporary feel.
- Rustic/Farmhouse: Use weathered wood or black iron with scrollwork. Add mason jar lights or Edison bulbs for a vintage touch.
- Coastal: White or gray PVC or aluminum posts with nautical rope accents. Think breezy, beachy vibes with soft white or blue-tinted bulbs.
- Bohemian: Mix materials—wooden posts with colorful ceramic finials or hand-painted details. Use multicolored or patterned string lights for a playful look.
Pro tip: If your posts will be visible from inside the house, choose a style that complements your interior decor too. You don’t want a clash between your living room and patio!
Installation Tips: From Planning to Perfect Setup
Installing a post for patio string lights might sound daunting, but with the right prep, it’s totally doable—even for DIY beginners. The key is planning ahead and taking your time. Rushing can lead to crooked posts, sagging lights, or (worst of all) a post that collapses after a few months.
Step-by-Step Guide for DIY Installation
Here’s how I installed my own posts—and what I learned along the way:
- Sketch Your Layout: Use graph paper or a free app like SketchUp to map where each post will go. Mark distances, entry points, and any obstacles (like trees or railings).
- Choose Your Mounting Method:
- Ground-Mounted (In-Ground): Best for lawns or soil. Dig a hole 18–24 inches deep (below the frost line in cold climates), set the post, and fill with concrete. Let it cure for 24–48 hours before attaching lights.
- Deck-Mounted (Surface or Flange): Use a metal flange or base plate secured to your deck with lag screws. Great for wood or composite decks. Avoid this on concrete unless you use concrete anchors.
- Clamp-On: For temporary setups or rental homes, use adjustable clamps that grip deck rails or fence posts. Not ideal for heavy loads, but quick and tool-free.
- Level and Align: Use a level on each post before the concrete sets. Even a slight tilt becomes obvious once the lights are up. For multiple posts, run a string line between them to ensure straight alignment.
- Weatherproof Connections: If your posts have outlets or switches, use waterproof junction boxes and outdoor-rated extension cords. Seal all wire entry points with silicone caulk.
- Test Before Finalizing: Hang the lights temporarily and turn them on. Check for sagging, glare, or dark spots. Adjust post height or spacing if needed.
Common Mistakes to Avoid
- Ignoring Local Codes: Some areas require permits for permanent structures. Check with your city before digging.
- Overloading Posts: Don’t hang heavy lights or multiple strands without reinforcing the post. Use turnbuckles or guy wires for long spans.
- Skipping Ground Prep: Loose soil or gravel can cause posts to shift. Compact the soil before setting concrete.
- Forgetting Maintenance Access: If you use in-ground posts, leave space to reseal or repair them later. Don’t bury wires too deep.
Real talk: I once installed a post in clay soil without compacting it. Two weeks later, it leaned 5 degrees. Lesson learned: prep the ground like your patio depends on it—because it does!
Creative Ways to Use Post for Patio String Lights
Once you’ve got your posts in place, the fun begins! The way you hang your lights can completely change the vibe of your space. Here are some of my favorite (and most effective) setups, tested in my own backyard and shared by fellow patio lovers.
Canopy or Grid Pattern
Create a “ceiling” of light by running strings in a grid between posts. This works best for square or rectangular patios.
- Use 4–6 posts arranged in a rectangle.
- Run lights in straight lines, 1–2 feet apart, both horizontally and vertically.
- Use turnbuckles at corners to keep tension even.
- Pro tip: For a softer glow, use frosted bulbs or add sheer fabric panels between the strings.
Example: My friend Sarah used this in her 12×16 ft patio. She added a central chandelier-style fixture (hung from a crossbeam) for extra sparkle. The result? A restaurant-worthy dining area.
Zigzag or “Z” Pattern
Perfect for irregularly shaped patios or if you want a playful, dynamic look.
- Start at one post, zigzag the lights diagonally across to the opposite post.
- Repeat, overlapping slightly for density.
- Ideal for bistro lights or globe lights.
Why it works: It guides the eye across the space and creates movement. Great for parties or when you want to highlight a seating area.
Single or Double Row
Simple but effective. Hang lights along a single line (e.g., above a dining table) or two parallel lines (like a runway).
- Use 2–4 posts in a straight line.
- Add hooks or eye screws every 12–16 inches for even spacing.
- Pair with dimmable bulbs to adjust brightness.
Tip: For a double row, angle the strings slightly inward to create a “tunnel” effect. It feels cozy and intimate.
Hanging from Trees or Structures
Use posts as anchors to connect to trees, pergolas, or house eaves.
- Install posts at the corners of your patio.
- Run lights from post to tree, post to house, or post to pergola beam.
- Use cable ties or S-hooks to secure wires to natural supports.
Caution: Avoid wrapping wires tightly around tree trunks—it can damage bark. Use soft straps instead.
Accent Lighting with Posts
Use posts to highlight features, not just cover the whole patio.
- Place a single post near a fire pit with a single strand of lights.
- Use a post with a built-in planter to add greenery and light.
- Install a post with a small spotlight to illuminate a garden path.
Example: I added a short (5 ft) metal post with a vintage-style lantern next to my hot tub. It’s now my favorite spot for evening soaks.
Lighting Types and Accessories for Maximum Impact
The posts are just the beginning. The lights you choose—and how you enhance them—can make or break the effect. Let’s talk about bulbs, controls, and little extras that take your setup from “nice” to “wow.”
Choosing the Right String Lights
Not all string lights are equal. Here’s what to look for:
- Bulb Type:
- LED: Energy-efficient, long-lasting, and cool to the touch. Best for year-round use.
- Incandescent: Warm, soft glow but uses more energy and burns out faster. Use sparingly or for special events.
- Edison Bulbs: Vintage-style with visible filaments. Great for rustic or industrial looks.
- Color Temperature:
- Warm white (2200K–2700K): Cozy, inviting—perfect for dining and lounging.
- Cool white (3000K–4000K): Crisp and bright—better for task lighting or modern spaces.
- Multicolor: Fun for parties or holidays, but can feel chaotic in everyday use.
- Spacing: Closer bulbs (2–4 inches apart) create a denser glow; wider spacing (6–8 inches) feels airier.
Smart Lighting & Controls
Want to dim the lights with your phone? Set a timer? Sync with music? Smart tech makes it easy.
- Smart Plugs: Plug your lights into a Wi-Fi-enabled outlet. Control via app or voice (Alexa, Google Assistant).
- Dimmer Switches: Use a remote-controlled dimmer to adjust brightness from your couch.
- Timers: Program lights to turn on at sunset and off at bedtime. Saves energy and adds convenience.
- RGB Lights: Change colors on demand. Use for holidays or mood lighting.
Note: Make sure your smart devices are rated for outdoor use. Look for “wet location” or “damp location” labels.
Accessories to Elevate Your Setup
- Turnbuckles: Adjust tension on long spans. Prevents sagging and keeps lights taut.
- Weatherproof Covers: Protect outlets and switches from rain. Use silicone caps or rubber boots.
- Light Clips: Instead of nails, use plastic clips designed for string lights. They’re gentle on wires and posts.
- Reflective Backs: Attach white panels or mirrors behind the lights to bounce more light into the space.
Maintenance and Longevity: Keeping Your Setup Shining
Great lighting isn’t a “set it and forget it” project. A little upkeep keeps your post for patio string lights looking amazing for years. Here’s how to care for your investment.
Seasonal Care Checklist
Spring:
- Inspect posts for rot (wood), rust (metal), or cracks (PVC).
- Clean light bulbs with a soft cloth. Replace any dead bulbs.
- Check wires for fraying or rodent damage.
Summer:
- Trim back overgrown plants that touch the lights.
- Wipe down posts to remove dust and pollen.
- Test smart controls and timers.
Fall:
- Remove leaves and debris from around posts.
- Check concrete bases for cracks or shifting.
- Store non-weatherproof lights indoors (if desired).
Winter:
- Brush snow off lights to prevent sagging.
- Use a cover or tarp if you live in a heavy snow area.
- Turn off lights during storms to avoid electrical surges.
When to Replace or Upgrade
- Posts: Wooden posts last 5–10 years with maintenance. Metal and composite can last 15+ years. Replace if cracked, warped, or rusted through.
- String Lights: LED strands last 25,000+ hours (about 5–10 years with regular use). Replace if more than 20% of bulbs are out or if the wire is damaged.
- Wiring: Upgrade to heavier-gauge wire (14- or 16-gauge) if adding more lights or longer runs.
Pro tip: Take photos of your setup each season. It helps spot issues early and track how your design evolves over time.
Final Thoughts: Light Up Your Life, One Post at a Time
Transforming your patio with post for patio string lights isn’t just about adding brightness—it’s about creating moments. It’s the laughter around a table under a canopy of stars (well, lights). It’s the quiet joy of sipping tea on a summer night, surrounded by a glow that feels like magic. Whether you go for a simple two-post setup or a full grid, the right posts and lights can turn your outdoor space into a place you never want to leave.
Remember, this is your space. There’s no “perfect” way to do it—only what feels right to you. Maybe you love the rustic charm of weathered wood, or the sleek lines of modern metal. Maybe you want twinkling fairy lights or bold Edison bulbs. Whatever your style, the key is to start small, experiment, and adjust as you go. I’ve changed my own setup three times in five years—and I’m still not done! But that’s the beauty of it. Your patio evolves with you.
So grab those posts, hang those lights, and step outside. The glow is waiting.
| Feature | Wood Posts | Metal Posts | Composite/PVC Posts | Concrete/Stone Posts |
|---|---|---|---|---|
| Lifespan | 5–10 years | 10–20+ years | 15–25 years | 25+ years |
| Maintenance | High (sealing, staining) | Low (wipe down, check for rust) | Very Low (rinse with water) | Very Low (occasional cleaning) |
| Cost (per post) | $30–$80 | $50–$150 | $70–$200 | $150–$500+ |
| Best For | Rustic, natural settings | Modern, industrial, traditional | Coastal, low-maintenance areas | Permanent, high-end installations |
| Installation Difficulty | Easy to Moderate | Moderate | Easy | Hard (requires heavy tools) |
Frequently Asked Questions
What are the best types of posts for patio string lights?
The best posts for patio string lights include wooden fence posts, metal poles, pergola beams, or dedicated light poles. Choose sturdy, weather-resistant materials that complement your outdoor décor for long-lasting use.
How do I install post for patio string lights without damaging my property?
Use freestanding poles, ground stakes, or clamp-on fixtures to secure your post for patio string lights without drilling. These methods provide stability while preserving your deck, walls, or landscaping.
Can I use patio string lights with existing structures like trees or railings?
Yes! Wrap lights around trees or railings, but ensure the bulbs won’t overheat against organic materials. For a seamless look, use zip ties or insulated hooks to secure lights safely.
What spacing should I keep between posts for patio string lights?
Space posts 8–10 feet apart for optimal light distribution and support. Tighter spacing (6 feet) works for heavier bulbs or windy areas to prevent sagging.
Are solar-powered string lights compatible with posts?
Absolutely. Solar-powered string lights work well with post for patio string lights setups, especially if the solar panel is mounted where it gets direct sunlight.
How do I hide the wires for a cleaner look?
Run cords through hollow posts, use wire clips to tuck them behind trim, or conceal them with outdoor-rated cord covers. This keeps your setup tidy and hazard-free.

