Featured image for post to hang patio string lights
Image source: i.pinimg.com
Transform your outdoor space with perfectly hung patio string lights by using sturdy posts designed to support tension and weather elements for long-lasting ambiance. Choose durable, rust-resistant materials like powder-coated steel or cedar and ensure proper spacing and height (8–10 feet) to create a balanced, inviting glow that enhances any evening gathering.
Key Takeaways
- Plan spacing first: Measure and mark post positions for even, balanced light distribution.
- Use weatherproof posts: Choose treated wood or metal for durability and safety.
- Secure posts deeply: Anchor at least 24 inches into ground for stability.
- Check wire tension: Pre-stretch cables to prevent sagging over time.
- Add dimmers or timers: Control brightness and duration for ideal ambiance.
- Inspect annually: Tighten connections and replace damaged bulbs or wires.
📑 Table of Contents
- Why Patio String Lights Are a Game-Changer for Outdoor Spaces
- Understanding the Basics: Why Use Posts for String Lights?
- Choosing the Right Posts and Materials
- Planning Your Layout: Design Tips for Maximum Ambiance
- Step-by-Step: How to Install Posts and Hang String Lights
- Maintenance, Safety, and Long-Term Tips
- Real-World Examples and Inspiration
Why Patio String Lights Are a Game-Changer for Outdoor Spaces
Imagine this: it’s a warm summer evening, the sun has just dipped below the horizon, and you’re sitting outside with a glass of wine. Your patio is softly lit by the warm glow of string lights, casting a gentle, inviting ambiance. There’s laughter, maybe some music, and the kind of comfort that makes you never want to go inside. That’s the magic of patio string lights—they don’t just light up a space; they transform it into an experience.
But here’s the thing: hanging them can be trickier than it looks. I learned this the hard way when I tried to drape lights over my pergola and ended up with a tangled mess that looked more like a spiderweb than a cozy retreat. The key to achieving that perfect ambiance isn’t just about buying the right lights—it’s about how you hang them. And that’s where the post to hang patio string lights method comes in. It’s one of the most reliable, flexible, and aesthetically pleasing ways to create a professional-looking setup, whether you’re working with a small balcony or a sprawling backyard.
Understanding the Basics: Why Use Posts for String Lights?
If you’ve ever struggled with sagging wires, uneven spacing, or lights that just don’t stay put, you’re not alone. Using posts to hang patio string lights solves many of these common problems. Unlike temporary solutions like tape, hooks, or zip ties, posts offer stability, height control, and a clean, intentional look. But before you start driving stakes into the ground, let’s break down why this method stands out.
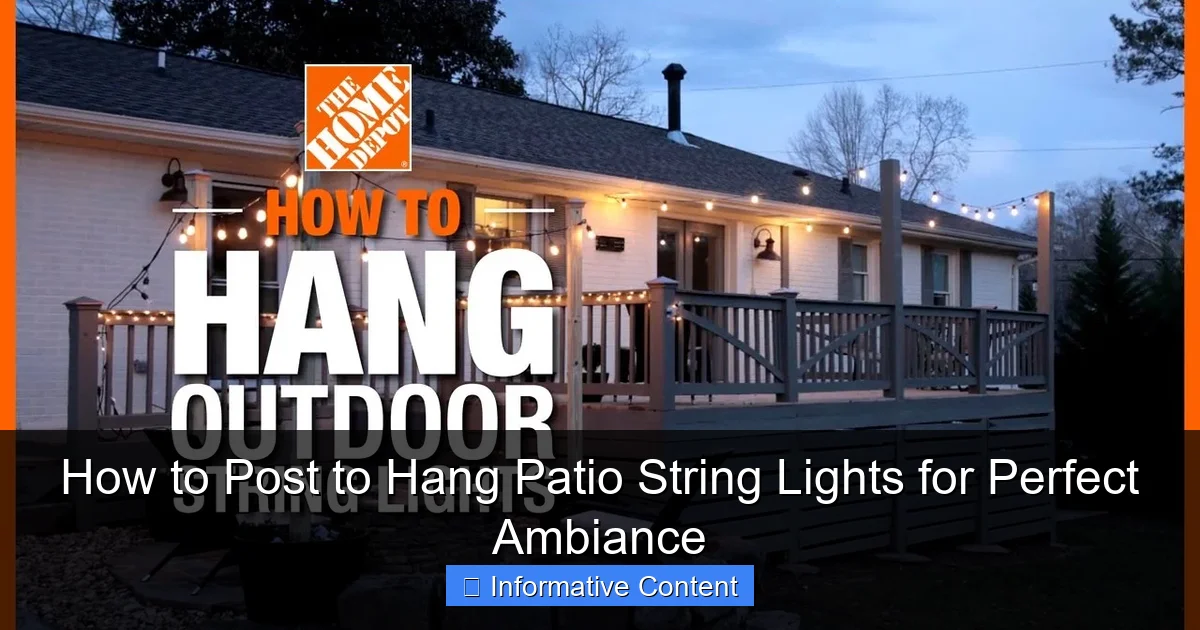
Visual guide about post to hang patio string lights
Image source: i.ytimg.com
The Advantages of Using Posts
- Stability: Posts provide a solid anchor point, especially in windy areas. Unlike trees or fences, which can sway or shift, posts stay put.
- Customizable Height: You can adjust the height to suit your space—higher for a dramatic canopy effect, lower for intimate dining areas.
- No Damage to Structures: If you rent or don’t want to drill into your house, fence, or deck, posts are a non-invasive option.
- Scalability: Need to expand your lighting setup next year? Just add another post. It’s modular and future-proof.
- Aesthetic Appeal: When done right, posts can enhance your outdoor design, especially if you choose materials that match your decor.
When Posts Are the Best Choice
Posts work best in open areas where you need to create your own structure—think backyards without trees, large patios, or even driveways. They’re also ideal if:
- Your existing structures (like a house or fence) are too far apart or too fragile to support lights.
- You want to create a “room-like” feel with defined lighting zones (e.g., dining, lounging, cooking).
- You live in a region with frequent storms or strong winds—posts can be anchored securely to withstand weather.
- You’re planning a permanent or semi-permanent setup and want it to look polished year-round.
For example, my neighbor, Sarah, lives in a modern home with a large concrete patio. There are no trees nearby, and the house has large glass doors she didn’t want to drill into. She used four wooden posts to create a square canopy of lights above her dining table. The result? A restaurant-quality outdoor dining experience—without a single hole in her house.
Choosing the Right Posts and Materials
Not all posts are created equal. The right choice depends on your space, budget, and how permanent you want the setup to be. Let’s walk through the most popular options, their pros and cons, and what to look for.
Material Options: Wood, Metal, or PVC?
- Wooden Posts: Classic and warm, wood (like cedar or pressure-treated pine) blends naturally into most backyard designs. Pros: Aesthetic appeal, easy to customize with paint or stain. Cons: Requires sealing to prevent rot, especially if in-ground. Best for: Permanent installations in moderate climates.
- Metal Posts (Steel or Aluminum): Extremely durable and weather-resistant. Steel is heavier and more rigid; aluminum is lighter and easier to move. Pros: Long-lasting, great for windy areas. Cons: Can rust if not coated properly; may look industrial unless painted. Best for: High-wind zones or modern-style patios.
- PVC or Vinyl Posts: Lightweight and low-maintenance. Often used for temporary setups or renters. Pros: Won’t rot or rust, easy to assemble. Cons: Less sturdy in strong winds; may look cheap if not styled well. Best for: Temporary or seasonal use, small patios.
Height and Diameter: Getting the Proportions Right
For most patio setups, aim for posts between 7 and 10 feet tall. This height:
- Keeps lights above head level (no one wants to duck under a bulb).
- Allows for a gentle slope if connecting multiple posts, which prevents sagging.
- Creates a cozy, enclosed feeling without blocking sightlines.
For diameter, 2×4 or 4×4 wooden posts are standard. If using metal, look for 2-3 inch diameter pipes. Thinner poles may wobble, especially if you’re hanging heavier Edison-style bulbs.
Anchoring Methods: In-Ground vs. Weighted Bases
- In-Ground Posts: The most stable option. Dig a 2-3 foot hole, set the post in concrete, and let it cure for 24-48 hours. Ideal for permanent setups. Pro tip: Use a level to ensure posts are straight before the concrete sets.
- Weighted Bases (Sandbags, Water-Filled, or Concrete-Filled): Great for renters or patios with hard surfaces. Look for bases that hold at least 50-100 lbs. Some even have built-in wheels for easy repositioning. Just be sure they’re wide enough to prevent tipping.
- Surface-Mount Brackets: Attach posts to your deck or patio using metal brackets. Requires drilling, but less invasive than in-ground installation. Best for wooden decks.
When I set up my first post system, I went with 8-foot cedar posts anchored in concrete. It took a weekend, but now, five years later, they’re still standing strong—even after a few windstorms.
Planning Your Layout: Design Tips for Maximum Ambiance
Hanging lights isn’t just about utility—it’s about creating a mood. The way you space, angle, and layer your lights can make the difference between “meh” and “magical.” Let’s talk design.
Mapping Your Space
Start by sketching your patio or yard on paper or using a digital tool (like Google SketchUp or even a napkin). Mark:
- Where you want the lights to hang (over dining table, lounge area, etc.).
- Existing structures (trees, railings, pergolas) that can serve as anchor points.
- Power source locations (you’ll need outlets or extension cords).
- Any obstacles (furniture, planters, walkways).
For example, my patio is L-shaped. I used two posts on the open end to create a square canopy over the dining area, and ran a single strand along the house to connect to the lounge section. This kept the lighting focused and prevented a chaotic look.
Spacing and Height for Visual Balance
- Post Spacing: For a canopy effect, place posts 8-12 feet apart. Closer spacing (6-8 feet) works for tighter areas or heavier lights.
- Height Variations: Don’t be afraid to stagger heights. A slightly lower post on one side can create a dynamic, organic feel—just avoid drastic drops that look unbalanced.
- Light Spacing: Most string lights have bulbs 6-12 inches apart. For a fuller look, consider doubling up (run two parallel strands).
Creating Layers and Zones
Instead of one big blanket of light, break your patio into zones:
- Canopy Lights: Hang lights in a grid or crisscross pattern above seating areas. Use zip ties or light clips to secure them to posts.
- Pathway or Border Lights: Run a single strand along the edge of your patio or garden bed. Use shorter posts (4-5 feet) or attach to existing structures.
- Accent Lights: Hang a few strands near planters or water features for a subtle glow. Battery-operated fairy lights work well here.
Pro tip: Use dimmers or smart plugs to control brightness. Lower light levels (around 20-30% brightness) create the most intimate ambiance. I use a smart plug that turns my lights on at sunset and off at 11 PM—no fumbling with switches.
Step-by-Step: How to Install Posts and Hang String Lights
Ready to build your own post-to-hang patio string lights setup? Follow this step-by-step guide. I’ll walk you through it like we’re working on it together.
Tools and Materials You’ll Need
- Posts (wood, metal, or PVC)
- Post anchors or weighted bases
- Concrete mix (for in-ground posts)
- Shovel and post hole digger (if in-ground)
- Level and tape measure
- Drill with wood or masonry bit (if using brackets)
- String lights (LED recommended for energy efficiency)
- Light clips, zip ties, or hooks
- Extension cords (outdoor-rated)
- Safety gloves and goggles
Step 1: Mark and Prep the Post Locations
Use stakes and string to mark where each post will go. Double-check spacing and alignment. If using in-ground posts, dig holes 24-36 inches deep and 6-8 inches wide. Tip: Add a few inches of gravel at the bottom for drainage.
Step 2: Set the Posts
Place the post in the hole, brace it with temporary supports, and use a level to ensure it’s plumb (straight up and down). Mix concrete and pour it around the post, leaving 2-3 inches at the top to add dirt later. Let cure for 24-48 hours.
For weighted bases: Assemble the base, fill with sand or water, and attach the post according to the manufacturer’s instructions. Make sure the base is wide enough—wider is better for stability.
Step 3: Install Mounting Points
At the top of each post, install:
- Eye bolts (for metal or wood posts)
- Hooks or cleats
- Pre-drilled holes for zip ties
Space them evenly—every 6-12 inches, depending on your light strand length.
Step 4: Run the Lights
Start at the power source. Unroll the light strand and attach one end to the first post. Run it to the next post, securing it every 12-24 inches with clips or zip ties. Avoid pulling too tight—allow a slight sag (about 6-12 inches) to prevent strain.
If creating a grid, use zip ties to connect strands at intersections. For a crisscross pattern, run lights diagonally between posts.
Step 5: Test and Adjust
Plug in the lights and check for:
- Even brightness (no dim or dark sections)
- Proper sag (not too tight, not too loose)
- No tripping hazards (keep cords off walkways)
Adjust hooks or clips as needed. I once had a strand that kept slipping off a hook—switched to a carabiner clip, and it’s been rock-solid ever since.
Maintenance, Safety, and Long-Term Tips
Great lighting should last—not just through the summer, but for years. Here’s how to keep your post setup safe, functional, and beautiful.
Weatherproofing Your Setup
- Use Outdoor-Rated Lights: Look for “wet-rated” or “damp-rated” labels. Indoor lights can short-circuit in rain.
- Seal Wooden Posts: Apply a weatherproof sealant every 1-2 years to prevent rot.
- Check Connections: Inspect plugs and cords annually for fraying or water damage.
Safety First: Avoiding Hazards
- Keep Cords Elevated: Use cord covers or run them along posts to prevent tripping.
- Use GFCI Outlets: Ground-fault circuit interrupters cut power if there’s a short—essential for outdoor use.
- Avoid Overloading Circuits: Check the wattage of your lights. Most outdoor outlets can handle 1,500-1,800 watts.
- Turn Off in Storms: Unplug lights during heavy rain or lightning to prevent surges.
Seasonal Care and Storage
If you live in a cold climate, consider removing lights in winter to prevent damage from ice and snow. Store them in a cool, dry place—wrap strands around a piece of cardboard or a light reel to prevent tangling.
For permanent setups, clean bulbs and posts annually. A mild soap and water solution works for most materials. Avoid abrasive cleaners that can damage finishes.
Upgrading and Expanding
Love your setup? Add more! You can:
- Install additional posts for a larger canopy.
- Swap out bulbs for different colors (warm white is most popular, but amber or multicolor can be fun for parties).
- Add motion sensors or timers for energy savings.
Last year, I added a second strand of fairy lights to my posts for a layered look. It took 20 minutes and made the space feel twice as cozy.
Real-World Examples and Inspiration
To help you visualize, here’s a quick look at different post setups and their results. These aren’t just ideas—they’re real solutions from homeowners just like you.
| Setup | Posts Used | Lighting Style | Result | Best For |
|---|---|---|---|---|
| Square Canopy | 4 wooden 4×4 posts, 8 ft tall, in-ground | Grid pattern with Edison bulbs | Warm, restaurant-style ambiance | Dining areas, large patios |
| Crisscross | 2 metal posts, 9 ft tall, weighted bases | Diagonal strands with LED fairy lights | Romantic, twinkling effect | Small patios, balconies |
| Linear Run | 3 PVC posts, 6 ft tall, surface-mounted | Single strand along edge of patio | Subtle, pathway-style lighting | Walkways, garden borders |
| U-Shaped | 3 wooden posts, 7 ft tall, in-ground | Two parallel strands with dimmers | Flexible brightness for different moods | Lounge areas, fire pits |
My personal favorite? The square canopy. It’s simple, elegant, and works in almost any space. But don’t be afraid to mix styles—like combining a canopy with border lights for a full-room effect.
Hanging patio string lights with posts isn’t just about function—it’s about creating a space where memories happen. Whether it’s a quiet night with a book or a lively dinner party, the right lighting sets the tone. And with the post to hang patio string lights method, you’re not just hanging lights; you’re building an atmosphere.
So grab your tools, sketch your layout, and get started. The perfect ambiance is closer than you think—and it’s worth every minute of effort.
Frequently Asked Questions
How do I securely post to hang patio string lights without damaging my deck?
Use freestanding posts or weighted bases designed for outdoor string lights, or install permanent posts anchored to concrete footings below the frost line. Avoid drilling into deck surfaces by opting for clamp-on or ground-mounted solutions.
What’s the best spacing between posts to hang patio string lights effectively?
Space posts 8-12 feet apart, depending on the string lights’ weight and sag tolerance. For heavier commercial-grade lights, stick to 8-foot intervals to prevent excessive drooping.
Can I use existing structures instead of installing posts to hang patio string lights?
Yes! Attach lights to fences, pergolas, or trees using weather-resistant hooks or zip ties. Ensure the structures can support the weight and tension of the lights.
How tall should posts be for hanging patio string lights?
Aim for posts 7-9 feet tall to create a comfortable, walk-under height while allowing a gentle sag (1-2 feet) between posts for a cozy ambiance.
What materials work best for DIY posts to hang patio string lights?
Galvanized steel, aluminum, or pressure-treated wood are durable options. Metal posts resist rust, while wood blends naturally with outdoor spaces—just seal it for weather protection.
How do I hide wires when using posts to hang patio string lights?
Run cords through hollow posts or use cord covers to conceal them. Alternatively, install outdoor-rated raceways or bury low-voltage wires underground for a clean look.

